1. What is TestNG?
TestNG is a testing framework inspired by JUnit and NUnit but introduces some new functionalities that make it more powerful and easier to use. The software testers to efficiently run the automated test scripts created in Selenium Webdriver use TestNG. Its full form is the “Testing New Generation” framework. It is used mostly to assert the results in an Automated Script as well as generate reports for test execution.
2. How TestNG can be installed in Eclipse?
Follow the below steps to install TestNG on Eclipse:
- Launch Eclipse go to the Help option present at the top and select –“Install New Software”.
- A dialog box will appear, click on the Add button
- A new dialog box will appear. Mention the Name as TestNG and the location as “http://beust.com/eclipse/” and click on the Add button.
- Check the TestNG checkbox and click on the “Next” action button. The installation will start and the Eclipse will restart after installation.
- To verify if TestNG is installed successfully or not, go to Window, select Show View, and then Other. Select Java and see within the Java folder, you will see TestNG. This shows that TestNG is successfully installed on the machine
- Right-click on the project in Eclipse -> Select build path -> Configure Build Path.
- Select the library tab -> Click on Add library button -> Select TestNG-> Click on Next -> Click on Finish and Apply and close.
3. What is the sequence of execution of the annotations in TestNG?
The Sequence of execution of the annotations is as follows:
@BeforeSuite
@BeforeTest
@BeforeClass
@BeforeMethod
@Test
@AfterMethod
@AfterClass
@Aftertest
@AfterSuite
For more details,click here
4. What is the importance of testng.xml file?
The testng.xml file is important because of the following reasons:
- It defines the order of the execution of all the test cases.
- It allows you to group the test cases and can be executed as per the requirements by mentioning.
groups = { "e2etest", "integerationtest" }
3. It executes the selected test cases. It can disable the test cases that we don’t want to execute.
@Test(enabled = false)
4. In TestNG, listeners can be implemented at the suite level by adding below in xml.
listenerclass-name ="com.selenium.testng.ListenerDemo
5. It supports parallel testing means provides multiple ways to execute tests in separate threads.
suitename="TestSuite"thread-count="3"parallel="methods
6. It allows for cross-browser testing which means a web application tests on different browsers and operating systems. Here, mention different browser names in the parameter.
<parameter name="browser" value="Edge" />
7. It helps to integrate the TestNG framework in CI/CD pipelines such as GitLab, GitHub, Jenkins.
5. What are the types of Asserts in TestNG?
There are two types of assert in TestNG – Hard Assert and Soft Assert.
Hard Assert: Hard Assert is the normal assert that is used to do validations in the TestNG class.
We have to use the Assert class for hard assert as follows:
Assert.assertEquals(actual value, expected value);
If the hard assert fails, then none of the code is executed after the assert statement.
Soft Assert: If we want to continue the test execution even after the assert statement fails, then we have to use soft assert.
To create a soft assert, we have to create an object of a “softAssert” class as follows:
softAssert soft_assert = new softAssert();
soft_assert.assertAll();
So now if the test case fails, the execution does not terminate when we use soft assert.
For more details, click here.
6. What is TestNG Assert and list out some common Assertions supported by TestNG?
TestNG Asserts help us to verify the condition of the test in the middle of the test run. Based on the TestNG Assertions, we will consider a successful test only if it completed the test run without throwing any exception. Some of the common assertions supported by TestNG are:
assertEqual(String actual,String expected)
assertEqual(String actual,String expected, String message)
assertEquals(boolean actual,boolean expected)
assertTrue(condition)
assertTrue(condition, message)
assertFalse(condition)
assertFalse(condition, message)
For more details, click here
7. How to run a group of test cases using TestNG?
Groups are specified in your testng.xml file and can be found either under the <test> or <suite> tag. Groups specified in the <suite> tag apply to all the <test> tags underneath.
import org.testng.annotations.Test;

public class TestNGGroupDemo {

    @Test(alwaysRun = true, groups = { "e2etest", "integerationtest" })
    public void testPrintMessage() {
        System.out.println("This method is run by both e2e and integeration test");
    }

    @Test(alwaysRun = true, groups = { "e2etest" })
    public void testE2EMessage() {
        System.out.println("This method is run by e2e test");
    }

    @Test(alwaysRun = true, groups = { "integerationtest" })
    public void testingIntegrationMessage() {
        System.out.println("This method is run by integeration test");
    }

    @Test(alwaysRun = true, groups = { "acceptancetest" })
    public void testingAcceptanceMessage() {
        System.out.println("This method is run by Acceptance test");
    }

    @Test(alwaysRun = true, groups = { "e2etest", "acceptancetest" })
    public void testE2EAndAcceptanceMessage() {
        System.out.println("This method is run by both e2e and acceptance test");
    }

    @Test(alwaysRun = true, groups = { "e2etest", "integerationtest", "acceptancetest" })
    public void testE2EAndAcceptanceAndIntegrationMessage() {
        System.out.println("This method is run by e2e, integration and acceptance test");
    }

}
TestNG.xml
<?xml version = "1.0" encoding = "UTF-8"?>
<!DOCTYPE suite SYSTEM "http://testng.org/testng-1.0.dtd" >
<suite name = "TestNG Demo">
    <test name = "TestNG Grouping">
        <groups>
            <run>
                <include name = "e2etest" />
            </run>
        </groups>
        <classes>
            <class name = "TestNGGroupDemo" />
        </classes>
    </test>
</suite>
The output of the above program is

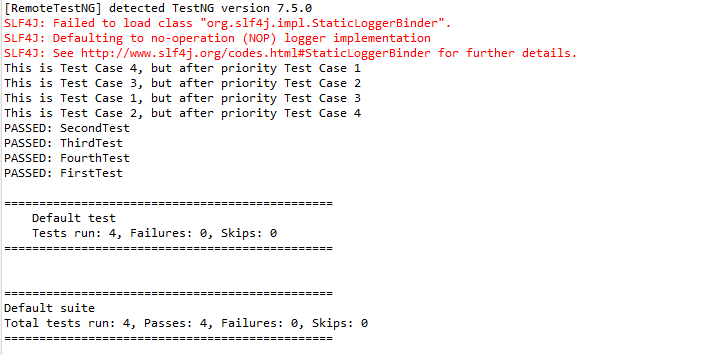
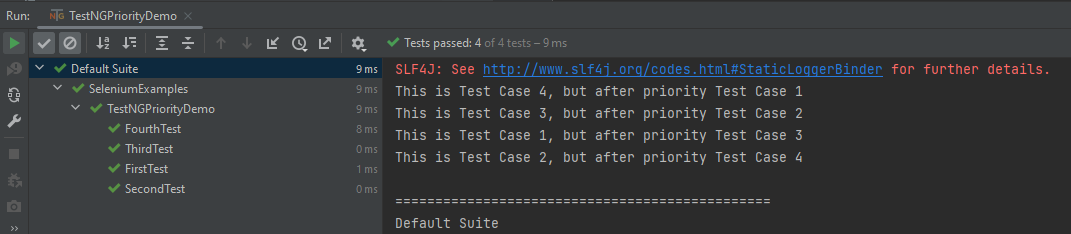
8. How to set test case priority in TestNG?
We use priority attribute to the @Test annotations. If no priority is assigned to a Test Case, then the annotated test methods are, executed as per the alphabetical order of the tests
import org.testng.annotations.Test;

public class TestNGPriorityDemo {

    @Test(priority = 3)
    public static void FirstTest() {
        System.out.println("This is Test Case 1, but after priority Test Case 3");
    }


    @Test(priority = 4)
    public static void SecondTest() {
        System.out.println("This is Test Case 2, but after priority Test Case 4");
    }


    @Test(priority = 2)
    public static void ThirdTest() {
        System.out.println("This is Test Case 3, but after priority Test Case 2");
    }


    @Test(priority = 1)
    public static void FourthTest() {
        System.out.println("This is Test Case 4, but after priority Test Case 1");
    }
}
The output of the above program is
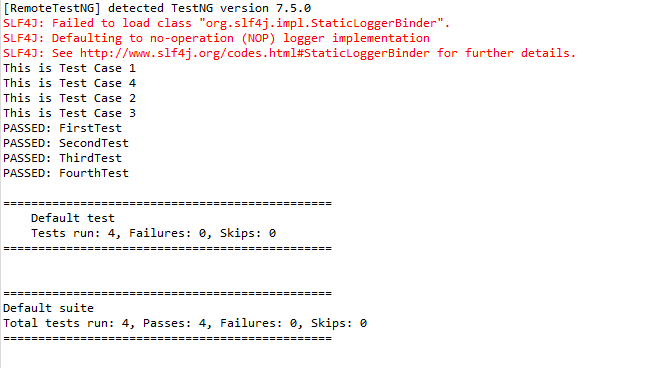
9. How can we make one test method dependent on others using TestNG?
Using the dependsOnMethods parameter inside @Test annotation in TestNG we can make one test method run only after the successful execution of the dependent test method. Dependency is a feature in TestNG that allows a test method to depend on a single or a group of test methods. Method dependency only works if the “depend-on-method” is part of the same class or any of the inherited base classes (i.e. while extending a class)
         @Test
            public static void FirstTest() {
                        System.out.println("This is Test Case 1");
            }

          @Test(dependsOnMethods = "FirstTest")
             public static void SecondTest() {
                        System.out.println("This is Test Case 2 and will be executed after Test Case 1 sucessfully executed");
            }

           @Test
           public static void ThirdTest() {
                       System.out.println("This is Test Case 3");
             }

           @Test
             public static void FourthTest() {
                            System.out.println("This is Test Case 4");
         }
}
For more details, click here
10. How to skip a method or a code block in TestNG?
If you want to skip a particular test method, then you can set the ‘enabled’ parameter in the test annotation to false.
@Test(enabled = false)
By default, the value of the ‘enabled’ parameter will be true. Hence, it is not necessary to define the annotation as true while defining it.
For more details, click here
11. How do you exclude a group from the test execution cycle?
Excluding a group in TestNG denotes that this particular group refrains from running during the execution, and TestNG will ignore it. Additionally, the name of the group that we want to exclude is defined in the XML file by the following syntax:
<?xml version = "1.0"encoding = "UTF-8"?>
<!DOCTYPE suite SYSTEM "http://testng.org/testng-1.0.dtd">
<suite name = "Suite1">
   <test name = "Test Demo">
      <groups>
         <run>
            <exclude name = "e2etest"/>
         </run>
      </groups>
      <classes>
         <class name = "com.selenium.testng.TestNGDemo.TestNGGroupDemo"/>
      </classes>
   </test>
</suite>
By putting our group “e2etest” inside the exclude tag, we are requesting TestNG to ignore the test cases under the group “e2etest”.
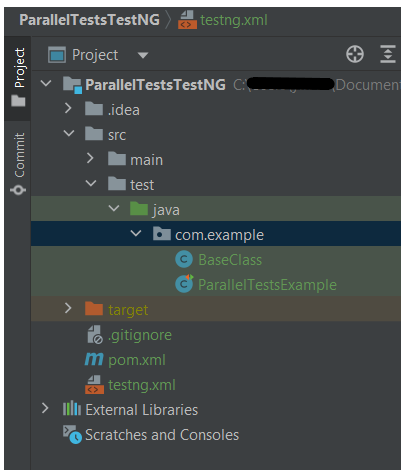
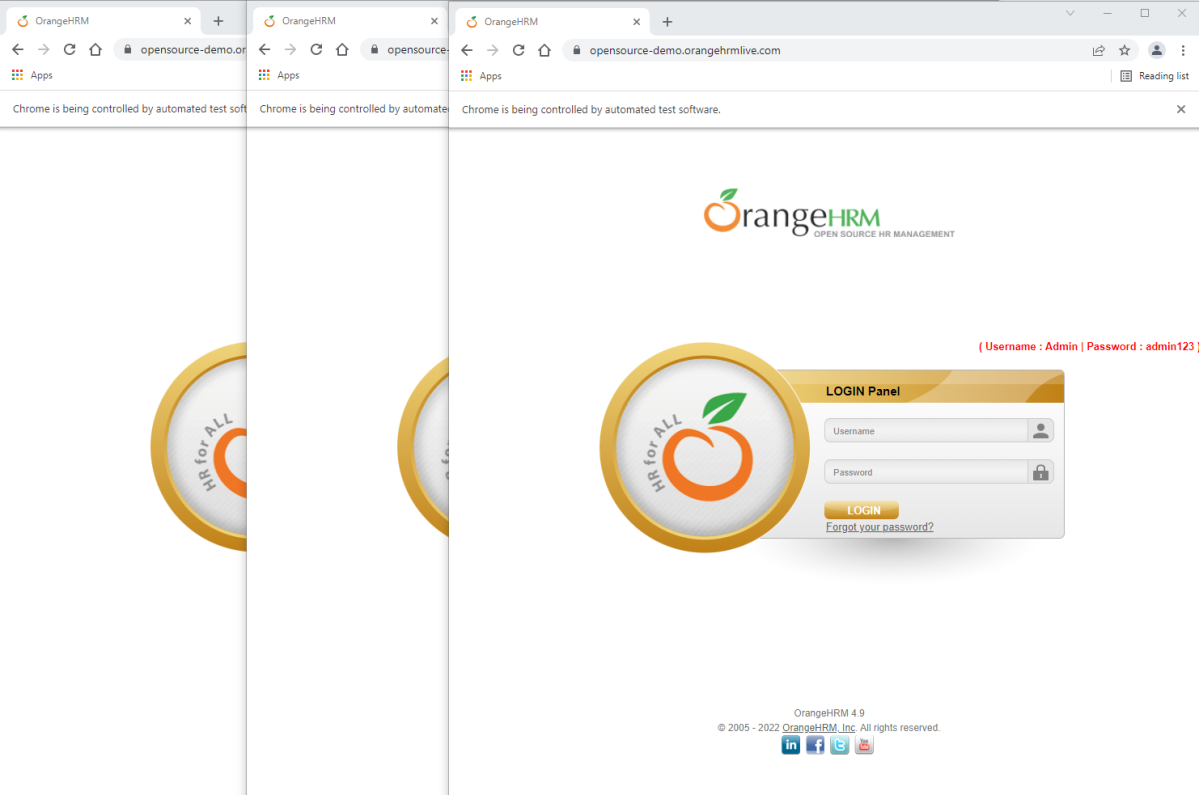
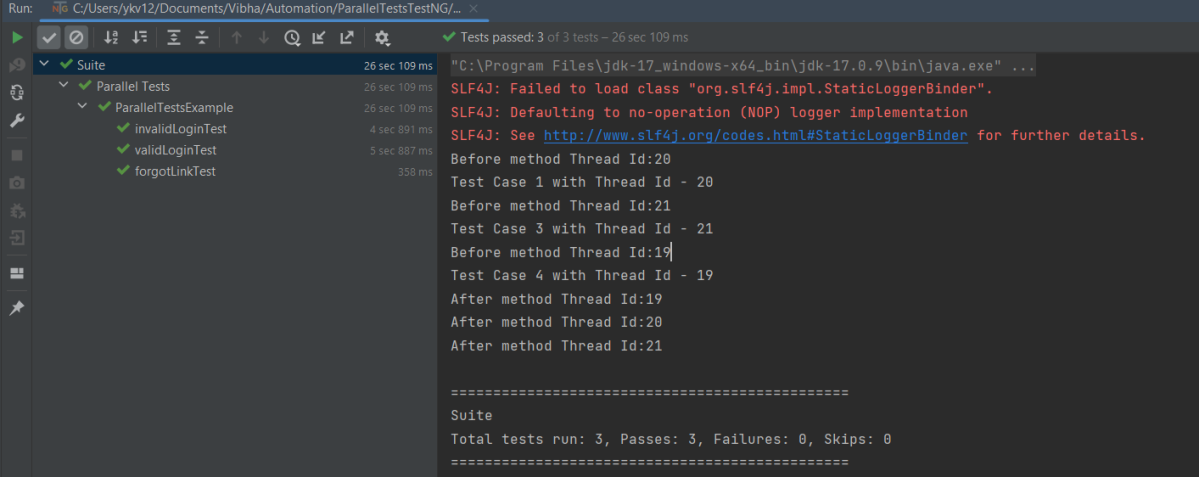
12. How to run test cases in parallel using TestNG?
In testng.xml, if we set the ‘parallel’ attribute on the tag to ‘methods’, testNG will run all the ‘@Test’ methods in the tag in a separate thread.
The parallel attribute of suite tag can accept four values:
tests – All the test cases inside tag of testng.xml file will run parallel
classes – All the test cases inside a java class will run parallel
methods – All the methods with @Test annotation will execute parallel
instances – Test cases in same instance will execute in parallel but two methods of two different instances will run in a different thread.
Below is an example to testng.xml file
<?xml version="1.0" encoding="UTF-8"?>
<!DOCTYPE suite SYSTEM "http://testng.org/testng-1.0.dtd">
<suite name="TestSuite" thread-count="3" parallel="methods" >
<test name="GoogleTest">
<classes>
<class name="TestNGDemo.ParallelTestDemo">
</class>
</classes>
</test>
</suite>
For more details,click here
13. What is the use of @Listener annotation in TestNG?
A listener is defined as an interface that modifies the default TestNG’s behavior. It allows customizing TestNG reports or logs. There are many types of TestNG listeners available. Here are a few listeners:
- IAnnotationTransformer
- IAnnotationTransformer2
- IHookable
- IInvokedMethodListener
- IMethodInterceptor
- IReporter
- ISuiteListener
- ITestListener
For more details, click here
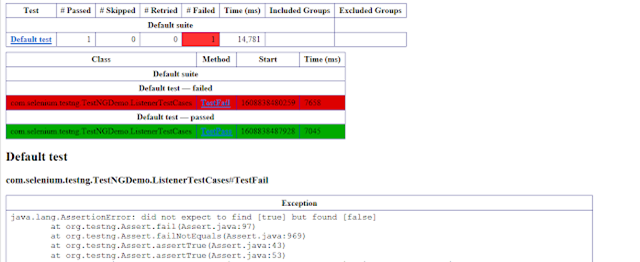
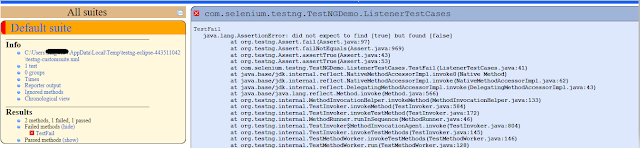
14. How are listeners declared in TestNG?
When you implement one of these interfaces, you can let TestNG know about it in either of the following ways:
- Using in your testng.xml file.
@Listeners(com.selenium.testng.TestNGDemo.ListenerDemo.class)
Using the@Listeners annotation on any of your test classes.
<?xml version = "1.0" encoding = "UTF-8"?>
<!DOCTYPE suite SYSTEM "http://testng.org/testng-1.0.dtd" >
<suite name = "TestSuite">
<listeners>
<listener class-name ="com.selenium.testng.TestNGDemo.ListenerDemo"/>
</listeners>

<test name ="Test">
<classes>
<class name="com.selenium.testng.TestNGDemo.ListenerTestCases"/>
</classes>
</test>
</suite>
For more details, click here
15. Do TestNG reports need external code to write?
No, there is no need to write any code to generate reports in TestNG. In other words, the report generation happens by default.
16. What are the two reports generated in TestNG?
We can generate the TestNG reports in two ways:
· Emailable Reports
· Index Reports
17. Where is the emailable report generated and saved in TestNG?
Emailable reports are generated under the project folder and test-output subfolder. This report is available as “emailable-report.html” by default.
18. Where is the index report generate and saved in TestNG?
The index report generates under the project folder and test-output subfolder. Moreover, this report is available as “index.html” by default.
19. What is invocationCount in TestNG?
An invocationCount in TestNG is the number of times that we want to execute the same test.
import org.testng.annotations.Test;
public class InvocationCountDemo {
            @Test(invocationCount = 5)
            public void testcase1() {
                        System.out.println("testcase1");
            }
}

Output
testcase1
testcase1
testcase1
testcase1
testcase1
PASSED: testcase1
PASSED: testcase1
PASSED: testcase1
PASSED: testcase1
PASSED: testcase1
20. How to pass the parameter in the test case through testng.xml file?
TestNG can pass different test data to a test case as arguments which is called parametrization
@Parameters("value")
TestNG.xml looks like this as shown below. Here, the parameter name is the browser name value for the browser is “Chrome”. So, this “Chrome” value is passed to Test as a parameter, and as a result a Google Chrome browser opens.
<?xml version = "1.0" encoding = "UTF-8"?>
<!DOCTYPE suite SYSTEM "http://testng.org/testng-1.0.dtd" >
<suite name = "TestSuite">
  <test name="ChromeTest">
<parameter name="browser" value="Chrome" />
<classes>
<class name="com.selenium.testng.TestNGDemo.TestNGParameterizationDemo">
</class>
</classes>
</test>
</suite>
For more details, click here