The previous tutorial has explained how to install it onto a Windows 10 system and create a Maven or Gradle project in Jenkins. Jenkins and GitLab are two powerful tools on their own, but what about using them together? In this tutorial, learn about the benefits of a Jenkins GitLab integration and how to set up the integration on your own.
What is GitLab?
GitLab is a web-based Git repository that provides free open and private repositories, issue-following capabilities, and wikis. It is a complete DevOps platform that enables professionals to perform all the tasks in a project—from project planning and source code management to monitoring and security. Additionally, it allows teams to collaborate and build better software.
What is Jenkins?
Jenkins is a well-known open-source tool that aids in the implementation of Continuous Integration (CI) and Continuous Deployment/Continuous Delivery (CD) processes by automating parts of the software development pipeline such as building, testing, and deployment.
Jenkins Version Used – 2.361.2
In this version of Jenkins, Git Plugin is already installed. If the Git Plugin is not installed, then follow the below steps to add Git Plugin in Jenkins.
Step 1: Open your dashboard.
Click on the Manage Jenkins button on your Jenkins dashboard:

Step 2: Select Manage Plugins.
Click on the Manage Jenkins. Choose Manage Plugins.

Step 3: Add Git Plugin
On the Plugins Page, go to the Available option.
- Select the GIT Plugin
- Click on Install without restart. The plugin will take a few moments to finish downloading depending on your internet connection, and will be installed automatically.
- You can also select the option Download now and Install after the restart button. In which plugin is installed after the restart
- You will be shown a “No updates available” message if you already have the Git plugin installed.

In my case, Git Plugin is already installed, so you can’t see it in the Available Plugin.
Step 4: Verify Git Plugin is installed
Once the plugins have been installed,
Go to Manage Jenkins on your Jenkins dashboard. You will see your plugins listed among the rest.

How to Integrate Jenkins With GitLab
Step 1: Create a new project using the Maven project plugin.
- Give the Name of the project.
- Click on the Maven project.
- Click on the OK button.
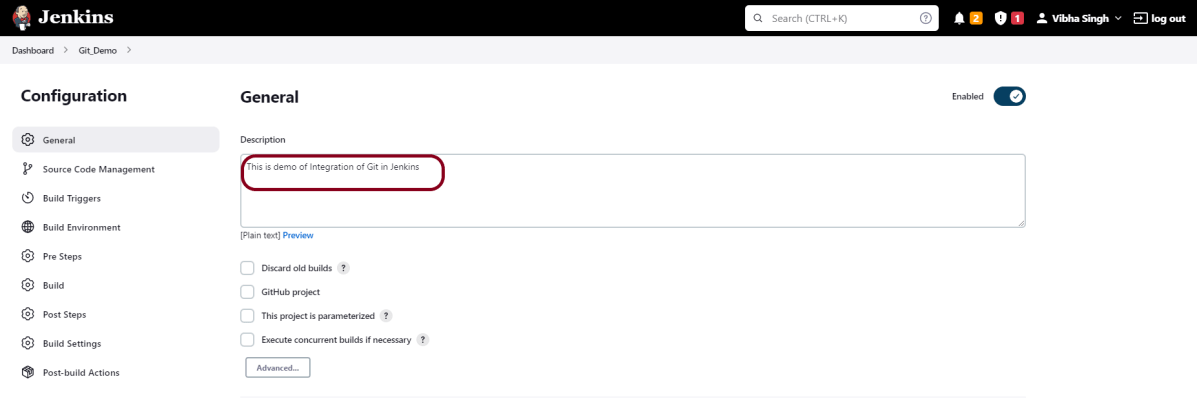
In the General section, enter the project description in the Description box.
Click on create new jobs.
Enter the item name, select the job type, and click OK. We shall create a Maven project as an example.

Step 2: Describe the project in the description section
In the General section, enter the project description in the Description box.
Step 3 – Source Code Management section
You will see a Git option under Source Code Management if your Git plugin has been installed in Jenkins.
Enter the Git repository URL to pull the code from GitHub. Enter the credentials to log in to GitLab.

I have already set up the credentials to log in to GitLab. Click on the Add button and select Jenkins.

Add the username and password used to log in to GitLab. Click on the “Add” button.

Note:- Please make sure that Git is installed on your local machine. To install Git on your local machine, go to this tutorial – How to install Git on Windows 10.
Step 4: Build Management
Go to the Build section of the new job.
- In the Root POM textbox, enter pom.xml
- In the Goals and options section, enter “clean test“

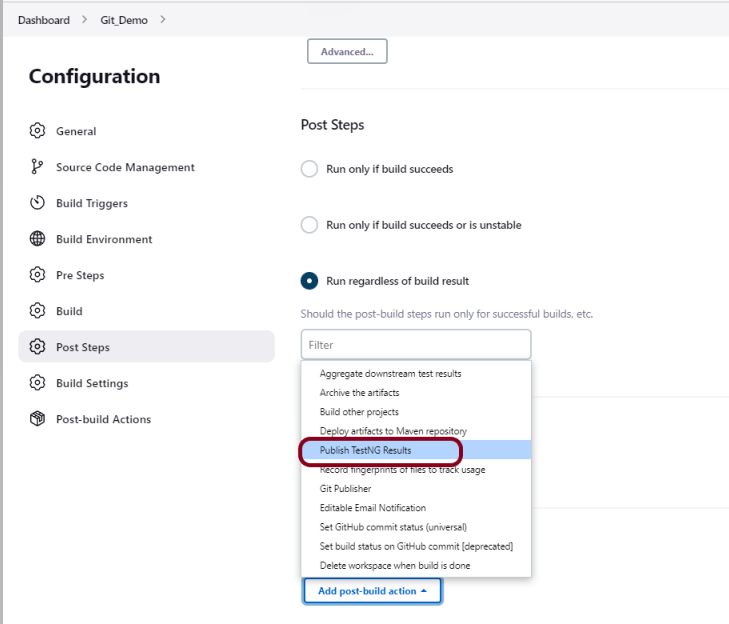
Step 5: Select “Publish TestNG Results” from “Post Build Actions“
Scroll down to “Post Build Actions” and click on the “Add Post Build Actions” drop-down list. Select “Publish TestNG Results“.
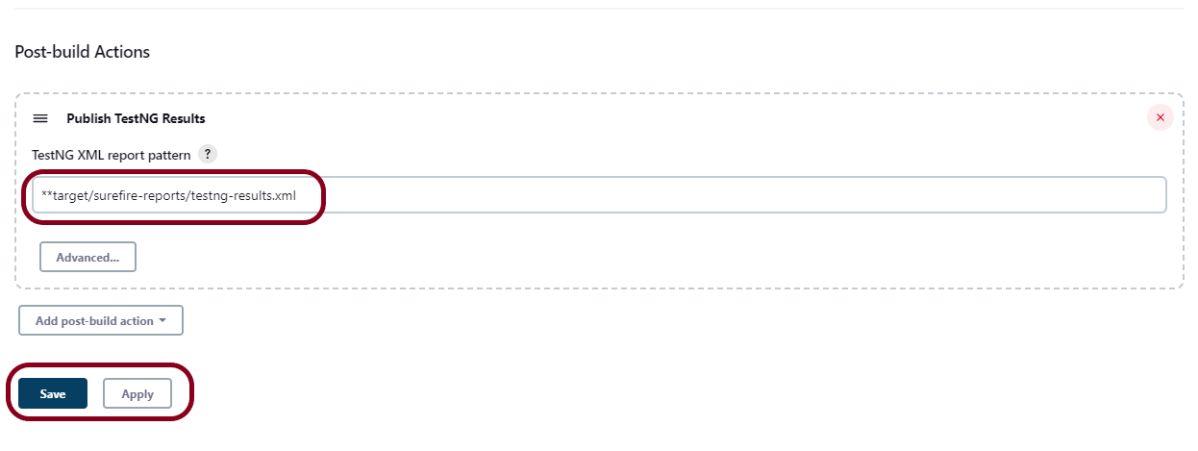
Enter TestNG XML Report Pattern as “**target/surefire-reports/testng-results.xml” and click on the “Save” button.
We have created a new project “Git_Demo” with the configuration to run TestNG Tests and also to generate TestNG Reports after execution using Jenkins.
Step 6: Execute the tests
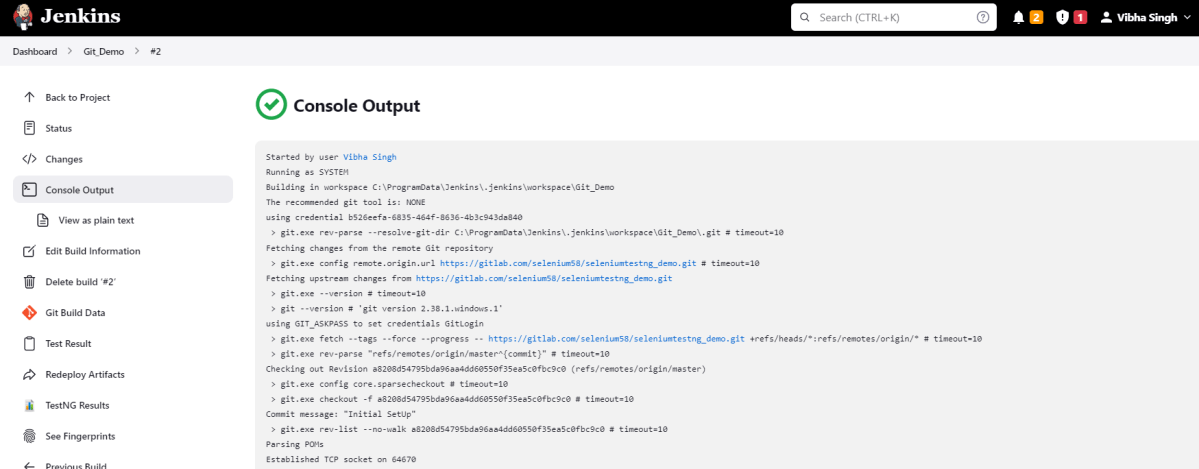
Let’s execute it now by clicking on the “Build Now” button.

Right-click on Build Number (here in my case it is #2) and click on Console Output to see the result.

Step 7: View the TestNG Report
Once the execution is completed, we could see a link to view “TestNG Results“.
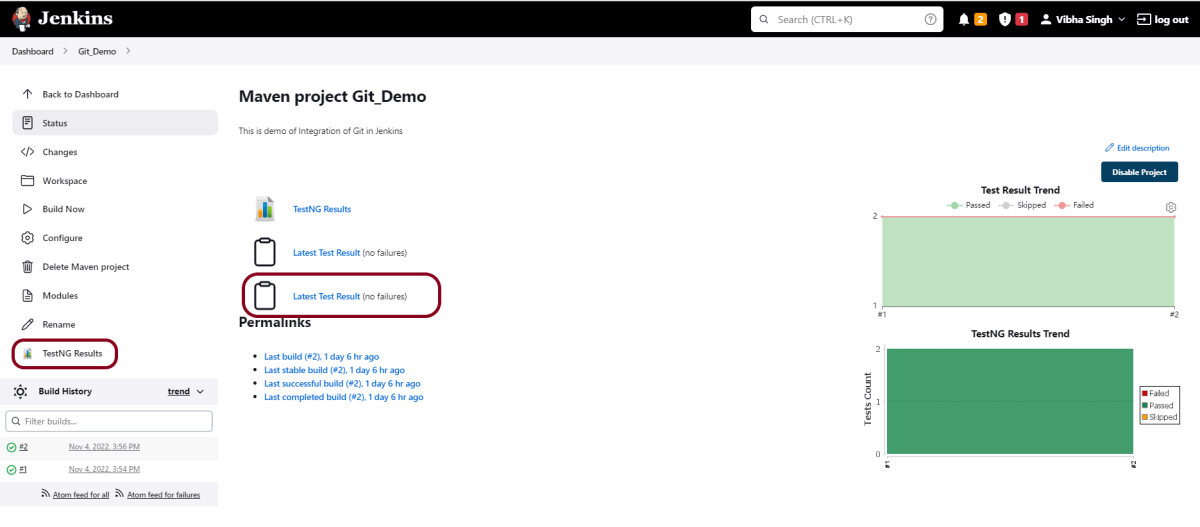
Click on the TestNG Results. It displays the summary of the tests.

If you want to check the execution history, then click on the shown link.
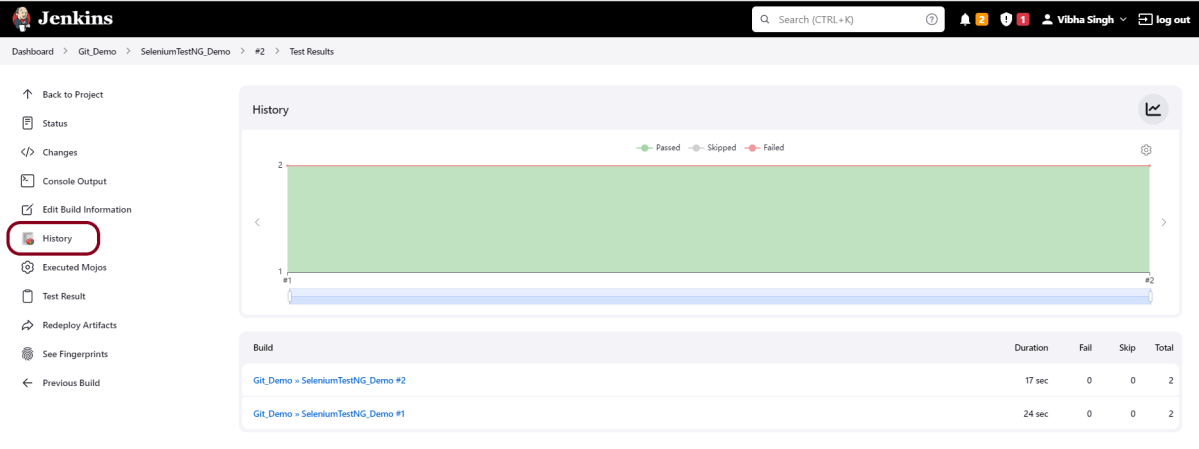
This way, we could integrate Git in Jenkins.
Congratulations on making it through this tutorial and hope you found it useful! Happy Learning!! Cheers!!
