The previous tutorial has shown the various parameterized tests in JUnit5. This tutorial shows how to run a Selenium test multiple times with a different set of data. This helps to reduce the duplication of code. This is a very common scenario in any testing. Imagine, we want to test the requirement for a login page that uses a username and password to log in to the application. Username and password must satisfy some conditions like username can be only alphabets and no numeric and special characters. There could be multiple sets of data that can be used to test this requirement.
Prerequisite:
- Selenium – 4.21.0
- Maven – 3.9.6
- Java 17
- JUnit Jupiter Engine – 5.11.0-M2
- JUnit Jupiter API – 5.11.0-M2
JUnit5 provides a lot of ways to parameterize a test – @ValueSource, @EnumSource, @MethodSource, @CsvSource, @CsvFileSource, and @ArgumentsSource.
Let us see an example where the test is not parameterized. In the below example, we want to verify the different error messages generated by passing incorrect values to username and password.
This is the base class – Login, which contains the test method that uses a different set of test data.
package com.example.parameterized;

import org.openqa.selenium.WebDriver;
import org.openqa.selenium.WebElement;
import org.openqa.selenium.support.FindBy;
import org.openqa.selenium.support.PageFactory;

public class LoginPage {

    WebDriver driver ;

    @FindBy(name="username")
    WebElement username;

    @FindBy(name="password")
    WebElement password;

    @FindBy(xpath="//*[@class='oxd-form']/div[3]/button")
    WebElement loginButton;

    @FindBy(xpath="//*[@class='orangehrm-login-error']/div[1]/div[1]/p")
    WebElement actualErrorMessage;


    public LoginPage(WebDriver driver) {

        this.driver = driver;

        // This initElements method will create all WebElements
        PageFactory.initElements(driver, this);
    }

    public void setUserName(String strUserName) {
        username.sendKeys(strUserName);
    }

    // Set password in password textbox
    public void setPassword(String strPassword) {
        password.sendKeys(strPassword);
    }

    // Click on login button
    public void clickLogin() {
        loginButton.click();
    }

    // Get the error message
    public String getErrorMessage() {
        return actualErrorMessage.getText();
    }

    public void login(String strUserName, String strPasword) {

        // Fill user name
        this.setUserName(strUserName);

        // Fill password
        this.setPassword(strPasword);

        // Click Login button
        this.clickLogin();
    }

}
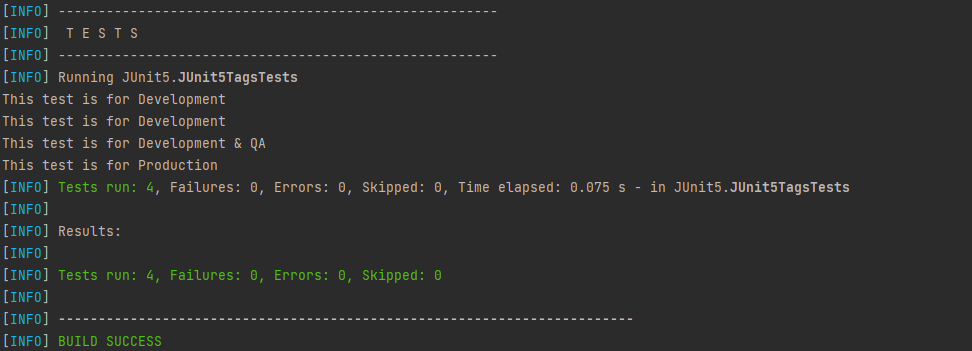
The example below shows 4 tests using a common test with 4 different sets of data.
import org.junit.jupiter.api.AfterEach;
import org.junit.jupiter.api.BeforeEach;
import org.junit.jupiter.api.Test;
import org.openqa.selenium.WebDriver;
import org.openqa.selenium.chrome.ChromeDriver;
import org.openqa.selenium.chrome.ChromeOptions;

import java.time.Duration;

import static org.junit.jupiter.api.Assertions.assertEquals;

public class NonParameterizedLoginTest {

    WebDriver driver;
    LoginPage login;

    @BeforeEach
    void setUp() {

        ChromeOptions chromeOptions = new ChromeOptions();
        driver = new ChromeDriver(chromeOptions);
        driver.manage().window().maximize();
        driver.get("https://opensource-demo.orangehrmlive.com/");
        driver.manage().timeouts().implicitlyWait(Duration.ofSeconds(5));

    }

    @Test
    void invalidCredentials1() {

        login = new LoginPage(driver);
        login.login("Admin","Admin");
        String actualErrorMessage = login.getErrorMessage();
        assertEquals("Invalid credentials", actualErrorMessage);

    }

    @Test
    void invalidCredentials2() {

        login = new LoginPage(driver);
        login.login("admin","Admin");
        String actualErrorMessage = login.getErrorMessage();
        assertEquals("Invalid credentials", actualErrorMessage);

    }

    @Test
    void invalidCredentials3() {

        login = new LoginPage(driver);
        login.login("Admin","123");
        String actualErrorMessage = login.getErrorMessage();
        assertEquals("Invalid credentials", actualErrorMessage);

    }

    @Test
    void invalidCredentials4() {

        login = new LoginPage(driver);
        login.login("admin123","3456admin");
        String actualErrorMessage = login.getErrorMessage();
        assertEquals("Invalid credentials", actualErrorMessage);

    }

    @AfterEach
    void tearDown() {
        if (driver != null) {
            driver.close();
        }
    }

}
We can see that the same method is called multiple times. This is a duplication of code. The output of the above program is

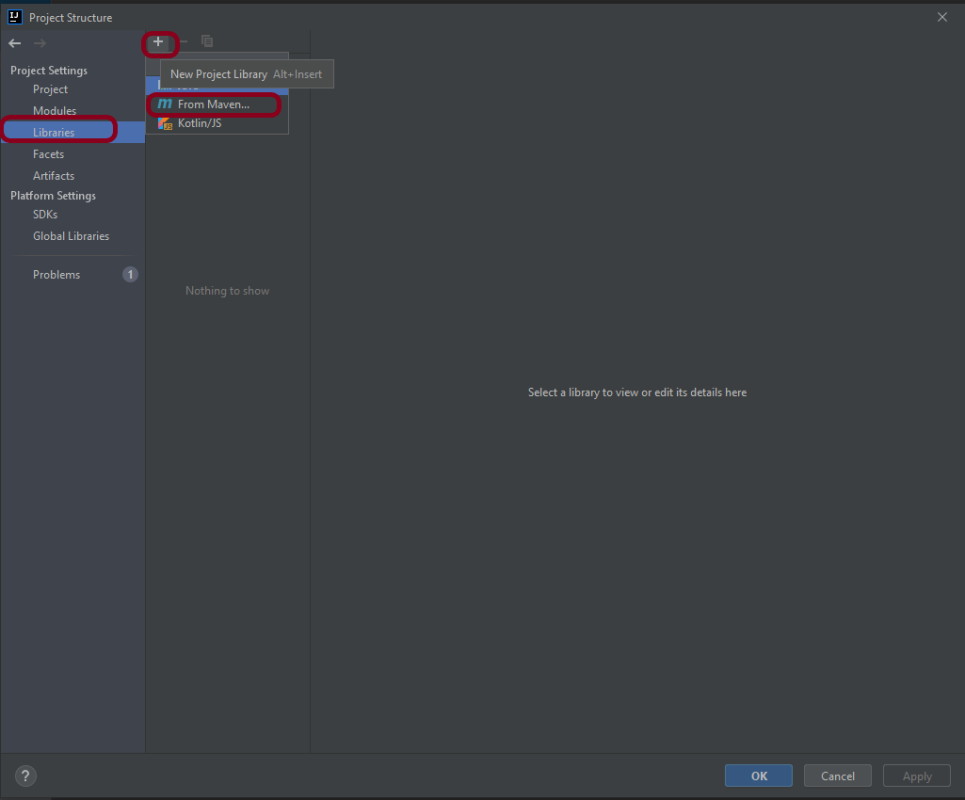
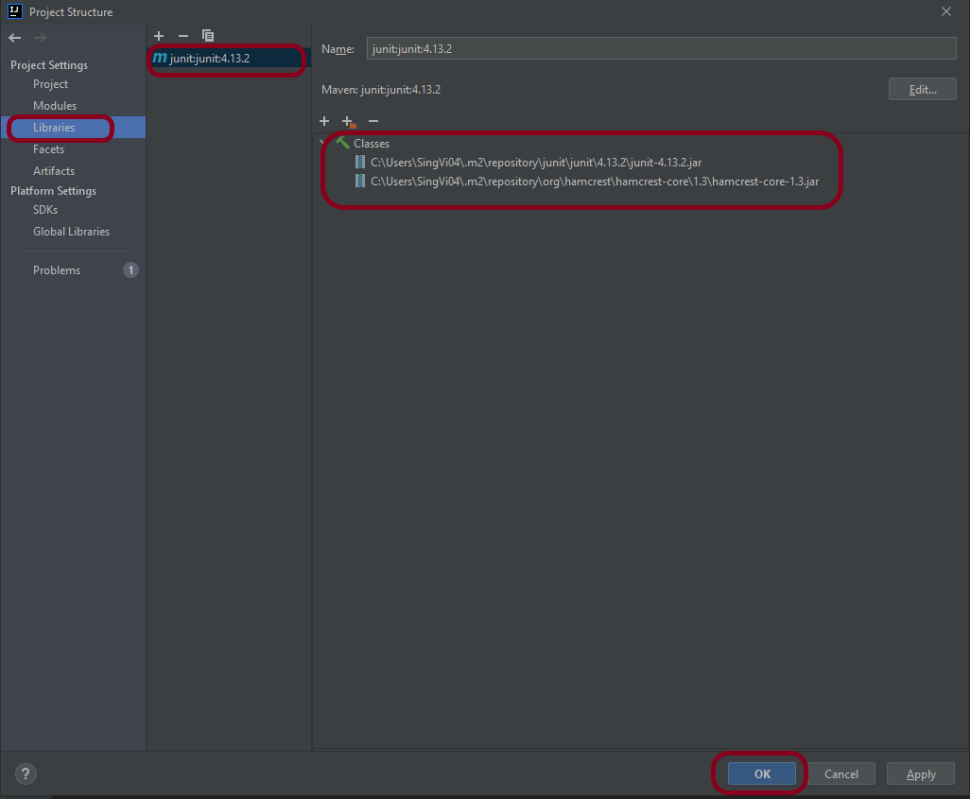
Now, we will parameterize the same test. To do so, we need to add a dependency to the POM.xml.
<project xmlns="http://maven.apache.org/POM/4.0.0" xmlns:xsi="http://www.w3.org/2001/XMLSchema-instance"
  xsi:schemaLocation="http://maven.apache.org/POM/4.0.0 http://maven.apache.org/xsd/maven-4.0.0.xsd">
  <modelVersion>4.0.0</modelVersion>

  <groupId>com.example</groupId>
  <artifactId>JUnit5_Examples</artifactId>
  <version>1.0-SNAPSHOT</version>
  <packaging>jar</packaging>

  <name>JUnit5_Examples</name>
  <url>http://maven.apache.org</url>

  <properties>
    <project.build.sourceEncoding>UTF-8</project.build.sourceEncoding>
    <selenium.version>4.21.0</selenium.version>
    <junit.jupiter.engine.version>5.11.0-M2</junit.jupiter.engine.version>
    <junit.jupiter.api.version>5.11.0-M2</junit.jupiter.api.version>
    <junit.jupiter.params.version>5.11.0-M2</junit.jupiter.params.version>
    <maven.compiler.plugin.version>3.13.0</maven.compiler.plugin.version>
    <maven.compiler.source.version>17</maven.compiler.source.version>
    <maven.compiler.target.version>17</maven.compiler.target.version>
    <maven.surefire.plugin.version>3.2.5</maven.surefire.plugin.version>
    <maven.compiler.source>17</maven.compiler.source>
    <maven.compiler.target>17</maven.compiler.target>
  </properties>

  <dependencies>

    <dependency>
      <groupId>org.seleniumhq.selenium</groupId>
      <artifactId>selenium-java</artifactId>
      <version>${selenium.version}</version>
    </dependency>

    <dependency>
      <groupId>org.junit.jupiter</groupId>
      <artifactId>junit-jupiter-engine</artifactId>
      <version>${junit.jupiter.engine.version}</version>
      <scope>test</scope>
    </dependency>

    <dependency>
      <groupId>org.junit.jupiter</groupId>
      <artifactId>junit-jupiter-api</artifactId>
      <version>${junit.jupiter.api.version}</version>
      <scope>test</scope>
    </dependency>

    <dependency>
      <groupId>org.seleniumhq.selenium</groupId>
      <artifactId>selenium-java</artifactId>
      <version>${selenium.version}</version>
    </dependency>

    <dependency>
      <groupId>org.junit.jupiter</groupId>
      <artifactId>junit-jupiter-params</artifactId>
      <version>${junit.jupiter.params.version}</version>
      <scope>test</scope>
    </dependency>

  </dependencies>

  <build>
    <plugins>

      <plugin>
        <groupId>org.apache.maven.plugins</groupId>
        <artifactId>maven-surefire-plugin</artifactId>
        <version>${maven.surefire.plugin.version}</version>

        <dependencies>
          <dependency>
            <groupId>org.junit.jupiter</groupId>
            <artifactId>junit-jupiter-engine</artifactId>
            <version>${junit.jupiter.engine.version}</version>
          </dependency>
        </dependencies>
      </plugin>
    </plugins>
  </build>

</project>
There are multiple ways to parameterize the test. To start with:
- Replace the @Test annotation with the @ParameterizedTest annotation provided by the JUnit5 framework.
- Add parameters to the loginTest() method. In this example, we will add a username and a password parameter.
- Add the parameters source. In this example, we will use the @CsvFileSource annotation.
To know all the different types of parameterization methods, please refer to this tutorial. This tutorial will show the 2 most common ways to parameterize tests in JUnit5.
1.@CsvSource
@CsvSource allows us to express argument lists as comma-separated values (i.e., CSV String literals). Each string provided via the value attribute in @CsvSource represents a CSV record and results in one invocation of the parameterized test. An empty, quoted value (”) results in an empty String. This can be seen in the example below.
import org.junit.jupiter.api.AfterEach;
import org.junit.jupiter.api.BeforeEach;
import org.junit.jupiter.params.ParameterizedTest;
import org.junit.jupiter.params.provider.CsvSource;
import org.openqa.selenium.WebDriver;
import org.openqa.selenium.chrome.ChromeDriver;
import org.openqa.selenium.chrome.ChromeOptions;

import java.time.Duration;

import static org.junit.jupiter.api.Assertions.assertEquals;

public class ParameterizedSourceTest {

    WebDriver driver;

    LoginPage loginPage;

    @BeforeEach
    void setUp() {

        ChromeOptions chromeOptions = new ChromeOptions();
        driver = new ChromeDriver(chromeOptions);
        driver.manage().window().maximize();
        driver.get("https://opensource-demo.orangehrmlive.com/");
        driver.manage().timeouts().implicitlyWait(Duration.ofSeconds(6));

    }

    @ParameterizedTest
    @CsvSource({
            "admin123,admin123,Invalid credentials",
            "admin,admin12,Invalid credentials",
            "Admin,1234,Invalid credentials",
            "12345,%^$£56,Invalid credentials"
    })

    void invalidCredentials1(String username, String password, String errorMessage) {

        loginPage = new LoginPage(driver);
        loginPage.login(username,password);
        String actualErrorMessage = loginPage.getErrorMessage();
        assertEquals(errorMessage, actualErrorMessage);

    }

    @AfterEach
    void tearDown() {
        driver.close();
    }
}
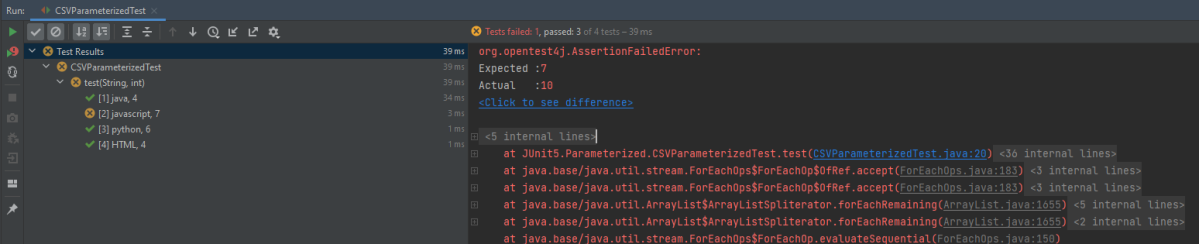
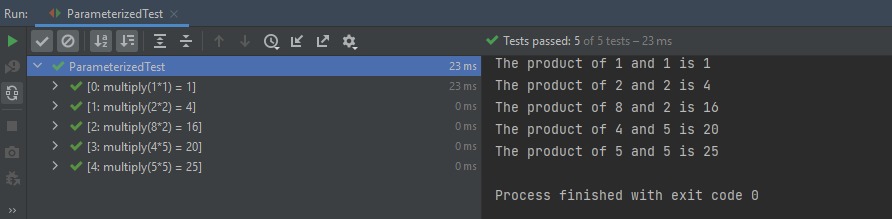
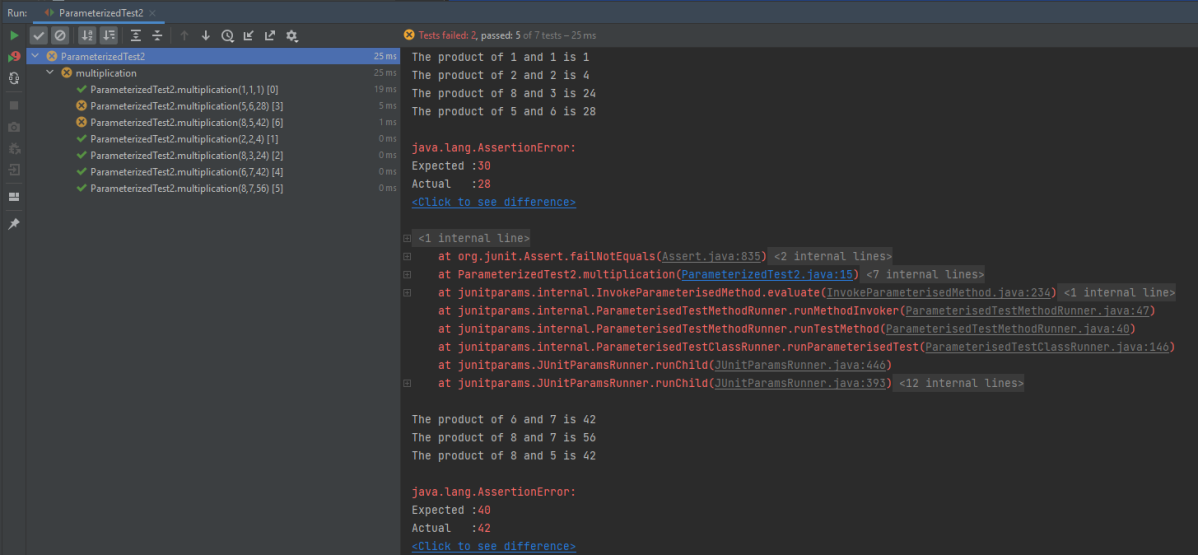
The output of the above program is

2. @CsvFileSource
@CsvFileSource lets us use comma-separated value (CSV) files from the classpath or the local file system.
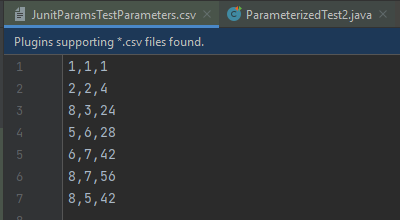
We can see in the example below that we have skipped the first line from the credentials.csv file as it is the heading of the file. invalidCredentials() method got 4 different set of the test data from CSV file using parameterization. JUnit5 ignores the headers via the numLinesToSkip attribute.
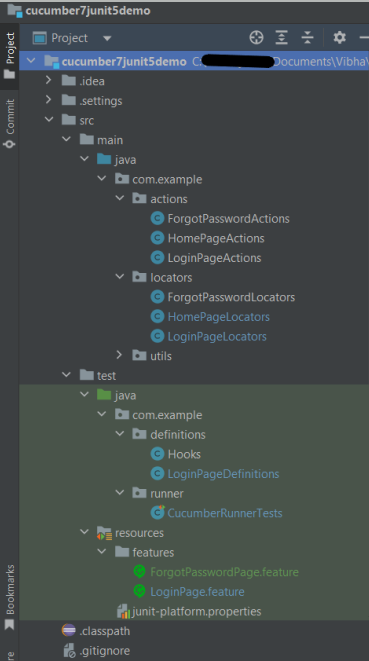
In this example, will retrieve the data from CSV. This CSV file is placed under src/test/resources. Below is an example of the credentials.csv file.

In @CsvFileSource, an empty, quoted value (“”) results in an empty String in JUnit5.
package com.example.parameterized;

import org.junit.jupiter.api.AfterEach;
import org.junit.jupiter.api.BeforeEach;
import org.junit.jupiter.params.ParameterizedTest;
import org.junit.jupiter.params.provider.CsvFileSource;
import org.junit.jupiter.params.provider.CsvSource;
import org.openqa.selenium.WebDriver;
import org.openqa.selenium.chrome.ChromeDriver;
import org.openqa.selenium.chrome.ChromeOptions;

import java.time.Duration;

import static org.junit.jupiter.api.Assertions.assertEquals;

public class ParameterizedFileTest {

    WebDriver driver;

    LoginPage loginPage;

    @BeforeEach
    void setUp() {

        ChromeOptions chromeOptions = new ChromeOptions();
        driver = new ChromeDriver(chromeOptions);
        driver.manage().window().maximize();
        driver.get("https://opensource-demo.orangehrmlive.com/");
        driver.manage().timeouts().implicitlyWait(Duration.ofSeconds(6));

    }

    @ParameterizedTest
    @CsvFileSource(files = "src/test/resources/credentials.csv", numLinesToSkip = 1)
    void invalidCredentials1(String username, String password, String errorMessage) {

        loginPage = new LoginPage(driver);
        loginPage.login(username,password);
        String actualErrorMessage = loginPage.getErrorMessage();
        assertEquals(errorMessage, actualErrorMessage);

    }

    @AfterEach
    void tearDown() {
        driver.close();
    }
}
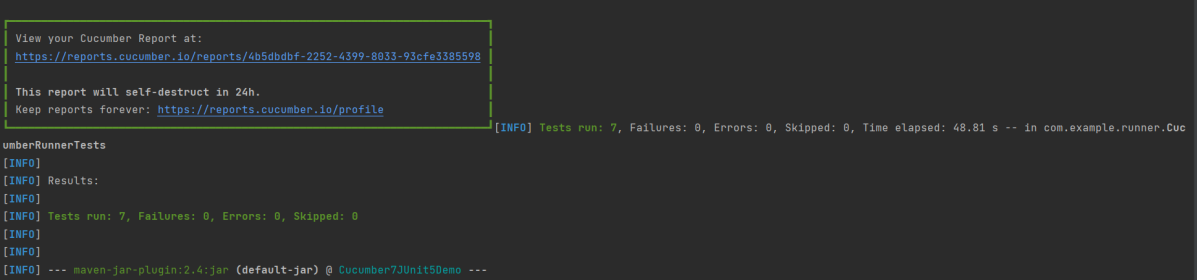
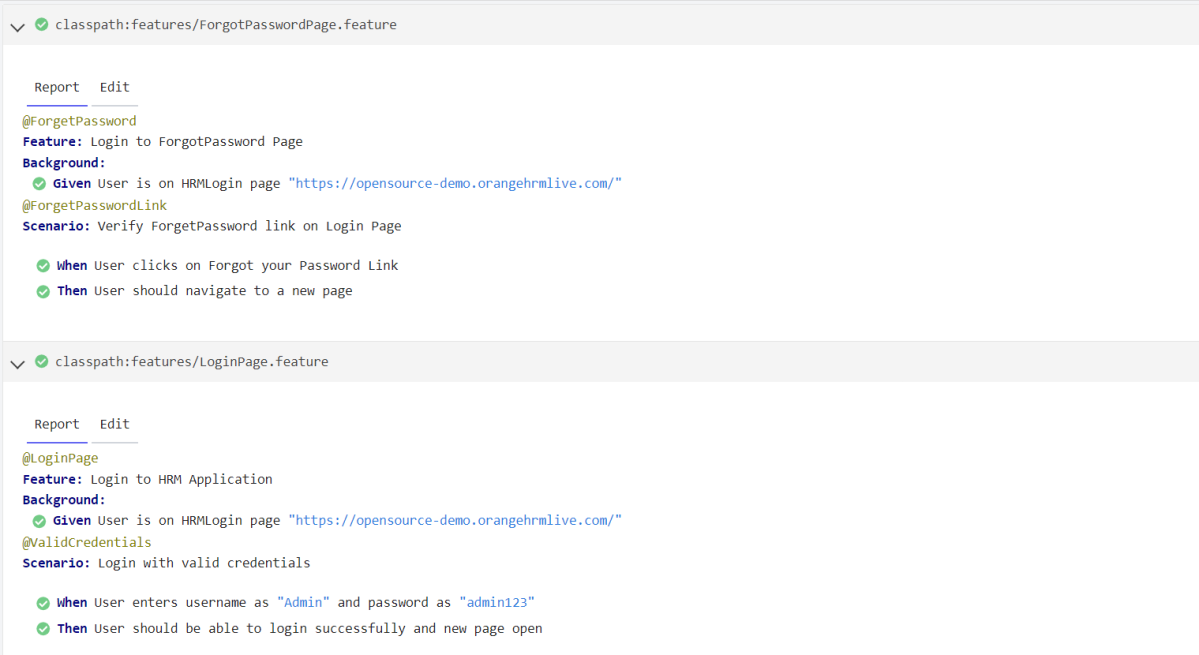
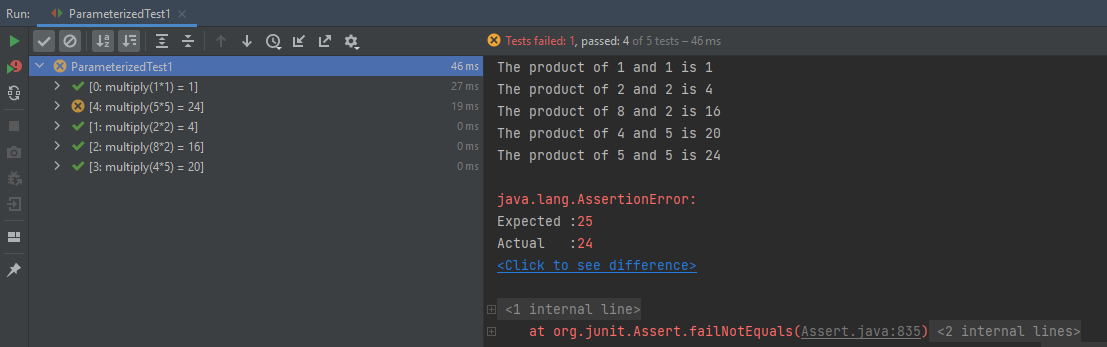
The result of the above program is

Congratulations!! We have seen how Selenium tests are parameterized in JUnit5. Happy Learning.