In the previous tutorial, I have explain about SpringBoot and how to perform Integration testing of SpringBoot Exception Handling. In this tutorial, I will explain about the Integration testing of Testing of SpringBoot Validation for RESTful Services.
What is Validation?
It is necessary that the response recieve from RestFul service should return meaningful information, like certain data type, constraints. If a response returns error message, then we expect it to provide information like clear error message, which field has an error, what is the type of error, proper status code and most importantly should not provide any sensitive information.
From SpringBoot 2.3, we also need to explicitly add the spring-boot-starter-validation dependency:
<dependency>
    <groupId>org.springframework.boot</groupId>
    <artifactId>spring-boot-starter-validation</artifactId>
</dependency>
To know about all the dependencies neede to test Springboot, please click here.
Below are various Java classes present in a SpringBoot REST Application/API
• SpringBootRestServiceApplication.java – The Spring Boot Application class generated with Spring Initializer. This class acts as the launching point for application.
• pom.xml – Contains all the dependencies needed to build this project.
• Student.java – This is JPA Entity for Student class
• StudentRepository.java – This is JPA Repository for Student. This is created using Spring Data JpaRepository.
• StudentController.java – Spring Rest Controller exposing all services on the student resource.
• CustomizedExceptionHandler.java – This implements global exception handling and customize the responses based on the exception type.
• ErrorDetails.java – Response Bean to use when exceptions are thrown from API.
• StudentNotFoundException.java – Exception thrown from resources when student is not found.
• data.sql – Data is loaded from data.sql into Student table. Spring Boot would execute this script after the tables are created from the entities.
REST request validation annotations
| ANNOTATION | USAGE |
|---|---|
| @AssertFalse | The annotated element must be false. |
| @AssertTrue | The annotated element must be true. |
| @DecimalMax | The annotated element must be a number whose value must be lower or equal to the specified maximum. |
| @DecimalMin | The annotated element must be a number whose value must be higher or equal to the specified minimum. |
| @Future | The annotated element must be an instant, date or time in the future. |
| @Max | The annotated element must be a number whose value must be lower or equal to the specified maximum. |
| @Min | The annotated element must be a number whose value must be higher or equal to the specified minimum. |
| @Negative | The annotated element must be a strictly negative number. |
| @NotBlank | The annotated element must not be null and must contain at least one non-whitespace character. |
| @NotEmpty | The annotated element must not be null nor empty. |
| @NotNull | The annotated element must not be null. |
| @Null | The annotated element must be null. |
| @Pattern | The annotated CharSequence must match the specified regular expression. |
| @Positive | The annotated element must be a strictly positive number. |
| @Size | The annotated element size must be between the specified boundaries (included). |
Implementing Validation on the Resource
Add @Valid in addition to @RequestBody.
public ResponseEntity<Object> createStudent(@Valid @RequestBody Student student) {
Below is the example of Student.java class. Here, you can see I have used various validations.
Here, Student class is annotated with @Entity, indicating that it is a JPA entity. There is no @Table annotation so entity is mapped to a table named Student .)
Id property is annotated with @Id and also annotated with @GeneratedValue to indicate that the ID should be generated automatically.
@Entity
public class Student {
    @Id
    @GeneratedValue
    private Long id;

    @NotNull
    @Size(min = 4, message = "Name should have atleast 4 characters")
    private String name;

   @NotBlank(message = "passportNumber is mandatory")
   private String passportNumber;

    public Student() {
        super();
    }

    public Student(Long id, String name, String passportNumber) {
        super();
        this.id = id;
        this.name = name;
        this.passportNumber = passportNumber;
    }

    public Long getId() {
        return id;
    }

    public void setId(Long id) {
        this.id = id;
    }

    public String getName() {
        return name;
    }

    public void setName(String name) {
        this.name = name;
    }

    public String getPassportNumber() {
        return passportNumber;
    }

    public void setPassportNumber(String passportNumber) {
        this.passportNumber = passportNumber;
    }
}
We need a @ControllerAdvice to handle validation errors. Below is the snippet of validation error for invalid method arguement.
@ControllerAdvice
@RestController
public class CustomizedResponseEntityExceptionHandler extends ResponseEntityExceptionHandler {

	@Override
	protected ResponseEntity<Object> handleMethodArgumentNotValid(MethodArgumentNotValidException ex,
			HttpHeaders headers, HttpStatus status, WebRequest request) {
		ExceptionResponse exceptionResponse = new ExceptionResponse(new Date(), "Validation Failed",
				ex.getBindingResult().toString());
		return new ResponseEntity(exceptionResponse, HttpStatus.BAD_REQUEST);
	}
}
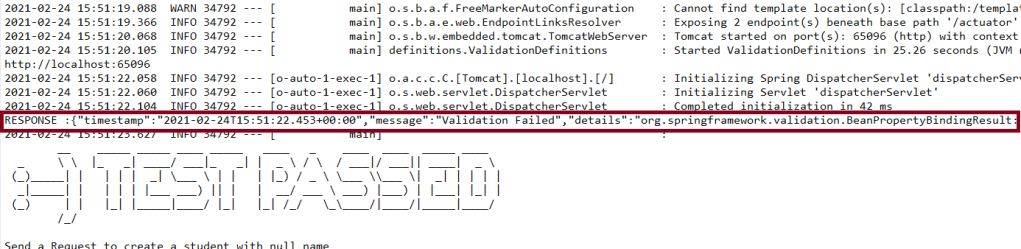
Scenario 1 – Below picture shows how we can execute a POST Request where Name is passed as null using Postman
@NotNull
    private String name;
In the below image, I am trying to create a new Student with name as null.

Above scenario can be tested in the below way.
Feature: Validation of  Student Request

  @CreateStudentWithNoName
    Scenario: Send a Request to create a student with no name

    Given I send a request to the URL "/students" to create a user with name as null and passport as "RA000002"
    Then the response will return error message as "Validation Failed" and details contain error detail as "default message [name]]; default message [must not be null]"
Test Code to test above scenario (StepDefinition file)
@SpringBootTest(classes = SpringBootRestServiceApplication.class, webEnvironment = WebEnvironment.RANDOM_PORT)
public class ValidationDefinitions {

	private final static String BASE_URI = "http://localhost";

	@LocalServerPort
	private int port;

	private ValidatableResponse validatableResponse, validatableResponse1;

	private void configureRestAssured() {

		RestAssured.baseURI = BASE_URI;
		RestAssured.port = port;
	}

	protected RequestSpecification getAnonymousRequest() throws NoSuchAlgorithmException {
		configureRestAssured();
		return given();
	}

	@Given("^I send a request to the URL \"([^\"]*)\" to create a user with name as null and passport as \"([^\"]*)\"$")
	public void iSendARequestwithNullName(String endpoint, String passport) throws Throwable {

		Map<String, String> map = new HashMap<>();
		map.put("name", null);
		map.put("passport", passport);

		JSONObject newStudent = new JSONObject(map);

		validatableResponse = getAnonymousRequest().contentType(ContentType.JSON).body(newStudent.toString()).when()
				.post(endpoint).then();
	}

	@Then("^the response will return error message as \"([^\"]*)\" and details contain error detail as \"([^\"]*)\"$")

	public void extractErrorResponse(String message, String details) {

		validatableResponse.assertThat().body("message", equalTo(message)).and().body(containsString(details));
	}
}
To know how to start the springBoot test and web environment. Please refer this link.
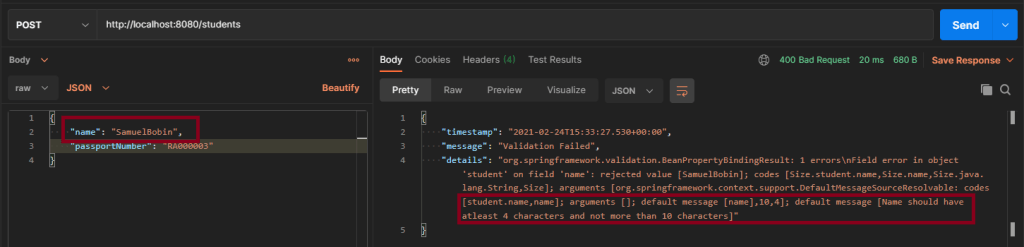
Scenario 2 – Below picture shows how we can execute a POST Request to create a student with Name as length outside the range using Postman
@Size(min = 4, max = 10, message = "Name should have atleast 4 characters and not more than 10 characters")
	private String name;
This means that name should have minimum 4 characters and maximum 10 character. Name not in this range will throw validation error with message as “Name should have atleast 4 characters and not more than 10 characters”
Above scenario can be tested in the below way.
 @CreateStudentWithInvalidName

    Scenario: Send a Request to create a student with invalid name

    Given I send a request to the URL "/students" to create a user with name as "SamuelBobin" and passport as "RA000003"
    Then the response will return error message as "Validation Failed" and details contain error detail as "Name should have atleast 4 characters and not more than 10 characters"
Test Code to test above scenario (StepDefinition file)
@Given("^I send a request to the URL \"([^\"]*)\" to create a user with name as \"([^\"]*)\" and passport as \"([^\"]*)\"$")
	public void iSendARequest(String endpoint, String newName, String passport) throws Throwable {

		Map<String, String> map = new HashMap<>();
		map.put("name", newName);
		map.put("passport", passport);

		JSONObject newStudent = new JSONObject(map);

		validatableResponse = getAnonymousRequest().contentType(ContentType.JSON).body(newStudent.toString()).when()
				.post(endpoint).then();
	}

	@Then("^the response will return error message as \"([^\"]*)\" and details contain error detail as \"([^\"]*)\"$")

	public void extractErrorResponse(String message, String details) {

		validatableResponse.assertThat().body("message", equalTo(message)).and().body(containsString(details));

	}

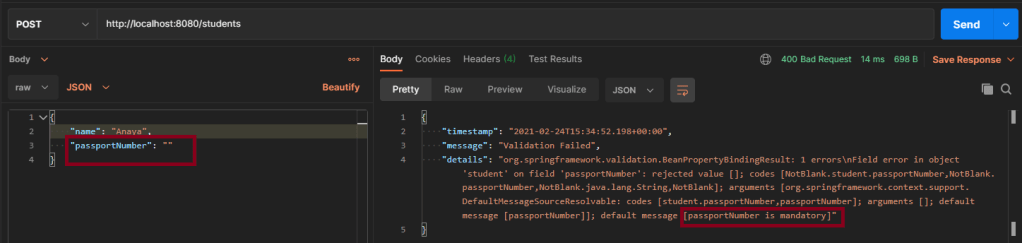
Scenario 3 – Below picture shows how we can execute a POST Request where creating a student with passport as not Blank using Postman
@NotBlank(message = "passportNumber is mandatory")
	private String passportNumber;
@NotBlank is to specify the attribute should not be blank and also a message when a validation error occurs “passportNumber is mandatory”.
This scenario can be tested as shown above.
