In the previous tutorial, I have explained how to create a Java Gradle project in IntelliJ. In this tutorial, I will explain about creating a Java Gradle project Eclipse. I have used Gradle 6.6 to create the project.
Steps to follow:-
Step 1 – To create a new project – Click on the “New” and then select – “Project”.

Step 2 – Select the “Gradle Project” and click on the “Next” button.

Step 3 – A welcome screen will appear. You can uncheck the box – Show the welcome page the next time the wizard appears. This is optional. Click the NEXT button.

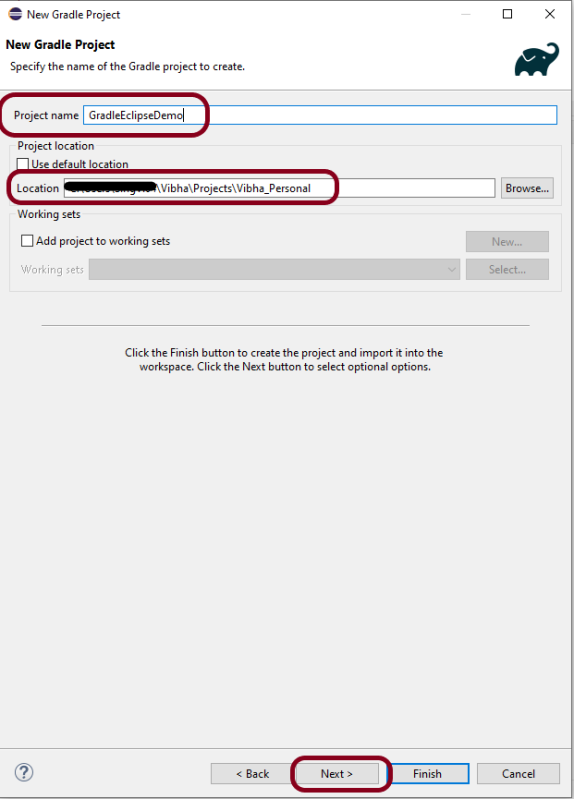
Step 4 – Below the screen will appear. Mention the “Project Name – GradleEclipseDemo”. Mention the location where we want to save the project in the system. Click the NEXT button.
Step 5 – Options screen appear. Make sure you use Gradle version 6.6 to create Gradle project in Eclipse for Version: 2021- 03 (4.19.0).
Note:- If you will try to use version higher than 6.6, then Gradle project structure will have a Gradle project with the nested project with a lib subproject in it.

Step 6 – Verify the Gradle Version and Gradle project structure name.

Step 7 – Below is the structure of Gradle project. The init task generates the new project with the following structure:-
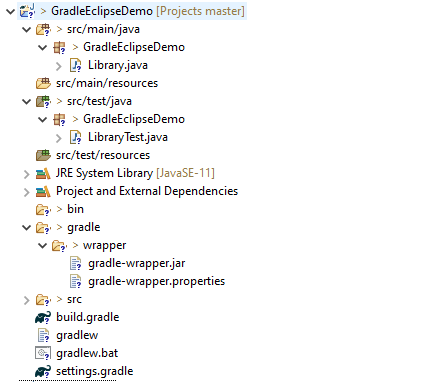
- Generated folder for wrapper files -wrapper
- Gradle wrapper start scripts – gradlew, gradlew.bat
- Settings file to define build name and subprojects – settings.gradle
- Build script of lib project – build.gradle
- Default Java source folder – src/main/java
- Default Java test source folder – src/test/java
Step 8 – Below is the structure and content of the build.gradle.
/*
 * This file was generated by the Gradle 'init' task.
 *
 * This generated file contains a sample Java Library project to get you started.
 * For more details take a look at the Java Libraries chapter in the Gradle
 * User Manual available at https://docs.gradle.org/6.6/userguide/java_library_plugin.html
 */

plugins {
    // Apply the java-library plugin to add support for Java Library
    id 'java-library'
}

repositories {
    // Use jcenter for resolving dependencies.
    // You can declare any Maven/Ivy/file repository here.
    jcenter()
}

dependencies {
    // This dependency is exported to consumers, that is to say found on their compile classpath.
    api 'org.apache.commons:commons-math3:3.6.1'

    // This dependency is used internally, and not exposed to consumers on their own compile classpath.
    implementation 'com.google.guava:guava:29.0-jre'

    // Use JUnit test framework
    testImplementation 'junit:junit:4.13'
}
- plugins – Apply the java-library plugin for API and implementation separation.
- jcenter – Use JCentral for resolving dependencies. JCenter is a central repository on JFrog Bintray platform for finding and sharing popular JVM language packages in Maven format
- api – This dependency is exported to consumers, that is to say found on their compile classpath.
- implementation – This dependency is used internally, and not exposed to consumers on their own compile classpath.
- testImplementation – Use JUnit test framework.
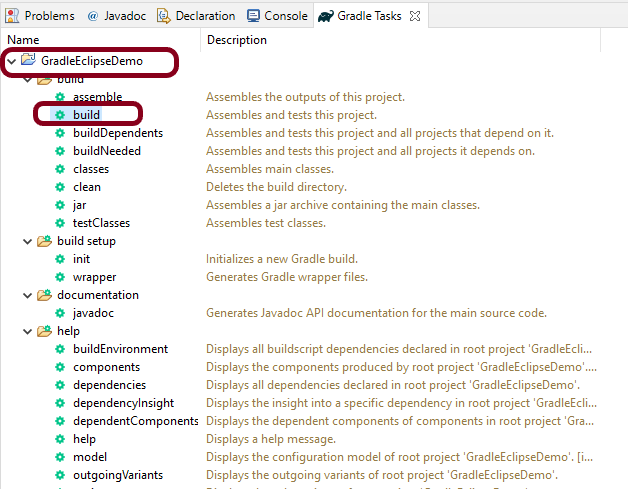
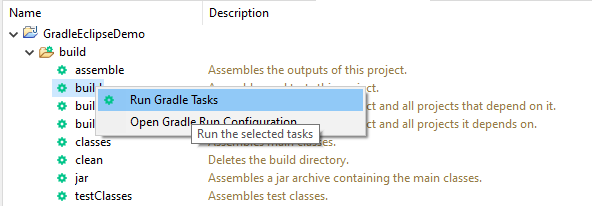
Step 9 – To check if the project is created successfully. In gradle tasks tab -> navigate to the project -> expand build folder -> right click on build -> Select Run Gradle tasks.
This will be the output of the Gradle Run.
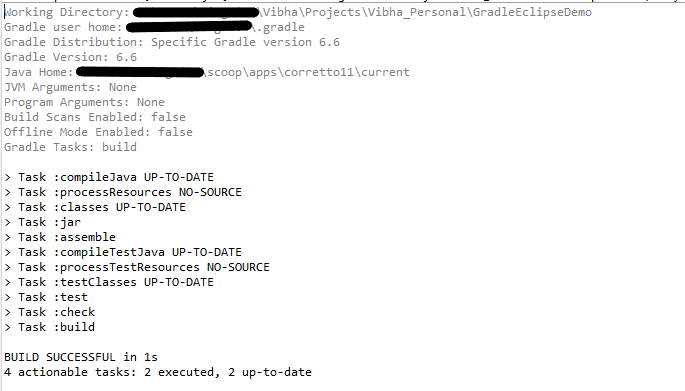
That’s it. We have successfully created a Gradle Java project in Eclipse.
Congratulations on making it through this tutorial and hope you found it useful! Happy Learning!! Cheers!!
