In this tutorial, I will explain How to install Gradle on Windows.
Steps to follow:-
Step 1 – To install Gradle on window, we need to download Gradle from Official Gradle Site. I am downloading gradle-8.8.
Step 2 – Create a new directory Documents\Vibha\Automation with File Explorer.
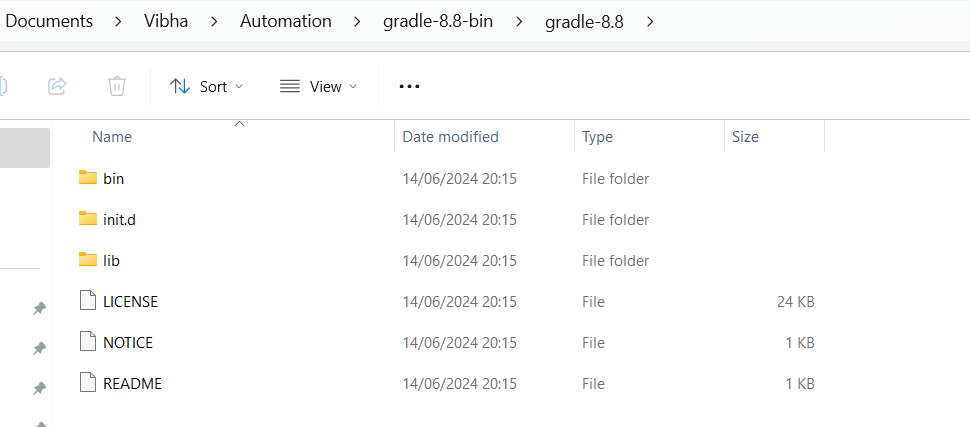
Step 3 – Copy the extracted files under C:\Users\ykv12\Documents\Vibha\Automation\gradle-8.8-bin. Below is the image of the folder.
Step 4 – We need to configure GRADLE_HOME environment variable. Type – “View Adva” in the search option and we will see the option – View Advanced system setting.
Step 5 – In System Properties dialog, select Advanced tab and click on the Environment Variables button.
Step 6 – In “Environment variables” dialog, System variables, Clicks on the New button and add a GRADLE_HOME variable .

Step 7 – Below is the image which shows addition of Environment Variables.

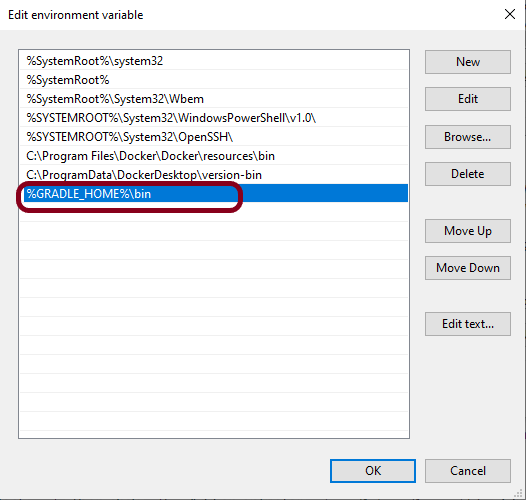
Step 8 – Add %GRADLE_HOME%\bin (full path till bin where gradle is placed on your machine) to Path. Click New Button present in System Variable and add GRADLE_HOME\bin.
How to verify if Gradle is install properly on your machine
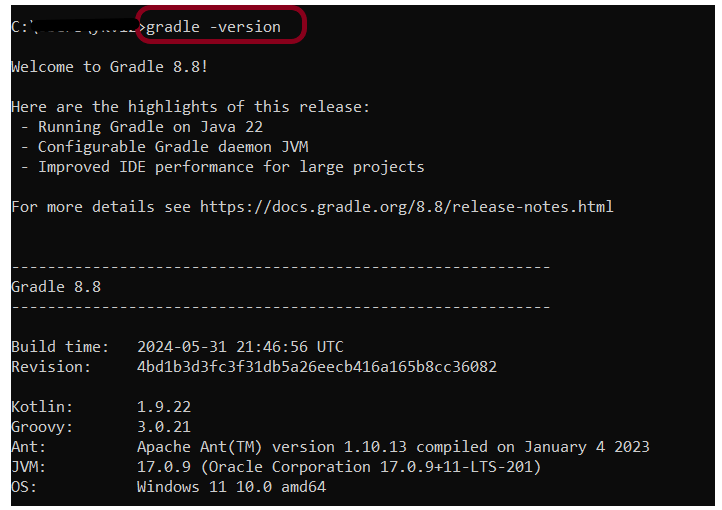
Open command prompt and type gradle -version, then the screen should look something like below screen.
That’s it! We have installed Gradle.
Congratulations on making it through this tutorial and hope you found it useful! Happy Learning!! Cheers!!
