There are 2 ways to run TestNG tests – using Run As TestNG tests and from testng.xml.
In this tutorial, I’m explaining how to create and run tests using TestNG.xml.
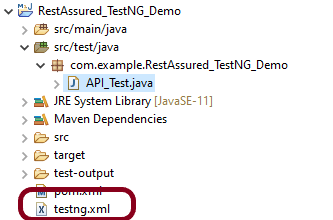
Step 1 – In the below project, there is no testng.xml present.

Step 2 – Right click on class name “API_Test.java” and navigate “TestNG–>Convert to TestNG“.

Step 3 – Now a new window for testng.xml will be generated as shown below. Click the Finish Button.

Below is the sample testng.xml.
<?xml version="1.0" encoding="UTF-8"?>
<!DOCTYPE suite SYSTEM "https://testng.org/testng-1.0.dtd">
<suite name="Suite">
  <test thread-count="5" name="Test">
    <classes>
      <class name="com.example.RestAssured_TestNG_Demo.API_Test"/>
    </classes>
  </test> <!-- Test -->
</suite> <!-- Suite -->
Step 4 – A xml file named “testng.xml“ will be generated in project hierarchy.
Step 5 – Right click on this testng.xml and select Run As–> Testng Suite.

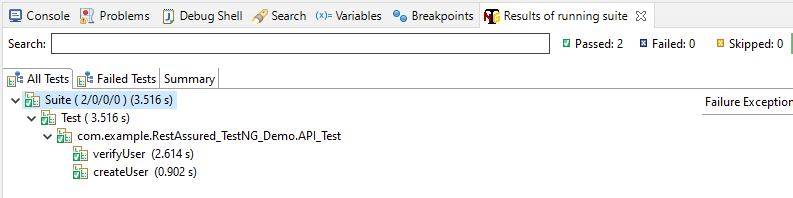
Step 6 – You will view the result in two different tabs: Console and “Results of running suite”. Below is the image of Rest of running suite tab.
Multiple Classes
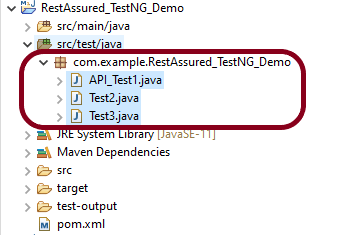
Let us imagine a scenario where there are 3 classes and we want to run them all together, you can done that by creating a testng.xml and mention all 3 classes in that testng.xml.
Select all 3 classes and right click and navigate “TestNG–>Convert to TestNG“.
This is how the testng.xml will look like for multiple classes.
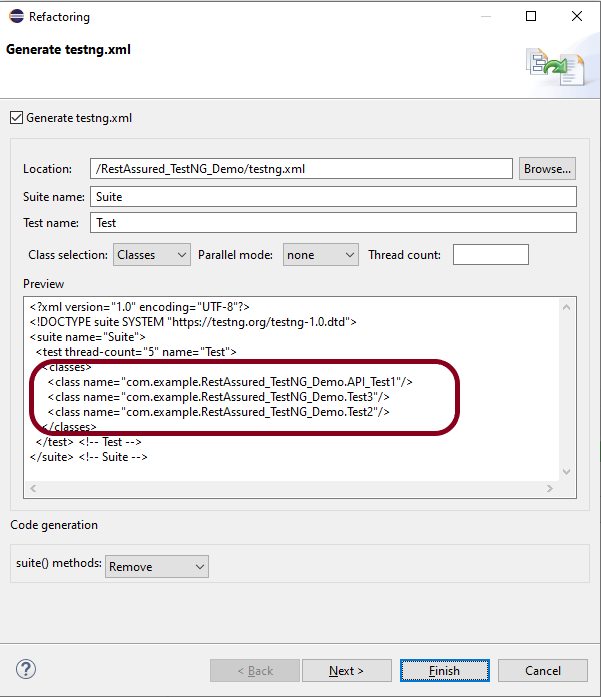
Below is the sample testng.xml.
<?xml version="1.0" encoding="UTF-8"?>
<!DOCTYPE suite SYSTEM "https://testng.org/testng-1.0.dtd">
<suite name="Suite">
  <test thread-count="5" name="Test">
    <classes>
      <class name="com.example.RestAssured_TestNG_Demo.API_Test1"/>
      <class name="com.example.RestAssured_TestNG_Demo.Test3"/>
      <class name="com.example.RestAssured_TestNG_Demo.Test2"/>
    </classes>
  </test> <!-- Test -->
</suite> <!-- Suite -->
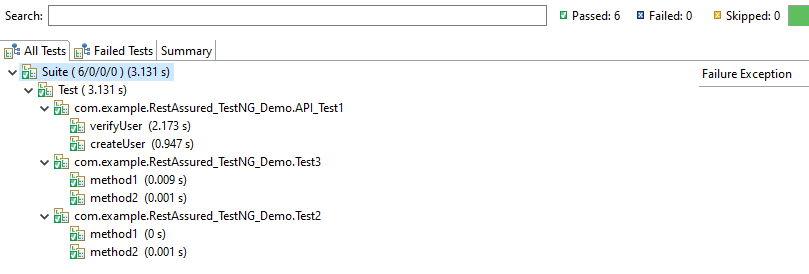
Right click on this testng.xml and select Run As–> Testng Suite. You will get the result in two tabs: Console and “Results of running suite”. This shows that all the tests present within the three classes are executed.
Congratulations on making it through this tutorial and hope you found it useful! Happy Learning!! Cheers!!
