This tutorial describes how to create and run a Spring application in IntelliJ IDEA. For this purpose, we need IntelliJ IDEA Ultimate Version. The Ultimate edition is commercial version (which has trial version for 30 days post which you needs license).
IntelliJ Ultimate will create a Spring Boot Maven project generated by Spring Initializr. This is the quickest way to create a Spring application, and IntelliJ IDEA provides a dedicated project wizard for it.
Steps to create a new Spring Boot project
Step 1 – From the main menu, select File -> New -> Project.
Step 2 – In the left pane of the New Project wizard, select Spring Initializr.
From the Project SDK list, select the JDK that you want to use in the project. I have used – 11 Amazon Corretto version 11.0.10.
If the JDK is installed on your computer, but not defined in the IDE, select Add JDK and specify the path to the JDK home directory.
If you don’t have the necessary JDK on your computer, please Download JDK from here.
To check if you have Java installed on your machine or not, please use the below command in command prompt.
java -version
This shows that Java 11 is already installed on my machine.

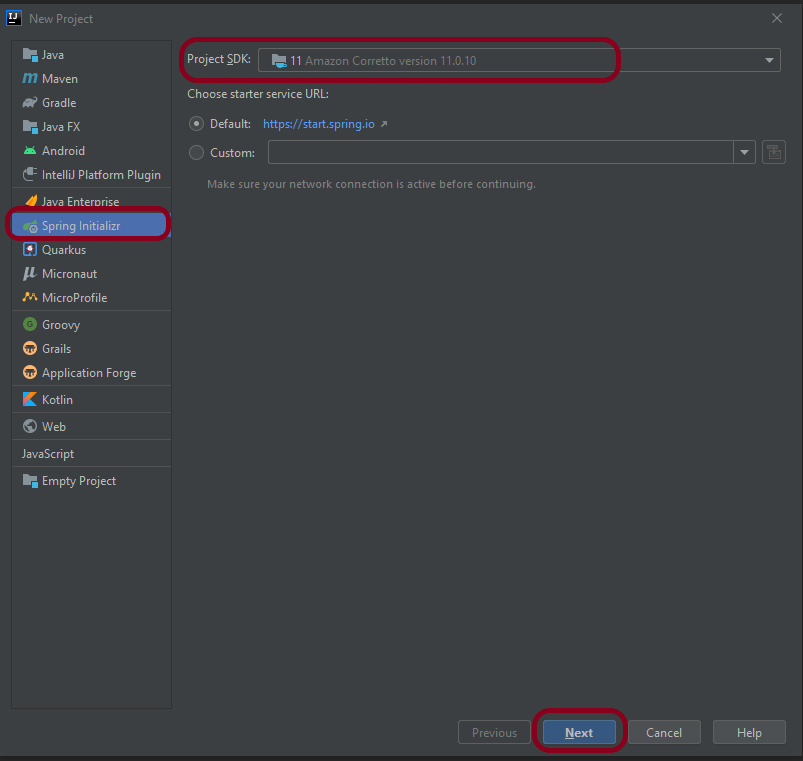
Step 3 – Select the default https://start.spring.io/ service and click the Next button.
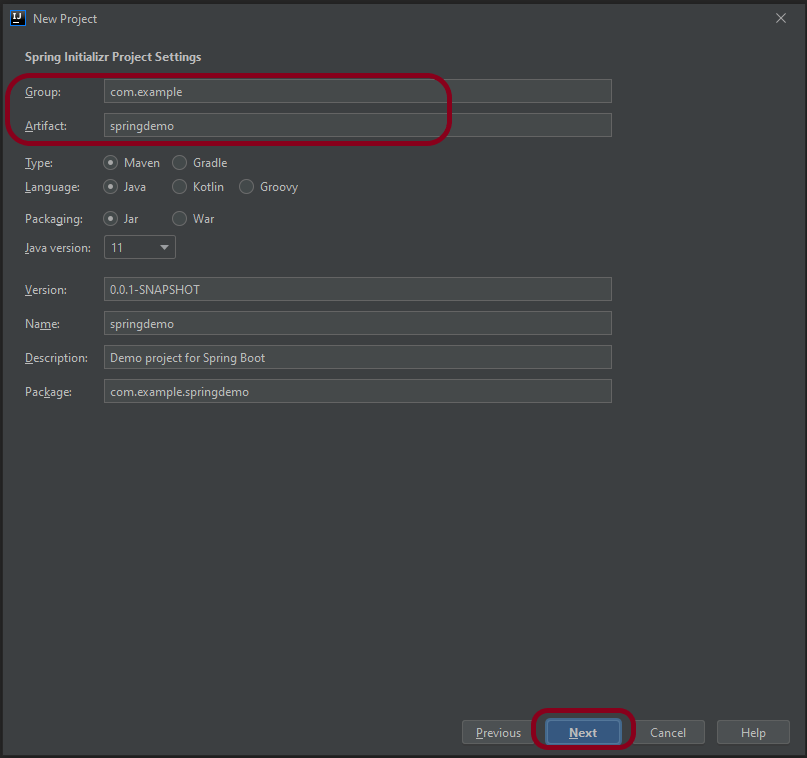
Step 4 – Mention the Group and Artifact name. Other Information is auto populated. Change them, if you want something different than already mentioned. Click the Next button.
Step 5 – Select the Spring Web dependency under Web and click the Next button. I have used this combination because I want to create a RESTful application using Apache Tomcat.

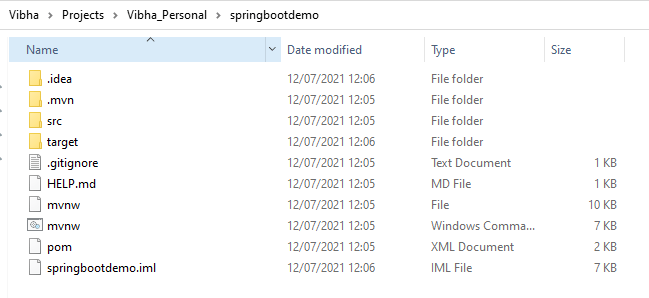
Step 6 – A new window appears where mention the location where you want to save the new project. I have created a folder springbootdemo and save the project files in that folder.

Step 7 – Below is the structure of new project on local machine
Step 8 – This is how the project looks in IntelliJ.

Spring Initializr generates a valid project structure with the following files:
- A build configuration file – pom.xml for Maven.
- A class with the main() method to bootstrap the application – SpringbootdemoApplication.
- An empty JUnit test class – SpringbootdemoApplicationTests.
- An empty Spring application configuration file – application.properties.
Step 9 – To run the application, Right click on the SpringbootdemoApplication.java class and select Run SpringbootdemoApplication

The springbootdemoApplication is started and this is the image of the execution screen.

The POM.xml created is as shown below.
<?xml version="1.0" encoding="UTF-8"?>
<project xmlns="http://maven.apache.org/POM/4.0.0" xmlns:xsi="http://www.w3.org/2001/XMLSchema-instance"
         xsi:schemaLocation="http://maven.apache.org/POM/4.0.0 https://maven.apache.org/xsd/maven-4.0.0.xsd">
    <modelVersion>4.0.0</modelVersion>
    <parent>
        <groupId>org.springframework.boot</groupId>
        <artifactId>spring-boot-starter-parent</artifactId>
        <version>2.5.2</version>
        <relativePath/> <!-- lookup parent from repository -->
    </parent>
    <groupId>com.example</groupId>
    <artifactId>springbootdemo</artifactId>
    <version>0.0.1-SNAPSHOT</version>
    <name>springbootdemo</name>
    <description>Demo project for Spring Boot</description>
    <properties>
        <java.version>11</java.version>
    </properties>
    <dependencies>
        <dependency>
            <groupId>org.springframework.boot</groupId>
            <artifactId>spring-boot-starter</artifactId>
        </dependency>

        <dependency>
            <groupId>org.springframework.boot</groupId>
            <artifactId>spring-boot-starter-test</artifactId>
            <scope>test</scope>
        </dependency>
    </dependencies>

    <build>
        <plugins>
            <plugin>
                <groupId>org.springframework.boot</groupId>
                <artifactId>spring-boot-maven-plugin</artifactId>
            </plugin>
        </plugins>
    </build>

</project>
