In the previous tutorial, I explained about the Testing of Web Application using Serenity with JUnit4. In this tutorial, I’ll explain the Integration of Serenity BDD with JUnit5.
Table Of Contents
- Prerequisite
- Dependency List
- Structure of Project
- Implementation Steps
- Update Properties section in Maven pom.xml
- Add Serenity and JUnit dependencies to POM.xml
- Update Build Section of pom.xml
- Create Test Class sunder src/test/java folder
- Create serenity.conf file under src/test/resources
- Create serenity.properties file at the root of the project
- Run the tests through the command line
- Serenity Report Generation
Prerequisite
- Java 17 installed
- Maven installed
- Eclipse or IntelliJ installed
Dependency List:
- Java 17
- Maven – 3.9.9
- Serenity – 4.0.30
- Serenity JUnit5 – 4.0.30
- JUnit5 – 5.11.0
- Maven Surefire Plugin – 3.5.0
- Maven Failsafe Plugin – 3.5.0
- Maven Compiler Plugin – 3.13.0
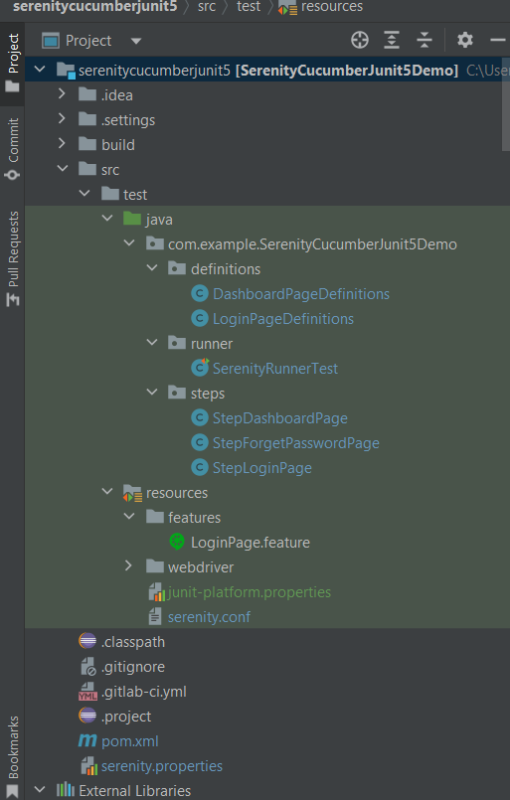
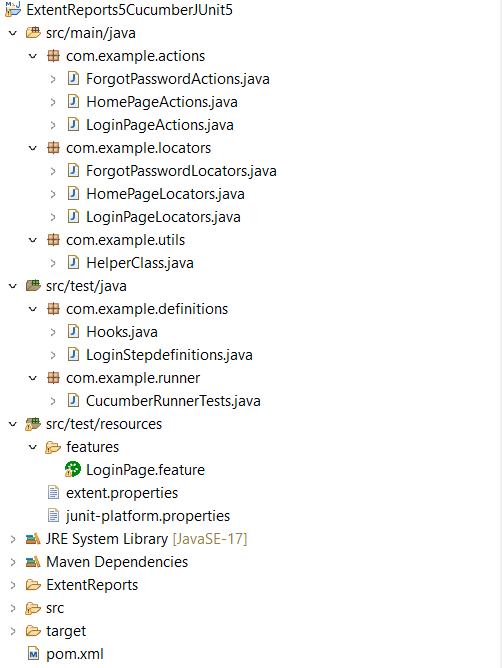
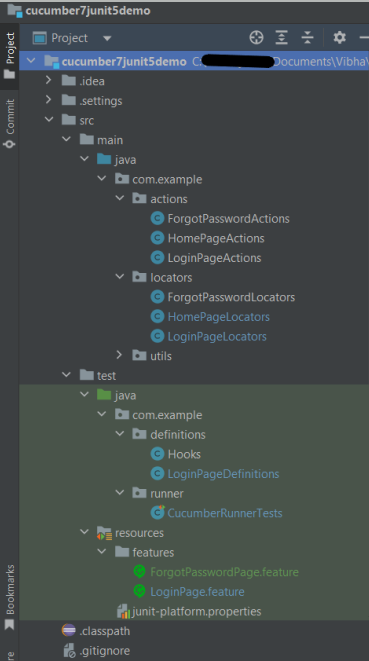
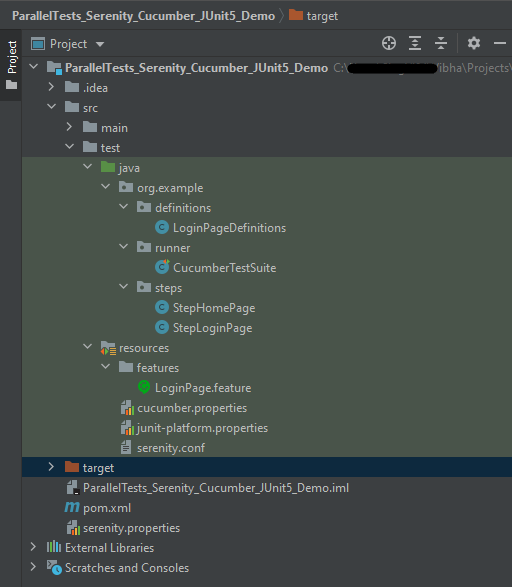
Structure of Project


Implementation Steps
Step 1 – Update Properties section in Maven pom.xml
<properties>
    <project.build.sourceEncoding>UTF-8</project.build.sourceEncoding>
    <serenity.version>4.0.30</serenity.version>
    <junit5.version>5.11.0</junit5.version>
    <maven.surefire.plugin.version>3.5.0</maven.surefire.plugin.version>
    <maven.failsafe.plugin.version>3.5.0</maven.failsafe.plugin.version>
    <maven.compiler.plugin.version>3.13.0</maven.compiler.plugin.version>
    <maven.compiler.source>17</maven.compiler.source>
    <maven.compiler.target>17</maven.compiler.target>
    <encoding>UTF-8</encoding>
    <tags></tags>
    <webdriver.base.url></webdriver.base.url>
</properties>
Step 2 – Add Serenity and JUnit dependencies to POM.xml
<dependencies>

    <dependency>
      <groupId>net.serenity-bdd</groupId>
      <artifactId>serenity-core</artifactId>
      <version>${serenity.version}</version>
      <scope>test</scope>
    </dependency>

    <dependency>
      <groupId>net.serenity-bdd</groupId>
      <artifactId>serenity-junit5</artifactId>
      <version>${serenity.version}</version>
      <scope>test</scope>
    </dependency>

    <!-- JUNIT 5 DEPENDENCY-->
    <dependency>
      <groupId>org.junit.jupiter</groupId>
      <artifactId>junit-jupiter-api</artifactId>
      <version>${junit5.version}</version>
      <scope>test</scope>
    </dependency>

    <dependency>
      <groupId>org.junit.jupiter</groupId>
      <artifactId>junit-jupiter-engine</artifactId>
      <version>${junit5.version}</version>
      <scope>test</scope>
    </dependency>

    <!-- Assertj -->
    <dependency>
      <groupId>org.assertj</groupId>
      <artifactId>assertj-core</artifactId>
      <version>${assertj.version}</version>
      <scope>test</scope>
    </dependency>

</dependencies>
Step 3 – Update Build Section of pom.xml
 <build>
    <plugins>
      <plugin>
        <groupId>org.apache.maven.plugins</groupId>
        <artifactId>maven-surefire-plugin</artifactId>
        <version>${maven.surefire.plugin.version}</version>
        <configuration>
          <skip>false</skip>
        </configuration>
      </plugin>
      <plugin>
        <artifactId>maven-failsafe-plugin</artifactId>
        <version>${maven.failsafe.plugin.version}</version>
        <configuration>
          <includes>
            <include>**/*Test.java</include>
            <include>**/Tests.java</include>
            <include>**/*TestSuite.java</include>
            <include>**/When*.java</include>
          </includes>
          <systemPropertyVariables>
            <webdriver.base.url>${webdriver.base.url}</webdriver.base.url>
            <junit.jupiter.extensions.autodetection.enabled>true</junit.jupiter.extensions.autodetection.enabled>
          </systemPropertyVariables>
        </configuration>
        <executions>
          <execution>
            <goals>
              <goal>integration-test</goal>
              <goal>verify</goal>
            </goals>
          </execution>
        </executions>
      </plugin>
      <plugin>
        <groupId>org.apache.maven.plugins</groupId>
        <artifactId>maven-compiler-plugin</artifactId>
        <version>${maven.compiler.plugin.version}</version>
        <configuration>
          <source>${maven.compiler.source}</source>
          <target>${maven.compiler.target}</target>
        </configuration>
      </plugin>
      <plugin>
        <groupId>net.serenity-bdd.maven.plugins</groupId>
        <artifactId>serenity-maven-plugin</artifactId>
        <version>${serenity.version}</version>
        <configuration>
          <tags>${tags}</tags>
          <reports>single-page-html</reports>
        </configuration>
        <executions>
          <execution>
            <id>serenity-reports</id>
            <phase>post-integration-test</phase>
            <goals>
              <goal>aggregate</goal>
            </goals>
          </execution>
        </executions>
        <dependencies>
          <dependency>
            <groupId>net.serenity-bdd</groupId>
            <artifactId>serenity-single-page-report</artifactId>
            <version>${serenity.version}</version>
          </dependency>
        </dependencies>
      </plugin>
    </plugins>
  </build>
Step 4 – Create the Test Class sunder src/test/java folder
ApplicationLoginJUnit5Tests.java
import com.example.steps.StepDashboardPage;
import com.example.steps.StepForgetPasswordPage;
import com.example.steps.StepLoginPage;
import net.serenitybdd.annotations.Steps;
import net.serenitybdd.annotations.Title;
import net.serenitybdd.core.Serenity;
import net.serenitybdd.junit5.SerenityJUnit5Extension;
import org.junit.jupiter.api.Test;
import org.junit.jupiter.api.extension.ExtendWith;

import static org.assertj.core.api.Assertions.assertThat;

@ExtendWith(SerenityJUnit5Extension.class)
public class ApplicationLoginTests {

    @Steps
    NavigateActions navigate;

    @Steps
    StepLoginPage loginPage;

    @Steps
    StepDashboardPage dashboardPage;

    @Steps
    StepForgetPasswordPage forgetPasswordPage;

    @Test
    @Title("Login to application with valid credentials navigates to DashBoard page")

    public void successfulLogin() {

        navigate.toTheHomePage();

        // When
        loginPage.inputUserName("Admin");
        loginPage.inputPassword("admin123");
        loginPage.clickLogin();

        // Then
        Serenity.reportThat("Passing valid credentials navigates to DashBoard page",
                () -> assertThat(dashboardPage.getHeading()).isEqualToIgnoringCase("Dashboard"));
    }

    @Test
    @Title("Login to application with invalid credential generates error message")
    void unsuccessfulLogin() {

        navigate.toTheHomePage();

        // When
        loginPage.inputUserName("Admin");
        loginPage.inputPassword("admin1232");
        loginPage.clickLogin();

        // Then
        Serenity.reportThat("Passing invalid credentials generates error message",
                () -> assertThat(loginPage.loginPageErrorMessage()).isEqualToIgnoringCase("Invalid credentials"));
    }

    @Test
    @Title("Verify Forgot your password link")
    void clickForgetPasswordLink() {

        // Given
        navigate.toTheHomePage();

        // When
        loginPage.clickForgetPasswordLink();

        // Then
        Serenity.reportThat("Open Forget Password Page after clicking forget password link",
                () -> assertThat(forgetPasswordPage.getHeadingForgetPasswordPage())
                        .isEqualToIgnoringCase("Reset Password"));
    }
}
To run a JUnit5 test with Serenity BDD, simply add the annotation @net.serenitybdd.junit5.SerenityTest (instead of @org.junit.runner.RunWith(net.serenitybdd.junit.runners.SerenityRunner.class) for JUnit4.
@ExtendWith(SerenityJUnit5Extension.class)
@Test is imported from package:-
import org.junit.jupiter.api.Test;
StepDashboardPage
import net.serenitybdd.annotations.Step;

import net.serenitybdd.core.pages.PageObject;
import net.serenitybdd.core.pages.WebElementFacade;
import org.openqa.selenium.support.FindBy;

public class StepDashboardPage extends PageObject {

    @FindBy(xpath = "//*[@class='oxd-topbar-header-breadcrumb']/h6")
    WebElementFacade dashboardPageTitle;

    @Step("Heading of DashBoard Page")
    public String getHeading() {
        return dashboardPageTitle.getText();
    }
}
StepForgetPasswordPage
import net.serenitybdd.annotations.Step;

import net.serenitybdd.core.pages.PageObject;
import net.serenitybdd.core.pages.WebElementFacade;
import org.openqa.selenium.support.FindBy;

public class StepForgetPasswordPage extends PageObject {

    @FindBy(xpath = "//*[@class='oxd-form']/h6")
    WebElementFacade forgetLink;

    @Step("Verify Forget Password Page ")
    public String getHeadingForgetPasswordPage() {
        return forgetLink.getText();
    }
}
StepLoginPage
package com.example.steps;

import net.serenitybdd.annotations.Step;

import net.serenitybdd.core.pages.PageObject;
import net.serenitybdd.core.pages.WebElementFacade;
import org.openqa.selenium.support.FindBy;

public class StepLoginPage extends PageObject {

    @FindBy(name = "username")
    WebElementFacade username;

    @FindBy(name = "password")
    WebElementFacade password;

    @FindBy(xpath = "//*[@class='oxd-form']/div[3]/button")
    WebElementFacade submitButton;

    @FindBy(xpath = "//*[@class='orangehrm-login-error']/div/div/p")
    WebElementFacade errorMessage;

    @FindBy(xpath = "//*[@class='orangehrm-login-forgot']/p")
    WebElementFacade forgotPasswordLinkText;

    @Step("Enter Username")
    public void inputUserName(String userName) {
        username.sendKeys(userName);
    }

    @Step("Enter Password")
    public void inputPassword(String passWord) {
        password.sendKeys(passWord);
    }

    @Step("Click Submit Button")
    public void clickLogin() {
        submitButton.click();
    }

    @Step("Error Message on unsuccessful login")
    public String loginPageErrorMessage() {
        return errorMessage.getText();
    }

    @Step("Click Forget Password Link")
    public void clickForgetPasswordLink() {
        forgotPasswordLinkText.click();
    }
}
The WebElementFacade class contains a convenient fluent API for dealing with web elements, providing some commonly-used extra features that are not provided out-of-the-box by the WebDriver API. WebElementFacades are largely interchangeable with WebElements: you just declare a variable of type WebElementFacade instead of type WebElement
The @Steps annotation marks a Serenity step library.
Create the test following the Given/When/Then pattern and using step methods from the step library.
The @Title annotation lets you provide your own title for this test in the test reports. Serenity @Title is considered for the Serenity report. Consistently with Junit4, the @Title annotation does not influence the name in the Junit report.
The JUnit Serenity integration provides some special support for Serenity Page Objects. In particular, Serenity will automatically instantiate any PageObject fields in your JUnit test.
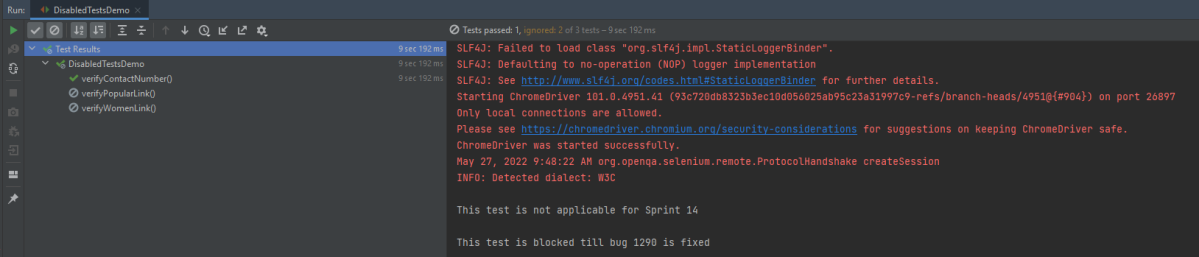
Junit5 @Disabled annotation can be used on test and step methods(same as @Ignore in JUnit4).
NavigateAction
import net.serenitybdd.annotations.Step;
import net.serenitybdd.core.steps.UIInteractionSteps;

public class NavigateAction extends UIInteractionSteps {

    @Step
    public void toTheHomePage() {
        openPageNamed("loginForm");

    }
}
Step 5 – Create serenity.conf file under src/test/resources
serenity.conf file is used to specify various features like the type of web driver used, various test environments, run tests in headless mode, and many more options.
pages{
   loginForm ="https://opensource-demo.orangehrmlive.com/"
   }

webdriver {
  driver = chrome
  capabilities {
    browserName = "chrome"
    acceptInsecureCerts = true
    "goog:chromeOptions" {
      args = ["remote-allow-origins=*","test-type", "no-sandbox", "ignore-certificate-errors", "--window-size=1920,1080",
        "incognito", "disable-infobars", "disable-gpu", "disable-default-apps", "disable-popup-blocking",
        "disable-dev-shm-usage", "disable-extensions", "disable-web-security", "disable-translate", "disable-logging"]
    }
  }
}
Step 6 – Create serenity.properties file at the root of the project
serenity.project.name = Serenity and JUnit5 Demo
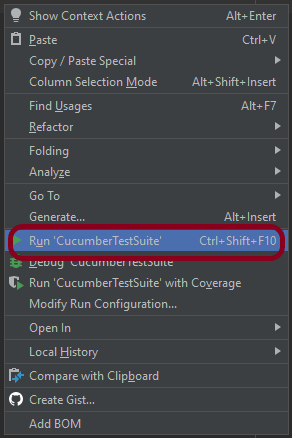
Step 7 – Run the tests through the command line
Execute the tests through the command line by using the below command
mvn clean verify
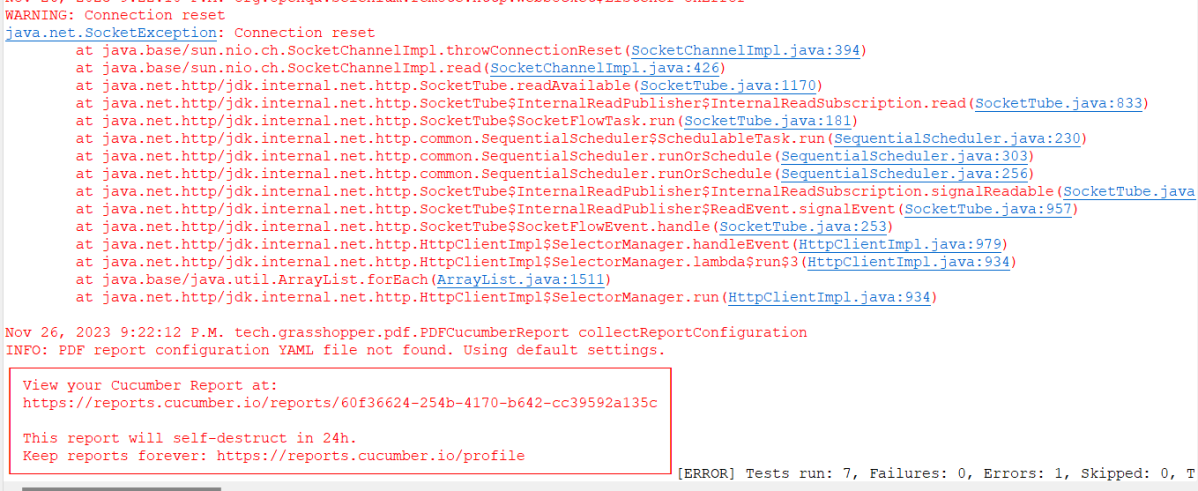
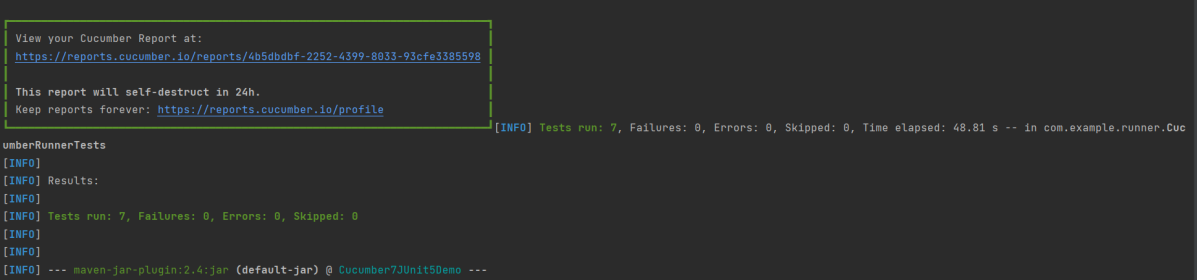
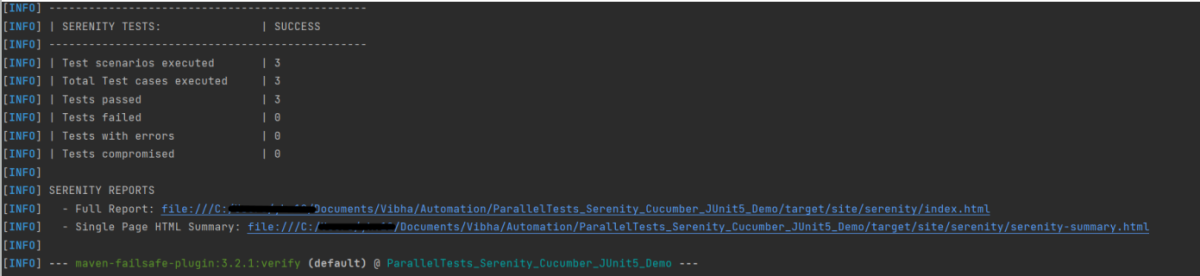
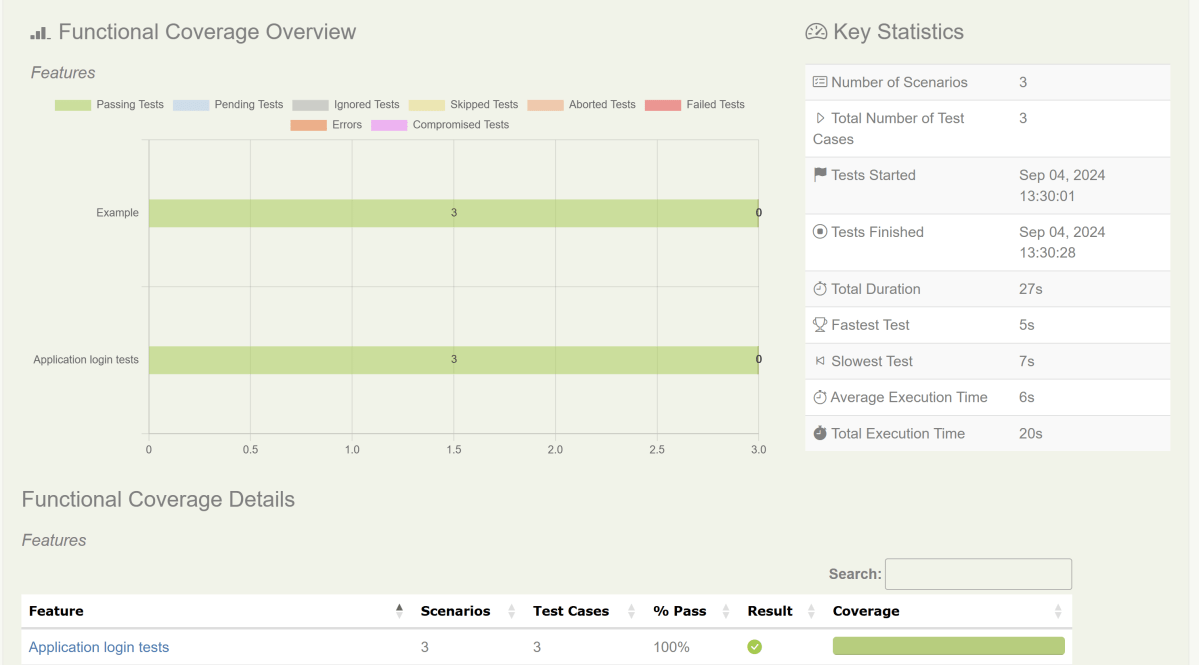
The output of the above test execution is

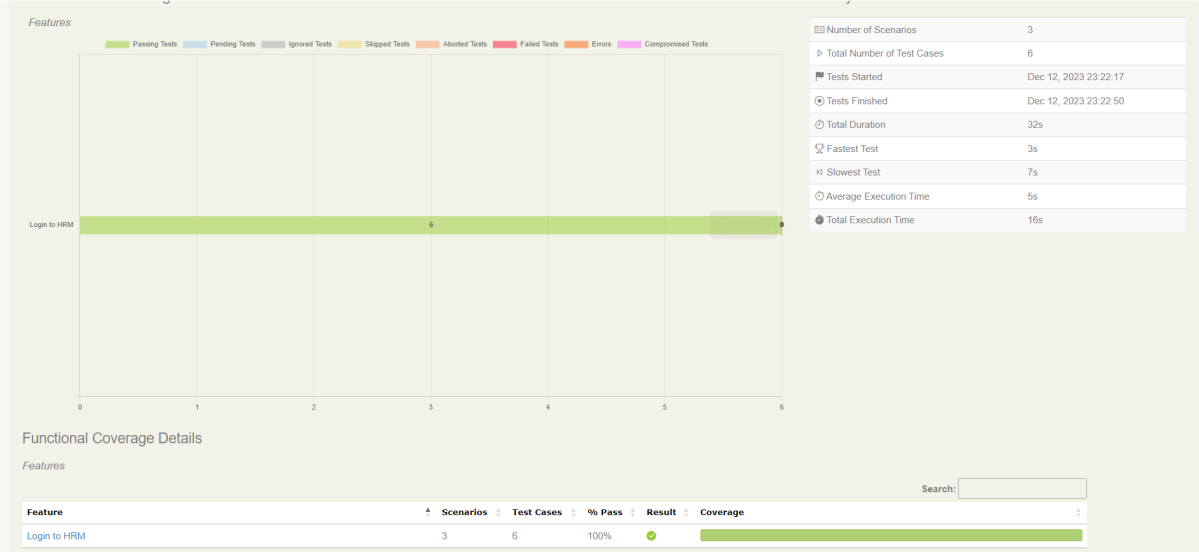
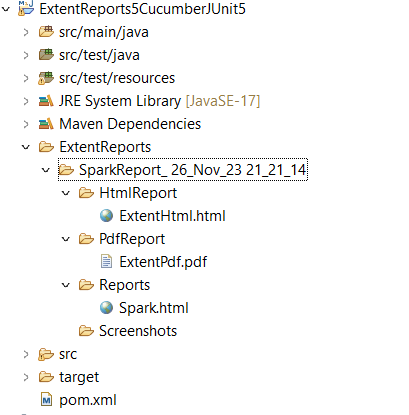
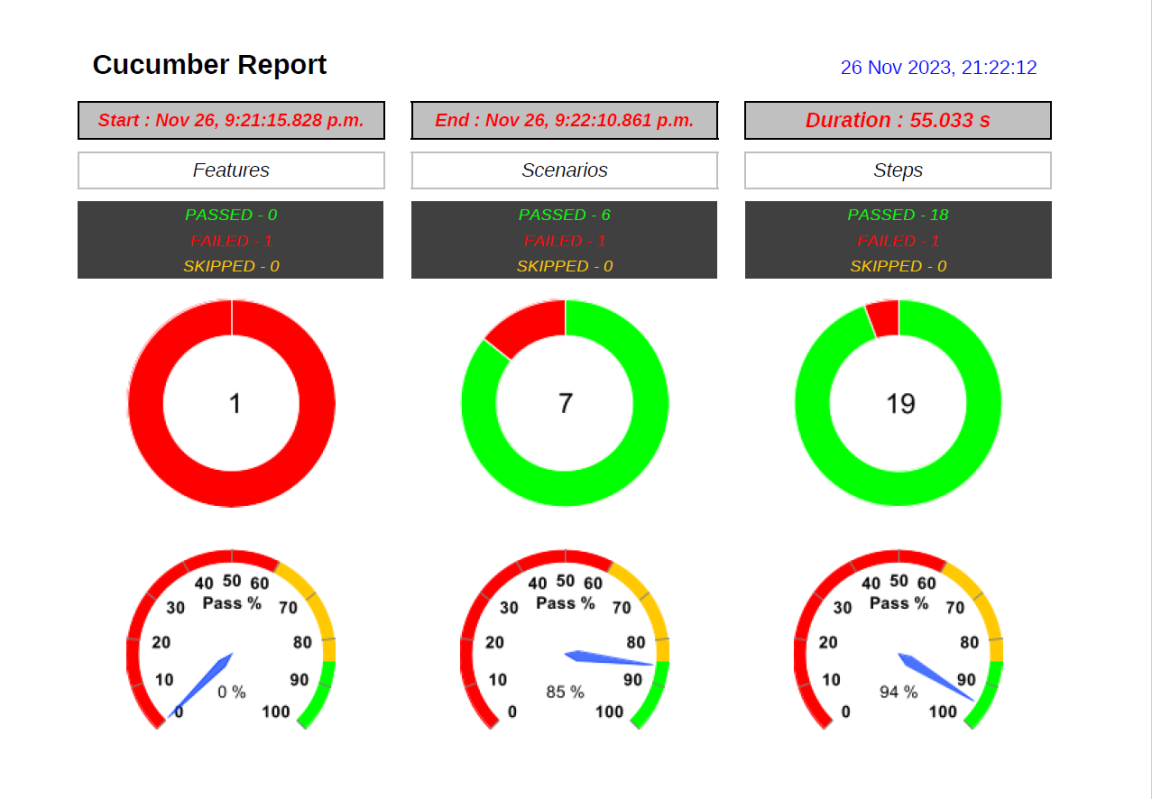
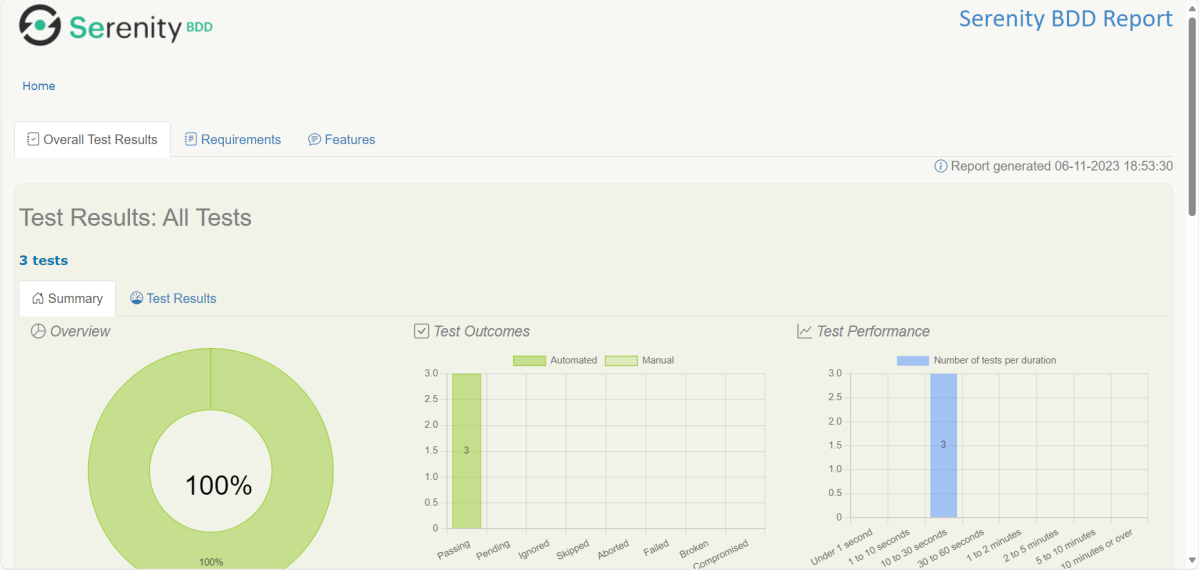
Step 8 – Serenity Report Generation
The path of Serenity’s reports is mentioned in the image. The reports are generated under /target/site/serenity/.
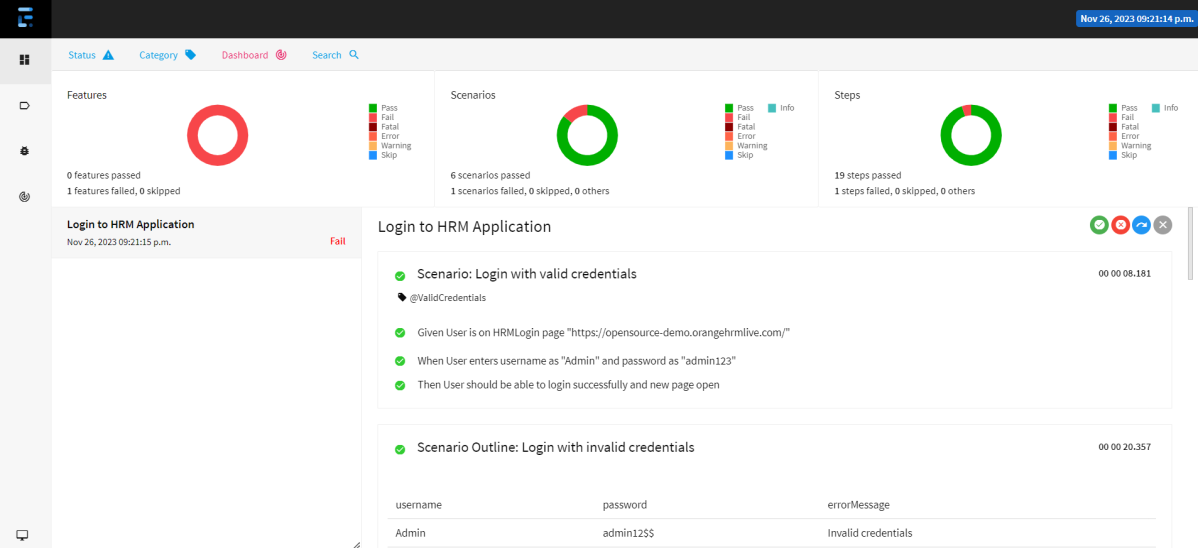
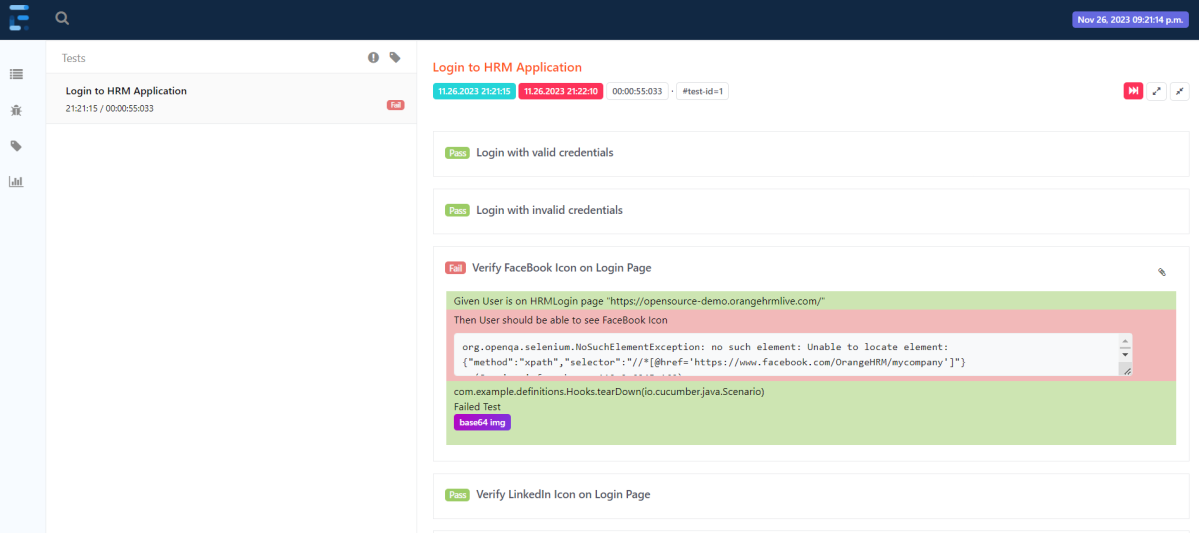
Index.html

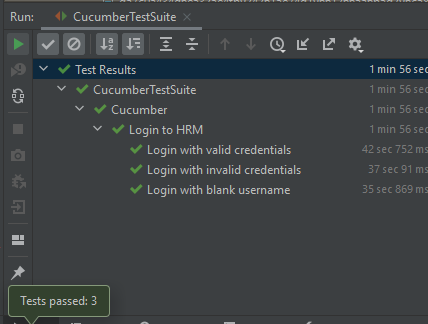
The detailed steps of the tests can also be viewed in the Serenity Report. It shows the execution time of all the steps in a Test.

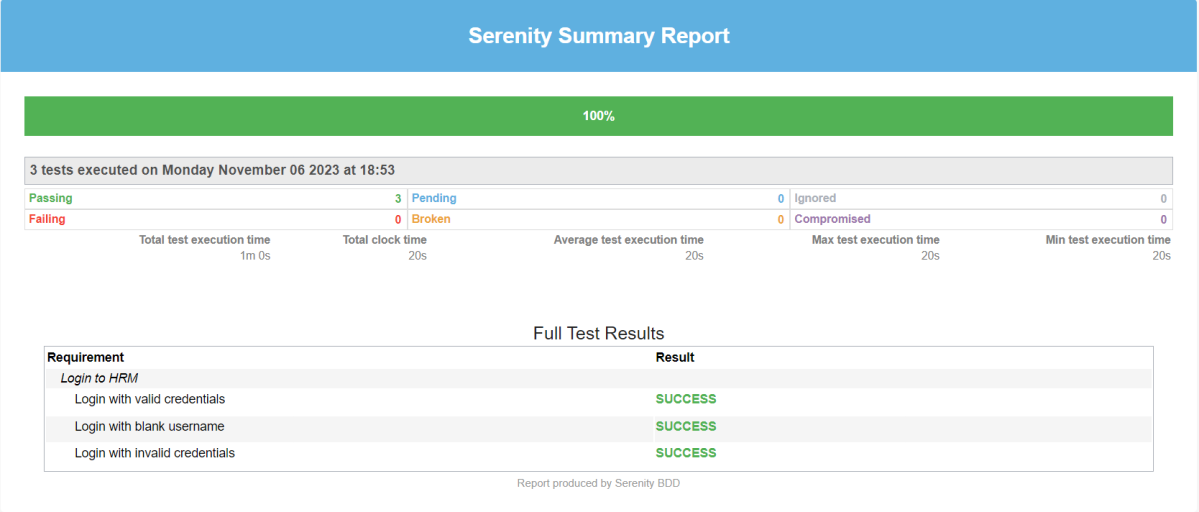
Serenity-Summary.html

We are done! Congratulations on making it through this tutorial and hope you found it useful! Happy Learning!!