How to handle Alerts in Selenium WebDriver

HOME

driver.switchTo().alert()

Below is a perfect example that shows how to handle Simple Alert with Selenium

import org.openqa.selenium.Alert;
import org.openqa.selenium.By;
import org.openqa.selenium.chrome.ChromeDriver;
import org.openqa.selenium.chrome.ChromeOptions;

import java.time.Duration;

public class SimpleAlert_Demo {
    public static void main(String[] args) throws InterruptedException {

        ChromeOptions options = new ChromeOptions();
        options.setImplicitWaitTimeout(Duration.ofSeconds(10));
        options.addArguments("start-maximized");
        ChromeDriver driver = new ChromeDriver(options);
        driver.navigate().to("https://the-internet.herokuapp.com/javascript_alerts");

        //Click on button to open Confirmation Box
        driver.findElement(By.xpath("//button[@onclick='jsAlert()']")).click();


        // accepting javascript alert
        Alert simpleAlert = driver.switchTo().alert();
        String alertText = simpleAlert.getText();

        //Print the message mentioned on the AlertBox
        System.out.println("Alert text is :" + alertText);

        //This step is only for demonstration purpose to show the alert box
        Thread.sleep(2000);
        simpleAlert.accept();

        //Close the current page
        driver.quit();
    }
}

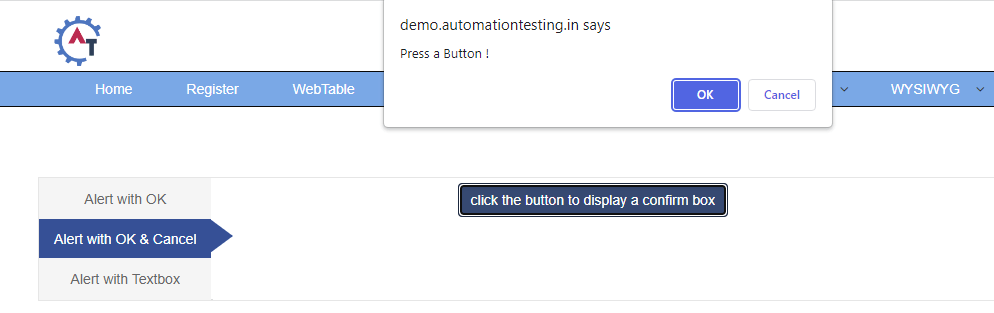
2) Confirmation Alert

This alert comes with an option to accept or dismiss the alert. To accept the alert we can use Alert.accept() and to dismiss we can use the Alert.dismiss()

Below is an example that shows how to handle Confirmation Alert with Selenium.

import org.openqa.selenium.Alert;
import org.openqa.selenium.By;
import org.openqa.selenium.chrome.ChromeDriver;
import org.openqa.selenium.chrome.ChromeOptions;
import org.openqa.selenium.support.ui.ExpectedConditions;
import org.openqa.selenium.support.ui.WebDriverWait;
import java.time.Duration;

public class ConfirmationAlert_Demo {
    public static void main(String[] args) throws InterruptedException {

        ChromeOptions options = new ChromeOptions();
        options.setImplicitWaitTimeout(Duration.ofSeconds(10));
        options.addArguments("start-maximized");
        ChromeDriver driver = new ChromeDriver(options);
        driver.navigate().to("https://the-internet.herokuapp.com/javascript_alerts");

        //Click on button to open Confirmation Box
        driver.findElement(By.xpath("//button[@onclick='jsConfirm()']")).click();

        // accepting javascript alert
        Alert ConfirmationAlert = driver.switchTo().alert();
        String alertText = ConfirmationAlert.getText();
        System.out.println("Alert text is :" + alertText);
        ConfirmationAlert.accept();

        //Close the page
        driver.quit();
    }
}

3) Prompt Alert

In the prompt alert, we get an option to add text to the alert box. This is used when some input is required from the user. We will use the sendKeys() method to type something in the Prompt alert box. 

Below is an example that illustrates how to handle Prompt Alert using Selenium WebDriver.

import org.openqa.selenium.Alert;
import org.openqa.selenium.By;
import org.openqa.selenium.chrome.ChromeDriver;
import org.openqa.selenium.chrome.ChromeOptions;
import org.openqa.selenium.support.ui.ExpectedConditions;
import org.openqa.selenium.support.ui.WebDriverWait;

import java.time.Duration;

public class PromptAlert_Demo {
    public static void main(String[] args) throws InterruptedException {

        ChromeOptions options = new ChromeOptions();
        options.setImplicitWaitTimeout(Duration.ofSeconds(10));
        options.addArguments("start-maximized");
        ChromeDriver driver = new ChromeDriver(options);
        driver.navigate().to("https://the-internet.herokuapp.com/javascript_alerts");

        //Click on button to open Prompt Box
        driver.findElement(By.xpath("//button[@onclick='jsPrompt()']")).click();
        Alert promptAlert = driver.switchTo().alert();

        //Enter message in Alert Box
        promptAlert.sendKeys("Welcome to Selenium 4");
        promptAlert.accept();

        //This sleep is not necessary, just for demonstration
        Thread.sleep(2000);

        System.out.println("Prompt Alert text is :" + driver.findElement(By.id("result")).getText());

        //Close the current page
        driver.quit();
    }

}

That’s it! Congratulations on making it through this tutorial and hope you found it useful! Happy Learning!!

Basic Selenium Tutorials

HOME

Selenium – Introduction, Installation, Test Script

Chapter 1 Introduction to Selenium Automation Tool
Chapter 2 How to Download & Install Java JDK 11 in Windows
Chapter 3 How to Download and Install Eclipse IDE
Chapter 4 How to install IntelliJ on Windows
Chapter 5 How to Download & Install Selenium WebDriver 
Chapter 6  How to create first Selenium WebDriver Script using Java
Chapter 7 How to run Selenium Tests using on Internet Explorer

Locators in Selenium

 Chapter 1 How to Locate Elements in Chrome, Firefox and IE Browsers for creating Selenium Scripts
Chapter 2 Locators in Selenium – Locate by ID, ClassName,  Name, TagName,  LinkText, PartialLinkText
Chapter 3 Dynamic XPath  in Selenium WebDriver
Chapter 4 CSS Selector in Selenium WebDriver

Launching Browsers and headless Browser

Chapter 1 How to run Chrome tests in headless mode in Selenium
Chapter 2 How to run Firefox tests in headless mode in Selenium
Chapter 3 How to run Edge tests in headless mode in Selenium4
Chapter 4 How to manage driver executables using WebDriverManager
Chapter 5 How to disable infobar warning for Chrome tests in Selenium
Chapter 6 How to maximize and minimize the window in Selenium

WebDriver Commands

Chapter 1 Difference between FindElement and FindElements in WebDriver
Chapter 2 Difference between getText() and getAttribute() method in WebDriver
Chapter 3 WebDriver Browser Commands – get,  getTitle, getCurrentUrl, getPageSource, getClass, close, quit in WebDriver
Chapter 4 WebDriver Navigation Commands – Navigate, Forward, Back, Refresh in  WebDriver
Chapter 5 Selenium Form WebElement Commands – Sendkeys, Clear, Click,Submit
Chapter 6 How to automate selecting Checkbox and Radio Buttons in Selenium WebDriver
Chapter 7 How to Select value from Drop down list or perform Multiple Selection  Operations in WebDriver
Chapter 8 How to get all options in a DropDown list in WebDriver
Chapter 9 How to automate Radio Button in WebDriver
Chapter 10 How to automate BootStrap DropDown using WebDriver
Chapter 15 How to handle Dynamic Web Tables using Selenium WebDriver
Chapter 16 How to get all the values from a Dynamic Table in Selenium WebDriver 
Chapter 17 isDisplayed, isSelected, isEnabled in Selenium
Chapter 18 How to test HTML ordered list in Selenium
Chapter 19 How to test HTML5 validation messages with Selenium

Waits in Selenium

Chapter 1 Implicit and Explicit Wait in Selenium WebDriver
Chapter 2 What is Fluent Wait in Selenium WebDriver

Handle Window and Alerts

Chapter 1 Switch Window Commands in Selenium WebDriver
Chapter 2 How to handle Alerts in Selenium WebDriver
Chapter 3 How to Switch Between Frames in Selenium WebDriver

Selenium Interview Questions and Answers
Advanced Selenium Interview Questions and Answers
Selenium Multiple Choice Questions – MCQ1
Selenium Multiple Choice Questions – MCQ3

How to handle alerts in Robot Framework 

HOME

In this tutorial, we will discuss various types of Alerts available in web application testing and how to handle alerts in Robot Framework.

Prerequisite:

  1. Install Python
  2. Install PIP
  3. Install Robot Framework
  4. Install Robot framework Selenium Library
  5. Install PyCharm IDE

Please refer to this tutorial to install Robot Framework – How to install and setup Robot Framework for Python.

Implementation Steps:

Step 1.1 – Open PyCharm and create a new project. Go to File and select New Project from the main menu.

Step 1.2 – Choose the project location. Click the “Browse” button next to the Location field and specify the directory for your project.

Deselect the Create a main.py welcome script checkbox because you will create a new Python file for this tutorial.

Click on the “Create” Button.

Step 1.3 – A new dialog appears asking to open the project using any one of the given options. I have selected New Window as I like to have separate windows for each project.

Below is the image of the new project created in PyCharms.

How to create a test to automate the alerts in Robot Framework?

1. Simple Alert

Step 4 – Create a new directory in the new project

Right-Click on the project, select New->Directory and provide name as Tests

Below is the image of the new directory.

Right-click on the new directory and select New File and provide the name as Confirm_Alert_Demo.robot, Ok_Alert_Demo.robot and TextBox_Alert_Demo.robot as shown below:

Step 5 – Download ChromeBinaries from the below location

The tests are going to use the Chrome browser, so we need to download the ChromeBinaries to open a blank browser in Chrome.

https://chromedriver.chromium.org/

The chromedriver is placed in a folder name drivers in the RobotFramework_Demo project. I have renamed chromedriver to Chrome.

Step 6 – Automate the Simple Alert

We are now going to write test cases. The test case details will be as follows :

To work with the Robot Framework, we need a locator. A locator is an identifier for the textbox like id, name, class, xpath, css selector, etc.

To know more about locators, refer to these Selenium Tutorials:

 Locators in Selenium – Locate by ID, ClassName,  Name, TagName,  LinkText, PartialLinkText

Dynamic XPath  in Selenium WebDriver

CSS Selector in Selenium WebDriver

The below page shows that when we click on “Alert with OK”, then click on the “click the button to display an alert box” button, a new alert opens with the message – I am an alert box!.

Below is an example of selecting the “Simple Alert”.

*** Settings ***
Documentation    To validate the Message Alert
Library     SeleniumLibrary
Test Teardown    Close Browser

*** Variables ***
${okOption}    xpath://div[@class='tabpane pullleft']/ul/li[1]/a
${alertBtn}    css:.btn-danger

*** Test Cases ***
Handle Message Alert
    Open the Browser with URL
    Select the Alert with OK Option
    Verify text on Alert Box

*** Keywords ***
Open the Browser with URL
    Create Webdriver    Chrome  executable_path=/Vibha_Personal/RobotFramework/drivers/chromedriver_linux64
    Go To    https://demo.automationtesting.in/Alerts.html
    Maximize Browser Window
    Set Selenium Implicit Wait    2

Select the Alert with OK Option
    Click Element    ${okOption}
    Click Button     ${alertBtn}

Verify text on Alert Box
    Alert Should Be Present     I am an alert box!      ACCEPT

All the below-mentioned keywords are derived from SeleniumLibrary. The functionality of keywords mentioned above:

1. Create Webdriver − The keyword creates an instance of Selenium WebDriver.

2. Go To – This keyword navigates the current browser window to the provided URL – https://demo.automationtesting.in/Register.html.

3. Maximize Browser Window – This keyword maximizes the current browser window.

4. Set Selenium Implicit Wait – This keyword sets the implicit wait value used by Selenium.

5. Click Element − This keyword is used to click the element identified by the locator. In this case, it is the “Alert with OK” link.

6. Click Button – This keyword is used to click the button identified by the locator. In this case, it is the “Click the button to display an alert box” button.

7. Alert Should Be Present – This keyword is used to verify that an alert is present on the page and, by default, accepts it.

These keywords are present in SeleniumLibrary. To know more about these keywords, please refer to this document – https://robotframework.org/SeleniumLibrary/SeleniumLibrary.htm.

To run this script, go to the command line and go to directory tests.

Step 7 – Execute the tests

We need the below command to run the Robot Framework script.

 robot Ok_Alert_Demo.robot

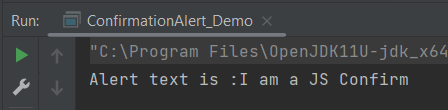
The output of the above program is
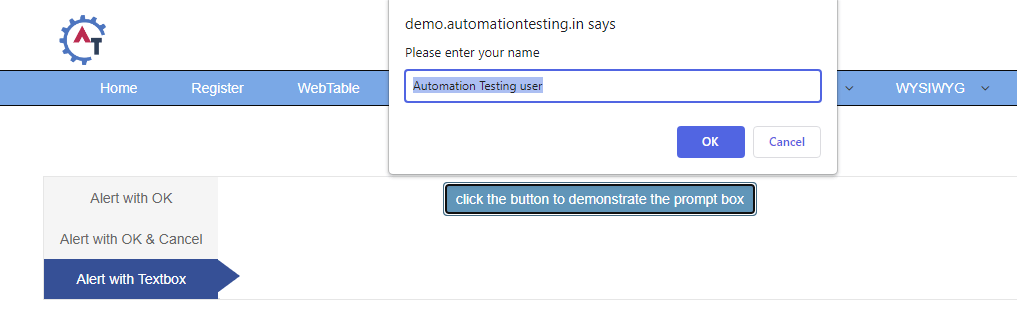
Step 8 – View Report and Log

We have the test case passed. The Robot Framework generates log.html, output.xml, and report.html by default.

Let us now see the report and log details.

Report

Right-click on report.html. Select Open In->Browser->Chrome(any browser of your wish).

The Report generated by the framework is shown below:

Log

Robot Framework has multiple log levels that control what is shown in the automatically generated log file. The default Robot Framework log level is INFO.

Right-click on log.html. Select Open In->Browser->Chrome(any browser of your wish).

2. Confirmation Alert

This alert comes with an option to accept or dismiss the alert.

The below page shows that when we click on Alert with OK & Cancel”, then click on the “click the button to display a confirm box” button, a new alert opens with the message – Press a Button!.

We are now going to write test cases. The test case details will be as follows :

Below is an example of selecting the “Confirmation Alert”.

*** Settings ***
Documentation    To validate the Confirm Alert
Library     SeleniumLibrary
Test Teardown    Close Browser
Documentation    To validate the Confirmation Alert
Library     SeleniumLibrary
Test Teardown    Close Browser


*** Variables ***
${okCancelOption}    xpath://div[@class='tabpane pullleft']/ul/li[2]/a
${confirmBtn}    css:.btn-primary
${text}     id:demo

*** Test Cases ***
Handle Confirm Alert
    Open the Browser with URL
    Select the Alert with OK & Option
    Verify text on Confirm Box on selecting Cancel option

*** Keywords ***
Open the Browser with URL
    Create Webdriver    Chrome  executable_path=/Vibha_Personal/RobotFramework/drivers/chromedriver_linux64
    Go To    https://demo.automationtesting.in/Alerts.html
    Maximize Browser Window
    Set Selenium Implicit Wait    2

Select the Alert with OK & Option
    Click Element    ${okCancelOption}
    Click Button     ${confirmBtn}

Verify text on Confirm Box on selecting Cancel option
    Alert Should Be Present     Press a Button !     DISMISS
    Element Text Should Be    ${text}      You Pressed Cancel

3. Prompt Alert

 In the prompt alert, we get an option to add text to the alert box. This is used when some input is required from the user.

We are now going to write test cases. The test case details will be as follows :

Below is an example of selecting the “Prompt Alert”.

*** Settings ***
Documentation    To validate the TextBox Alert
Library     SeleniumLibrary
Test Teardown    Close Browser

*** Variables ***
${textboxOption}    xpath://div[@class='tabpane pullleft']/ul/li[3]/a
${displayBtn}    css:.btn-info
${text}     id:demo1

*** Test Cases ***
Handle TextBox Alert
    Open the Browser with URL
    Select the Alert with TextBox Option
    Verify text on entered on textbox is displayed as message

*** Keywords ***
Open the Browser with URL
    Create Webdriver    Chrome  executable_path=/Vibha_Personal/RobotFramework/drivers/chromedriver_linux64
    Go To    https://demo.automationtesting.in/Alerts.html
    Maximize Browser Window
    Set Selenium Implicit Wait    2

Select the Alert with TextBox Option
    Click Element    ${textboxOption}
    Click Button     ${displayBtn}

Verify text on entered on textbox is displayed as message
    Input Text Into Alert     Hello     ACCEPT
    Element Text Should Be    ${text}      Hello Hello How are you today

That’s it! Congratulations on making it through this tutorial and hope you found it useful! Happy Learning!!

Robot Framework Tutorials

HOME

Robot Framework is a generic open-source automation framework. It can be used for test automation and robotic process automation (RPA). RPA is extensively used for Web Application Automation, API Automation, RPA, and Database Testing.

Robot Framework has an easy syntax, utilizing human-readable keywords. Its capabilities can be extended by libraries implemented with Python, Java, or many other programming languages.

Chapter 1 Robot Framework Features – Settings, Libraries, Variables, Keywords, Resources, Reports, Logs
Chapter 2 What are variables in Robot Framework?
Chapter 3 How to handle text box in Robot Framework
Chapter 4 How to handle radio buttons in Robot Framework
Chapter 5 How to handle checkbox in Robot Framework
Chapter 6 How to handle dropdowns in Robot Framework
Chapter 7 How to handle multiple windows in Robot Framework
Chapter 8 How to handle alerts in Robot Framework
Chapter 9 What is Resource File in Robot Framework 
Chapter 10 How to run all the tests from the folder in Robot Framework
Chapter 11 How to implement tagging in Robot Framework
Chapter 12 How to rerun failed tests in Robot Framework
Chapter 13 How to use Drag and Drop in Robot Framework?
Chapter 14 How to set variable values from Runtime command in Robot Framework
Chapter 15 Page Object Model in Robot Framework with Selenium and Python
Chapter 16 Parallel Testing in Robot Framework
Chapter 17 How to write tests in Robot Framework in BDD Format

Data-Driven Testing

Chapter 1 Data-Driven Testing in Robot Framework 
Chapter 2 How to load data from CSV files in the Robot Framework?

API Testing

Chapter 1 How to perform API Testing in Robot Framework using RequestLibrary
Chapter 2 How to Implement Basic Auth in Robot Framework – NEW
Chapter 3 How to pass authorization token in header in Robot Framework – NEW
Chapter 4 Verifying Status Code and Status Line in Robot Framework – NEW

CI/CD

Chapter 1 Run Robot Framework Tests in GitLab CI/CD
Chapter 2How to run Robot Framework in GitHub Actions

Jenkins

Chapter 1 How to integrate Robot Framework with Jenkins
Chapter 2 How to run parameterized Robot Framework tests in Jenkins