How to Download and Configure Selenium WebDriver
- Java 11 is installed on the machine
- Install the Latest Version of Eclipse
- Install Selenium WebDriver
- Download Third Party Browser Drivers like Mozilla GeckoDriver
1. Java 11 Installation in Windows 10
Verify that Java is installed on your machine or not. If not, then refer to this link to install Java 11 in Windows 10.
2. Download and Install Eclipse IDE
Eclipse IDE is a software that allows you to write your programs and test scripts in multiple programming languages (with Java being the most popular one). Verify that Eclipse is installed on your machine. If not, then follow this link to get the instructions to install Eclipse
3. Download Selenium WebDriver
Go to Selenium’s Official site – https://www.selenium.dev/downloads/. Scroll down to Selenium Client & WebDriver Language Bindings. We can see there are different languages of download links. We are using Selenium with Java, so will click on the Download link next to Java.

2. Selenium WebDriver JARs download in zip format.

3. Unzip the Selenium folder. It will have these files.

4. Install/Configure Selenium Webdriver
1. Open Eclipse IDE. Click on WorkBench. Once Eclipse IDE opens, go to File -> New -> Java Project

2. Create a Java project with the name – Selenium. You can give any name and click on the “Finish” button.

3. A Java class is created with the name Selenium, and it looks like this:-
5. Add Selenium JAR files to Eclipse IDE
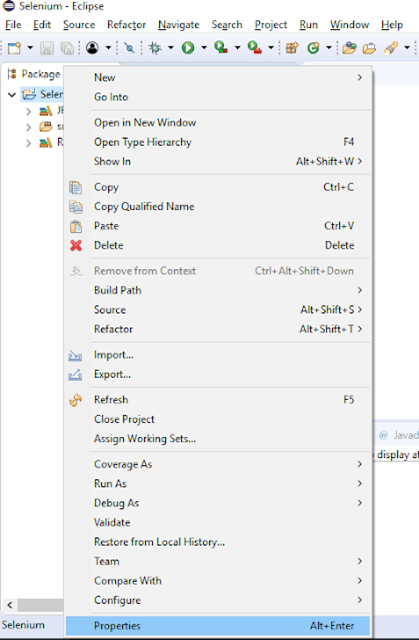
1. Right-click on Selenium and click on Properties
2. Click on Java Build Path. Select Libraries. Click on – Add External JARs. Add your all external jars such as selenium jars under the class path, not module path

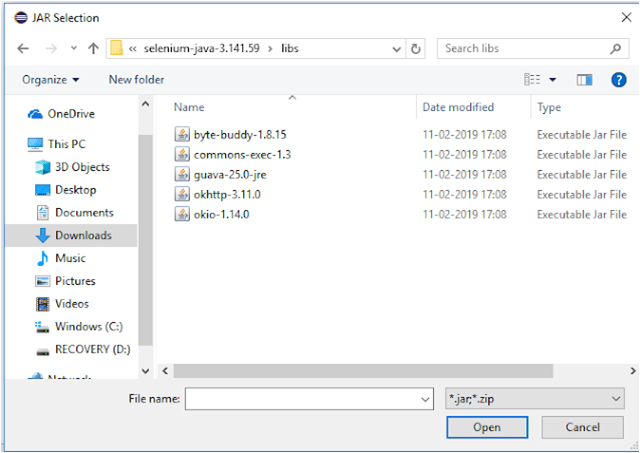
3. Go to the path where the Selenium WebDriver JAR folder was downloaded and select these 2 JAR files and click on the Open button.

4. Similarly, go to the Lib folder of the Selenium file and select the entire JAR present there.
5. Java Build Path looks like as shown in the below image.

6. Click on Referenced Libraries and will see all these JARs are present here.

6. Download Third Party Browser Drivers
Go to the Selenium Official site. Scroll down and go to Third Party Drivers, Bindings, and Plugins. We need to download the browser drivers which we want to use like Google Chrome Driver, Mozilla Firefox, and so on.


I was trying to configure Selenium,but was getting few issues like was using older version of java, later error like return error code 13. This blog has cleared all my issues. Thanks a lot
LikeLike
Thanks Kant. Let me know if you want to know anything specific.
LikeLike
You have not told about creating environment variable for Java anywhere… That is a very important step
LikeLike
Thanks Shweta for your valuable feedback. I have updated my blog as per your suggestion
LikeLike