In Python, the requests library is commonly employed for retrieving content from a specific resource URI. When a request is made to a designated URI using Python, it yields a response object. This response object is then utilized to access various attributes, including content and headers. This article focuses on demonstrating how to examine the response.elapsed attribute within a response object.
Prerequisite:
Python is installed on the machine
PIP is installed on the machine
PyCharm or other Python Editor is installed on the machine
In Python, response.elapsed is an attribute of the Response object from the requests library, which is commonly used for making HTTP requests. The elapsed attribute represents the time elapsed between sending the request and receiving the response.
One of the major testing workflows involves switching between multiple windows. Selenium WebDriver has specific switch commands to serve this purpose. Selenium WebDriver assigns an alphanumeric id to each window as soon as the WebDriver object is instantiated. This unique alphanumeric id is called a window handle. Selenium uses this unique id to switch control among several windows. In simple terms, each unique window has a unique ID, so that Selenium can differentiate when it is switching controls from one window to the other.
1) GetWindowHandle
To get the window handle of the current window. It returns a string of alphanumeric window handles.
String parentHandle= driver.getWindowHandle();
2) GetWindowHandles
To get the window handle of all the windows. It returns a set of window handle.
Set handle= driver.getWindowHandles();
3) SwitchTo Window
WebDriver supports moving between named windows using the “switchTo” method.
driver.switchTo().window("windowName");
Let us explain window switch with an example:-
1) Launch new Browser and open https://demoqa.com/browser-windows 2) Check the count of windows which is 1 3) Locate “New Window” button using Id – “windowButton” and click to open a new window 4) Get the count of both windows which is now 2. 5) Get the parent window handle and print it to console 6) Get the window handles of both the open windows and print them 7) Switch to the new window (child window) 8) Get the text of Child Window and print it 9) Close the new window (child window)
The program for the above scenario is shown below:
package com.example.definitions;

import org.openqa.selenium.By;
import org.openqa.selenium.WebDriver;
import org.openqa.selenium.WebElement;
import org.openqa.selenium.chrome.ChromeDriver;
import org.openqa.selenium.chrome.ChromeOptions;
import java.util.Iterator;
import java.util.Set;
import java.util.concurrent.TimeUnit;

public class WindowSwitchDemo {

    public static void main(String[] args) {

        ChromeOptions options = new ChromeOptions();
        options.addArguments("--start-maximized");
        WebDriver driver = new ChromeDriver(options);
        driver.manage().timeouts().implicitlyWait(10, TimeUnit.SECONDS);

        // Pass application url
        driver.get("https://demoqa.com/browser-windows");

        //Count of window - 1
        Set<String> allWindowHandles = driver.getWindowHandles();
        System.out.println("Count of Window :" + allWindowHandles.size());

        //Open a child window
        driver.findElement(By.id("windowButton")).click();

        //Count of windows , changed from 1 to 2
        Set<String> newAllWindowHandles = driver.getWindowHandles();
        System.out.println("New Count of Window :" + newAllWindowHandles.size());

        // Get the detail of the parent window
        String ParentHandle = driver.getWindowHandle();
        System.out.println("Parent Window :" + ParentHandle);

        //Get details of parent and child windows
        Iterator<String> iterator = newAllWindowHandles.iterator();
        String mainWindow = iterator.next();
        String childWindow = iterator.next();
        System.out.println("Parent Window :" + mainWindow);
        System.out.println("Child Window :" + childWindow);

        //Switch control to child window
        driver.switchTo().window(childWindow);

        //Verify the text present on child window
        WebElement text = driver.findElement(By.id("sampleHeading"));
        System.out.println("Child_Title :" + text.getText());

        // Close Child window
        driver.close();

        // Switch back to parent window
        driver.switchTo().window(ParentHandle);
        System.out.println("Parent Title :" + driver.getTitle());

        // Close Parent window
        driver.quit();
    }

}
The output of the above program is
What is the difference between driver.close() and driver.quit()?
When we are working on multiple windows and a selective window needs to be closed, then transfer the control to that window and use driver.close() to close the selective window. This will not stop the execution of the rest of the program. But, in case it is needed to close all the open windows, then use driver.quit() which will close all the windows opened in a particular session. It basically stops the driver instance, and any further actions to WebDriver may result in an exception. It is generally the last statement of any code.
Congratulations. We have learnt about window switching in Selenium. I hope you find this tutorial helpful. Happy Learning!!
Cucumber Data Tables can be used to add multiple parameters in Step Definition in a tabular form rather than putting all the parameters in the Gherkin statement. This is much easier to read and multiple rows of data can be passed in the same step. Data tables from Gherkin can be accessed by using the DataTable object as the last parameter in a Step Definition. This conversion can be done either by Cucumber or manually.
Let’s write a simple data table and see how we use it.
1. Table into List of a List of Strings
| firstName | lastName | age |
| Thomas    | Brown | 30 |
| Perry     | Wilson | 26 |
| Ashley    | William | 27 |

java type: List<List<String>>

The natural representation of list of a list of strings is shown below.

[
  [ "firstName", "lastName", "age" ],
  [ "Thomas", "Brown", "30" ],
  [ "Perry", "Wilson", "26" ],
  [ "Ashley", "William", "27" ]
]
2. Table into List of Maps
java type: List<Map<String, String>>
The natural representation of list of maps is shown below.

[
  { "firstName": "Thomas", "lastName": "Brown",  "age": "30" },
  { "firstName": "Perry",  "lastName": "Wilson", "age": "26" },
  { "firstName": "Ashley", "lastName": "William", "age": "27" }
]
3. Table into Single Map
Table where first colum is key as shown below

| IN  | India          |
| IRE | Ireland        |
java type: Map<String, String>

TO convert the table into a single map

{
  "IN": "India",
  "IRE": "Ireland"
}
4. Table into map that uses a list as its value
 A table with multiple column values per key.

 | IN  | India          | 29  |
 | IRE | Ireland        | 8   |

java type: Map<String, List<String>>

{
  "IN":  ["India","29"],
  "IRE": ["Ireland","8"]
}
Now, let us see how we can use DataTable in Cucumber
Cucumber Data Tables Example in Java
Data Table without Header Example
Below is an example of how to implement Data Tables without a Header. For example, we want to test the Login Page of an application. We can either mention all the arguments inside the Gherkin statement or use a table to list all the arguments, as we used below:
Feature: Login to HRM Application

  @ValidCredentials
  Scenario: Login with valid credentials - Data Table without Header

    Given User is on HRMLogin page
    When User enters valid credentials
      | Admin | admin123 |
    Then User should be able to login successfully and new page open
Below is the Step Definition of the above scenario.
import io.cucumber.datatable.DataTable;
import io.cucumber.java.After;
import io.cucumber.java.Before;
import io.cucumber.java.en.Given;
import io.cucumber.java.en.Then;
import io.cucumber.java.en.When;
import org.junit.Assert;
import org.openqa.selenium.By;
import org.openqa.selenium.WebDriver;
import org.openqa.selenium.chrome.ChromeDriver;
import java.util.List;
import java.util.Map;
import java.util.concurrent.TimeUnit;
import static org.hamcrest.CoreMatchers.containsString;
import static org.hamcrest.MatcherAssert.assertThat;

public class DataTableDefinitions {

    WebDriver driver;

 @Before
    public void setup() {

        ChromeOptions options = new ChromeOptions();
        options.addArguments("--start-maximized");
        driver = new ChromeDriver(options);
        driver.manage().timeouts().implicitlyWait(Duration.ofSeconds(5));

    }

    @Given("User is on HRMLogin page")
    public void userOnHomePage() {

        driver.get("https://opensource-demo.orangehrmlive.com/");
    }

     @When("User enters valid credentials")
    public void entersValidCredential(DataTable dataTable) throws InterruptedException{

        System.out.println("Credentials Entered");

        List<List<String>> signUpForm = dataTable.asLists(String.class);
        String userName = signUpForm.get(0).get(0);
        String passWord = signUpForm.get(0).get(1);
        driver.findElement(By.name("username")).sendKeys(userName);
        driver.findElement(By.name("password")).sendKeys(passWord);
        driver.findElement(By.xpath("//*[@class='oxd-form']/div[3]/button")).submit();
    }

    @Then("User should be able to login successfully and new page open")
    public void successfulLogin() throws InterruptedException {

        String newPageText = driver.findElement(By.xpath("//*[@class='oxd-topbar-header-breadcrumb']/h6")).getText();
        System.out.println("newPageText :" + newPageText);
        assertThat(newPageText, containsString("Dashboard"));
    }

    @After
    public void teardown(){
        driver.quit();
    }
}
To run the Feature file, we need a Cucumber TestRunner.
import io.cucumber.junit.Cucumber;
import io.cucumber.junit.CucumberOptions;
import org.junit.runner.RunWith;

@RunWith(Cucumber.class)
@CucumberOptions(monochrome = true, plugin = "pretty", features = "src/test/resources/Features/DataTable.feature",
        glue = "definitions", tags="@ValidCredentials")

public class CucumberRunnerTest {
}
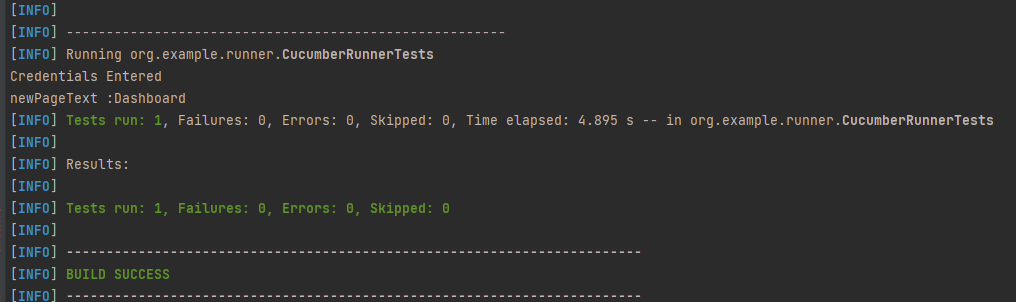
The output of the above program is
In the above example, we don’t have a header. We have just got the List object. We get the values of DataTable starting from 0 index.
Cucumber converts the above table into a list of lists. It treats each row as a list of the column values. We use the asLists method — supplying a String.class argument — to convert the DataTable argument to a List<List<String>>. This Class argument informs the asLists method of what data type we expect each element to be.
Data Table with Header and Single Row Example
Below is a cucumber data tables example with the header.
Adding a header to your table makes it easier to read and maintain.
  @InValidCredential
  Scenario: Login with invalid credential - Header with Single Row

    Given User is on HRMLogin page
    Then User enters invalid credentials and Login will be unsuccessful with error message
      | Username  | Password   | ErrorMessage        |
      | Admin1    | admin123!$ | Invalid credentials |
Below is the Step Definition of the above scenario.
package org.example.definitions;

import io.cucumber.datatable.DataTable;
import io.cucumber.java.After;
import io.cucumber.java.Before;
import io.cucumber.java.en.Given;
import io.cucumber.java.en.Then;
import io.cucumber.java.en.When;
import org.junit.Assert;
import org.openqa.selenium.By;
import org.openqa.selenium.WebDriver;
import org.openqa.selenium.chrome.ChromeDriver;
import org.openqa.selenium.chrome.ChromeOptions;

import java.time.Duration;
import java.util.List;
import java.util.Map;

public class DataTableDefinitions {

    WebDriver driver;

    @Before
    public void setup() {

        ChromeOptions options = new ChromeOptions();
        options.addArguments("--start-maximized");
        driver = new ChromeDriver(options);
        driver.manage().timeouts().implicitlyWait(Duration.ofSeconds(5));

    }

    @Given("User is on HRMLogin page")
    public void userOnHomePage() {

        driver.get("https://opensource-demo.orangehrmlive.com/");
    }

    @Then("User enters invalid credentials and Login will be unsuccessful with error message")
    public void entersInvalidCredential(DataTable userTable) throws InterruptedException {

        System.out.println("Enter Credentials");
        List<Map<String, String>> user = userTable.asMaps(String.class, String.class);

        String userName = user.get(0).get("Username");
        System.out.println("Username :" + userName);
        driver.findElement(By.name("username")).sendKeys(userName);

        String passWord = user.get(0).get("Password");
        System.out.println("Password :" + passWord);
        driver.findElement(By.name("password")).sendKeys(passWord);

        driver.findElement(By.xpath("//*[@class='oxd-form']/div[3]/button")).submit();

        String errorMessage = user.get(0).get("ErrorMessage");
        String actualErrorMessage = driver.findElement(By.xpath("//*[@class='orangehrm-login-error']/div[1]/div[1]/p")).getText();
        System.out.println("Actual Error Message :" + actualErrorMessage);
        Assert.assertTrue(actualErrorMessage.equalsIgnoreCase(errorMessage));

    }

    @After
    public void teardown(){
        driver.quit();
    }

}
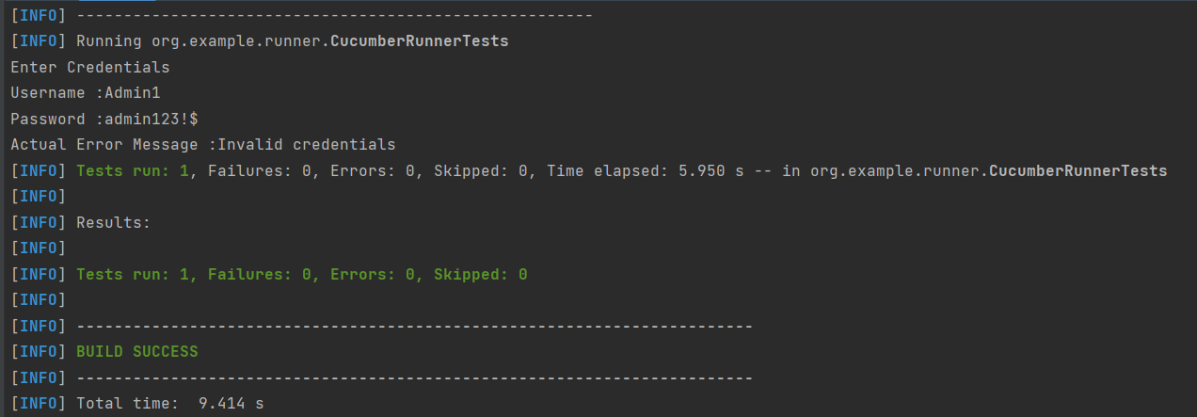
The output of the above program is
In the above example, we have only 1 row with the header, so have used get(0) to retrieve the first row of DataTable. After that, I used get(“HeaderName”) to get the value of the row of DataTable.
Data Table with Header and Multiple Rows Example
Below is a cucumber data table example with multiple rows of data with the header. This is helpful when we want to test multiple combinations of data in a step.
  @Multiple_InValidCredentials
  Scenario: Login with invalid credentials - Data Table with Header and Multiple Rows

    Given User is on HRMLogin page
    Then User enters invalid credentials and Login will be unsuccessful with custom error messages
      | Username    | Password  | ErrorMessage         |
      | Admin1      | admin123! | Invalid credentials  |
      | Admina      | admin123a | Invalid credentials  |
Below is the Step Definition of the above scenario
import io.cucumber.datatable.DataTable;
import io.cucumber.java.After;
import io.cucumber.java.Before;
import io.cucumber.java.en.Given;
import io.cucumber.java.en.Then;
import io.cucumber.java.en.When;
import org.junit.Assert;
import org.openqa.selenium.By;
import org.openqa.selenium.WebDriver;
import org.openqa.selenium.chrome.ChromeDriver;
import java.util.List;
import java.util.Map;
import java.util.concurrent.TimeUnit;
import static org.hamcrest.CoreMatchers.containsString;
import static org.hamcrest.MatcherAssert.assertThat;

public class DataTableDefinitions {

    WebDriver driver;

     @Before
    public void setup() {

        ChromeOptions options = new ChromeOptions();
        options.addArguments("--start-maximized");
        driver = new ChromeDriver(options);
        driver.manage().timeouts().implicitlyWait(Duration.ofSeconds(5));

    }

    @Given("User is on HRMLogin page")
    public void userOnHomePage() {

        driver.get("https://opensource-demo.orangehrmlive.com/");
    }

     @Then("User enters invalid credentials and Login will be unsuccessful with custom error messages")
    public void entersInvalidCredentials(DataTable userTable) throws InterruptedException {

        System.out.println("Enter Credentials");

        List<Map<String, String>> user = userTable.asMaps(String.class, String.class);
        for (Map<String, String> form : user) {

            String userName = form.get("Username");
            System.out.println("Username :" + userName);
            driver.findElement(By.name("username")).sendKeys(userName);

            String passWord = form.get("Password");
            System.out.println("Password :" + passWord);
            driver.findElement(By.name("password")).sendKeys(passWord);

            driver.findElement(By.xpath("//*[@class='oxd-form']/div[3]/button")).submit();

            String errorMessage = form.get("ErrorMessage");
            String actualErrorMessage = driver.findElement(By.xpath("//*[@class='orangehrm-login-error']/div[1]/div[1]/p")).getText();
            System.out.println("Actual Error Message :" + actualErrorMessage);

            Assert.assertTrue(actualErrorMessage.equalsIgnoreCase(errorMessage));

        }
    }

    @After
    public void teardown(){
        driver.quit();
    }

}
The output of the above program is
Cucumber creates a list containing each row, but instead maps the column heading to each column value. Cucumber repeats this process for each subsequent row. We use the asMaps method — supplying two String.class arguments — to convert the DataTable argument to a List<Map<String, String>>.
The first argument denotes the data type of the key (header). The second indicates the data type of each column value. Thus, we supply two String.class arguments because our headers (key) and title and author (values) are all Strings.
Congratulations on making it through this tutorial and hope you found it useful! Happy Learning!! Cheers!!
ArrayList is a part of collection framework and is present in java.util package. It provides us dynamic arrays in Java. ArrayList is a resizable-array implementation of the List interface. In this tutorial, we will cover the below topics:-
1) What is the difference between Array and ArrayList?
Array has fixed length, so if it is full we cannot add more elements, similarly if we delete few elements from the array, there will not be any change in the memory consumption. Whereas ArrayList can grow dynamically. We can add elements as well can delete the elements and this will make changes in the memory consumption. The size of an array cannot modified (if you want to add or remove elements to/from an array, we have to create a new one). While elements can added and removed from an ArrayList.
2) How to create an ArrayList?
This statement creates an ArrayList with the name Companies with type “String”.
import java.util.ArrayList; // import the ArrayList class
ArrayListCompanies = new ArrayList(); // Create an ArrayList object
3) How to add elements to an ArrayList?
We can add element to an ArrayList by using add() method. There are many ways to add elements.
1) To add the element at the end of the List.
Companies.add("Samsung");
2) To add the element at the specified location in ArrayList, we can specify the index in the add method like this.
Companies.add(2,"Microsoft");
4) How to remove elements from ArrayList?
1) To remove the element with name.
Companies.remove("MI");
2) To remove the element at the specified location in ArrayList, we can specify the index in the remove method.
Companies.remove(1);
5) ArrayList SizeMethod
To find out how many elements an ArrayList have, use the size() method.
Companies.size();
Let me show how to add and remove elements from an ArrayList with the help of an example.
package com.example.definitions;

import java.util.ArrayList;
import java.util.function.Predicate;

public class ArrayList_IteratorExample {

    public static void main(String[] args) {

        //Create ArrayList of String
        ArrayList<String> Companies = new ArrayList();

        // Check if an ArrayList is empty
        System.out.println("Is Company List empty :"+Companies.isEmpty());

        // Adding new elements to the ArrayList
        Companies.add("Samsung");
        Companies.add("Apple");
        Companies.add("Motorola");
        Companies.add("Google");
        Companies.add("Sony");
        Companies.add("Blackberry");
        System.out.println("Company List is :"+Companies);

        // Adding an element at a particular index in an ArrayList
        Companies.add(2,"Microsoft");
        System.out.println("Updated Company List is:"+Companies);

        // Find the size of an ArrayList
        System.out.println("Size of Company List: "+Companies.size());

        // Retrieve the element at a given index
        System.out.println("First Company in list: "+Companies.get(0));

        // Retrieve the last element from ArrayList
        String LastCompany = Companies.get(Companies.size()-1);
        System.out.println("Last Company in list: "+LastCompany);

        // Remove the element
        Companies.remove("MI");

        // Remove the element at index '1'
        Companies.remove(1);
        System.out.println("Updated Company List after removal is:"+Companies);

        // Remove first occurrence of the given element from the ArrayList
        // (The remove() method returns false if the element does not exist in the ArrayList)
        boolean isRemoved = Companies.remove("Lenovo");
        System.out.println("Lenovo exists in Company List :"+isRemoved);

        // Remove all the elements that satisfy the given predicate
        Predicate<String> newCompanies = company -> company.startsWith("B");
        Companies.removeIf(newCompanies);

        System.out.println("After Removing all elements that start with \"B\": " + Companies);
    }
}
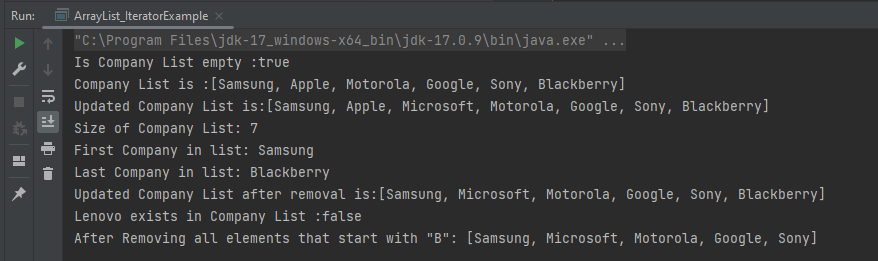
The output of the above program is
6) Method to iterate through ArrayList
There are various methods to iterate through ArrayList. We will discuss few of the methods. 1) Iterator interface 2) For -each loop 3) For loop 4) While loop
package com.example.definitions;

import java.util.ArrayList;

public class ArrayList_IteratorExample {

    public static void main(String[] args) {

        //Creating arraylist
        ArrayList<String> Companies = new ArrayList();

        // Adding new elements to the ArrayList
        Companies.add("Samsung");
        Companies.add("Apple");
        Companies.add("Motorola");
        Companies.add("Google");
        Companies.add("Sony");
        Companies.add("Blackberry");

        //Traversing list through Iterator
        for(String a:Companies)
            System.out.println(a);
        System.out.println("------------------------------------------");

        //Traversing list through for loop
        for(int i=0;i<Companies.size();i++)
        {
            System.out.println(Companies.get(i));
        }
        System.out.println("------------------------------------------");

        // Traversing list through For-Each loop
        for(String a:Companies)
            System.out.println(a);
    }
}
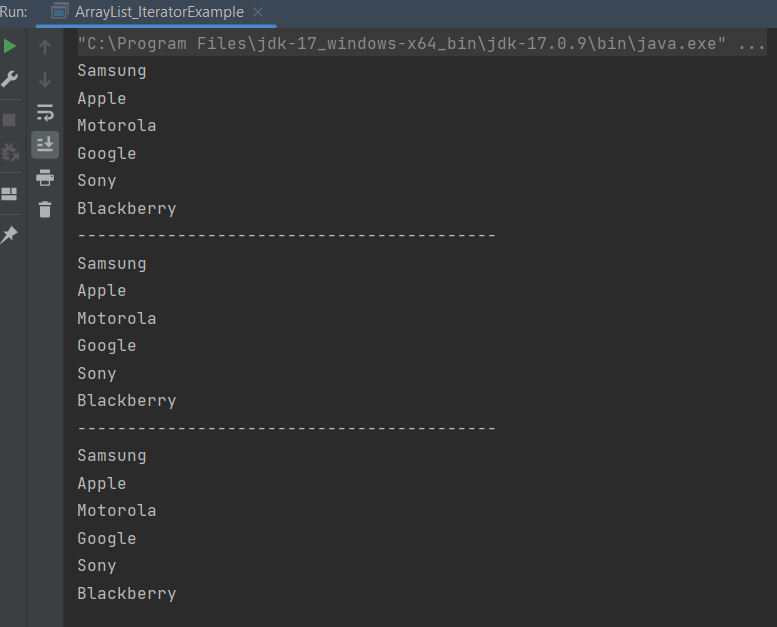
The output of the above program is
Congratulations on making it through this tutorial and hope you found it useful! Happy Learning!! Cheers!!
HTTP headers let the client and the server pass additional information with an HTTP request or response. All the headers are case-insensitive, headers fields are separated by colon, key-value pairs in clear-text string format.
requests.post(url, data=data, header=header) – function sends a POST request to the specified URL with the provided data. The data dictionary contains the key-value pairs that we want to send in the POST request payload. You can modify it based on the requirements of the API we are working with. The header dictionary also contains the key-value pair.
The response object contains information about the response, including the status code and the response content.
We can assert the header of the response also as shown below:
As we know, Cucumber is a BDD Tool and Selenium Webdriver is used for the automation of web applications. Imagine we need to build a test framework that can be used by businesses to understand the test scenarios and as well can test the web application. This can be achieved by integrating Cucumber with Selenium.
In this tutorial, I’ll create a BDD Framework for the testing of web applications using Selenium Webdriver.
Cucumber and Selenium need Java to be installed on the system to run the tests. Click here to knowHow to install Java.
Step 2 – Download and setup Eclipse IDE on the system
The Eclipse IDE (integrated development environment) provides strong support for Java developers. The Eclipse IDE for Java Developers distribution is designed to support standard Java development. It includes support for the Maven and Gradle build system and support for the Git version control system. Click here to know How to install Eclipse.
Step 3 – Setup Maven
To build a test framework, we need to add a number of dependencies to the project. It is a very tedious and cumbersome process to add each dependency manually. So, to overcome this problem, we use a build management tool. Maven is a build management tool that is used to define project structure, dependencies, build, and test management. Click here to know How to install Maven.
Step 4 – Install Cucumber Eclipse Plugin (Only for Eclipse)
The cucumber plugin is an Eclipse plugin that allows eclipse to understand the Gherkin syntax. When we are working with cucumber we will write the feature files that contain Feature, Scenario, Given, When, Then, And, But, Tags, Scenario Outline, and Examples. By default, eclipse doesn’t understand these keywords so it doesn’t show any syntax highlighter. Cucumber Eclipse Plugin highlights the keywords present in Feature File. Refer to this tutorial to get more detail – How to setup Cucumber with Eclipse.
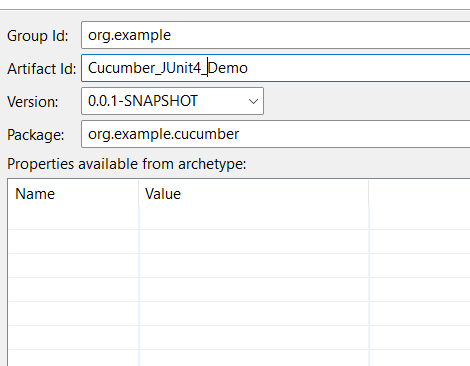
Group Id – org.example Artifact Id – Cucumber_JUnit4_Demo Version – 0.0.1-SNAPSHOT Package – cucumber
Maven Dependency (pom.xml) looks like something shown below for a new Maven project.
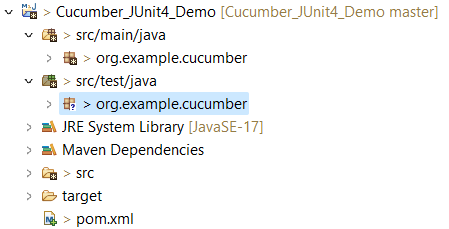
Step 6 – Create source folder src/test/resources
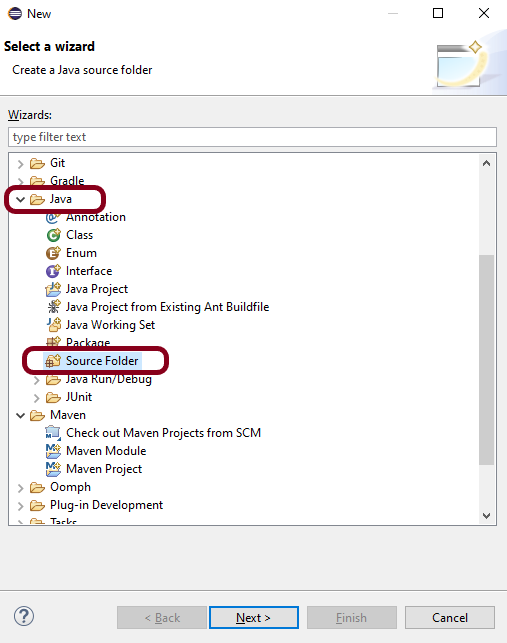
When a new Maven Project is created, it has 2 folders – src/main/java and src/test/java. To create test scenarios, we need a new source folder called – src/test/resources. To create this folder, Right-click on your Maven project ->select New ->Java, and then Source Folder. The Feature file is created in the src/test/resources source folder.
Mention the source folder name as src/test/resources and click the Next button. This will create a source folder under your new Maven project, as shown in the below image.
Step 7 – Add Selenium and Cucumber dependencies to the project
Add the below-mentioned Selenium and Cucumber dependencies to the project.
The compiler plugin is used to compile the source code of a Maven project. This plugin has two goals, which are already bound to specific phases of the default lifecycle:
Step 9 – Create a feature file (LoginPage.feature)
Feature file should be saved as an extension of .feature. Add the test scenarios in this feature file. I have added sample test scenarios. In this feature file, I have created a scenario for successful login and another one for a failed login. The test scenarios are written in the Gherkins language. A feature file contains all the test scenarios and is placed in src/test/resources/features.
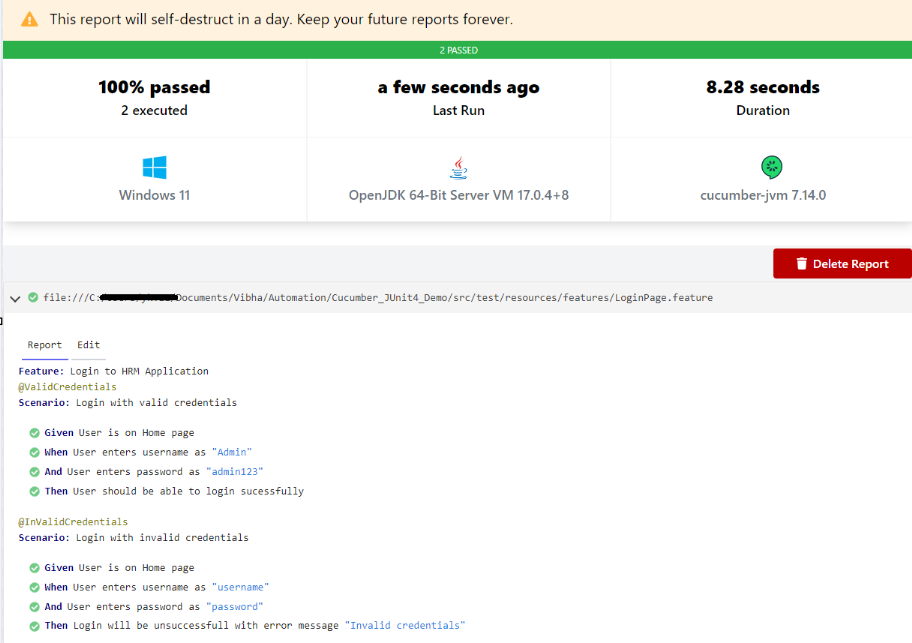
Feature: Login to HRM Application

   @ValidCredentials
   Scenario: Login with valid credentials

    Given User is on Home page
    When User enters username as "Admin"
    And User enters password as "admin123"
    Then User should be able to login sucessfully

   @InValidCredentials
   Scenario: Login with invalid credentials

    Given User is on Home page
    When User enters username as "username"
    And User enters password as "password"
    Then Login will be unsuccessfull with error message "Invalid credentials"
Step 10 – Create the step definition class
The StepDefinition class is created in src/test/java. The StepDefinition class contains the test code corresponding to the steps of Test Scenario in the Feature File.
It is recommended to create a package with a name such as org.example.cucumber.stepdefinitionsin src/test/java and create the step definition java file corresponding to the feature files in that package
package org.example.definitions;

import java.time.Duration;

import org.junit.Assert;
import org.openqa.selenium.By;
import org.openqa.selenium.WebDriver;
import org.openqa.selenium.chrome.ChromeDriver;
import org.openqa.selenium.chrome.ChromeOptions;

import io.cucumber.java.After;
import io.cucumber.java.Before;
import io.cucumber.java.en.Given;
import io.cucumber.java.en.Then;
import io.cucumber.java.en.When;

public class LoginStepdefinitions {

	WebDriver driver;

	@Before
    public void setUp() {

        ChromeOptions options = new ChromeOptions();
        options.addArguments("--start-maximized");
        driver = new ChromeDriver(options);
        driver.manage().timeouts().implicitlyWait(Duration.ofSeconds(5));

    }

    @Given("User is on Home page")
    public void userOnHomePage() {

        driver.get("https://opensource-demo.orangehrmlive.com/");
    }

    @When("User enters username as {string}")
    public void entersUsername(String userName)  {

        System.out.println("Username Entered");
        driver.findElement(By.name("username")).sendKeys(userName);


    }

    @When("User enters password as {string}")
    public void entersPassword(String passWord)  {

        System.out.println("Password Entered");
        driver.findElement(By.name("password")).sendKeys(passWord);
        driver.findElement(By.xpath("//*[@class='oxd-form']/div[3]/button")).submit();
    }

    @Then("User should be able to login sucessfully")
    public void sucessfullLogin()  {

    	 String homePageHeading = driver.findElement(By.xpath("//*[@class='oxd-topbar-header-breadcrumb']/h6")).getText();

         //Verify new page - HomePage
         Assert.assertEquals("Dashboard",homePageHeading);

    }

    @Then("Login will be unsuccessfull with error message {string}")
    public void unsucessfullLogin(String expectedErrorMessage)  {

    	 String actualErrorMessage = driver.findElement(By.xpath("//*[@class='orangehrm-login-error']/div[1]/div[1]/p")).getText();

         // Verify Error Message
         Assert.assertEquals( expectedErrorMessage, actualErrorMessage);

    }

    @After
    public void teardown() {

        driver.quit();
    }

}
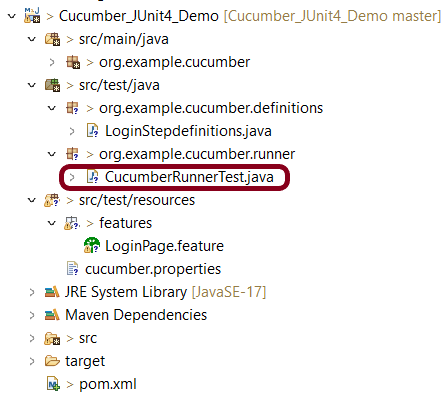
Step 11 – Create a Cucumber Runner classunder src/test/java
It is recommended to create a package with a name such as org.example.cucumber.runner in src/test/java and create the CucumberRunnerTest (Runner) java file corresponding to that package.
We need to create a class called Runner class to run the tests. This class will use the JUnit annotation @RunWith(), which tells JUnit what is the test runner class.
Java is a general-purpose programming language that is a concurrent, class-based, and object-oriented language. Java follows the concept of “write once and run anywhere (WORA).” This means that compiled Java code can be run on all different platforms that support Java. There’s no need for recompilation.
In the previous tutorial, I explained Hooks in Cucumber. In this tutorial, I will explain Condition Hooks in Cucumber.
Hooks can be conditionally selected for execution based on the tags of the scenario. These are called Condition or Tagged Hooks.
Tagged Hooks are much like the scenario hooks, but the only difference is that they are executed before and after the specified tag.
These tagged hooks will be very specific to the particular tags, so these are not common for all scenarios.
So basically, they can also be run in the following two ways:
Before (‘tagName’)
After (‘tagName’)
Why do we need Tagged Hooks?
Suppose there are 3 different sets of scenarios. The prerequisites of these scenarios are different, like they have to open different browsers. So, we don’t want to have a common hook for all the scenarios. In this case, we can create a tagged hook to satisfy the requirement of each scenario.
In the below example, there are 3 tags – ChromeBrowser, FireFoxBrowser, and EdgeBrowser. I want to run the hook which has the specified tag for that scenario. For Example, I want @After and @Before hooks related to Chrome Browser should be executed for the tag – @ChromeBrowser.
Below is the feature file which has 3 different scenarios.
Feature: Conditional or Tagged Hooks

@ChromeBrowser
Scenario: Open Chrome Browser

Given I want to open Google Chrome Browser

@FireFoxBrowser
Scenario: Open Firefox Browser

Given I want to open Mozilla Firefox Browser

@EdgeBrowser
Scenario: Open Edge Browser

Given I want to open Microsoft Edge Browser
Below is the Step Definition for the above feature file.
import io.cucumber.java.en.Given;

public class ConditionalHooksExampleDefinitions {

	@Given("I want to open Google Chrome Browser")
	public void chrome() throws Throwable {
	    System.out.println("I want to open Google Chrome Browser");
	}

	@Given("I want to open Mozilla Firefox Browser")
	public void firefox() throws Throwable {
		System.out.println("I want to open Mozilla Firefox Browser");
	}

	@Given("I want to open Microsoft Edge Browser")
	public void edge() throws Throwable {
		System.out.println("I want to open Microsoft Edge Browser");
	}

}
Hooks can be defined in the same class or different. I have defined Hooks in a separate class.
import io.cucumber.java.After;
import io.cucumber.java.AfterStep;
import io.cucumber.java.Before;
import io.cucumber.java.BeforeStep;

public class Hooks {

	@BeforeStep
    public void beforeStep(){
        System.out.println("@@@@@@@@@@@@@@@ Before Step @@@@@@@@@@@@@@@@@");
    }

	@AfterStep
    public void afterStep(){
        System.out.println("@@@@@@@@@@@@@@@@  After Step @@@@@@@@@@@@@@@@");
    }

	@Before("@ChromeBrowser")
    public void beforeGoogle(){
        System.out.println("******* before Chrome *******");
    }

	@Before("@FireFoxBrowser")
    public void beforeFirefox(){
        System.out.println("$$$$$$$$$$ before FireFox $$$$$$$$$$");
    }

	@Before("@EdgeBrowser")
    public void beforeEdge(){
		System.out.println("============ before Edge =============");
    }

	@After("@ChromeBrowser")
    public void afterGoogle(){
        System.out.println("********* After Google *********");
    }

	@After("@FireFoxBrowser")
    public void afterFireFox(){
		System.out.println("$$$$$$$$$$$ After FireFox $$$$$$$$$$");
    }

	@After("@EdgeBrowser")
    public void afterEdge(){
        System.out.println("============ After Edge ==============");
    }

}
There is no change in the Test Runner Class.
import org.junit.runner.RunWith;
import io.cucumber.junit.Cucumber;
import io.cucumber.junit.CucumberOptions;

@RunWith(Cucumber.class)
@CucumberOptions(monochrome = true, plugin = "pretty", features = "src/test/resources/features/ConditionalHooks.feature", tags = {
		"" })

public class MyRunnerTests {

}
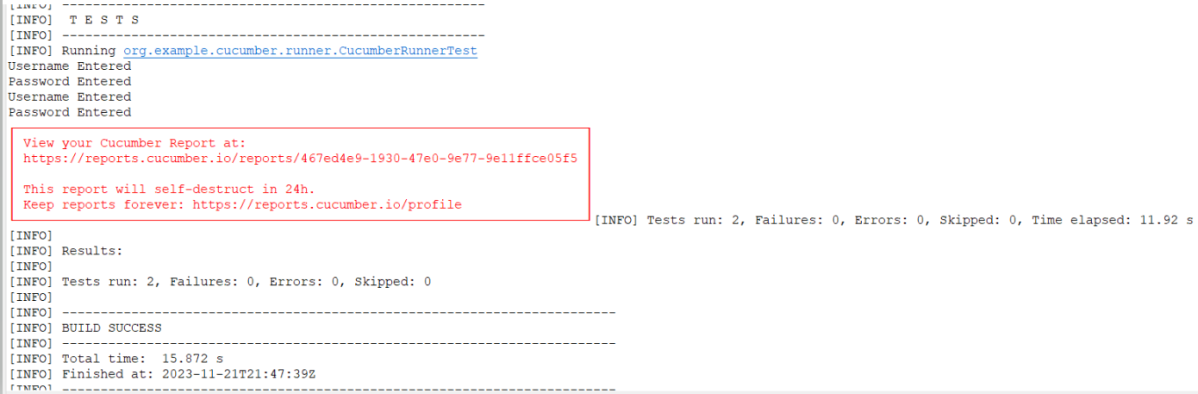
The output of the above execution is
At the start of execution, @Before(“@ChromeBrowser”) {Scenario Hook} is executed.
After that @BeforeStep (Step Hook) hook is executed.
The given statement of the @ChromeBrowser tag is executed in the third step.
The fourth step is to execute @AfterStep.
Now, at last, the @After(“@ChromeBrowser”) hook is executed. Similarly, the same sequence is followed for FireFox and Edge Scenarios.
Congratulations on making it through this tutorial and hope you found it useful! Happy Learning!! Cheers!!
requests.patch(url,data=data) – function sends a PATCH request to the specified URL with the provided data. The data dictionary contains the key-value pairs that we want to send in the PATCH request payload. You can modify it based on the requirements of the API we are working with.
The response object contains information about the response, including the status code and the response content.
The output of the above program is
We are done! Congratulations on making it through this tutorial and hope you found it useful! Happy Learning!!
Allure Framework is a lightweight, flexible multi-language test report tool that not only displays a very concise representation of what has been tested in a neat web report form, but also allows everyone involved in the development process to extract the most useful information from everyday test execution.