In the previous tutorial, I explained how to download and install IntelliJ on Windows. In this tutorial, I will explain how to create a Java project in IntelliJ.
Steps to follow:
- Open the IntelliJ. It will look as shown below. To create a New Project, click on the “New Project” Icon.

2. Select Project SDK as the Java version present on your system and select the option as Java. Click on the “Next” button.

3. The next screen provides options to choose Project Template as shown below. Click on the “Next” Button.

4. I have mentioned the Project Name as Java Demo and the path where I want to save my project on my computer.
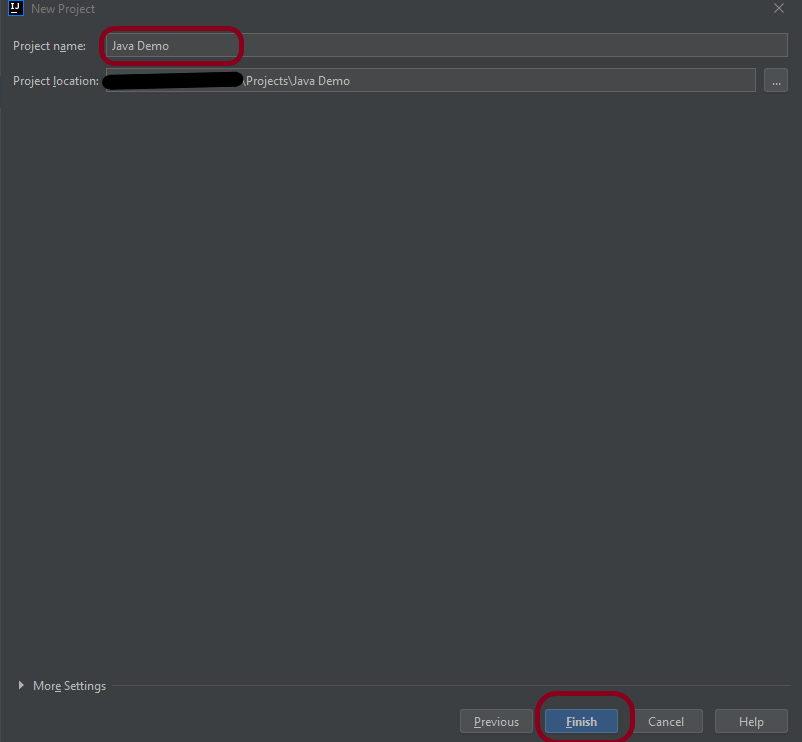
5. Click on the “Finish” Button to create the project. It will also ask to create the directory as shown below.

6. Click the “Create” button to grant permission. It will launch IDE as shown below.
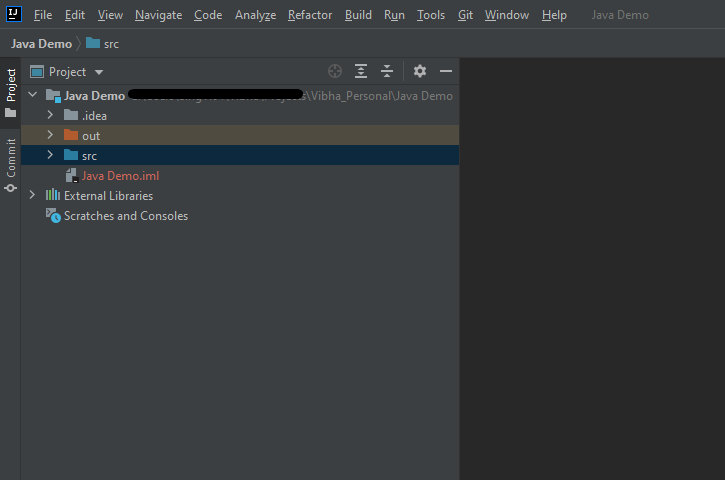
Now, I have created a new Java Project named Java Demo. Let me create a new Java Class – HelloWorld.
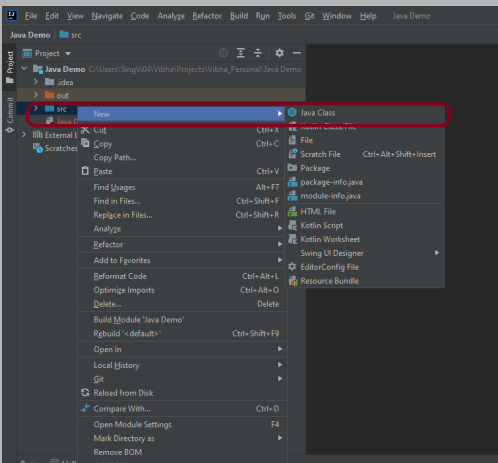
- Expand the Project Hello Word and right-click on the src folder, hover on New Option, and click on Java Class Option as shown below.
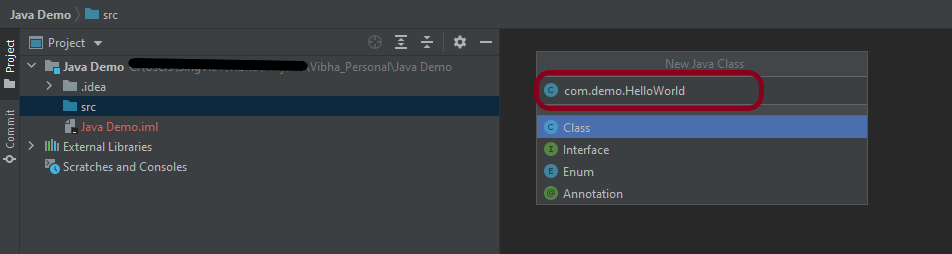
2. I have provided the Java Filename with the package as shown in the below image. Now press the Enter Key to create the packages and Java file.
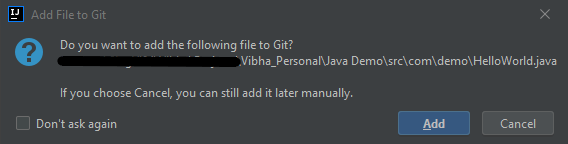
3. It will show a message to Add the File to Git. Depending on your requirement, select Add or Cancel. I don’t want to add the File to Git, so selected Cancel.
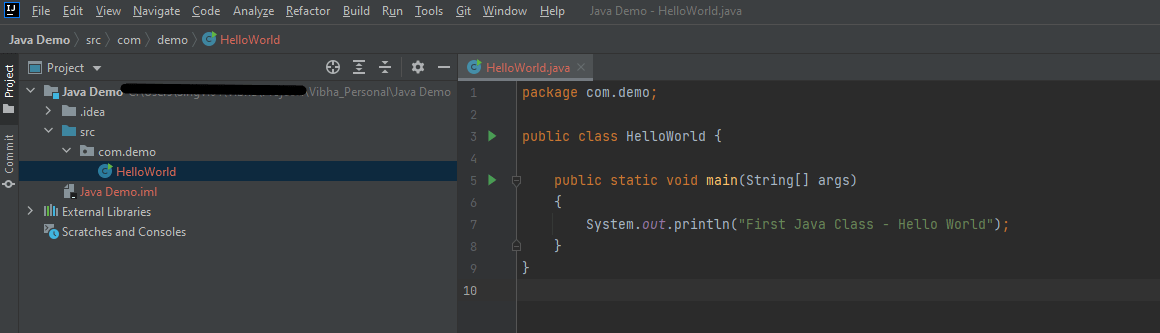
4. I have updated the “HelloWorld” class to print the first Java Class – Hello World on the console, as shown in the below image.
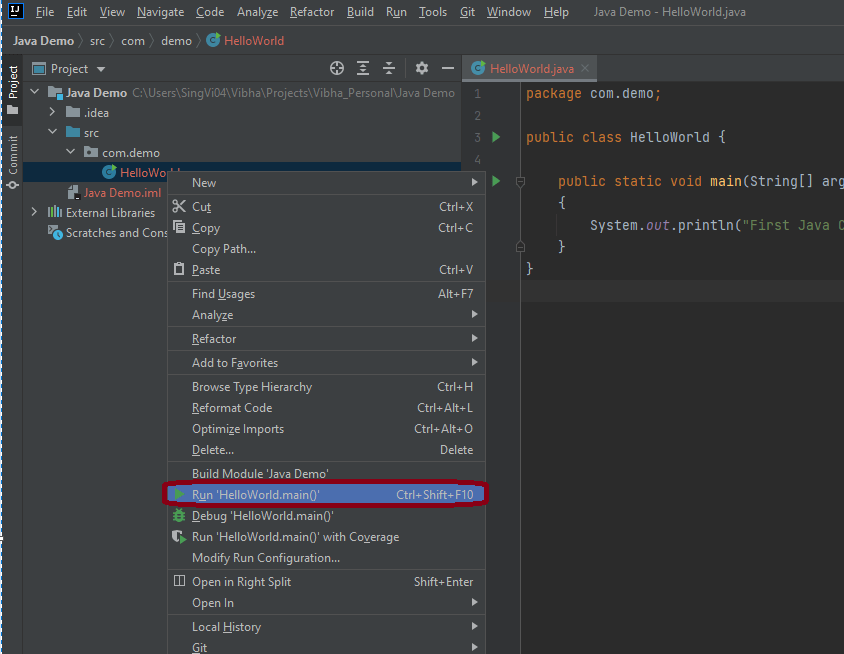
5. Now right-click on the “HelloWorld” class file and choose “Run HelloWorld.main()” Option or press Ctrl + Shift + F10 to compile and execute the program as shown in the below image. It will also build the project.
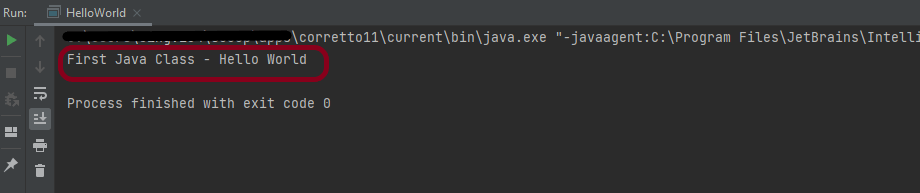
6. The final output of the program will be displayed on the console as shown below.
This is how we can create the Java Demo project to execute our first program in Java – HelloWorld.
That’s it! Congratulations on making it through this tutorial and hope you found it useful! Happy Learning!!
