In the last tutorial, I have explain the Parameters in TestNG which passes different test data to the test case as arguments. Similar to TestNG Parameters, DataProviders are a means to pass data to test scripts in TestNG. In this tutorial, I will explain about the DataProviders in TestNG.
What is DataProvider in TestNG?
The DataProvider in TestNG is another way to pass the parameters in the test function, the other one being TestNG parameters. Using DataProvider in TestNG, we can easily inject multiple values into the same test case. It comes inbuilt in TestNG and is popularly used in data-driven frameworks.
Syntax of DataProvider
@DataProvider (name = "name_of_dataprovider")
public Object[][] dpMethod() {
    return new Object [][] { values}
}
- A Data Provider is a method on the class that returns an array of array of objects. This method is annotated with @DataProvider
- A @Test method specifies its Data Provider with the dataProvider attribute. This name must correspond to a method on the same class annotated with @DataProvider(name=”…”) with a matching name.
- TestNG dataprovider returns a 2d list of objects..An array of array of objects (Object[][]) where the first dimension’s size is the number of times the test method will be invoked and the second dimension size contains an array of objects that must be compatible with the parameter types of the test method.
- DataProviders are not declared on top of the functions like TestNG parameters but have a method of their own, which in regular speaking terms called a dataprovider method. For example, dpMethod here.
- The dataprovider name calls the dataprovider method, and if there is no name specified by the tester, then the dataprovider method is the default name used in the receiving
@Testcase. - Data providers can run in parallel with the attribute parallel.
Below is the basic example of using DataProvider in TestNG.
import org.openqa.selenium.By;
import org.openqa.selenium.Keys;
import org.openqa.selenium.WebDriver;
import org.openqa.selenium.WebElement;
import org.openqa.selenium.chrome.ChromeDriver;
import org.openqa.selenium.chrome.ChromeOptions;
import org.testng.annotations.AfterMethod;
import org.testng.annotations.BeforeMethod;
import org.testng.annotations.DataProvider;
import org.testng.annotations.Test;

public class DataProvider_Demo {

    WebDriver driver;

    @DataProvider(name = "testData")
    public Object[][] dataProvFunc() {
        return new Object[][] { { "Selenium" }, { "TestNG" } };
    }

    @BeforeMethod
    public void setUp() {

        System.out.println("Start the test");
        ChromeOptions options = new ChromeOptions();
        options.addArguments("--start-maximized");
        driver = new ChromeDriver(options);
        driver.get("https://www.bing.com/");

    }

    // Passing the dataProvider to the test method through @Test annotation
    @Test(dataProvider = "testData")
    public void search(String keyWord) {
        WebElement txtBox = driver.findElement(By.id("sb_form_q"));
        txtBox.sendKeys(keyWord);
        System.out.println("Keyword entered is : " + keyWord);
        txtBox.sendKeys(Keys.ENTER);
        System.out.println("Search result is displayed.");
    }

    @AfterMethod
    public void burnDown() {
        driver.quit();

        System.out.println("End the test");
    }

}
In the above example, I am passing two search keywords, viz “Selenium” and “TestNG” to the test method using the DataProvider method. You can run the code and check the output.
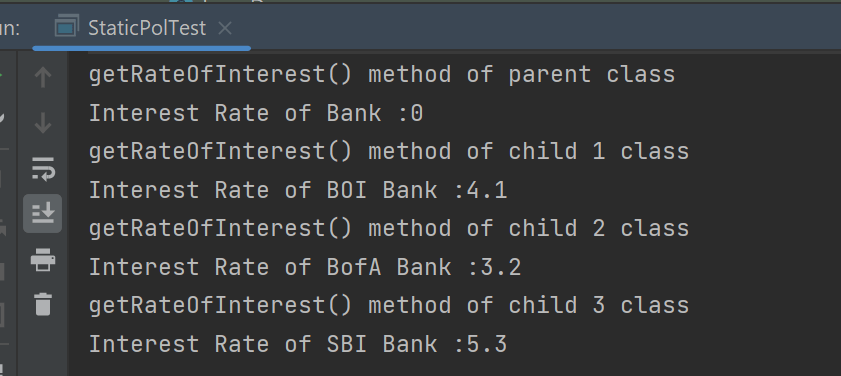
The output of the above program is

Here, Test is executed with two values, but we have run the test only once.
Inheriting DataProvider in TestNG
It is messy to have supporting methods like DataProvider and test code in one class. It is always preferred to declare the test case in one class and define TestNG parameters like DataProviders in another class. By default, the data provider will be looked for in the current test class or one of its base classes. If you want to put your data provider in a different class, it needs to be a static method or a class with a non-arg constructor, and you specify the class where it can be found in the dataProviderClass attribute.
Let us create separate classes for the DataProvider method and the test method, as shown below:
DataProvider Class
public class DPDemo {

	@DataProvider(name = "testData")
	public Object[][] dataProvFunc() {
		return new Object[][] {
          { "Selenium" }, { "TestNG" }, { "Automation" } };
	}
}
We can see that all we did was create a DataProvider method in a Class and create a new class for Test Code.
import org.openqa.selenium.By;
import org.openqa.selenium.Keys;
import org.openqa.selenium.WebDriver;
import org.openqa.selenium.WebElement;
import org.openqa.selenium.chrome.ChromeDriver;
import org.openqa.selenium.chrome.ChromeOptions;
import org.testng.annotations.AfterMethod;
import org.testng.annotations.BeforeMethod;
import org.testng.annotations.Test;

public class DataProviderInheritance_Demo {

    WebDriver driver;

    @BeforeMethod
    public void setUp() {

        System.out.println("Start the test");
        ChromeOptions options = new ChromeOptions();
        options.addArguments("--start-maximized");
        driver = new ChromeDriver(options);
        driver.get("https://www.bing.com/");

    }

    // Passing the dataProvider to the test method through @Test annotation
    @Test(dataProvider = "testData", dataProviderClass = DPDemo.class)
    public void search(String keyWord) {
        WebElement txtBox = driver.findElement(By.id("sb_form_q"));
        txtBox.sendKeys(keyWord);
        System.out.println("Keyword entered is : " + keyWord);
        txtBox.sendKeys(Keys.ENTER);
        System.out.println("Search result is displayed.");
    }

    @AfterMethod
    public void burnDown() {
        driver.quit();
        System.out.println("End the test");
    }

}
As you can see, to handle the inheritance, all we did was add an attribute to the test method (highlighted above), which specifies the class that has the DataProvider method.
The output of the above program is

Passing Multiple Parameter Values in TestNG DataProviders
Passing multiple values is pretty similar to passing numerous parameters. The only difference is that we will pass various values to a single parameter so that a string of input(s) is sent in one go.
Let us quickly understand this concept with the help of the code as shown below.
DataProvider Class
public class DPDemo {

	@DataProvider(name = "testData")
	public Object[][] dataProvFunc() {
		return new Object[][] { { "Automation Tester", "2-5 years" }, { "Performance Tester", "3+ years" },
				{ "DevOps", "5+ years" } };
	}
}
Test Code – DataProviderInheritanceDemo
import org.openqa.selenium.By;
import org.openqa.selenium.Keys;
import org.openqa.selenium.WebDriver;
import org.openqa.selenium.WebElement;
import org.openqa.selenium.chrome.ChromeDriver;
import org.openqa.selenium.chrome.ChromeOptions;
import org.testng.annotations.AfterMethod;
import org.testng.annotations.BeforeMethod;
import org.testng.annotations.Test;

public class DataProviderInheritanceDemo {

    WebDriver driver;

    @BeforeMethod
    public void setUp() {

        System.out.println("Start the test");
        ChromeOptions options = new ChromeOptions();
        options.addArguments("--start-maximized");
        driver = new ChromeDriver(options);
        driver.get("https://www.bing.com/");

    }

    // Passing the dataProvider to the test method through @Test annotation
    @Test(dataProvider = "testData", dataProviderClass = DPDemo.class)
    public void search(String keyWord1, String keyWord2) {

        WebElement txtBox = driver.findElement(By.id("sb_form_q"));
        txtBox.sendKeys(keyWord1, keyWord2);
        System.out.println("Keyword entered is : " + keyWord1 + " " + keyWord2);
        txtBox.sendKeys(Keys.ENTER);
        System.out.println("Search result is displayed.");
    }

    @AfterMethod
    public void burnDown() {
        driver.quit();
        System.out.println("End the test");
    }
}
Run the test script, and you will see both the values for the TestNG parameters being passed in one go.
The output of the above program is

We are done! Congratulations on making it through this tutorial and hope you found it useful! Happy Learning!!