Gson is a Java library that can be used to convert Java Objects into their JSON representation. It can also be used to convert a JSON string to an equivalent Java object. Gson can work with arbitrary Java objects, including pre-existing objects those you do not have source code.
Provide simple toJson() and fromJson() methods to convert Java objects to JSON and vice-versa.
Allow pre-existing unmodifiable objects to be converted to and from JSON.
Extensive support of Java Generics.
Allow custom representations for objects.
Support arbitrarily complex objects (with deep inheritance hierarchies and extensive use of generic types).
Add the below dependency to POM.xml to use Gson API.
Let us create a table named Employee which contains the data members same as node names in the above JSON payload and their corresponding getter and setter methods.
public class Employee {

	// private data members of POJO class
	private String firstName;
	private String lastName;
	private int age;
	private double salary;
	private String designation;
	private String contactNumber;
	private String emailId;

	// Getter and setter methods
	public String getFirstName() {
		return firstName;
	}

	public void setFirstName(String firstName) {
		this.firstName = firstName;
	}

	public String getLastName() {
		return lastName;
	}

	public void setLastName(String lastName) {
		this.lastName = lastName;
	}

	public int getAge() {
		return age;
	}

	public void setAge(int age) {
		this.age = age;
	}

	public double getSalary() {
		return salary;
	}

	public void setSalary(double salary) {
		this.salary = salary;
	}

	public String getDesignation() {
		return designation;
	}

	public void setDesignation(String designation) {
		this.designation = designation;
	}

	public String getContactNumber() {
		return contactNumber;
	}

	public void setContactNumber(String contactNumber) {
		this.contactNumber = contactNumber;
	}

	public String getEmailId() {
		return emailId;
	}

	public void setEmailId(String emailId) {
		this.emailId = emailId;
	}

}
We will convert a Java Object to a JSON object as a String and also will write it into a .json file. There are many variations for the method toJson().
You can create a Gson instance by invoking a new Gson() if the default configuration is all you need, as shown in the below example.
You can also use GsonBuilder to build a Gson instance with various configuration options such as versioning support, pretty-printing, custom JsonSerializer, JsonDeserializer.
import com.google.gson.Gson;
import com.google.gson.GsonBuilder;
import org.junit.Test;

public class EmployeeGsonTest {

    @Test
    public void gsonSerializationTest()  {

        // Create an object of POJO class
        Employee employee = new Employee();
        employee.setFirstName("Vibha");
        employee.setLastName("Singh");
        employee.setAge(30);
        employee.setSalary(75000);
        employee.setDesignation("Manager");
        employee.setContactNumber("+919999988822");
        employee.setEmailId("abc@test.com");

        Gson gson = new Gson();
        String employeeJsonPayload = gson.toJson(employee);
        System.out.println("Json :" + employeeJsonPayload);

        Gson builder = new GsonBuilder().setPrettyPrinting().create();
        String employeePrettyJsonPayload = builder.toJson(employee);
        System.out.println("Pretty Json :" + employeePrettyJsonPayload);

    }
}
The execution message is shown below.
We are done! Congratulations on making it through this tutorial and hope you found it useful! Happy Learning!!
Cucumber is not an API automation tool, but it works well with other API automation tools.
There are 2 most commonly used Automation Tools for JVM to test API – Rest-Assured and Karate. In this tutorial, I will use RestAssured with Cucumber and JUnit4 for API Testing.
REST Assured is a Java library that provides a domain-specific language (DSL) for writing powerful, maintainable tests for RESTful APIs. REST Assured can be used easily in combination with existing unit testing frameworks, such as JUnit and TestNG. Rest assured, no matter how complex the JSON structures are, Rest Assured has methods to retrieve data from almost every part of the request and response.
What is Cucumber?
Cucumber is one such open-source tool, which supports Behaviour Driven Development(BDD). In simple words, Cucumber can be defined as a testing framework, driven by plain English. It serves as documentation, automated tests, and development aid – all in one.
Each scenario is a set of steps that the Cucumber must complete. Cucumber validates the software’s compliance with the specification and generates a report indicating success or failure for each scenario.
The cucumber must adhere to some basic syntax rules known as Gherkin in order to comprehend the scenarios.
In this tutorial, I will explain creating a framework for the testing of Rest API in Cucumber BDD.
This framework consists of:
Cucumber – 7.18.0
Java 17
JUnit – 4.13.2
Maven – 3.9.6
Rest Assured – 5.4.0
Maven Compiler – 3.13.0
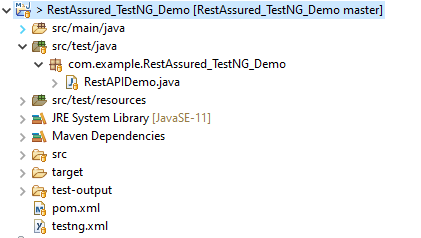
Project Structure
Implementation Steps
Step 1 – Download and Install Java
Cucumber and Rest-Assured need Java to be installed on the system to run the tests. Click here to know How to install Java.
Step 2 – Download and setup Eclipse IDE on the system
The Eclipse IDE (integrated development environment) provides strong support for Java developers. Click here to know How to install Eclipse.
Step 3 – Setup Maven
To build a test framework, we need to add several dependencies to the project. Click here to know How to install Maven.
Step 4 – Create a new Maven Project
File -> New Project-> Maven-> Maven project-> Next -> Enter Group ID & Artifact ID -> Finish
Step 5 – Install the Cucumber Eclipse plugin for the Eclipse project(Eclipse Only)
The Cucumber plugin is an Eclipse plugin that allows eclipse to understand the Gherkin syntax. Cucumber Eclipse Plugin highlights the keywords present in Feature File. To install Cucumber Eclipse Plugin, please refer to this tutorial – How to install Cucumber Eclipse Plugin.
Step 6 – Create source folder src/test/resources
Create source folder src/test/resources to create test scenarios in the Feature file.
A new Maven Project is created with 2 folders – src/main/java and src/test/java. To create test scenarios, we need a new source folder called – src/test/resources. To create this folder, right-click on your maven project ->select New ->Java and then Source Folder.
Mention the source folder name as src/test/resources and click the Next button. This will create a source folder under your new Maven project as shown in the below image.
Step 7 – Add Rest-Assured and Cucumber dependencies to the project
You should place rest-assured before the JUnit dependency declaration in your pom.xml / build.gradle to make sure that the correct version of Hamcrest is used. REST Assured includes JsonPath and XmlPath as transitive dependencies.
The compiler plugin is used to compile the source code of a Maven project. This plugin has two goals, which are already bound to specific phases of the default lifecycle:
Step 9 – Create a feature file under src/test/resources
Create a folder with name features. Now, create the feature file in this folder. The feature file should be saved with extension .feature. This feature file contains the test scenarios created to test the application. The Test Scenarios are written in Gherkins language in the format of Given, When, Then, And, But.
Below is an example of a Test Scenario where we are using the GET method to get the information from the API.
Feature: Validation of get method

  @GetUserDetails
  Scenario Outline: Send a valid Request to get user details

    Given I send a request to the URL to get user details
    Then the response will return status <statusCode> and id <id> and email "<employee_email>" and first name "<employee_firstname>" and last name "<employee_lastname>"

    Examples:
    | statusCode | id  | employee_email          | employee_firstname | employee_lastname |
    | 200        | 2   | janet.weaver@reqres.in  | Janet              | Weaver            |
Step 10 – Create the Step Definition class or Glue Code for the Test Scenario
StepDefinition acts as an intermediate to your runner and feature file. It stores the mapping between each step of the scenario in the Feature file. So when you run the scenario, it will scan the step definition file to check the matched glue or test code.
import io.cucumber.java.en.Given;
import io.cucumber.java.en.Then;
import io.restassured.http.ContentType;
import io.restassured.response.ValidatableResponse;

import static io.restassured.RestAssured.given;
import static org.hamcrest.Matchers.equalTo;

public class APIDemoDefinitions {
    private ValidatableResponse validatableResponse;
    private String endpoint = "https://reqres.in/api/users/2";

    @Given("I send a request to the URL to get user details")
    public void sendRequest(){
        validatableResponse = given().contentType(ContentType.JSON)
                .when().get(endpoint).then();

        System.out.println("Response :"+validatableResponse.extract().asPrettyString());
    }

    @Then("the response will return status {int} and id {int} and email {string} and first name {string} and last name {string}")
    public void verifyStatus(int expectedStatusCode, int expectedId, String expectedEmail, String expectedFirstName, String expectedLastName){

        validatableResponse.assertThat().statusCode(expectedStatusCode);

        validatableResponse.assertThat().body("data.id",equalTo(expectedId));

        validatableResponse.assertThat().body("data.email",equalTo(expectedEmail));

        validatableResponse.assertThat().body("data.first_name",equalTo(expectedFirstName));

        validatableResponse.assertThat().body("data.last_name",equalTo(expectedLastName));

    }
}
In order to use REST assured effectively it’s recommended to statically import methods from the following classes:
There is another way to perform these assertions. We can use multiple body assertions together.
@Then("the response will return status {int} and id {int} and email {string} and first name {string} and last name {string}")
    public void verifyStatus(int expectedStatusCode, int expectedId, String expectedEmail, String expectedFirstName, String expectedLastName){

   validatableResponse.assertThat().statusCode(expectedStatusCode).body("data.id",equalTo(expectedId)).and()
                .body("data.email",equalTo(expectedEmail)).body("data.first_name",equalTo(expectedFirstName))
                .body("data.last_name",equalTo(expectedLastName));
Step 11 – Create a JUnit Cucumber Runner class
A runner will help us to run the feature file and act as an interlink between the feature file and StepDefinition Class.
import io.cucumber.junit.Cucumber;
import io.cucumber.junit.CucumberOptions;
import org.junit.runner.RunWith;

@RunWith(Cucumber.class)
@CucumberOptions(features= {"src/test/resources"}, glue= {"com.example.stepdefinitions"})
public class CucumberRunnerTests {
}
Note:- The name of the Runner class should end with Test otherwise we can’t run the tests using Command-Line.
Step 12 – Run the tests from JUnit
You can execute the test script by right-clicking on TestRunner class -> Run As JUnit (Eclipse).
You can execute the test script by right-clicking on TestRunner class -> Run CucumberRunnerTests (IntelliJ).
Step 13 – Run the tests from the Command Line
Run the below command in the command prompt to run the tests and to get the test execution report.
mvn clean test
The output of the above program is
Step 14 – Cucumber Report Generation
To get Cucumber Test Reports, add cucumber.properties under src/test/resources and add the below instruction in the file.
cucumber.publish.enabled=true
We are done! Congratulations on making it through this tutorial and hope you found it useful! Happy Learning!!
In the last tutorial, I explained the Setup of the REST Assured Maven Project In Eclipse IDE. In this tutorial, I will automate a GET Request. I will verify the status code, line of Status, and content of the Response.
RestAssured is a class that consists of many static fields and methods. It supports POST, GET, PUT, DELETE, HEAD, PATCH, and OPTIONS requests and verifies the response to these requests.
Add the below-mentioned dependencies to the pom.xml.
Step 2 – Every Request in the Rest-Assured library is represented by an interface called RequestSpecification. This interface allows modification of the request, like adding headers or adding authentication details.
requestSpecification = RestAssured.given();
RequestSpecification is imported from the package:
Step 3 – Send the request to the server and receive the response to the request made by REST Assured. This response contains every detail returned by hitting request i.e. response body, response headers, status code, status lines, cookies, etc.
response = requestSpecification.get();
The response is imported from package:
import io.restassured.response.Response;
Step 4 – To validate a response like status code or value, we need to acquire a reference. This reference should be of type ValidatableResponse. ValidatableResponse is an interface. A validatable response to a request made by, REST Assured. ValidatableResponse is imported from the package:
PrettyPrint() – It prints the response body if possible and returns it as a string. Pretty printing is possible for content-types JSON, XML, and HTML.
Below is an example of creating a test in Non-BDD format. I have used ValidatableResponse for the assertion of the status. It is also used for the status line of the Response.
import io.restassured.RestAssured;
import io.restassured.response.Response;
import io.restassured.response.ValidatableResponse;
import io.restassured.specification.RequestSpecification;
import org.junit.Test;

public class Get_NonBDDDemo {
    RequestSpecification requestSpecification;
    Response response;
    ValidatableResponse validatableResponse;

    @Test
    public void verifyStatusCode() {

        RestAssured.baseURI = "http://dummy.restapiexample.com/api/v1/employees";

        // Create a request specification
        requestSpecification = RestAssured.given();

        // Calling GET method
        response = requestSpecification.get();

        // Let's print response body.
        String resString = response.prettyPrint();
        System.out.println("Response Details : " + resString);

        /*
         * To perform validation on response, we need to get ValidatableResponse type of
         * response
         */
        validatableResponse = response.then();

        // Get status code
        validatableResponse.statusCode(200);

        // Check status line is as expected
        validatableResponse.statusLine("HTTP/1.1 200 OK");

    }
}
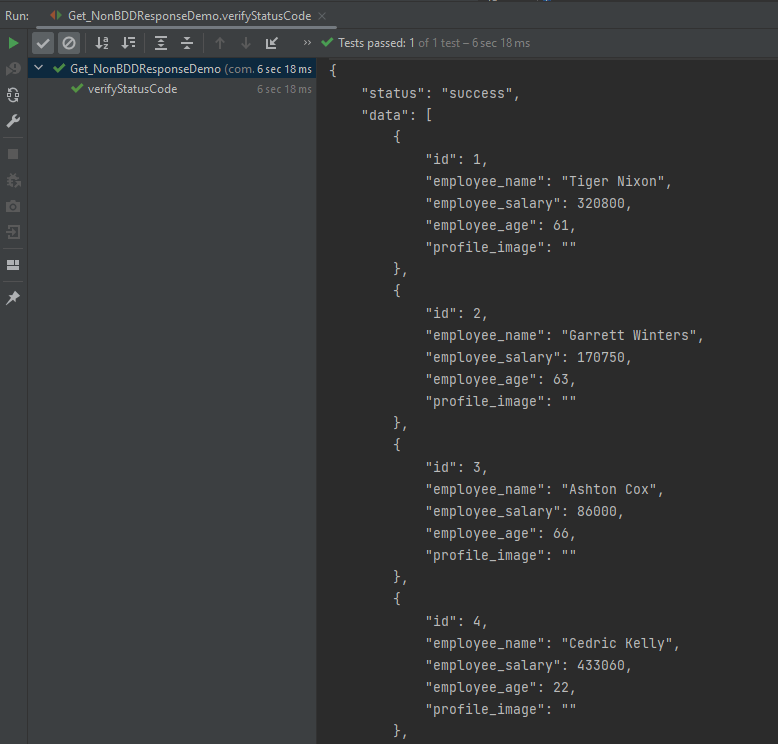
The output of the above program is
If you don’t want to use ValidatableResponse for the assertion, you can use Response from io.restassured .response to get the status code and status line, which are asserted using JUnit.Assert.
import io.restassured.RestAssured;
import io.restassured.response.Response;
import io.restassured.response.ValidatableResponse;
import io.restassured.specification.RequestSpecification;
import org.junit.Assert;
import org.junit.Test;

public class Get_NonBDDResponseDemo {
    RequestSpecification requestSpecification;
    Response response;

    @Test
    public void verifyStatusCode() {

        RestAssured.baseURI = "http://dummy.restapiexample.com/api/v1/employees";

        // Create a request specification
        requestSpecification = RestAssured.given();

        // Calling GET method
        response = requestSpecification.get();

        // Let's print response body.
        String resString = response.prettyPrint();
        System.out.println("Response Details : " + resString);

        // Get status line
        String statusLine = response.getStatusLine();
        Assert.assertEquals(statusLine, "HTTP/1.1 200 OK");

        // Get status code
        int statusCode = response.getStatusCode();
        Assert.assertEquals(statusCode, 200);

    }
}
The output of the above program is
Below is an example of a specific user in GET Request in Postman.
Below is the test implemented in BDD Format. In this test, I am asserting the data of Employee of Id 2. I have validated the name of the employee as well as the response message.
1. equalTo is used for assertion, andis imported from a static hamcrest package:
import static org.hamcrest.Matchers.equalTo;
2. givenis a static import from package:
import static io.restassured.RestAssured.given;
Let us see this with an example.
import org.junit.Test;
import static io.restassured.RestAssured.given;
import static org.hamcrest.CoreMatchers.equalTo;

public class Get_BDDDemo {

    @Test
    public void verifyUser() {

        // Given
        given()

                // When
                .when()
                .get("http://dummy.restapiexample.com/api/v1/employee/2")

                // Then
                .then()
                .statusCode(200).statusLine("HTTP/1.1 200 OK")

                // To verify booking id at index 3
                .body("data.employee_name", equalTo("Garrett Winters"))
                .body("message", equalTo("Successfully! Record has been fetched."));
    }

}
The output of the above program is
Explanation
1.This is the preconditionblock. It is used to specify headers, parameters, authentication, etc. In this example, it’s empty, meaning no special setup is needed for this GET request.
given
2. It performs a GET request to the given URL. It is trying to get the employee with id = 2.
JUnit is an open source Unit Testing Framework for JAVA. JUnit is a simple framework to write repeatable tests. It is an instance of the xUnit architecture for unit testing frameworks.
The PATCH method is used to partially modify an existing resource. This operation updates an existing resource but does not require sending the entire body with the request. PUT modifies a record’s information and creates a new record if one is not available, and PATCH updates a resource without sending the entire body of the request. Unlike PUT Request, PATCH does partial update e.g. Fields that need to be updated by the client, only that field is updated without modifying the other field.
We will use the following URL for this Postman tutorial.
https://reqres.in/api/users/2
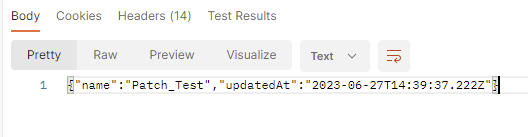
Sample Request Body
{
"name": "Patch_Test"
}
Implementation Steps:
To create the first PATCH request in Postman, follow the following steps:
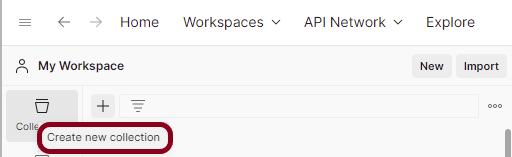
Create a Collection
Step 1: Create a Collection, click on Collections, and then click on the “+” plus button.
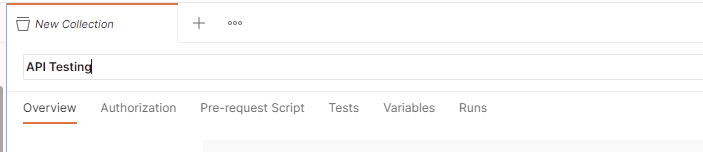
Step 2: Provide a name to the collection – “API Testing”.
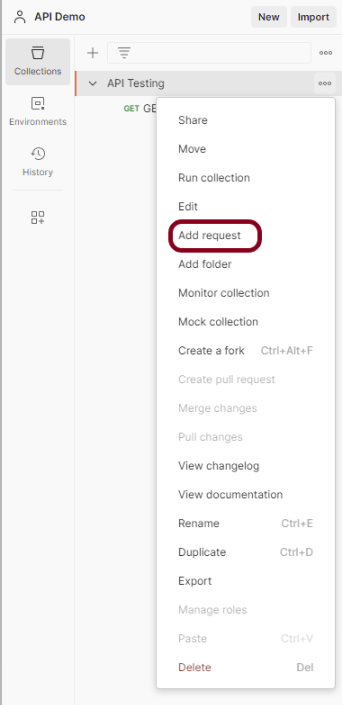
Add a request to the Collection
Step 3: To create a new request, click on “Add a request” if it is a new Collection. Otherwise, click on the 3 dots and select “Add request”.
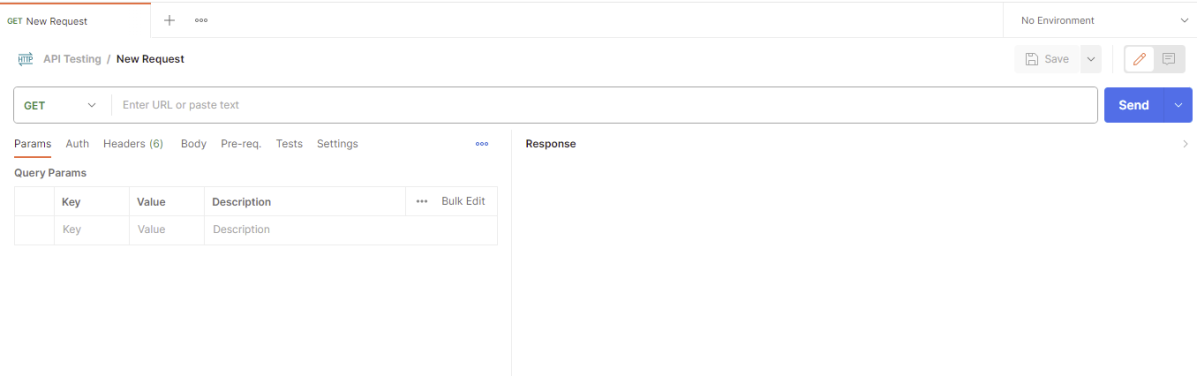
Step 4: Once you create a new request, then you will get the following window:
Enter the details of request
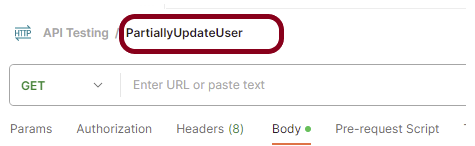
Step 5: Enter the “name” in the request. Here, the name is “PartiallyUpdateUser”.
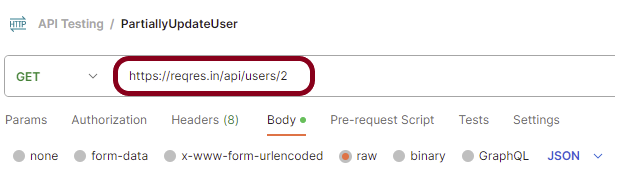
Step 6:Enter the “URL” in the address bar.
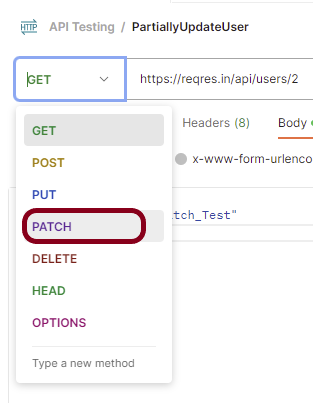
Step 7:Now, select the “PATCH” request from the list of request methods.
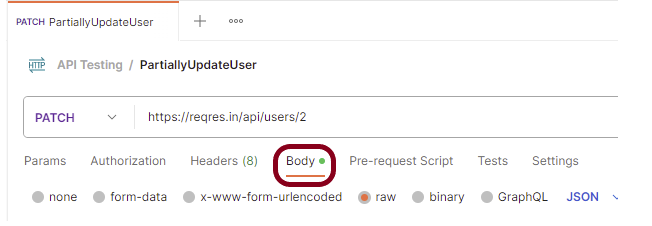
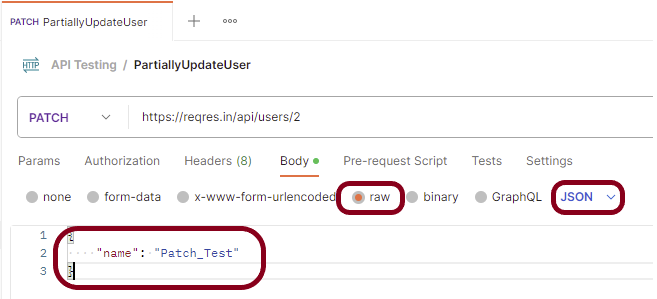
Step 8: Add a Request body to the Post request
For this, select the Body tab.
Now in the Body tab, select raw and select JSON as the format type from the drop-down menu, as shown in the image below. This is done because we need to send the request in the appropriate format that the server expects. Copy and paste the request body example mentioned at the beginning of the tutorial to the postman request Body.
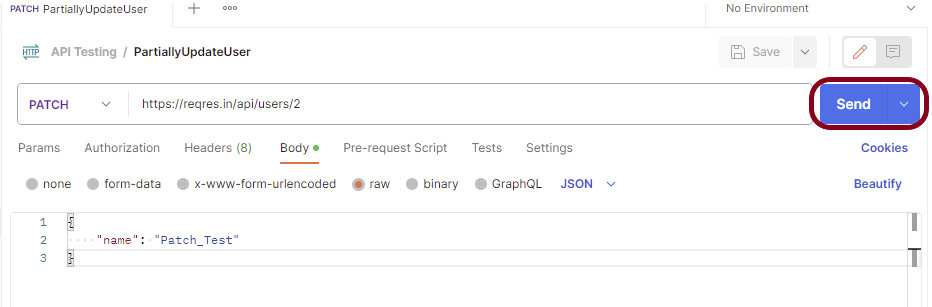
Step 9: Press the “Send” button.
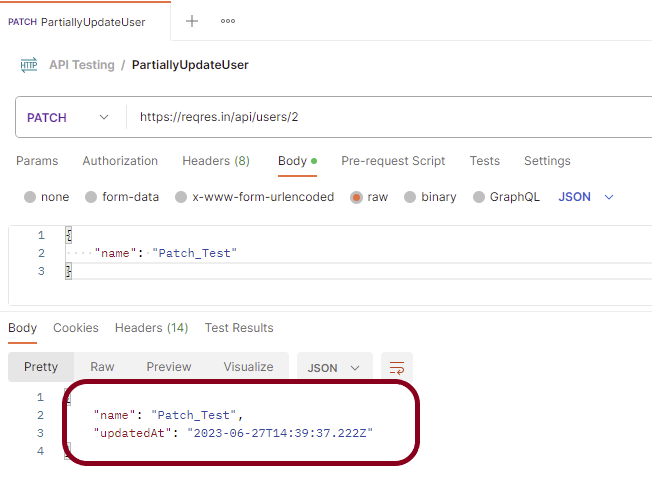
Verify the Response
Step 10: Once you press the send button, you will get the response from the server. Make sure you have a proper internet connection; otherwise, you will not get a response.
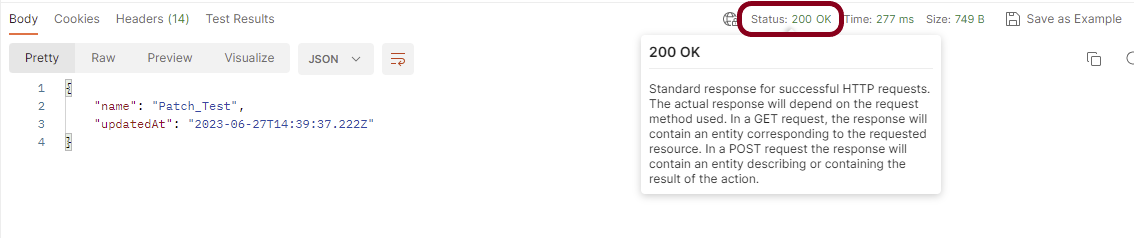
Status
You can check the status code. Here, we got the status code 200, which means we got a successful response to the request. In the case of new resource creation, the status code should be 201. But as this is a dummy API, we are getting a status code of 200.
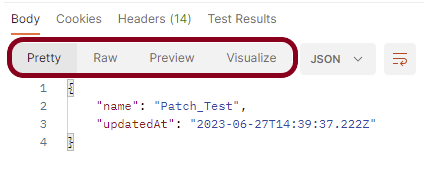
Body
In the Body tab of the response box, we have multiple options to see the response in a different format.
Format Type
Each request has a defined response to it as defined by the Content-Type header. That response can be in any format. Such as in the above example, we have JSON code file.
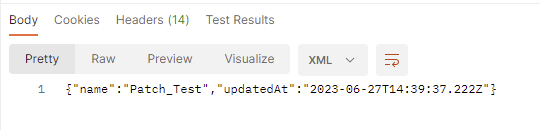
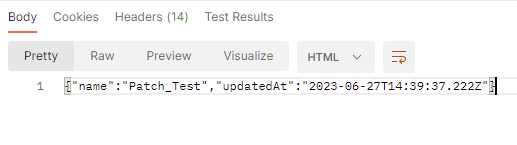
Below are the various format type present in Postman.
XML
HTML
Text
Headers
Headers are the extra information that is transferred to the server or the client. In Postman, headers will show like key-value pairs under the headers tab. Click on the Headers link as shown in the below image:
We are done! Congratulations on making it through this tutorial and hope you found it useful! Happy Learning!!
JSONArrayrepresents an immutable JSON array (an ordered sequence of zero or more values). It also provides an unmodifiable list view of the values in the array.
JSON array can store multiple value types. The values in a JSONArray can be of the following types: JsonObject, JsonArray, JsonString, JsonNumber, JsonValue.TRUE, JsonValue.FALSE, and JsonValue.NULL.
The array index begins with 0.
The square brackets [ ] are used to declare the JSON array.
An API can accept a JSON Array payload as a request body. Imagine, we want to add employee details of more than one employee in the below example. In this case, we can pass multiple JSON objects within a JSON array. I have explained 2 ways to create JSON Object – map or JsonObject. Refer to any one of the tutorials to get to know about the creation of JSON Object.
To create a JSON Array, we need to add org.jsonMaven dependency, as shown below. The latest version can be found here.
Create a JSON Object and add the first employee details.
Create another JSON Object and add second guest details.
Create a JSONArray.
Add both JSON Objects to JSONArray.
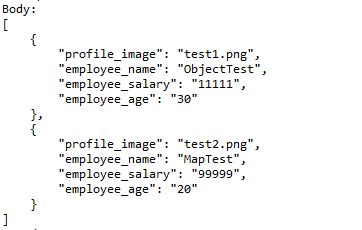
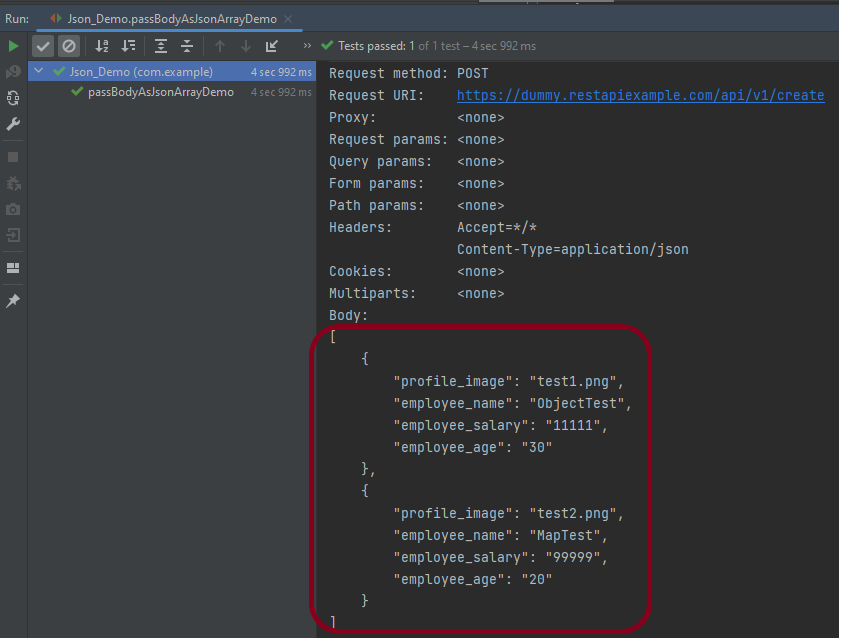
Below is an example of creating a request from JSONArray with multiple JSON Objects. I am using a logger just to print the JSON body in the Console.
import io.restassured.RestAssured;
import io.restassured.http.ContentType;
import org.json.JSONArray;
import org.json.JSONObject;
import org.junit.Test;
import static org.hamcrest.Matchers.equalTo;
public class Json_Demo {
@Test
public void passBodyAsJsonArrayDemo() {
// JSON Object for first employee
JSONObject data1 = new JSONObject();
data1.put("employee_name", "ObjectTest");
data1.put("profile_image", "test1.png");
data1.put("employee_age", "30");
data1.put("employee_salary", "11111");
// JSON Object for second employee
JSONObject data2 = new JSONObject();
data2.put("employee_name", "MapTest");
data2.put("profile_image", "test2.png");
data2.put("employee_age", "20");
data2.put("employee_salary", "99999");
// Creating JSON array to add both JSON objects
JSONArray array = new JSONArray();
array.put(data1);
array.put(data2);
// Send the request
RestAssured.given()
.contentType(ContentType.JSON)
.body(array.toString())
.log().all()
.when()
.post("https://dummy.restapiexample.com/api/v1/create")
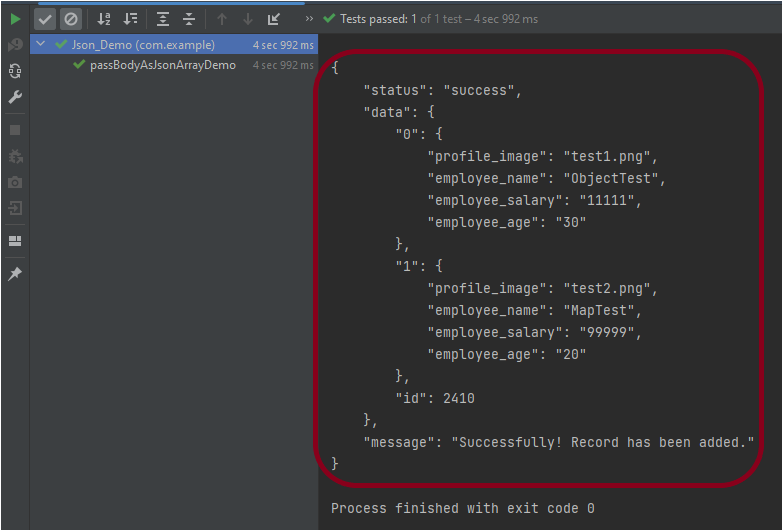
.then()
.assertThat().statusCode(200)
.body("message", equalTo("Successfully! Record has been added."))
.log().all();
}
}
The output of the above program is
Explanation:
1. Creating JSON Objects:
Two “JSONObject” instances (‘data1‘ and ‘data2‘) are created to represent two employees. Each JSON object contains employee details such as name, profile image, age, and salary.
// JSON Object for first employee
JSONObject data1 = new JSONObject();
data1.put("employee_name", "ObjectTest");
data1.put("profile_image", "test1.png");
data1.put("employee_age", "30");
data1.put("employee_salary", "11111");
// JSON Object for second employee
JSONObject data2 = new JSONObject();
data2.put("employee_name", "MapTest");
data2.put("profile_image", "test2.png");
data2.put("employee_age", "20");
data2.put("employee_salary", "99999");
2. Creating a JSON Array:
A JSONArrayinstance is created, and both JSON objects (data1 and data2) are added to it.
JSONArray array = new JSONArray();
array.put(data1);
array.put(data2);
3. Sending the POST Request:
3.1 The RestAssured library constructs and sends the HTTP POST request. It sets the content type of the request to JSON.
contentType(ContentType.JSON)
3.2 Converts the JSON array into a string format and sets it as the body of the request.
.body(array.toString())
3.3 Logs all details of the request for debugging purposes.
4.2 Asserts that the response status code is 200, indicating a successful request.
.assertThat().statusCode(200)
4.3 Asserts that the body of the response contains the specified message, confirming successful addition of records.
.body("message", equalTo("Successfully! Record has been added."))
4.4 Logs all details of the response for debugging purposes.
.log().all()
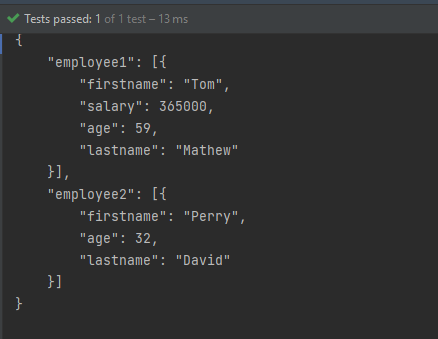
Complex JSON Array
Let us see an example of a complex JSON Array. This structure represents two separate employee data sets. Each is contained within its own JSON array. The whole is encapsulated within a larger JSON object identified by keys employee1and employee2.
Two JSONArray instances (array1 and array2) are created to encapsulate each employee’s JSON object.
JSONArray array1 = new JSONArray();
array1.put(data1);
JSONArray array2 = new JSONArray();
array2.put(data2);
3. Composing The JSON Structure:
A third JSONObject, data3, is created to aggregate the two JSON arrays under separate keys: employee1 and employee2.
JSONObject data3 = new JSONObject();
data3.put("employee1", array1);
data3.put("employee2", array2);
4. Output the JSON Object:
The entire composite JSON structure (data3) is printed to the console. The toString(4) method formats the output with an indentation of 4 spaces for readability.
System.out.println(data3.toString(4));
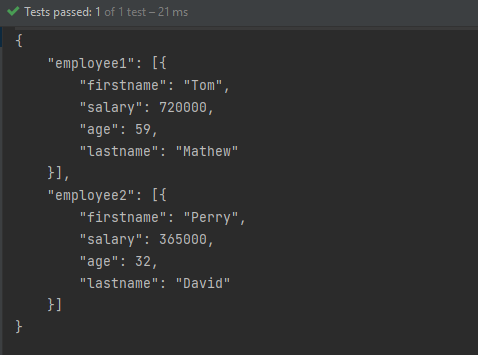
Similarly, there is another way to create this JSON Structure.
import org.json.JSONArray;
import org.json.JSONObject;
import org.junit.Test;
public class Json_Demo {
@Test
public void passBodyAsJsonArray1() {
// Creating JSON array to add first JSON object
JSONArray array1 = new JSONArray();
array1.put(new JSONObject().put("firstname", "Tom").put("lastname", "Mathew").put("age", 59).put("salary",
720000));
// Creating JSON array
JSONArray array2 = new JSONArray();
array2.put(new JSONObject().put("firstname", "Perry").put("lastname", "David").put("age", 32).put("salary",
365000));
// Create JSON Object to add JSONArrays
JSONObject data1 = new JSONObject();
data1.put("employee1", array1);
data1.put("employee2", array2);
System.out.println(data1.toString(4));
}
}
The output of the above program is
Congratulations on making it through this tutorial and hope you found it useful! Happy Learning!! Cheers!!
Postman is an API platform for building and using APIs. It simplifies each step of the API lifecycle and streamlines collaboration, so you can create better APIs—faster.
This tutorial explains the process to run the Rest API Tests in the GitLab pipeline. This is a significant step towards achieving CI/CD. Ideally, the tests need to run after any change (minor/major) before merging the change to the master branch. Suppose there are 100 changes in a day, and any QA won’t want to start the tests manually 100 times in a day. So, now adding tests to the GitLab pipeline comes into the picture. We can add a test stage to the pipeline and the tests will run automatically when the pipeline run, or we can schedule the tests to run automatically every hour or day using GitLab pipeline.
To use GitLab CI/CD, we need to keep 2 things in mind:-
a) Make sure a runner is available in GitLab to run the jobs. If there is no runner, install GitLab Runner and register a runner for your instance, project, or group.
b) Create a .gitlab-ci.yml file at the root of the repository. This file is where you define your CI/CD jobs.
Create a Rest API Project
Step 1 – Create a new Maven Project
Step 2 – Add dependencies to the project
Add the below-mentioned pom.xml which shows all the dependencies that need to add to the project.
It is needed to add maven-surefire plugin to run the TestNG tests through command line. To know more about this, please refer to this tutorial.
Step 3 – Create the Test Code to test the Rest API
Here, 2 tests are created. One of the tests gets all the employee data (GET) whereas another test creates an employee (POST).
import static io.restassured.RestAssured.given;
import static org.hamcrest.Matchers.equalTo;
import org.json.JSONObject;
import org.testng.annotations.Test;
import io.restassured.http.ContentType;
public class RestAPIDemo {
@Test(description = "To get the details of employee with id 2", priority = 0)
public void verifyUser() {
// Given
given()
// When
.when().get("http://dummy.restapiexample.com/api/v1/employee/2")
// Then
.then().statusCode(200).statusLine("HTTP/1.1 200 OK")
// To verify booking id at index 2
.body("data.employee_name", equalTo("Garrett Winters"))
.body("message", equalTo("Successfully! Record has been fetched."));
}
@Test(description = "To create a new employee", priority = 1)
public void createUser() {
JSONObject data = new JSONObject();
// Map<String, String> map = new HashMap<String, String>();
data.put("employee_name", "APITest");
data.put("employee_salary", "99999");
data.put("employee_age", "30");
// GIVEN
given().baseUri("http://dummy.restapiexample.com/api").contentType(ContentType.JSON).body(data.toString())
// WHEN
.when().post("/v1/create")
// THEN
.then().statusCode(200).body("data.employee_name", equalTo("APITest"))
.body("message", equalTo("Successfully! Record has been added."));
}
}
Step 4 – Create testng.xml to run the tests through TestNG
Now, let’s create a testng.xml to run the TestNG tests. If JUnit is used instead of TestNG, then this step is not needed.
<?xml version="1.0" encoding="UTF-8"?>
<!DOCTYPE suite SYSTEM "https://testng.org/testng-1.0.dtd">
<suite name="Suite">
  <test name="Test">
    <classes>
      <class name="com.example.RestAssured_TestNG_Demo.RestAPIDemo"/>
    </classes>
  </test> <!-- Test -->
</suite> <!-- Suite -->
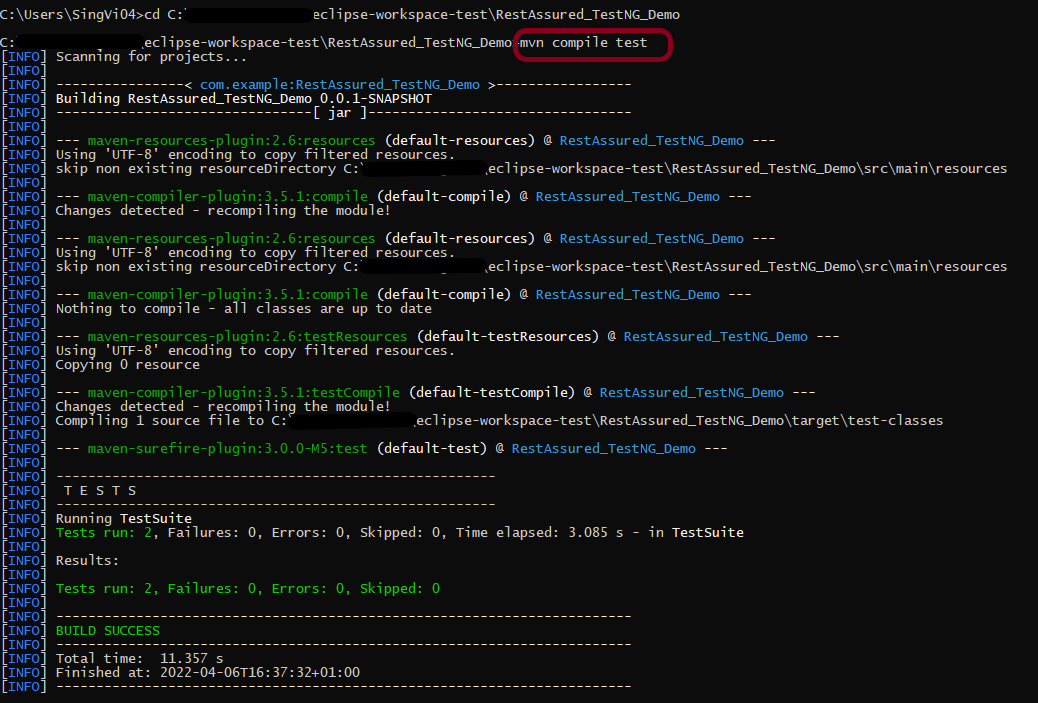
Step 5 – Run the tests through the command line
Now, let us execute the tests through the command line. Go to the place where pom.xml of the project is placed and use the below command to run the tests. This step makes sure that all the tests are running as expected.
Step 8 – Create .gitlab-ci.yml file in the project in GitLab
It is a YAML file where you configure specific instructions for GitLab CI/CD. In the .gitlab-ci.yml, we can define:
The scripts you want to run.
Other configuration files and templates you want to include.
Dependencies and caches.
The commands you want to run in sequence and those you want to run in parallel.
The location to deploy your application.
Whether you want to run the scripts automatically or trigger any of them manually.
image: adoptopenjdk/maven-openjdk11

stages:
  - test

variables:
  MAVEN_OPTS: "-Dmaven.repo.local=.m2/repository"

test:
  stage: test
  allow_failure: true

# Run the tests
  script:
    - mvn $MAVEN_OPTS clean package
    - mvn compile test

# Store artifacts
  artifacts:
    when: always
    name: "report"
    paths:
    - target/surefire-reports/*
    expire_in: 1 h
Step 9 – Run the tests in the GitLab pipeline
Now, when a new change is committed, a pipeline kicks off and it runs all the tests.
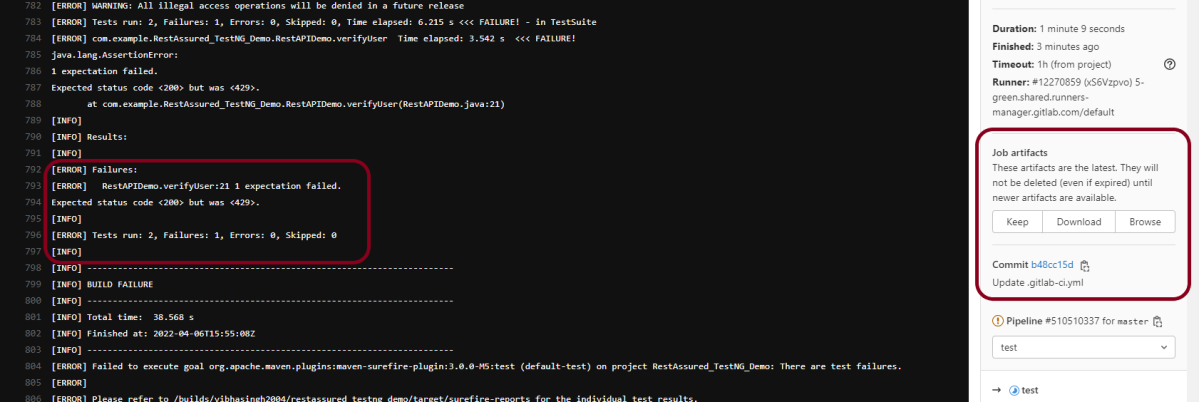
Step 10 – Check the status of the pipeline
Once the Status of the pipeline changes to either failed or passed.. that means the tests are already executed. Here, the pipeline is passed with brown colour means that the execution of the test is completed with some failures.
I have added an artifact in the gitalb-ci.yml with the name “report”. This artifact creates a folder with the name “report” and the reports in this folder come from the path /target/surefire-reports. This artifact gives us an option to download the reports or browse the report. This report will be available for 1 hour only as mentioned in the gitlab-ci.yml.
Step 11 – Download the report
Click on the Download button and the report zip file is downloaded. Unzip the folder, and it contains all different types of surefire-reports.
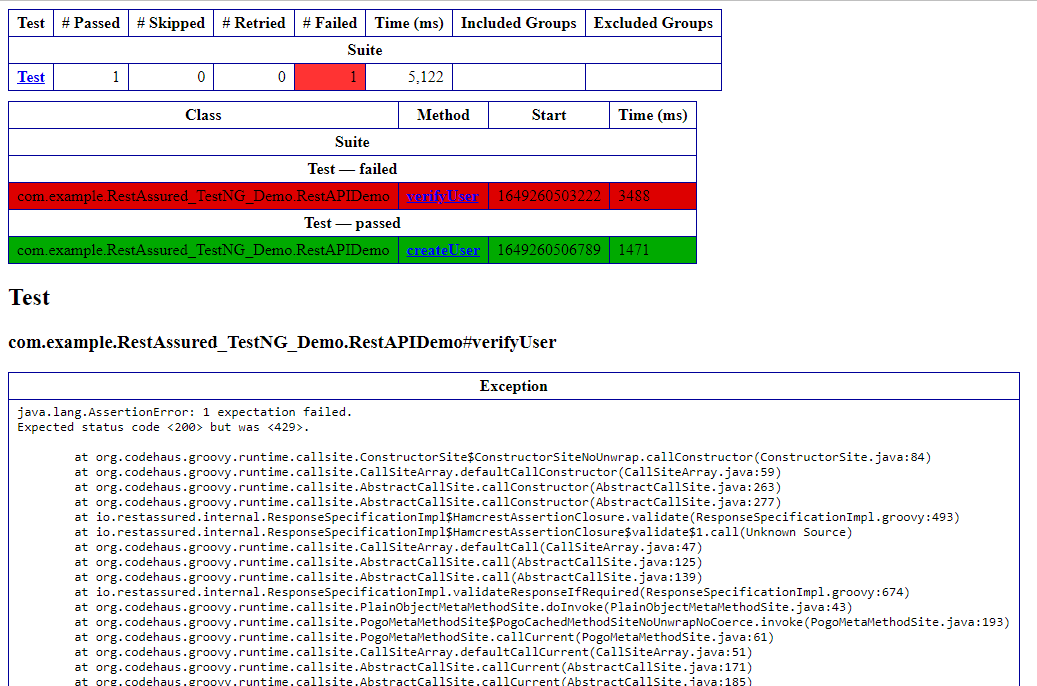
Example of Emailable-Report.html
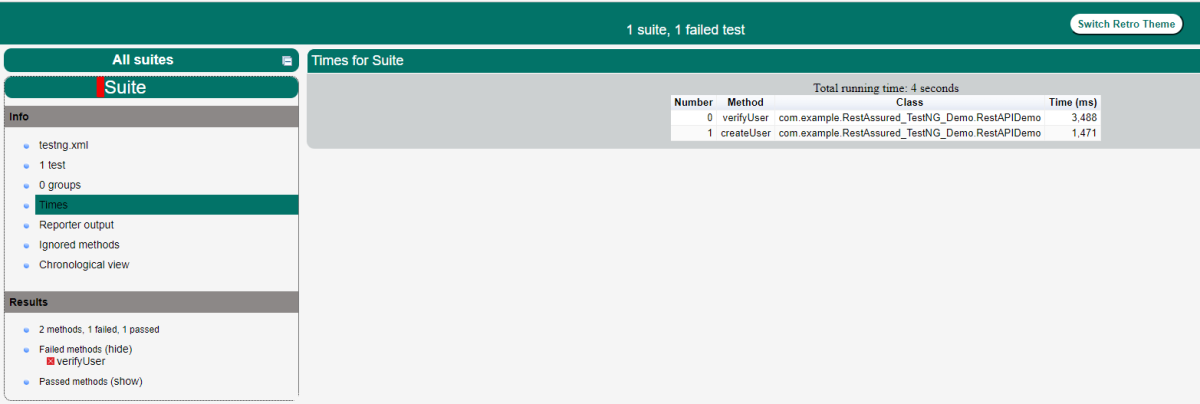
Example of Index.html
Congratulations. This tutorial has explained the steps to run Selenium tests in GitLab CI/CD. Happy Learning!!
As of Java 11, JAXB is not part of the JRE anymore, and you need to configure the relevant libraries via your dependency management system, for example, either Maven or Gradle.
Configure the Java compiler level to be at least 11 and add the JAXB Version 3 dependencies to your pom file.
Now, let us create the Java Objects (POJO) of above XML.
import jakarta.xml.bind.annotation.XmlAccessType;
import jakarta.xml.bind.annotation.XmlAccessorType;
import jakarta.xml.bind.annotation.XmlRootElement;

@XmlRootElement(name = "EmployeeDetail")
@XmlAccessorType(XmlAccessType.FIELD)
public class Employee {

	private String firstName;
	private String lastName;
	private int age;
	private double salary;
	private String designation;
	private String contactNumber;
	private String emailId;
	private String gender;
	private String maritalStatus;

	public Employee() {
		super();

	}

	// Getter and setter methods
	public String getFirstName() {
		return firstName;
	}

	public void setFirstName(String firstName) {
		this.firstName = firstName;
	}

	public String getLastName() {
		return lastName;
	}

	public void setLastName(String lastName) {
		this.lastName = lastName;
	}

	public int getAge() {
		return age;
	}

	public void setAge(int age) {
		this.age = age;
	}

	public double getSalary() {
		return salary;
	}

	public void setSalary(double salary) {
		this.salary = salary;
	}

	public String getDesignation() {
		return designation;
	}

	public void setDesignation(String designation) {
		this.designation = designation;
	}

	public String getContactNumber() {
		return contactNumber;
	}

	public void setContactNumber(String contactNumber) {
		this.contactNumber = contactNumber;
	}

	public String getEmailId() {
		return emailId;
	}

	public void setEmailId(String emailId) {
		this.emailId = emailId;
	}

	public String getGender() {
		return gender;
	}

	public void setGender(String gender) {
		this.gender = gender;
	}

	public String getMaritalStatus() {
		return maritalStatus;
	}

	public void setMaritalStatus(String maritalStatus) {
		this.maritalStatus = maritalStatus;
	}

    @Override
	public String toString() {
		return "Employee [FirstName=" + firstName + ", LastName=" + lastName + ", Age=" + age + ", Salary=" + salary
				+ ", Designation=" + designation + ", ContactNumber=" + contactNumber + ", EmailId=" + emailId
				+ ", Gender=" + gender + ", MaritalStatus=" + maritalStatus + "]";
	}
}
Let’s create a simple program using the JAXBContextwhich provides an abstraction for managing the XML/Java binding information necessary to implement the JAXB binding framework operations and unmarshal.
When we run the code above, we may check the console output to verify that we have successfully converted XML data into a Java object:
The Unmarshaller class governs the process of deserializing XML data into newly created Java content trees, optionally validating the XML data as it is unmarshalled. It provides overloading of unmarshal methods for many input kinds.
We are done! Congratulations on making it through this tutorial and hope you found it useful! Happy Learning!!
As of Java 11, JAXB is not part of the JRE anymore, and you need to configure the relevant libraries via your dependency management system, for example, either Maven or Gradle.
Configure the Java compiler level to be at least 11 and add the JAXB Version 3 dependencies to your pom file.
Now, let us create the Java Objects (POJO) of the above XML.
import jakarta.xml.bind.annotation.XmlAccessType;
import jakarta.xml.bind.annotation.XmlAccessorType;
import jakarta.xml.bind.annotation.XmlRootElement;

@XmlRootElement(name = "EmployeeDetail")
@XmlAccessorType(XmlAccessType.FIELD)
public class Employee {

	private String firstName;
	private String lastName;
	private int age;
	private double salary;
	private String designation;
	private String contactNumber;
	private String emailId;
	private String gender;
	private String maritalStatus;

	public Employee() {
		super();

	}

	// Getter and setter methods
	public String getFirstName() {
		return firstName;
	}

	public void setFirstName(String firstName) {
		this.firstName = firstName;
	}

	public String getLastName() {
		return lastName;
	}

	public void setLastName(String lastName) {
		this.lastName = lastName;
	}

	public int getAge() {
		return age;
	}

	public void setAge(int age) {
		this.age = age;
	}

	public double getSalary() {
		return salary;
	}

	public void setSalary(double salary) {
		this.salary = salary;
	}

	public String getDesignation() {
		return designation;
	}

	public void setDesignation(String designation) {
		this.designation = designation;
	}

	public String getContactNumber() {
		return contactNumber;
	}

	public void setContactNumber(String contactNumber) {
		this.contactNumber = contactNumber;
	}

	public String getEmailId() {
		return emailId;
	}

	public void setEmailId(String emailId) {
		this.emailId = emailId;
	}

	public String getGender() {
		return gender;
	}

	public void setGender(String gender) {
		this.gender = gender;
	}

	public String getMaritalStatus() {
		return maritalStatus;
	}

	public void setMaritalStatus(String maritalStatus) {
		this.maritalStatus = maritalStatus;
	}

    @Override
	public String toString() {
		return "Employee [FirstName=" + firstName + ", LastName=" + lastName + ", Age=" + age + ", Salary=" + salary
				+ ", Designation=" + designation + ", ContactNumber=" + contactNumber + ", EmailId=" + emailId
				+ ", Gender=" + gender + ", MaritalStatus=" + maritalStatus + "]";
	}
}
Let’s create a simple program using the JAXBContextwhich provides an abstraction for managing the XML/Java binding information necessary to implement the JAXB binding framework operations.
import java.io.StringWriter;

import org.junit.Test;

import jakarta.xml.bind.JAXBContext;
import jakarta.xml.bind.JAXBException;
import jakarta.xml.bind.Marshaller;
import jakarta.xml.bind.PropertyException;

public class JAXBSerialization {

	@Test
	public void serializationTest1() {

		try {

			Employee employee = new Employee();

			employee.setFirstName("Terry");
			employee.setLastName("Mathew");
			employee.setAge(30);
			employee.setSalary(75000);
			employee.setDesignation("Manager");
			employee.setContactNumber("+919999988822");
			employee.setEmailId("abc@test.com");
			employee.setMaritalStatus("married");
			employee.setGender("female");

			// Create JAXB Context
			JAXBContext context = JAXBContext.newInstance(Employee.class);

			// Create Marshaller
			Marshaller jaxbMarshaller = context.createMarshaller();

			// Required formatting
			jaxbMarshaller.setProperty(Marshaller.JAXB_FORMATTED_OUTPUT, Boolean.TRUE);

			// Print XML String to Console
			StringWriter sw = new StringWriter();

			// Write XML to StringWriter
			jaxbMarshaller.marshal(employee, sw);

			// Verify XML Content
			String xmlContent = sw.toString();
			System.out.println(xmlContent);

		} catch (PropertyException e) {
			e.printStackTrace();

		} catch (JAXBException e) {

		}
	}

}
When we run the code above, we may check the console output to verify that we have successfully converted the Java object into XML:
The Marshaller class is responsible for governing the process of serializing Java content trees back into XML data.
I hope this has helped you to understand the use of JAXB Version 3.
We are done! Congratulations on making it through this tutorial and hope you found it useful! Happy Learning!!