Last Updated On
In this tutorial we will discuss to create a JUnit project using IntelliJ. We will be at first creating a simple Java Project and will add JUnit5 as well as create a Maven Project, then we will add a basic Class and a JUnit Test for it.
Table of Contents
Create a Java Project
Step 1 – Create a new Java Project.
To create a new Java project in Intellij, please refer to this tutorial.
Step 2 – Right click on the project and select Open Module Settings.

Step 3 – Go to the “Libraries” group, click the little plus (look up), and choose “From Maven…” option.
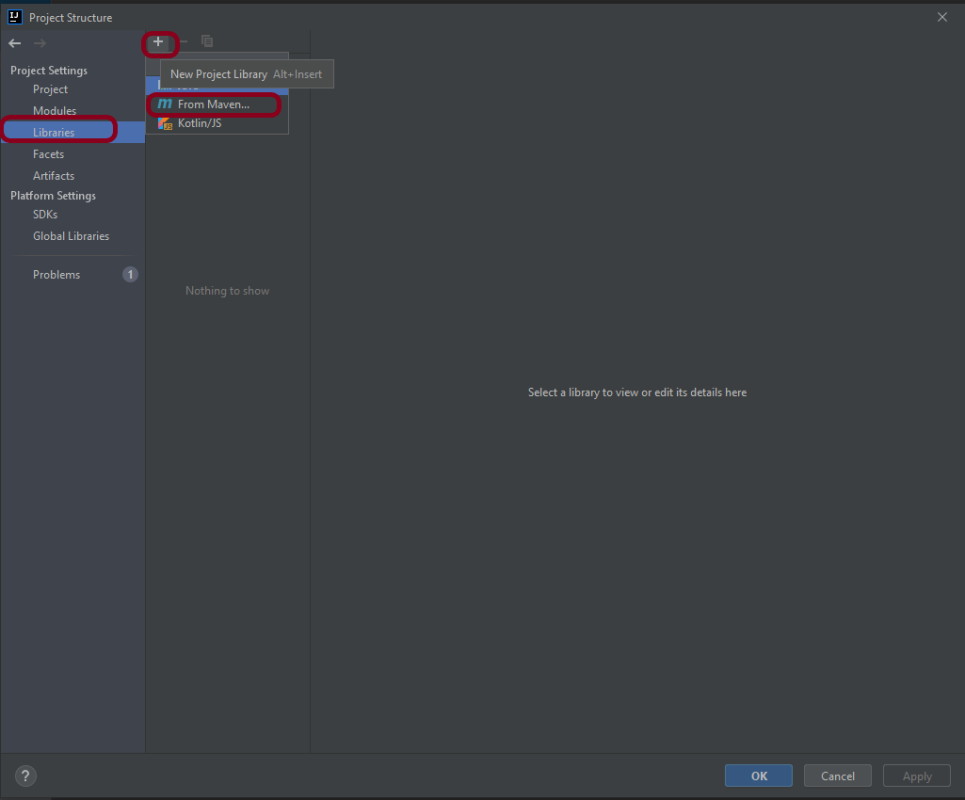
Step 4 – Search for “junit” — something like “junit:junit-4.13“. Click the “OK“ button.

Step 5 – A new dialog will appear to confirm that “junit:junit:4.13.2” will be added to the module. Click the “OK“ button.

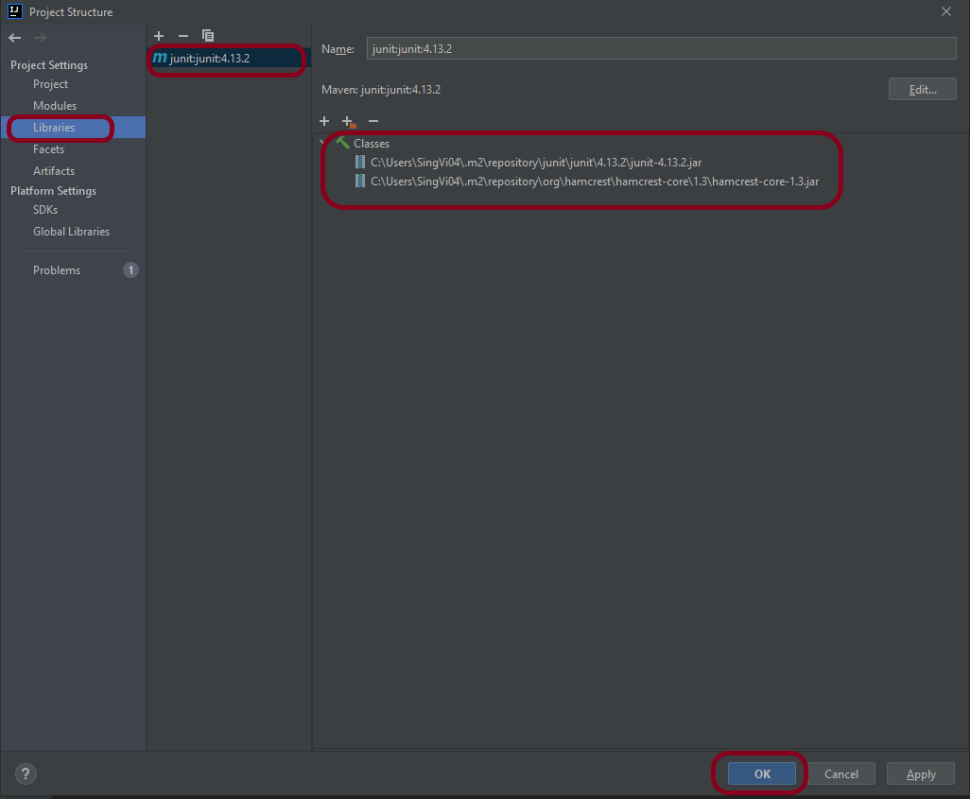
Step 6 – This screens shows that junit:junit:4.13.2 is added to the Libraries. It contains the highlighted classes – junit-4.13.2.jar and hamcrest-core-1.3.jar. Click the “OK” button.
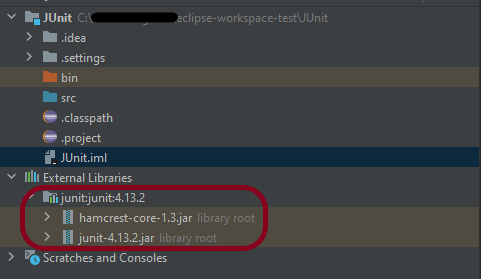
Step 7 – This image shows that the Junit is added to the External Libraries.
Step 8 – Create a Java Class – JUnit4Test under src and create a JUnit test to verify that it is installed properly.
import org.junit.Assert;
import org.junit.Test;

public class JUnit4Test {

    @Test
    public void Test() {

        String str1 = "Happy";
        String str2 = new String("Happy");
        Assert.assertEquals("String1 and String 2 are equal",str1, str2);

    }
}
Step 9 – There are many ways to run the test. One of the way is to Right-Click and select Run JUnit4Test
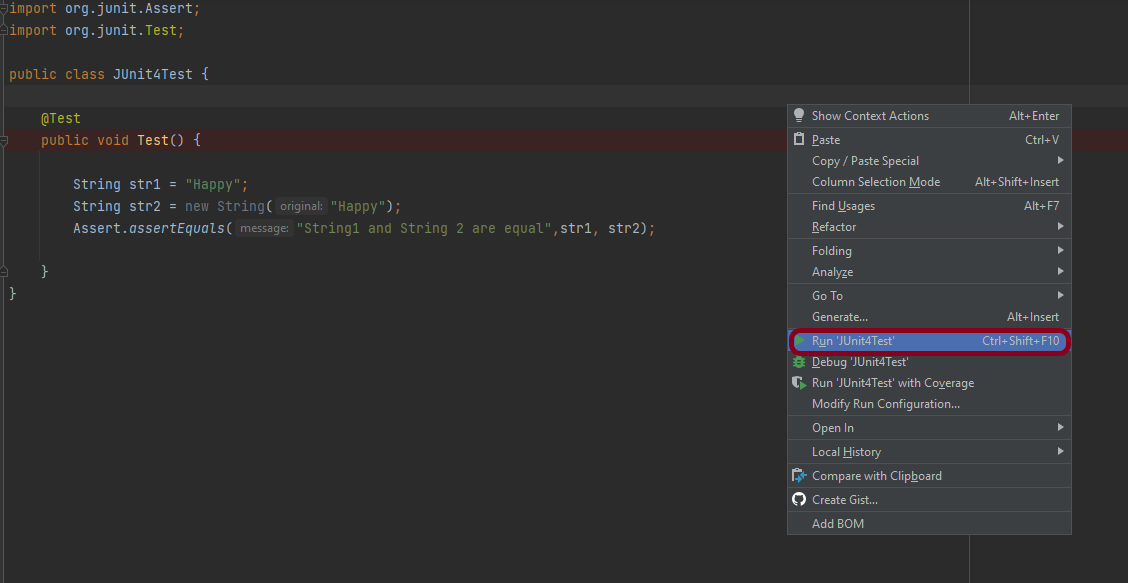
The successful execution of the test shows that the JUnit is configured properly.

Create a Maven Project
Add Junit dependency to the POM.xml and build the project.
<dependencies>

    <dependency>
        <groupId>junit</groupId>
        <artifactId>junit</artifactId>
        <version>4.13.2</version>
        <scope>test</scope>
    </dependency>

</dependencies>
Now we need to apply the changes in the build script. Press Ctrl+Shift+O or click Load Maven Changes in the notification that appears in the top-right corner of the editor.

Create a Java Class – JUnit4Test under src/test/java and create a JUnit test to verify that it is installed properly.
import org.junit.Test;
import static org.junit.Assert.assertArrayEquals;

public class JUnitMavenTest {

    @Test
    public void Test() {

        String[] expected = {"happy","days","summer","spring"};
        String[] actual = {"happy","days","summer","spring"};

        assertArrayEquals("Expected and Actual Arrays are not equal",expected,actual);

    }
}
The output of the above program is

Similarly, to add JUnit5 we can add below mentioned dependencies to the POM.xml.
<dependency>
     <groupId>org.junit.jupiter</groupId>
     <artifactId>junit-jupiter-engine</artifactId>
     <version>5.8.2</version>
     <scope>test</scope>
</dependency>

<dependency>
     <groupId>org.junit.jupiter</groupId>
     <artifactId>junit-jupiter-api</artifactId>
     <version>5.8.2</version>
     <scope>test</scope>
</dependency>
Congratulations. We are able to add JUnit to Java or Maven project. Happy Learning!!
