Last Updated On
This tutorial explains the steps to host Extent Reports on GitHub Pages with GitHub Actions.
Table of Contents
- What is GitHub Action?
- What is a GitHub Page?
- Why use GitHub Page to host the Report?
- Important points
- Implementation Steps
What is GitHub Action?
GitHub Actions is a continuous integration and continuous delivery (CI/CD) platform that allows you to automate your build, test, and deployment pipeline. You can create workflows that build and test every pull request to your repository, or deploy merged pull requests to production.
What is a GitHub Page?
GitHub Pages is a static site hosting service that takes HTML, CSS, and JavaScript files straight from a repository on GitHub, optionally runs the files through a build process, and publishes a website.
With GitHub Pages, we get a subdomain as github.io. To host your site, first and foremost thing is we need to have a GitHub account and a repository that will have our Automation code to run the Test Cases. Secondly, your site will be named as <username>.github.io
Why use GitHub Page to host the Report?
As automation testers, we are familiar with the challenges of sharing daily or weekly status reports on the progress of our automation efforts with management. Typically, we rely on tools like Extent Report or Allure Report and send these reports via email for management to review the current status of our automation progression or regression. However, there is a more efficient solution available: leveraging GitHub Pages to host our automation report.
By using GitHub Pages, we can eliminate the pain of manually sending reports to management and instead provide them with a simple URL. This means that whenever management wants to check the latest update on our automation progress, they can simply browse through the provided URL.
Important points
1. The Web Application tests need to run in the headless mode in GitHub Workflow.
          ChromeOptions options = new ChromeOptions();
          options.addArguments("--no-sandbox");
          options.addArguments("--disable-dev-shm-usage");
          options.addArguments("--headless");
	      driver = new ChromeDriver(options);
2. Use the below code to use gh-pages branch to host the Extent Report:
    - name: Deploy pages
      uses: JamesIves/github-pages-deploy-action@v4.5.0
      with:
        branch: gh-pages
        folder: ./ExtentReport/Reports
Implementation Steps
Step 1 – Create GitHub Actions and Workflows
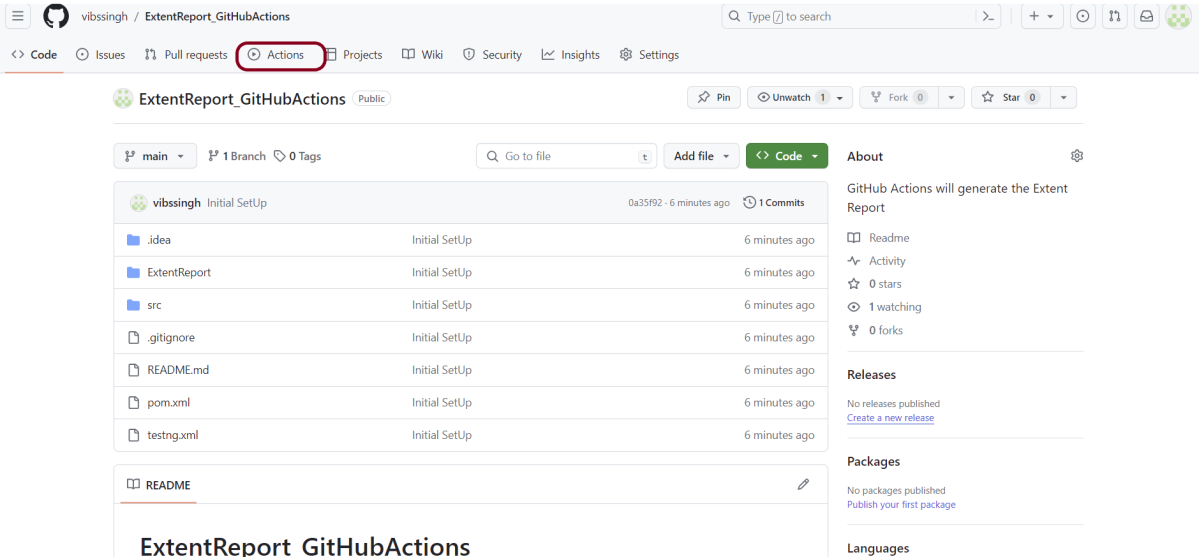
I have a repository available in GitHub – ExtentReport_GitHubActions as shown in the below image. Go to the “Actions” tab. Click on the “Actions” tab.
Step 2 – Select the type of Actions
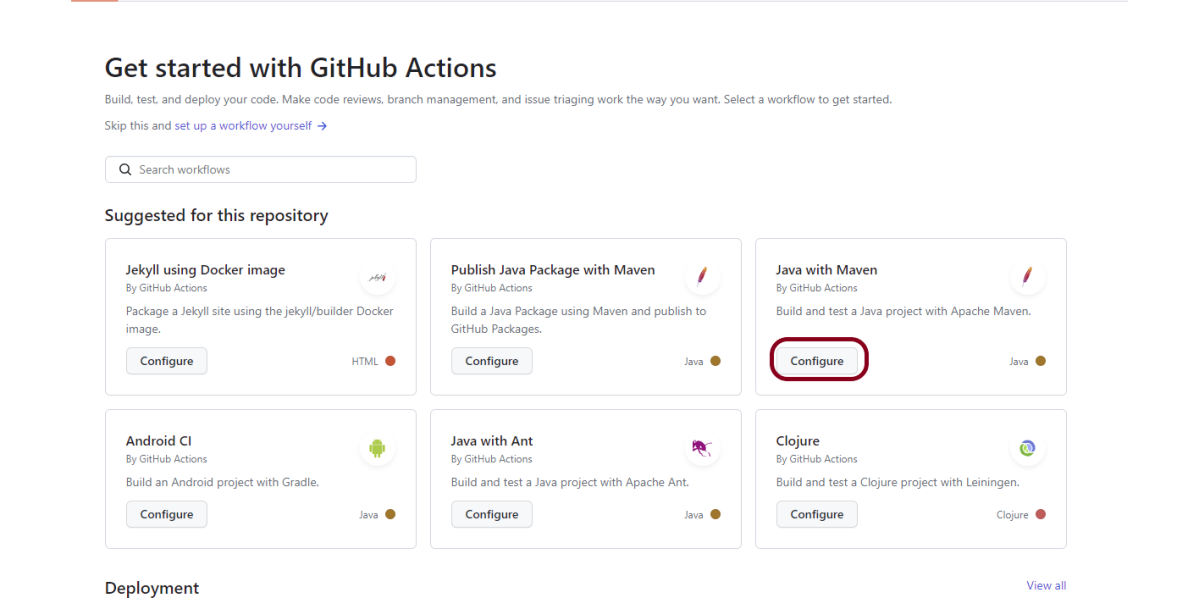
You will see that GitHub recommends Actions depending on the project. In our case, it is recommending actions suitable for a Java project. I have selected the “Java with Maven” option as my project is built in Maven.
Step 3 – Generation of Sample pipeline
If you choose an existing option, it will automatically generate a .yaml for the project as shown below.

We will replace the current workflow with the following yml file that will generate the ExtentReport in the GitHub as shown below:
name: ExtentReport

on:
  push:
    branches: [ "main" ]
  pull_request:
    branches: [ "main" ]

jobs:
  build:

    runs-on: ubuntu-latest

    steps:
    - uses: actions/checkout@v3
    - name: Set up JDK 17
      uses: actions/setup-java@v3
      with:
        java-version: '17'
        distribution: 'temurin'
        cache: maven
    - name: Build with Maven
      run: mvn clean test

    - name: Deploy pages
      uses: JamesIves/github-pages-deploy-action@v4.5.0
      with:
        branch: gh-pages
        folder: ./ExtentReport/Reports
Step 4 – Commit the changes
After the changes, hit the “Start Commit” button.

This will give the option to add a description for the commit. It will also enable the user to commit either to the main branch or commit to any other branch that exists in the project. Click on the “Commit new file” button to set up the workflow file.

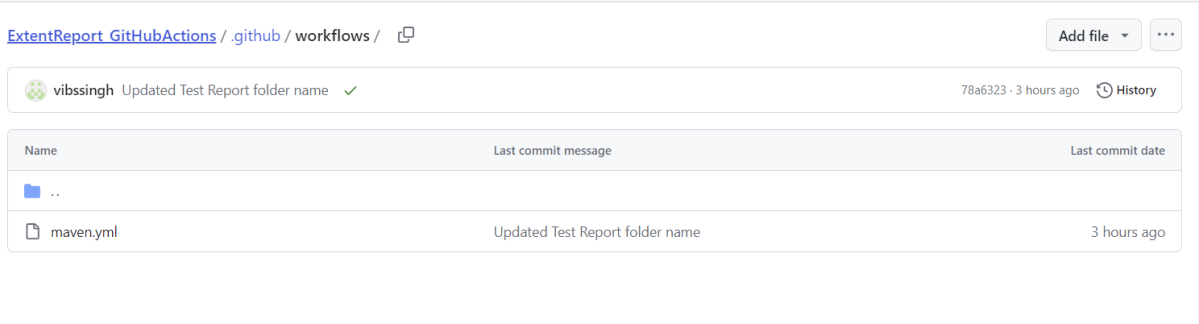
It will create a maven.yml file as shown below in the project.
Step 5 – Verify that the workflow is running
Next, head over to the “Actions” tab, and you will see your YAML workflow file present under the tab. The yellow sign represents that the job is in the queue. The pipeline will fail. It is because gh-pages is not configured yet now.

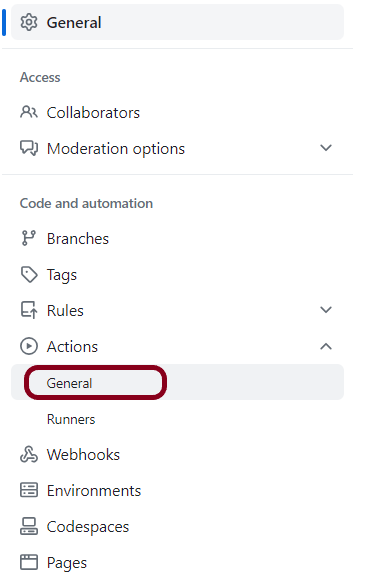
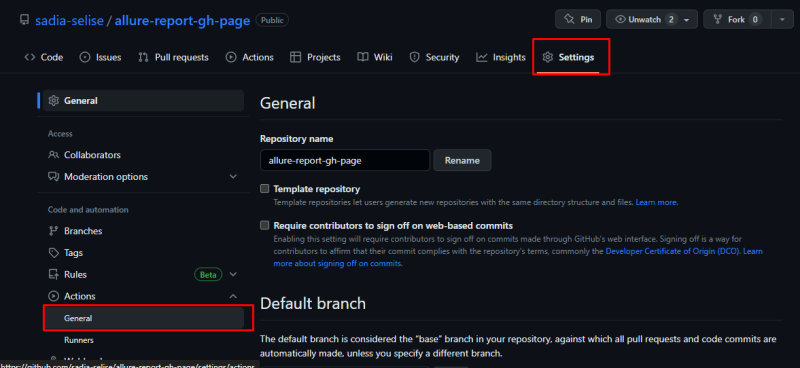
Navigate to the Repository Settings of GitHub, then select Action → General.
Check the “Read and Write Permissions” option, and save the changes.

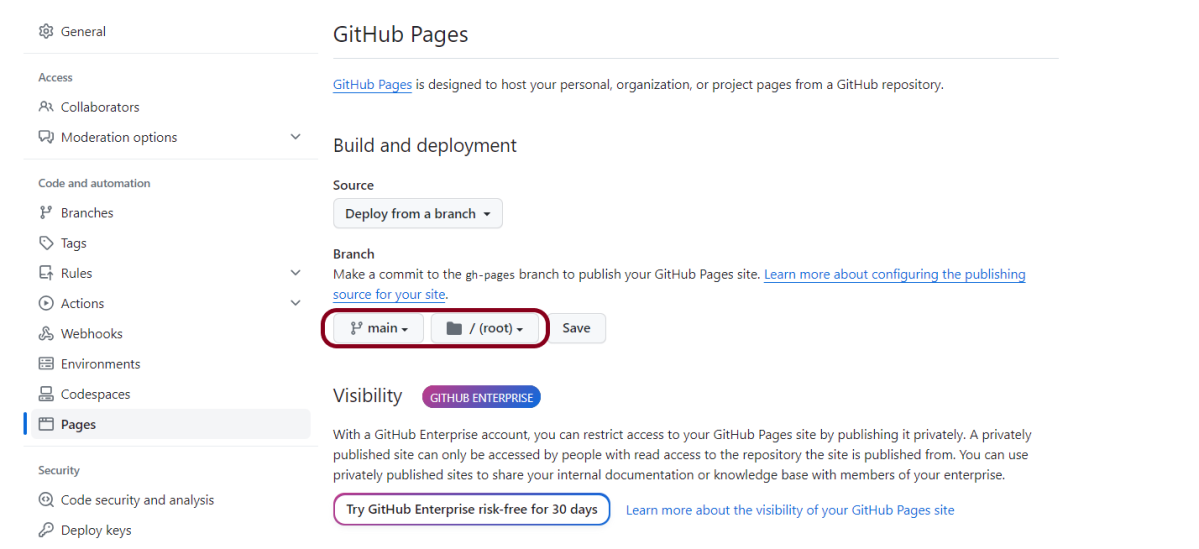
Go to Settings->Pages and you will see “GitHub Pages”. Go to the Branch, select “main” and “/root” and click on the “Save” button.
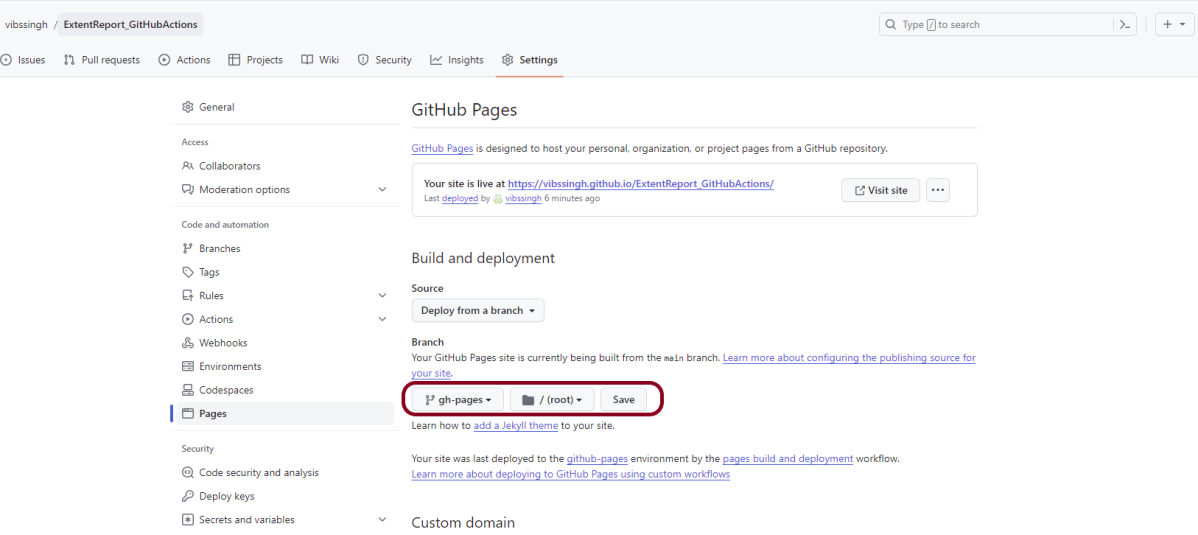
Here we are using gh-pages to host our automation report. Once you run your workflow for the first time this branch will not be present, so run the workflow, and you will see gh-pages branch is made. Now again go to the pages section of your repository change the source branch of gh-pages as below and now again run it.
Click on the workflow and the below screen is displayed. It shows the status of the run of the workflow, the total time taken to run the workflow, and the name of the .yml file.
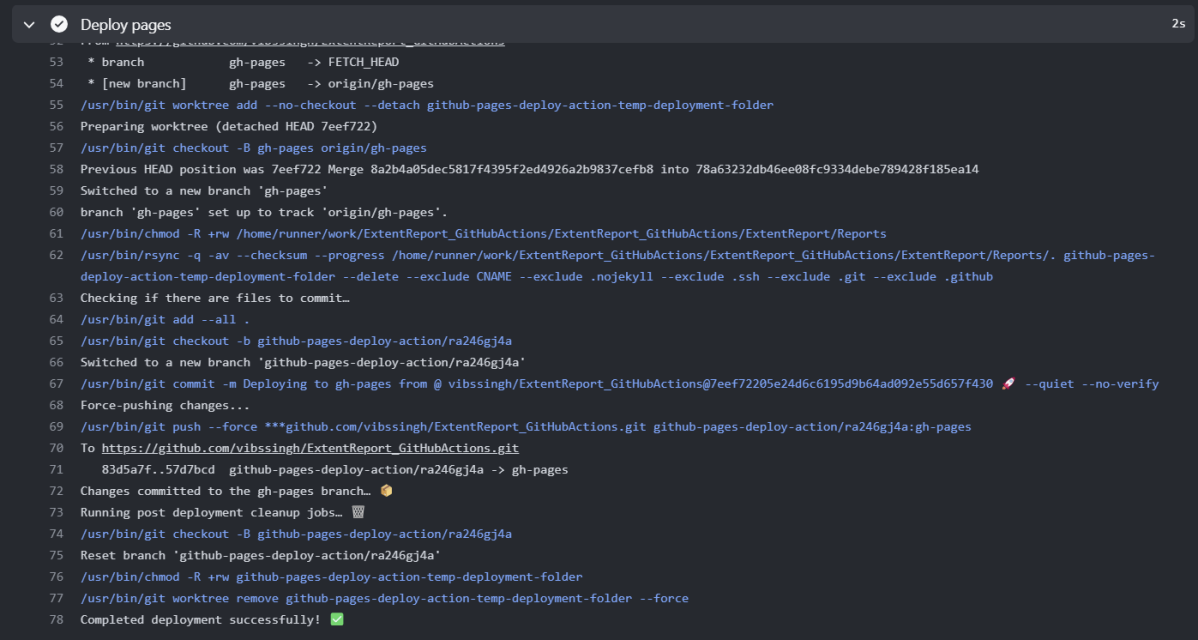
Below are all the steps of the workflow.

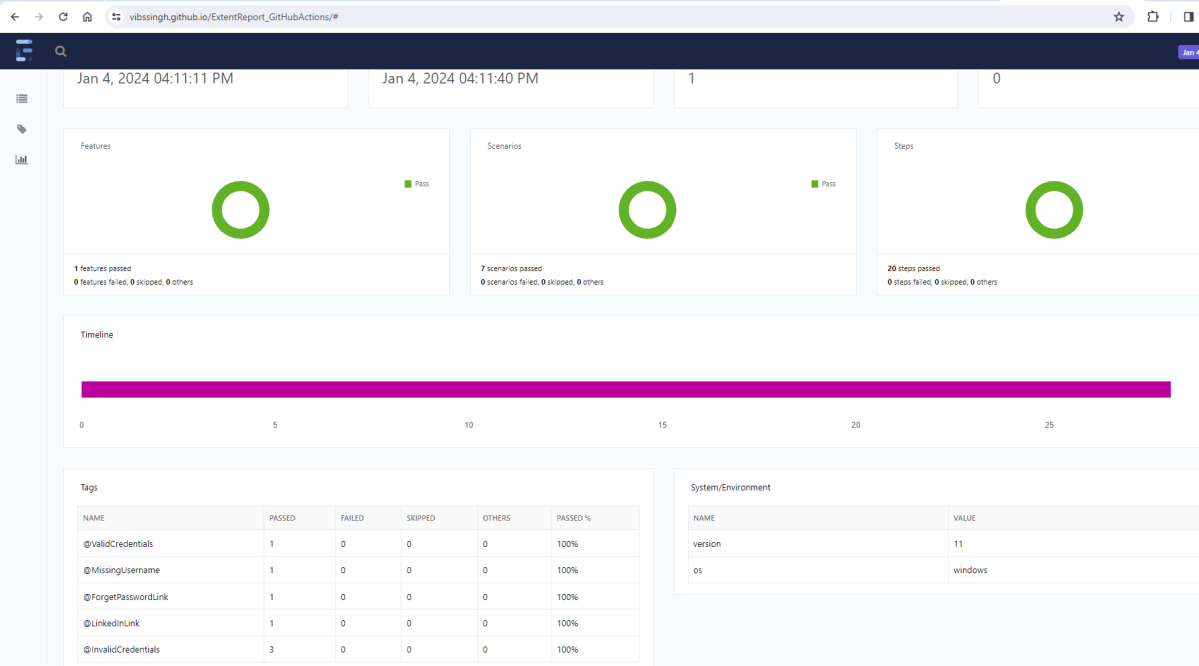
Published ExtentReport on GitHub
From the logs of the Workflow, you can see that the “Deploy Pages” stage was executed successfully.
Once the pipeline runs, a new workflow will be generated as shown in the below image:
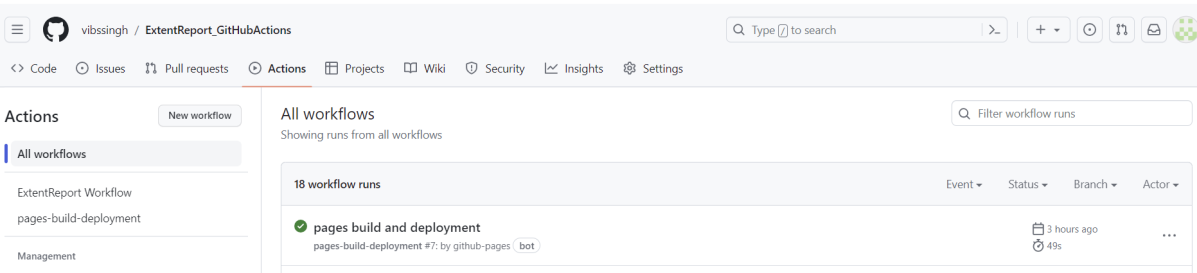
When we click on the pages build and deployment workflow, we will see 3 stages. The deploy stage contains the link to the ExtentReport.
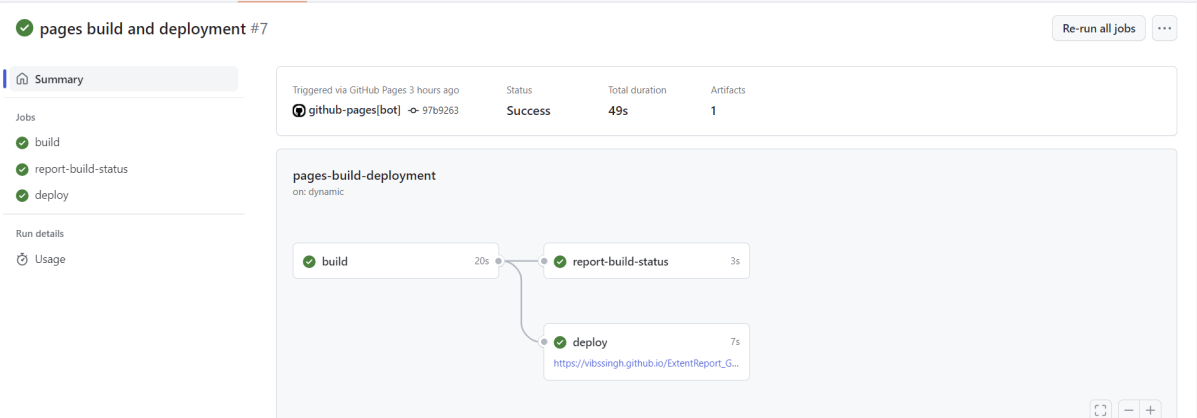
https://vibssingh.github.io/ExtentReport_GitHubActions/
The complete code can be found here on GitHub - vibssingh/ExtentReport_GitHubActions.
Congratulations! We just created our CI workflow for running the ExtentReport in GitHub.

