In this tutorial, we will clone a project from GitHub and import it in Eclipse.
Table Of Contents
What is GitHub?
GitHub is a for-profit organization that provides cloud-based Git repository hosting. It simplifies the use of Git for version control and collaboration by individuals and teams.
The GitHub interface is simple enough that even inexperienced coders can use it. Without GitHub, using Git generally necessitates a bit more technical know-how and command-line proficiency.
Furthermore, anyone can sign up for and host a public code repository for free, making GitHub particularly popular with open-source projects.
In this tutorial, I will explain how we can clone a project from GitLab in Eclipse.
Implementation Steps
Clone the Project
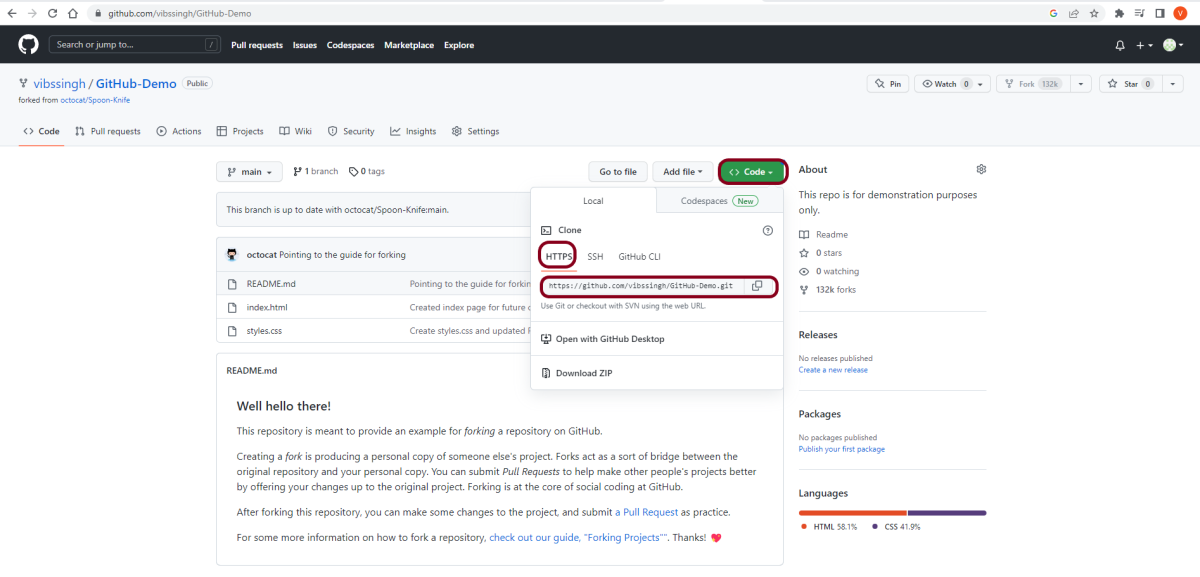
Step 1 – Go to GitHub and select the project which you want to clone. Click on the green colour “Code” button, then copy the hyperlink as shown in the image. You can either Clone with HTTPS, SSH, or GitHub CLI.
Import the project in Eclipse
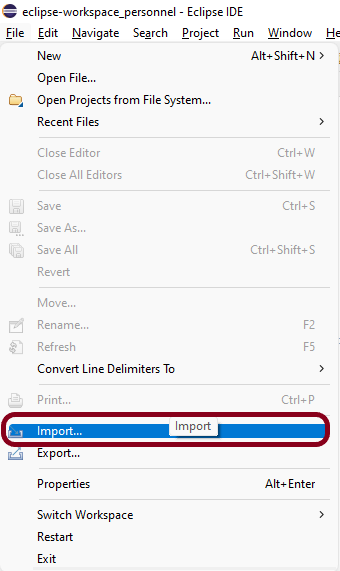
Step 2 – Open Eclipse and go to File > Import in eclipse as shown in the image.
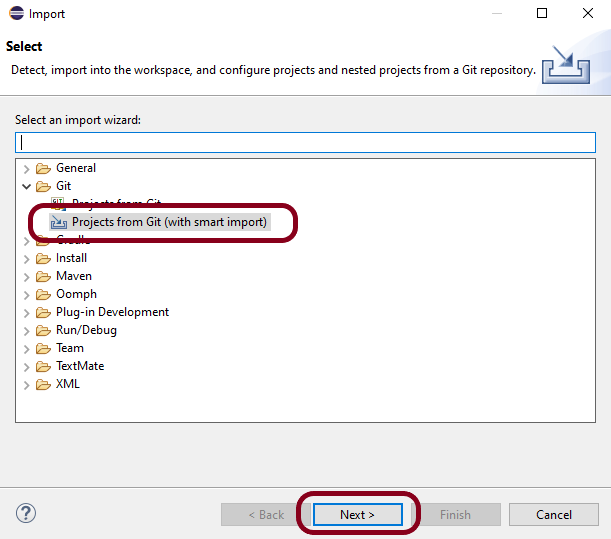
Step 3 – A window will pop up in which select Git Folder. Under the Git folder, select the option – Projects from Git (with smart import) as shown in the image.
Click on the NEXT button.
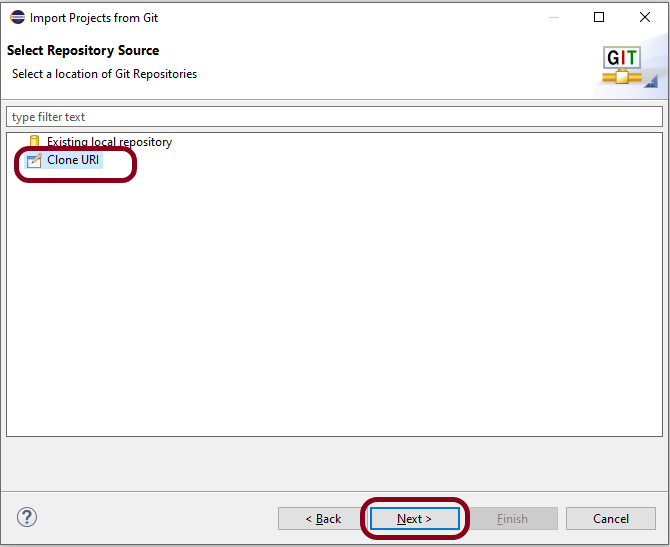
Step 4 – A new window will pop up in which select the option – Clone URI as shown in the image.
Click on the NEXT button.
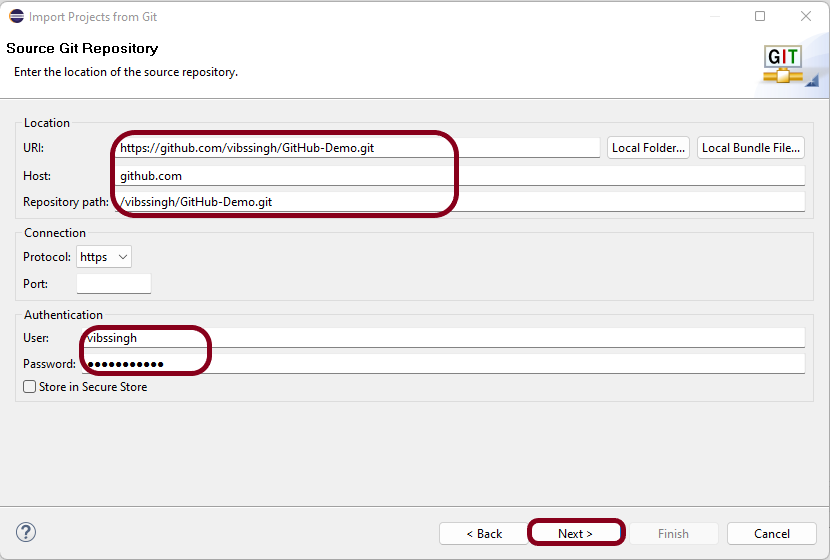
Step 5 – Another window will pop up in which you have to paste the GitHub Repository URL and also GitHub User ID and Password and click on the “Next” button.
URI – This is the URL that we have cloned from GitHub in Step 1.
Host – github.com
Repository path – Path of the project in GitHub (This is auto-populated after entering URI)
Authentication
User – Username of GitHub
Password – Password of GitHub
Step 6 – Select main and select “When fetching a commit, also fetch its tags“.
Click on the “Next” button.

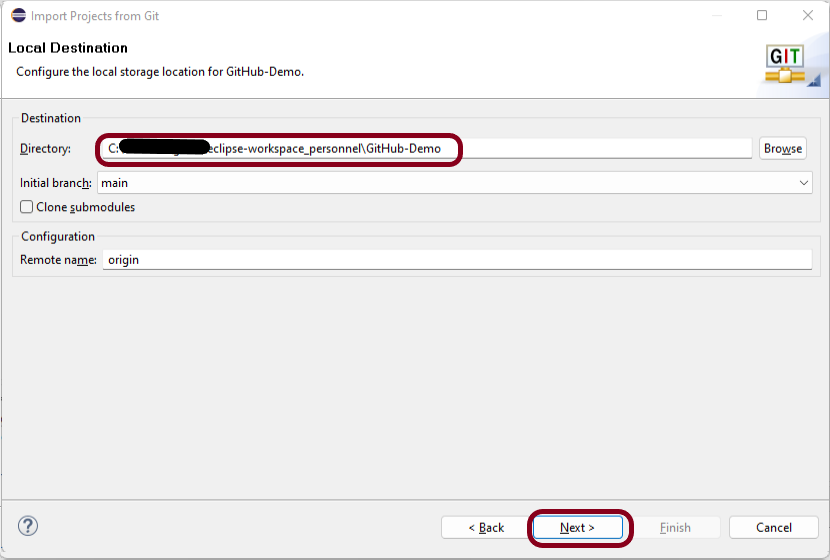
Step 7 – Select the Folder directory in which you want to import the repository.
Click on the Next button.
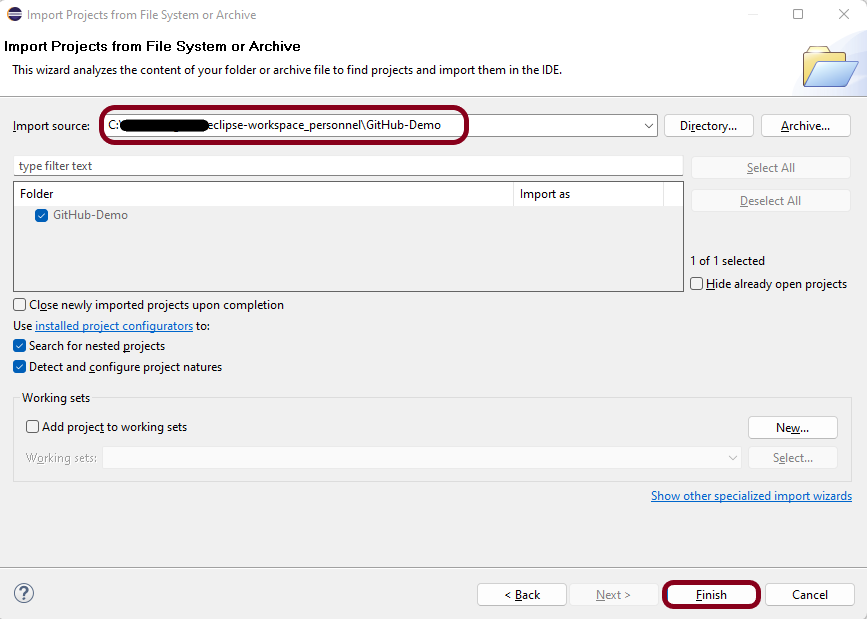
Step 8 – Select the Import Source, this is auto-generated. This wizard analyzes the content of the folder to find the project and import them into the IDE.
Click on the Finish button.
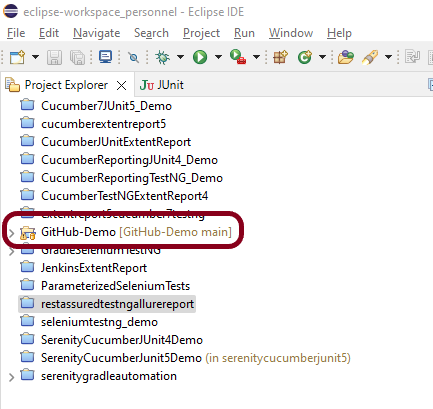
Step 9 – We have successfully imported the GitHub Repository as shown in the below image.
Congratulations on making it through this tutorial and hope you found it useful! Happy Learning!! Cheers!!
