The previous tutorial explained the How to rerun failed tests in Cucumber. There are multiple times that we need to rerun the failed tests twice to overcome the intermittent network or environment issues. This can be achieved by creating multiple TestRunner class.
Table of Contents
- Set Up a Runner for First Run of Tests
- Set Up a Runner for running the failed tests first time
- Set Up a Runner for running the failed tests second time
- Mention all the Test Runner details in the testng.xml
- Add cucumber-reporting Plugin to pom.xml
- Run the tests and Generate the Report
Set Up a Runner for First Run of Tests
In the main test runner, configure Cucumber to generate a JSON report for the initial test run and capture any failed tests in a rerun file. We are using rerun plugin to logs the paths of failed scenarios in a text file – rerun.txt that will be created inside the target folder.
import io.cucumber.testng.AbstractTestNGCucumberTests;
import io.cucumber.testng.CucumberOptions;
@CucumberOptions(features = "src/test/resources/features/LoginPage.feature",
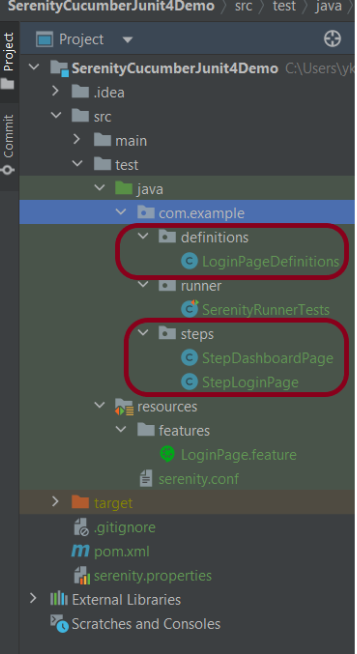
glue = "com.example.definitions",
plugin = {
"pretty",
"html:target/cucumber-reports/cucumber-report.html",
"json:target/cucumber-reports/cucumber-report.json",
"rerun:target/rerun.txt" // Saves paths of failed scenarios
}
)
public class RunnerTests extends AbstractTestNGCucumberTests {
}
Set Up a Runner for running the failed tests first time
Create a second runner that reads from the rerun.txt file and generates a new rerun1.txt file that contains the path of failed tests and create a separate JSON report for failed test reruns.
import io.cucumber.testng.AbstractTestNGCucumberTests;
import io.cucumber.testng.CucumberOptions;

@CucumberOptions(tags = "",
        features = "@target/rerun.txt",
        glue = "com.example.definitions",
        plugin =  {
                "pretty",
                "html:target/cucumber-reports/cucumber-rerun1-report.html",
                "json:target/cucumber-reports/cucumber-rerun1-report.json",
                "rerun:target/rerun1.txt"
        }
)

public class RunnerTestsFailed extends AbstractTestNGCucumberTests {
}
Set Up a Runner for running the failed tests second time
Create a third runner that reads from the rerun1.txt file and generates a separate JSON report for failed test reruns.
import io.cucumber.testng.AbstractTestNGCucumberTests;
import io.cucumber.testng.CucumberOptions;

@CucumberOptions(tags = "",
        features = "@target/rerun1.txt",
        glue = "com.example.definitions",
        plugin =  {
                "pretty",
                "html:target/cucumber-reports/cucumber-rerun2-report.html",
                "json:target/cucumber-reports/cucumber-rerun2-report.json"
        }
)

public class RunnerTestsSecondFailed extends AbstractTestNGCucumberTests {
}
Mention all the Test Runner details in the testng.xml
We need to mention all the TestRunner class name in the testng.xml. This will run first runner that will generate a file rerun.txt which in turns contain the path of the failed scenarios. Then, second runner will use this new file rerun.txt as input to the feature file and rerun the failed tests and generate second file – rerun1.txt which is used as input to the third Test Runner file.
<?xml version="1.0" encoding="UTF-8"?>
<!DOCTYPE suite SYSTEM "https://testng.org/testng-1.0.dtd">
<suite name="Suite">
<test name="Cucumber with TestNG Test">
<classes>
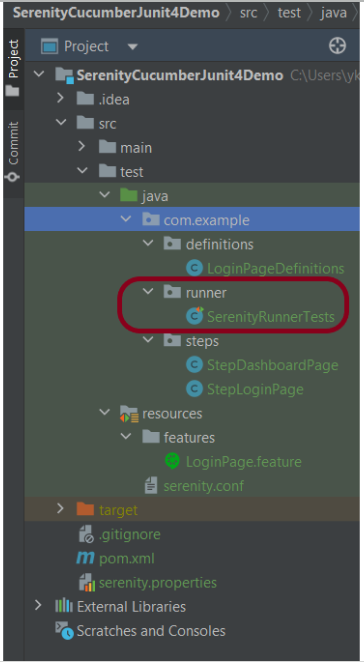
<class name="com.example.runner.RunnerTests"/>
<class name="com.example.runner.RunnerTestsFailed"/>
<class name="com.example.runner.RunnerTestsSecondFailed"/>
</classes>
</test> <!-- Test -->
</suite> <!-- Suite -->
Add cucumber-reporting Plugin to pom.xml
Use the cucumber-reporting plugin by Masterthought to combine the JSON files into a single report. Configure the plugin in your pom.xml to read both the main and rerun JSON files.
<project xmlns="http://maven.apache.org/POM/4.0.0" xmlns:xsi="http://www.w3.org/2001/XMLSchema-instance"
  xsi:schemaLocation="http://maven.apache.org/POM/4.0.0 http://maven.apache.org/xsd/maven-4.0.0.xsd">
  <modelVersion>4.0.0</modelVersion>

  <groupId>com.example</groupId>
  <artifactId>POM_Cucumber_TestNG_Demo</artifactId>
  <version>1.0-SNAPSHOT</version>
  <packaging>jar</packaging>

  <name>POM_Cucumber_TestNG_Demo</name>
  <url>http://maven.apache.org</url>

  <properties>
    <project.build.sourceEncoding>UTF-8</project.build.sourceEncoding>
    <cucumber.version>7.18.1</cucumber.version>
    <selenium.version>4.25.0</selenium.version>
    <testng.version>7.10.2</testng.version>
    <apache.common.version>2.4</apache.common.version>
    <maven.compiler.plugin.version>3.13.0</maven.compiler.plugin.version>
    <maven.surefire.plugin.version>3.3.1</maven.surefire.plugin.version>
    <maven.compiler.source.version>17</maven.compiler.source.version>
    <maven.compiler.target.version>17</maven.compiler.target.version>
    <maven.cucumber.reporting.version>5.8.2</maven.cucumber.reporting.version>
  </properties>

  <dependencies>

    <dependency>
      <groupId>io.cucumber</groupId>
      <artifactId>cucumber-java</artifactId>
      <version>${cucumber.version}</version>
    </dependency>

    <dependency>
      <groupId>io.cucumber</groupId>
      <artifactId>cucumber-testng</artifactId>
      <version>${cucumber.version}</version>
      <scope>test</scope>
    </dependency>

    <!-- Selenium -->
    <dependency>
      <groupId>org.seleniumhq.selenium</groupId>
      <artifactId>selenium-java</artifactId>
      <version>${selenium.version}</version>
    </dependency>

    <!-- TestNG -->
    <dependency>
      <groupId>org.testng</groupId>
      <artifactId>testng</artifactId>
      <version>${testng.version}</version>
      <scope>test</scope>
    </dependency>

    <!-- Cucumber Reporting -->
    <dependency>
      <groupId>net.masterthought</groupId>
      <artifactId>cucumber-reporting</artifactId>
      <version>${maven.cucumber.reporting.version}</version>
    </dependency>

  </dependencies>

  <build>
    <plugins>
      <plugin>
        <groupId>org.apache.maven.plugins</groupId>
        <artifactId>maven-compiler-plugin</artifactId>
        <version>${maven.compiler.plugin.version}</version>
        <configuration>
          <source>${maven.compiler.source.version}</source>
          <target>${maven.compiler.target.version}</target>
        </configuration>
      </plugin>

        <plugin>
        <groupId>org.apache.maven.plugins</groupId>
        <artifactId>maven-surefire-plugin</artifactId>
        <version>${maven.surefire.plugin.version}</version>
        <configuration>
          <testFailureIgnore>true</testFailureIgnore>
          <suiteXmlFiles>
            <suiteXmlFile>testng.xml</suiteXmlFile>
          </suiteXmlFiles>
        </configuration>
      </plugin>

      <plugin>
        <groupId>net.masterthought</groupId>
        <artifactId>maven-cucumber-reporting</artifactId>
        <version>${maven.cucumber.reporting.version}</version>

        <executions>
          <execution>
            <id>generate-cucumber-report</id>
            <phase>verify</phase>
            <goals>
              <goal>generate</goal>
            </goals>
            <configuration>
              <projectName>Cucumber Reporting Example</projectName>
              <outputDirectory>target/cucumber-html-reports</outputDirectory>
              <inputDirectory>target</inputDirectory>
              <jsonFiles>
                <!-- Include both main and rerun JSON reports -->
                <param>target/cucumber-reports/cucumber-report.json</param>
                <param>target/cucumber-reports/cucumber-rerun-report.json</param>
                <param>**/*.json</param>
              </jsonFiles>
            </configuration>
          </execution>
        </executions>
      </plugin>

    </plugins>
  </build>
</project>
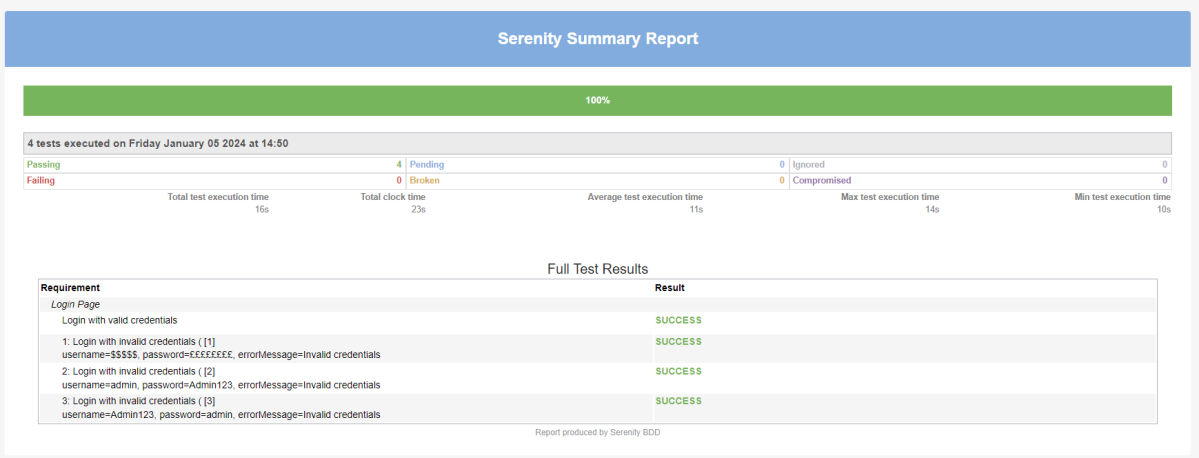
Run the tests and Generate the Report
Use the below command to run the tests and generate the consolidated Test Report.
mvn clean verify
RunnerTests class generates cucumber-report.json file whereas RunnerTestsFailed generates cucumber-rerun-report.json files are present in target/cucumber-reports folder.

MasterThought plugin uses these json files to generate a consolidated report in target/cucumber-html-reports.

There are different types of HTML reports gets generated as a part of the test execution cycle.
1. feature-overview – This HTML report gives an overall overview of test execution. Main HTML report which covers all different sections like Features, Tags, Steps, and Failures.

2. failures-overview – This HTML report gives an overview of all failed tests.

3. step-overview – This HTML report shows step statistics for the current cycle.

4. tag-overview – This HTML report shows passing and failing statistics for different tags used in test execution.

Congratulations on making it through this tutorial and hope you found it useful! Happy Learning!! Cheers!!