In the previous tutorial, I explained about SpringBoot and how to perform Integration testing of SpringBoot Application. In this tutorial, I will explain about the Testing of the SpringBoot Application in BDD format using Serenity Bdd and Cucumber and JUnit4.
Table of Contents
- Dependency List
- What is Serenity BDD?
- What is SpringBoot Application?
- Prerequisite
- Project Directory Structure
- Relationship between SpringBoot, Serenity BDD, Cucumber and Rest Assured
- Implementation Steps
- Create a source folder – src/test/resources
- Add SpringBoot, Serenity, Cucumber, and JUnit4 dependencies to the project
- Create a feature file under src/test/resources
- Create the StepDefinition and Helper classes
- To use Rest-assured, Serenity provides the class SerenityRest
- Create a Serenity Runner class in the src/test/java directory
- Run the tests from JUnit
- Run the tests from Command Line
- Serenity Report Generation
- Cucumber Report Generation
Dependency List
- SpringBoot Starter Parent – 3.1.0
- Serenity – 3.6.12
- Serenity Cucumber – 3.6.12
- Serenity JUnit4 – 3.6.12
- Serenity Rest Assured – 3.6.12
- Java 11
- Maven – 3.8.6
What is Serenity BDD?
Serenity BDD is an open-source library that aims to make the idea of living documentation a reality.
Serenity BDD helps you write cleaner and more maintainable automated acceptance and regression tests faster. Serenity also uses the test results to produce illustrated, narrative reports that document and describe what your application does and how it works. Serenity tells you not only what tests have been executed, but more importantly, what requirements have been tested.
What is SpringBoot Application?
Spring Boot is an open-source micro framework that provides Java developers with a platform to get started with an auto-configurable production-grade Spring application.
- Comes with embedded HTTP servers like Tomcat or Jetty to test web applications.
- Adds many plugins that developers can use to work with embedded and in-memory databases easily. Spring allows you to easily connect with database and queue services like Oracle, PostgreSQL, MySQL, MongoDB, Redis, Solr, ElasticSearch, Rabbit MQ, and others.
Prerequisite
Serenity seamlessly supports Cucumber 6 and Cucumber 7. However, this flexibility requires a little tweaking in the build dependencies. For the Maven project, you need to do the following:
- Add serenity-cucumber dependency
- Add Springboottest dependency to start up an application context to be used in a test.
- Add Junit-Vintage dependency as it is needed for spring boot application of version 2.4 and above with JUnit4.
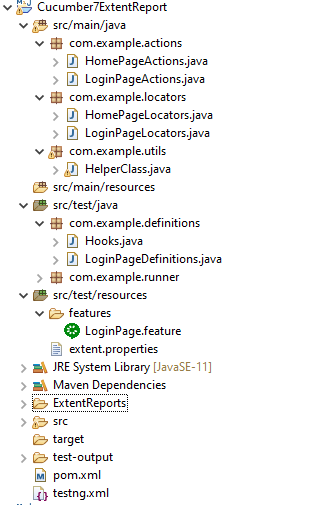
Project Directory Structure
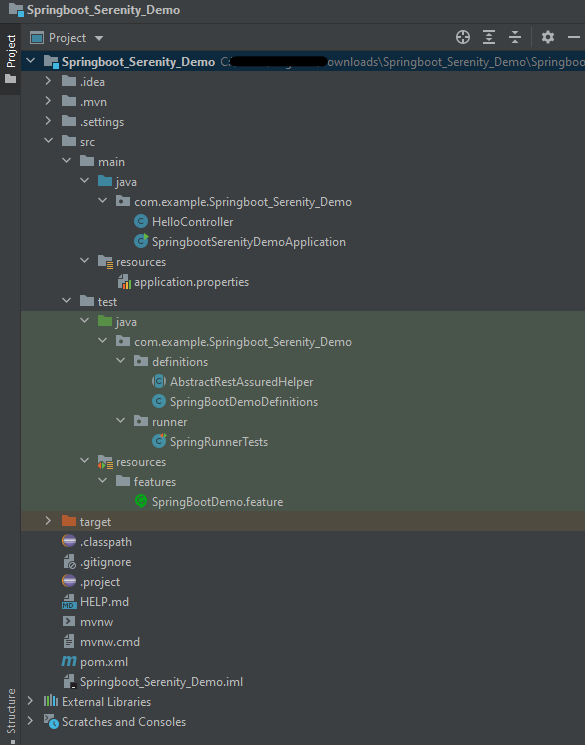
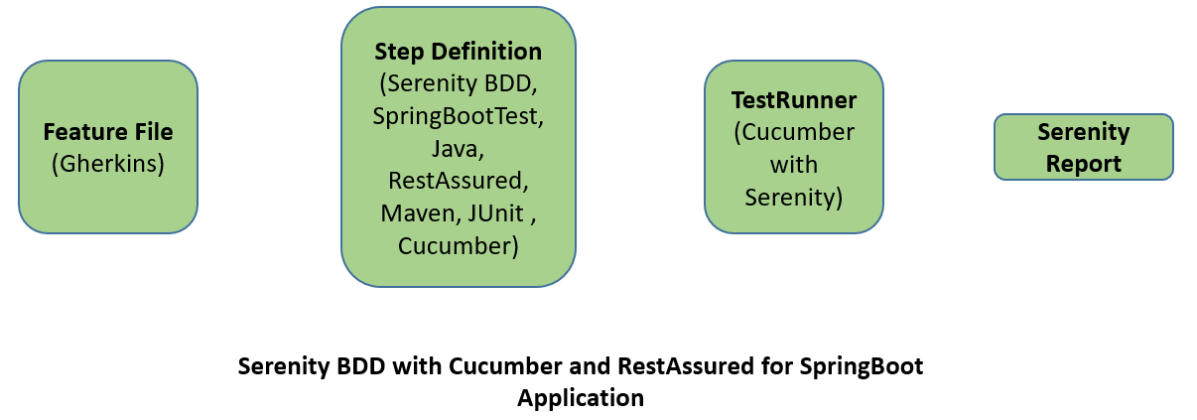
Relationship between SpringBoot, Serenity BDD, Cucumber and Rest Assured
Implementation Steps
- Create a source folder – src/test/resources to create test scenarios in the Feature file
- Add SpringBoot, Serenity, Cucumber, and JUnit4 dependencies to the project
- Create a feature file under src/test/resources
- Create the StepDefinition and Helper classes.
- Create a Serenity Runner class in the src/test/java directory
- Run the tests from JUnit
- Run the tests from Command Line
- Serenity Report Generation
- Cucumber Report Generation
Step 1 – Create a source folder – src/test/resources
Right-click on the test directory and select New->Directory and select resources (Maven Source Directories). Create a source folder – src/test/resources to create test scenarios in the Feature file

Step 2 – Add SpringBoot, Serenity, Cucumber, and JUnit4 dependencies to the project
We have added SpringBootTest, Serenity, Cucumber, JUnit4, and JUnit Vintage.
<?xml version="1.0" encoding="UTF-8"?>
<project xmlns="http://maven.apache.org/POM/4.0.0" xmlns:xsi="http://www.w3.org/2001/XMLSchema-instance"
         xsi:schemaLocation="http://maven.apache.org/POM/4.0.0 https://maven.apache.org/xsd/maven-4.0.0.xsd">
    <modelVersion>4.0.0</modelVersion>

    <parent>
        <groupId>org.springframework.boot</groupId>
        <artifactId>spring-boot-starter-parent</artifactId>
        <version>3.1.0-SNAPSHOT</version>
        <relativePath/> <!-- lookup parent from repository -->
    </parent>

    <groupId>com.example</groupId>
    <artifactId>Springboot_Serenity_Demo</artifactId>
    <version>0.0.1-SNAPSHOT</version>
    <name>Springboot_Serenity_Demo</name>
    <description>Demo project for Spring Boot</description>

    <properties>
        <java.version>11</java.version>
        <serenity.version>3.6.12</serenity.version>
        <maven.surefire.plugin.version>3.0.0-M9</maven.surefire.plugin.version>
        <maven.failsafe.plugin.version>3.0.0-M9</maven.failsafe.plugin.version>
        <parallel.tests></parallel.tests>
        <maven.compiler.plugin.plugin>3.10.1</maven.compiler.plugin.plugin>
        <maven.compiler.source.version>11</maven.compiler.source.version>
        <maven.compiler.target.version>11</maven.compiler.target.version>
        <tags></tags>
    </properties>

    <dependencies>
        <dependency>
            <groupId>org.springframework.boot</groupId>
            <artifactId>spring-boot-starter</artifactId>
        </dependency>

        <dependency>
            <groupId>org.springframework.boot</groupId>
            <artifactId>spring-boot-starter-test</artifactId>
            <scope>test</scope>
        </dependency>

        <dependency>
            <groupId>org.springframework.boot</groupId>
            <artifactId>spring-boot-starter-web</artifactId>
        </dependency>

        <dependency>
            <groupId>org.springframework.boot</groupId>
            <artifactId>spring-boot-starter-tomcat</artifactId>
            <scope>provided</scope>
        </dependency>

        <dependency>
            <groupId>org.springframework</groupId>
            <artifactId>spring-web</artifactId>
        </dependency>

		<!-- Serenity Core -->
        <dependency>
            <groupId>net.serenity-bdd</groupId>
            <artifactId>serenity-core</artifactId>
            <version>${serenity.version}</version>
            <scope>test</scope>
        </dependency>

		<!-- Serenity With JUnit4 -->
        <dependency>
            <groupId>net.serenity-bdd</groupId>
            <artifactId>serenity-junit</artifactId>
            <version>${serenity.version}</version>
            <scope>test</scope>
        </dependency>

		<!-- Serenity With Rest Assured -->
        <dependency>
            <groupId>net.serenity-bdd</groupId>
            <artifactId>serenity-rest-assured</artifactId>
            <version>${serenity.version}</version>
            <scope>test</scope>
        </dependency>

        <!-- Serenity With Cucumber -->
        <dependency>
            <groupId>net.serenity-bdd</groupId>
            <artifactId>serenity-cucumber</artifactId>
            <version>${serenity.version}</version>
            <scope>test</scope>
        </dependency>

        <!-- Serenity With Spring -->
        <dependency>
            <groupId>net.serenity-bdd</groupId>
            <artifactId>serenity-spring</artifactId>
            <version>${serenity.version}</version>
            <scope>test</scope>
        </dependency>

        <dependency>
            <groupId>org.junit.vintage</groupId>
            <artifactId>junit-vintage-engine</artifactId>
            <scope>test</scope>
        </dependency>

    </dependencies>

    <build>
        <plugins>
            <plugin>
                <groupId>org.springframework.boot</groupId>
                <artifactId>spring-boot-maven-plugin</artifactId>
            </plugin>

            <plugin>
                <groupId>org.apache.maven.plugins</groupId>
                <artifactId>maven-surefire-plugin</artifactId>
                <version>${maven.surefire.plugin.version}</version>
                <configuration>
                    <skip>true</skip>
                </configuration>
            </plugin>
            <plugin>
                <groupId>org.apache.maven.plugins</groupId>
                <artifactId>maven-failsafe-plugin</artifactId>
                <version>${maven.failsafe.plugin.version}</version>
                <configuration>
                    <includes>
                        <include>SpringRunnerTests.java</include>
                        <include>**/Test*.java</include>
                    </includes>
                    <parallel>methods</parallel>
                    <threadCount>${parallel.tests}</threadCount>
                    <forkCount>${parallel.tests}</forkCount>
                </configuration>
                <executions>
                    <execution>
                        <goals>
                            <goal>integration-test</goal>
                            <goal>verify</goal>
                        </goals>
                    </execution>
                </executions>
            </plugin>
            <plugin>
                <groupId>org.apache.maven.plugins</groupId>
                <artifactId>maven-compiler-plugin</artifactId>
                <version>${maven.compiler.plugin.plugin}</version>
                <configuration>
                    <source>${maven.compiler.source.version}</source>
                    <target>${maven.compiler.target.version}</target>
                </configuration>
            </plugin>

            <plugin>
                <groupId>net.serenity-bdd.maven.plugins</groupId>
                <artifactId>serenity-maven-plugin</artifactId>
                <version>${serenity.version}</version>
                <configuration>
                    <tags>${tags}</tags>
                </configuration>
                <dependencies>
                    <dependency>
                        <groupId>net.serenity-bdd</groupId>
                        <artifactId>serenity-core</artifactId>
                        <version>${serenity.version}</version>
                    </dependency>
                </dependencies>
                <executions>
                    <execution>
                        <id>serenity-reports</id>
                        <phase>post-integration-test</phase>
                        <goals>
                            <goal>aggregate</goal>
                        </goals>
                    </execution>
                </executions>
            </plugin>
        </plugins>
    </build>
    <repositories>
        <repository>
            <id>spring-milestones</id>
            <name>Spring Milestones</name>
            <url>https://repo.spring.io/milestone</url>
            <snapshots>
                <enabled>false</enabled>
            </snapshots>
        </repository>
        <repository>
            <id>spring-snapshots</id>
            <name>Spring Snapshots</name>
            <url>https://repo.spring.io/snapshot</url>
            <releases>
                <enabled>false</enabled>
            </releases>
        </repository>
    </repositories>
    <pluginRepositories>
        <pluginRepository>
            <id>spring-milestones</id>
            <name>Spring Milestones</name>
            <url>https://repo.spring.io/milestone</url>
            <snapshots>
                <enabled>false</enabled>
            </snapshots>
        </pluginRepository>
        <pluginRepository>
            <id>spring-snapshots</id>
            <name>Spring Snapshots</name>
            <url>https://repo.spring.io/snapshot</url>
            <releases>
                <enabled>false</enabled>
            </releases>
        </pluginRepository>
    </pluginRepositories>

</project>
Step 3 – Create a feature file under src/test/resources
Below is an example of a feature file which shows a sample test scenario.
Feature: SpringBoot Request

@ReceiveCorrectResponse

   Scenario Outline: Send a valid Request to get correct response
    Given I send a request to the URL "<url>"
    Then the response will return "<response>"

   Examples:
   | url             | response                   |
   | /               | Hello World, Spring Boot!  |
   | /qaautomation   | Hello QA Automation!       |
The test class mentioned below (AbstractRestAssuredHelper) contains integration tests for the spring boot rest controller mentioned. This test class:
- uses @SpringBootTest annotation which loads the actual application context.
- uses WebEnvironment.RANDOM_PORT to create and run the application at some random server port.
- @LocalServerPort gets the reference of the port where the server has started. It helps in building the actual request URIs to mimic real client interactions.
Step 4 – Create the StepDefinition and Helper classes
Below is the code of the StepDefinition and Helper class. These classes are created in the src/test/java directory.
AbstractRestAssuredHelper
import org.springframework.boot.test.context.SpringBootTest;
import org.springframework.boot.test.web.server.LocalServerPort;
import io.restassured.RestAssured;
import io.restassured.specification.RequestSpecification;
import net.serenitybdd.rest.SerenityRest;
import org.springframework.boot.test.context.SpringBootTest.WebEnvironment;

@SpringBootTest(webEnvironment = WebEnvironment.RANDOM_PORT)
public abstract class AbstractRestAssuredHelper {
     private final static String BASE_URI = "http://localhost";

     @LocalServerPort
     private int port;

     protected void configureRestAssured() {
           RestAssured.baseURI = BASE_URI;
           RestAssured.port = port;

     }

     protected RequestSpecification getAnonymousRequest() {
           configureRestAssured();
           return SerenityRest.given();
     }
}
This class sends the request and receives a response after performing the GET operation. Here, the validation of the response also takes place by asserting the expected and actual response
To use Rest-assured, Serenity provides the class SerenityRest
import org.junit.Assert;
import io.cucumber.java.en.Given;
import io.cucumber.java.en.Then;
import io.restassured.response.Response;
import net.serenitybdd.rest.SerenityRest;
import net.thucydides.core.annotations.Steps;

public class SpringBootDemoDefinitions {

	@Steps
    AbstractRestAssuredHelper helper;
    private Response response;

    @Given("I send a request to the URL {string}")
    public void iSendARequest(String endpoint) throws Exception  {
         response = helper.getAnonymousRequest().contentType("application/json")
                    .header("Content-Type", "application/json").when().get(endpoint);
    }

    @Then("the response will return {string}")
    public void extractResponse(String Expected ) {
          SerenityRest.restAssuredThat(response -> response.statusCode(200));
          String Actual = response.asString();
          Assert.assertEquals(Expected, Actual);
    }
}
Step 5 – Create a Serenity Runner class in the src/test/java directory
We cannot run a Feature file on its own in cucumber-based framework. We need to create a Java class that will run the Feature File. It is the starting point for JUnit to start executing the tests. TestRunner class is created under src/ test/java. When you run the tests with serenity, you use the CucumberWithSerenity test runner. If the feature files are not in the same package as the test runner class, you also need to use the @CucumberOptions class to provide the root directory where the feature files can be found.
import org.junit.runner.RunWith;
import io.cucumber.junit.CucumberOptions;
import net.serenitybdd.cucumber.CucumberWithSerenity;

@RunWith(CucumberWithSerenity.class)
@CucumberOptions(features = "src/test/resources", tags = "", glue = "com.example.Springboot_Serenity_Demo.definitions", publish = true)

public class SpringRunnerTests {

}
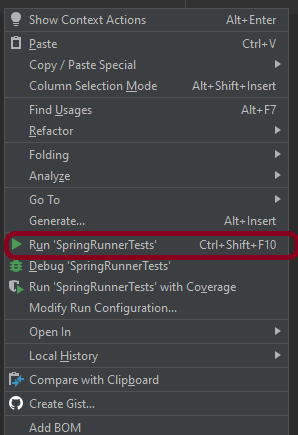
Step 6 – Run the tests from JUnit
You can run the tests from SpringRunnerTests class. Right-click on the class and select Run ‘SpringRunnerTests’.
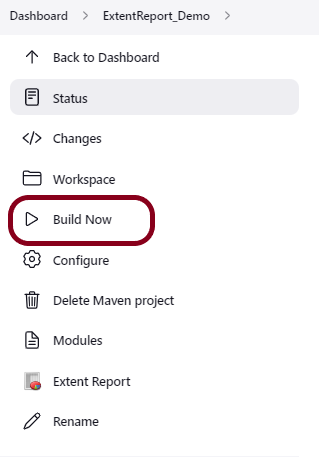
Step 7 – Run the tests from Command Line
Run the tests from the command line by using the below command
mvn clean verify
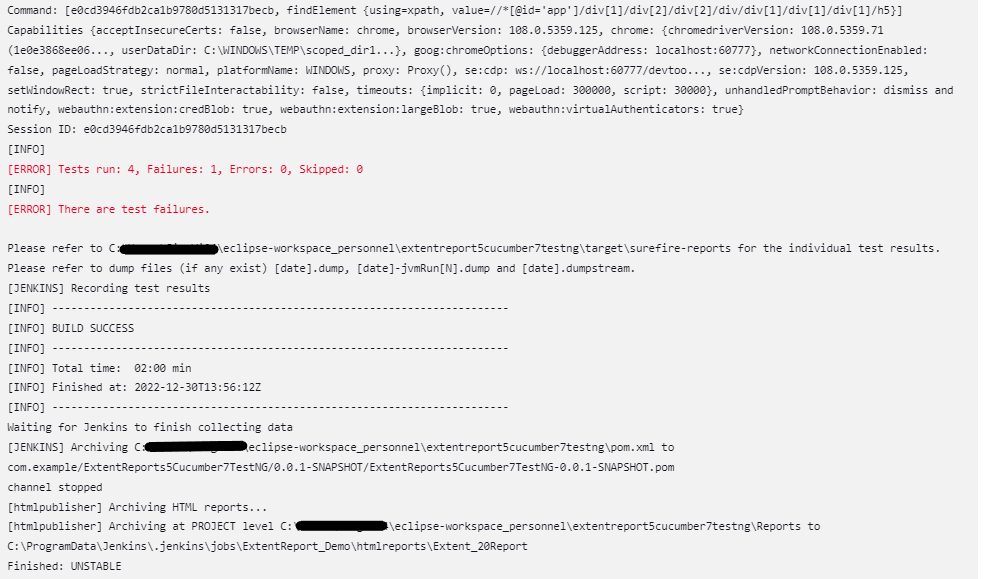
The output of the above program is

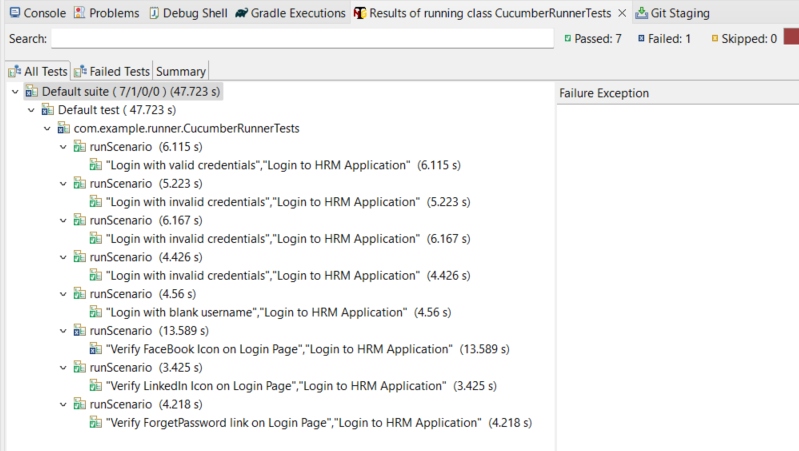
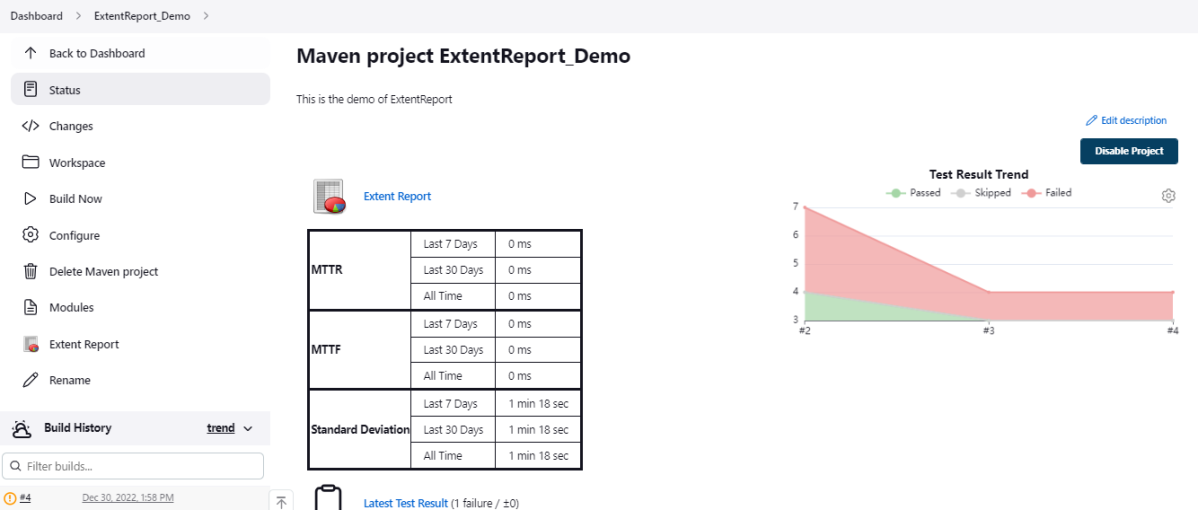
The test execution status is shown below:

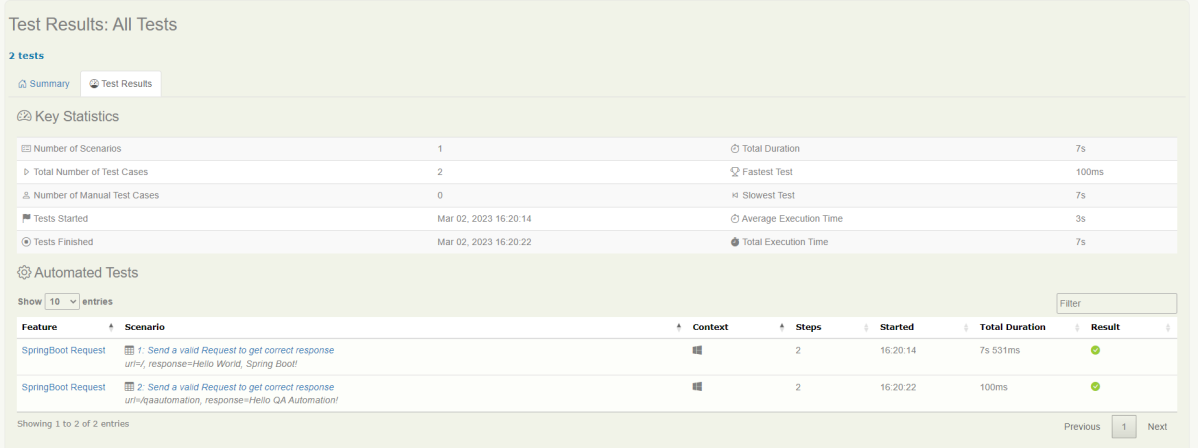
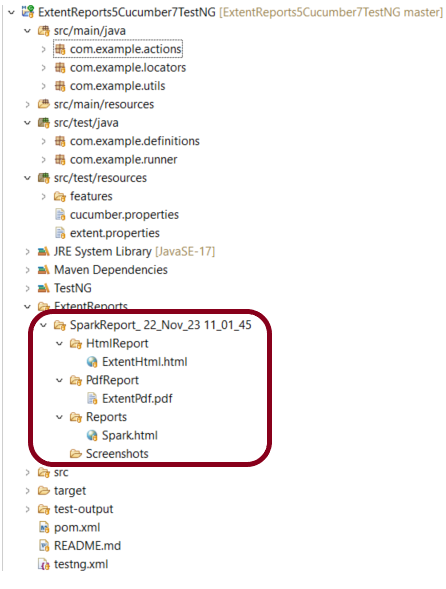
Step 8 – Serenity Report Generation
By default, the test report generated by Serenity is placed under target/site/serenity/index.html. Below is the sample Serenity Report.


Go to the Test Results tab and we can see all the test scenarios.

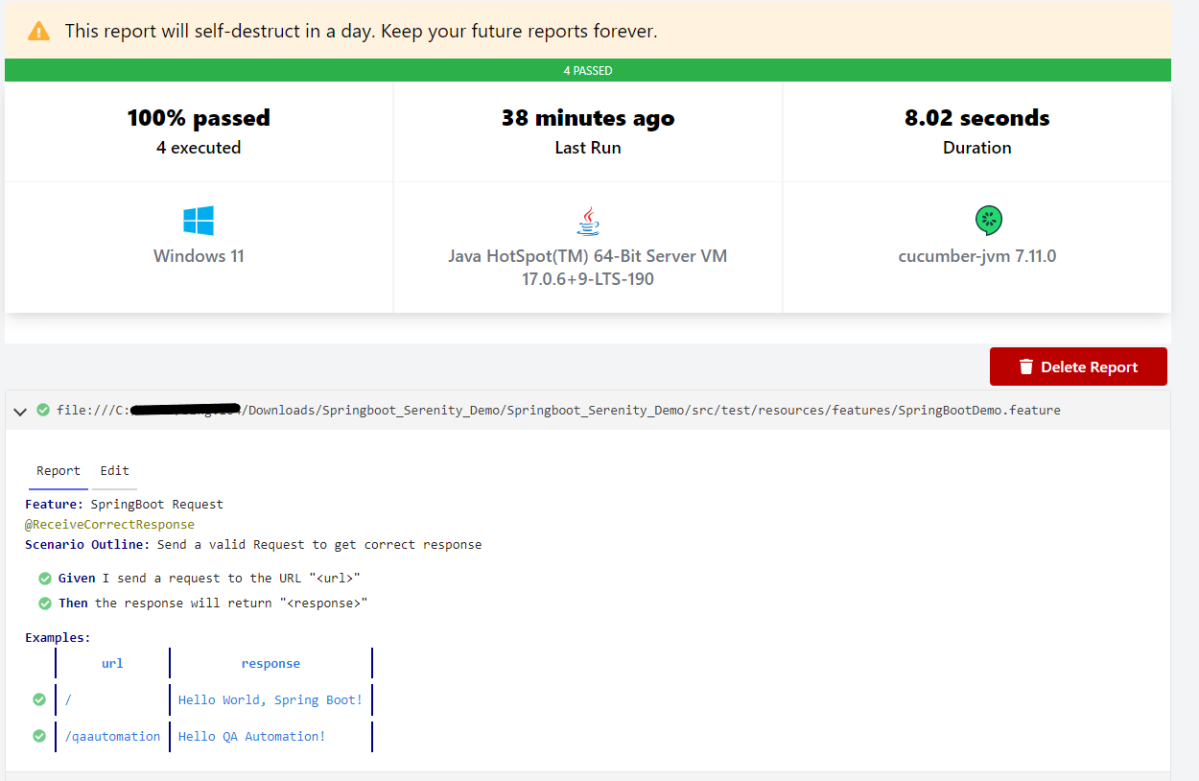
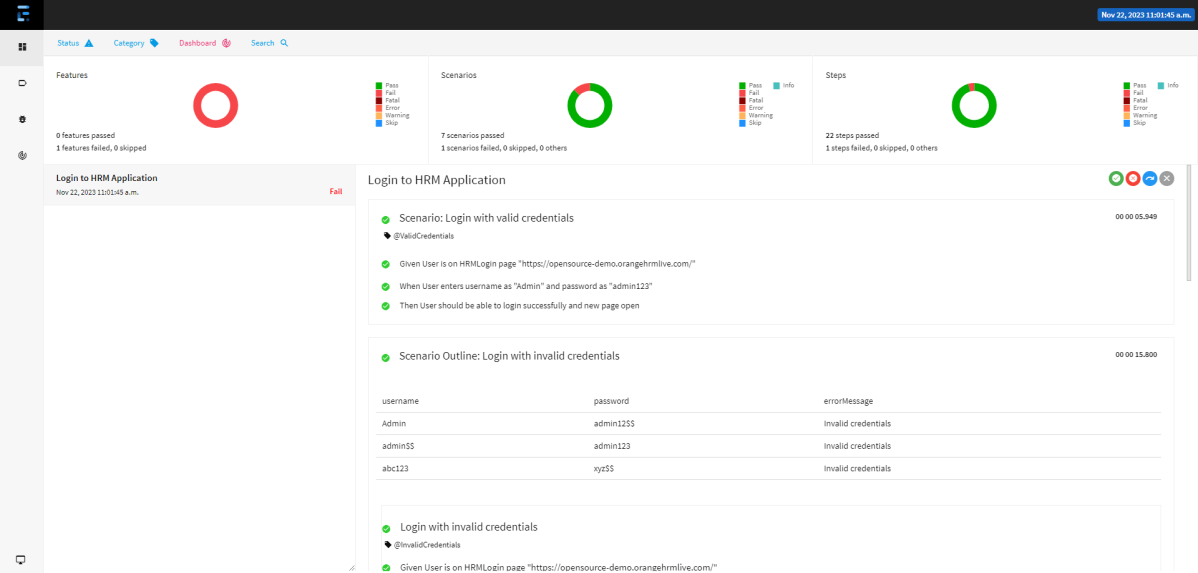
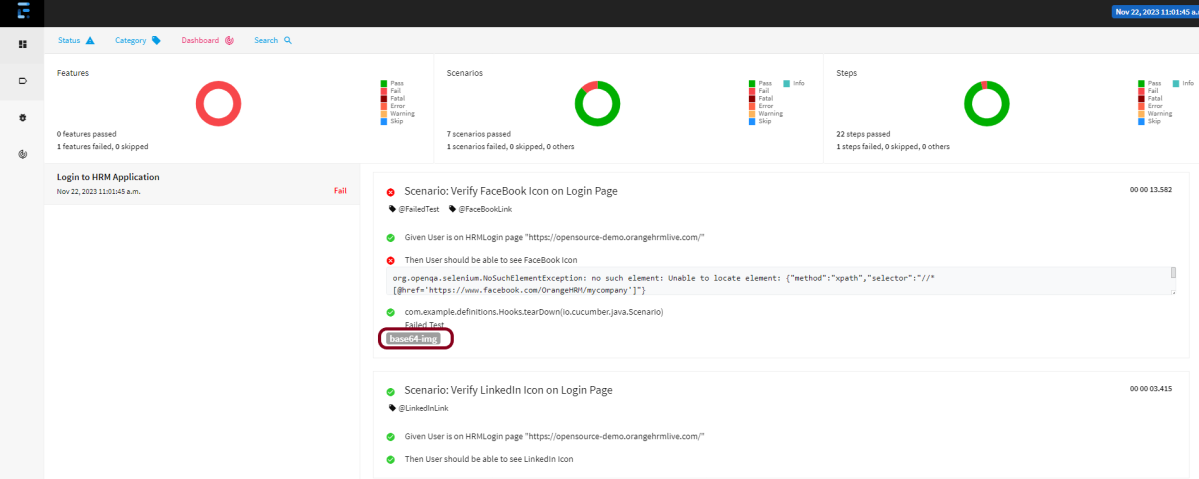
Step 9 – Cucumber Report Generation
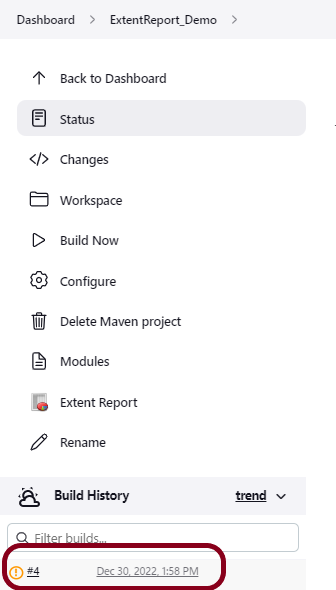
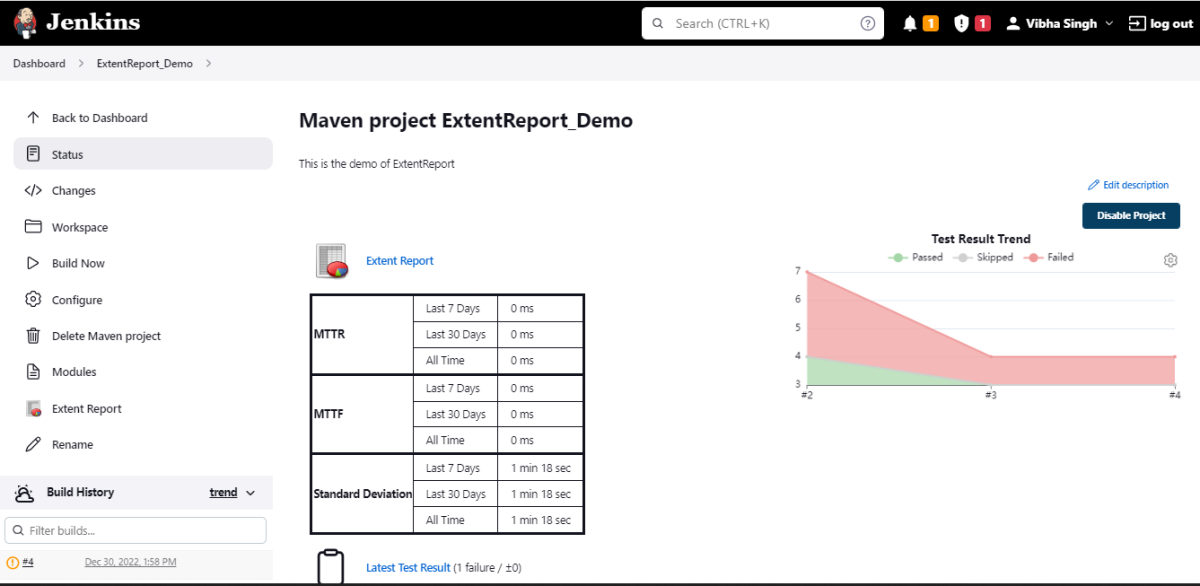
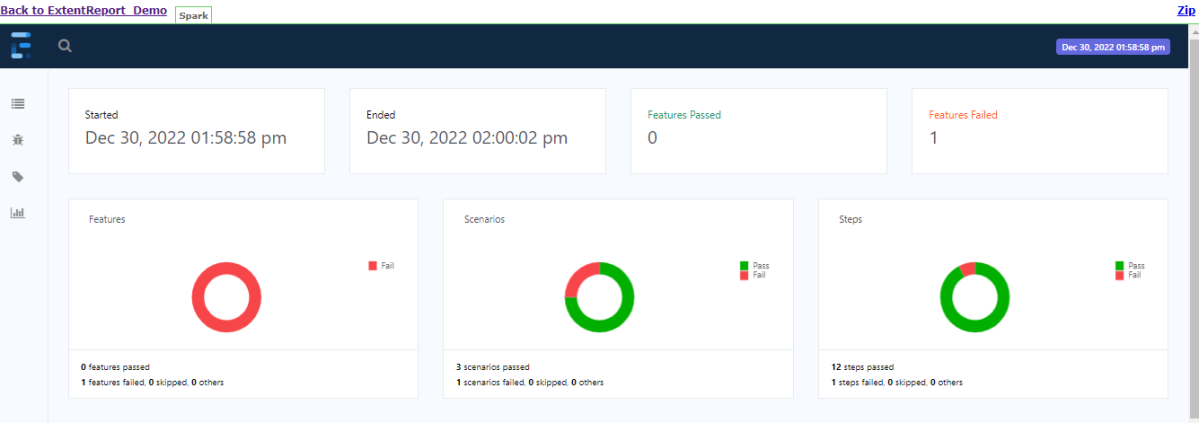
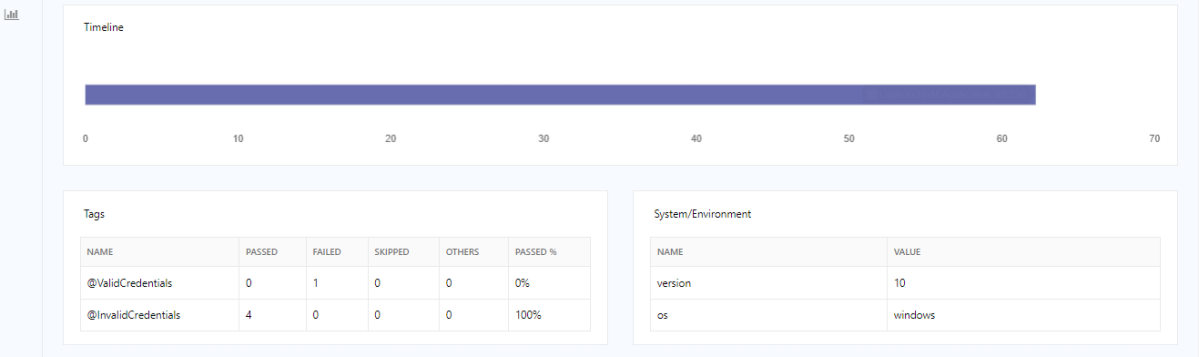
Cucumber Report can be generated by adding publish=true in SpringRunnerTests as shown in the above example. Click on the link provided in the execution status.

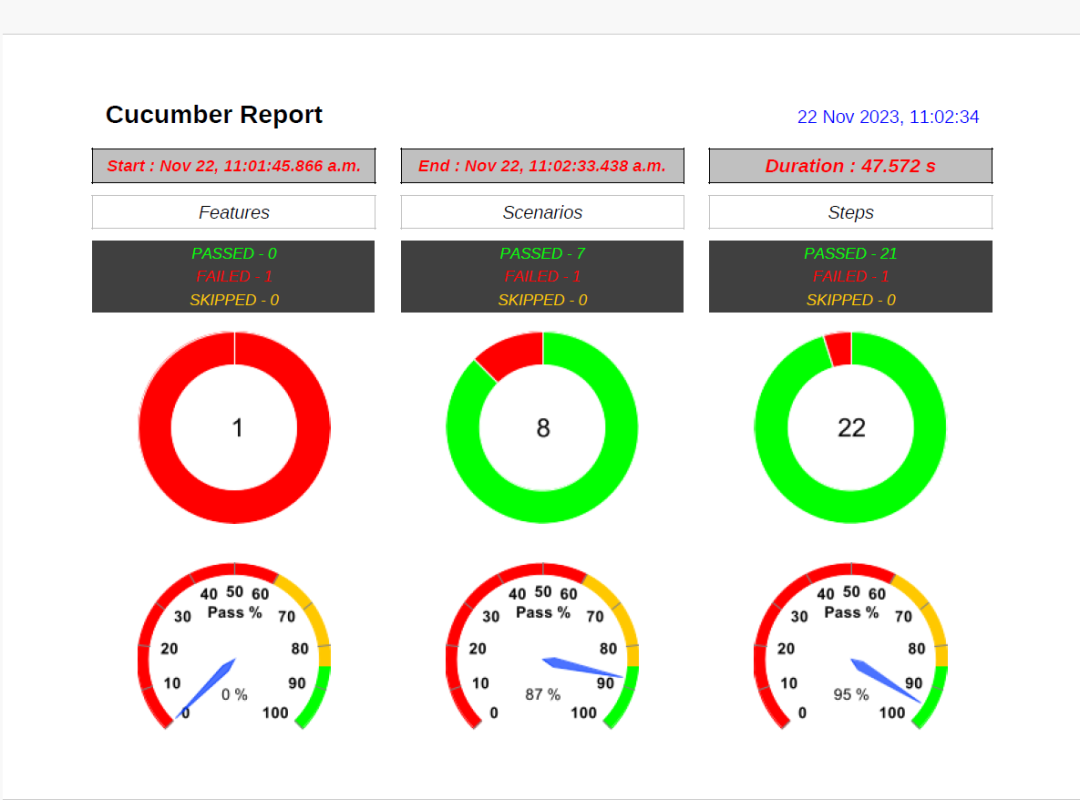
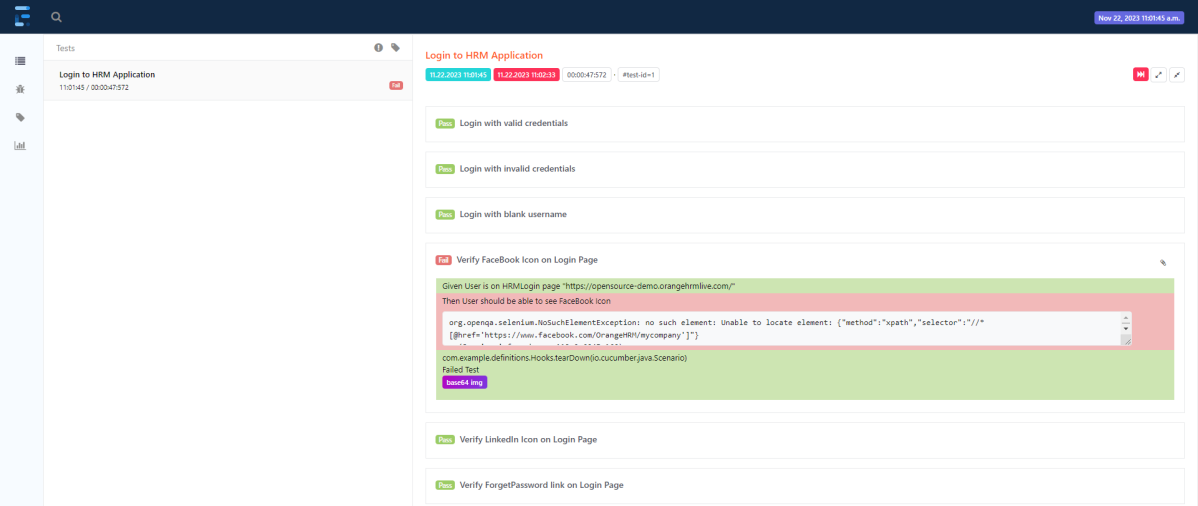
Cucumber Report
The next tutorial explains about the Testing of SpringBoot REST Application using Serenity BDD and Rest Assured for GET Method.
The complete code can be found in GitHub.


