Allure Framework is a lightweight, flexible multi-language test report tool that not only displays a very concise representation of what has been tested in a neat web report form, but also allows everyone involved in the development process to extract the most useful information from everyday test execution.
Selenium 3
How to run Chrome tests in headless mode in Selenium
This tutorial explains the steps to run the Selenium tests for Chrome browser in headless mode. We are going to run the tests in Selenium 4 as well as Selenium 3.
What is headless browser?
A headless browser is like any other browser, but without a Head/GUI (Graphical User Interface). A headless browser is used to automate the browser without launching the browser. While the tests are running, we could not see the browser, but we can see the test results coming on the console.
Headless browser testing is generally faster when compared to actual UI testing as it doesn’t wait for the whole page to render before performing any action.
When we need to execute automated test cases remotely on a server or in any of the build and release pipelines for continuous integration servers like Gitlab or Jenkins, it is not always possible to install real browsers on such remote machines. We can use headless browsers to run automation tests efficiently.
It is easy to perform multi-tasking with a Headless browser. The browser or our machine can do anything else while the tests run in the background.
There are 2 ways to add dependencies to the Selenium project.
1. Manually add the dependencies to the project.
Download Selenium Version from here (Selenium 3 & Selenium 4)
Download ChromeDriver Binary (Selenium 3 only)
Download the latest version of WebDriverManager (Selenium 3 only)
Once the Selenium and WebDriverManager folders are downloaded, unzip the folder. Once the zip file is extracted, reference these jar files in the project. For this, navigate to project properties and click Build Path-> Configure Build Path in Eclipse. Click “Add External Jars“. After clicking on the “Add External JARs“, selected all the extracted JARs. The JARs files are present in the project.
2. Add the below dependencies to pom.xml or build.gradle.
Selenium 4
Add below dependencies to the project.
 <dependency>
      <groupId>org.seleniumhq.selenium</groupId>
      <artifactId>selenium-java</artifactId>
      <version>4.16.1</version>
 </dependency>
The complete program looks like as shown below:
package com.example.steps;

import org.openqa.selenium.WebDriver;
import org.openqa.selenium.chrome.ChromeDriver;
import org.openqa.selenium.chrome.ChromeOptions;
import org.openqa.selenium.firefox.FirefoxDriver;
import org.openqa.selenium.firefox.FirefoxOptions;

public class ChromeOptionsHeadless_Demo {

    public static void main(String[] args) {

        // Create an object of Chrome Options class
        ChromeOptions options = new ChromeOptions();

        // Set Firefox Headless mode as TRUE
        options.addArguments("--headless=new");

        // Create an object of WebDriver class and pass the Chrome Options object
        // as an argument
        WebDriver driver = new ChromeDriver(options);

        // Navigate to site url
        driver.get("https://duckduckgo.com/");

        System.out.println("Executing Chrome Driver in Headless mode..");
        System.out.println("Page Title : " + driver.getTitle());
        System.out.println("Page URL  : " + driver.getCurrentUrl());

        // Close the driver
        driver.quit();
    }

}
The output of the above program is

Selenium 3
Add below dependencies to the project.
 <dependency>
      <groupId>org.seleniumhq.selenium</groupId>
      <artifactId>selenium-java</artifactId>
      <version>3.141.59</version>
 </dependency>
We know that to execute Selenium automation scripts on browsers like chrome or firefox, we must download the binary files of these drivers like chromedriver and geckodriver, etc. After this, we need to set the path to these binaries in the automation script or add the classpath location. Here, we want to execute Selenium WebDriver automation scripts on the Chrome browser, then you need first to download chromedriver.exe and then use the System.setProperty method to set its path as follows:
	// Set the path of ChromeDriver
	System.setProperty("webdriver.chrome.driver",
				"C:\\Users\\Vibha\\Software\\chromedriver_win32_98.0.4758.102\\chromedriver.exe");
The complete program looks like as shown below:
import org.openqa.selenium.chrome.ChromeDriver;
import org.openqa.selenium.chrome.ChromeOptions;

public class ChromeOptionsHeadless1 {

	public static void main(String[] args) {

		// Set the path of ChromeDriver
		System.setProperty("webdriver.chrome.driver",
				"C:\\Users\\Vibha\\Software\\chromedriver_win32_98.0.4758.102\\chromedriver.exe");

		// Create an object of Chrome Options class
		ChromeOptions options = new ChromeOptions();

		// pass the argument –headless to Chrome Options class.
		options.addArguments("--headless");

		// Create an object of Chrome Driver class and pass the Chrome Options object as
		// an argument
		ChromeDriver driver = new ChromeDriver(options);

		System.out.println("Executing Chrome Driver in Headless mode..");
		driver.get("https://duckduckgo.com/");

		System.out.println("Title of Page :" + driver.getTitle());
		System.out.println("Page URL  : " + driver.getCurrentUrl());

		// Close the driver
		driver.close();

	}
}
The output of the above program is

How to run headless Chrome Tests in Selenium using WebDriverManager?
WebDriverManager
<!-- https://mvnrepository.com/artifact/io.github.bonigarcia/webdrivermanager -->
<dependency>
    <groupId>io.github.bonigarcia</groupId>
    <artifactId>webdrivermanager</artifactId>
    <version>5.1.0</version>
</dependency>
WebDriverManager has an automated way to download browser executables(exes) or binaries. It supports different browsers like Chrome, Firefox, Microsoft Edge, Internet Explorer, Opera, or PhantomJS.
WebDriverManager.chromedriver().setup: checks for the latest version of the specified WebDriver binary. If the binaries are not present on the machine, then it will download the WebDriver binaries. Next, it instantiates the Selenium WebDriver instance with the ChromeDriver.
import org.openqa.selenium.chrome.ChromeDriver;
import org.openqa.selenium.chrome.ChromeOptions;

import io.github.bonigarcia.wdm.WebDriverManager;

public class ChromeOptionsHeadless2 {

	public static void main(String[] args) {

		// WebDriverManager downloads chrome browser executables or binaries.
		WebDriverManager.chromedriver().setup();

		// Create an object of Chrome Options class
		ChromeOptions options = new ChromeOptions();

		// pass the argument –headless to Chrome Options class.
		options.addArguments("--headless");

		// Create an object of Chrome Driver class and pass the Chrome Options object as
		// an argument
		ChromeDriver driver = new ChromeDriver(options);

		System.out.println("Executing Chrome Driver in Headless mode..");
		driver.get("https://duckduckgo.com/");

		System.out.println("Title of Page :" + driver.getTitle());
		System.out.println("Page URL  : " + driver.getCurrentUrl());

		// Close the driver
		driver.close();

	}

}
The output of the above program is

Congratulations!! We are able to run Chrome tests in Selenium in headless mode.
How to run Firefox tests in headless mode in Selenium
This tutorial explains the steps to run the Selenium tests on Firefox browser in headless mode. We are going to run the tests in Selenium. To run the Selenium tests on Chrome browser in headless mode, refer this tutorial.
To start with, we need to add dependencies to the project.
Manually add the dependencies to the project
Download Selenium Version from here
Download Firefox Binary from here
Download the latest version of WebDriverManager (Download this if you want to use WebDriverManager to download browser executables(exes) or binaries automatically, then skip downloading FireFox Binary).
Selenium 4
Add the below dependencies to pom.xml or build.gradle.
<dependency>
    <groupId>org.seleniumhq.selenium</groupId>
    <artifactId>selenium-java</artifactId>
    <version>4.16.1</version>
</dependency>
Below is an example to run the Firefox tests in the headless mode.
import org.openqa.selenium.WebDriver;
import org.openqa.selenium.firefox.FirefoxDriver;
import org.openqa.selenium.firefox.FirefoxOptions;

public class FirefoxOptionsHeadless_Demo {

    public static void main(String[] args) {

        // Create an object of Firefox Options class
        FirefoxOptions options = new FirefoxOptions();

        // Set Firefox Headless mode as TRUE
        options.addArguments("-headless");

        // Create an object of WebDriver class and pass the Firefox Options object
        // as an argument
        WebDriver driver = new FirefoxDriver(options);

        // Navigate to site url
        driver.get("https://duckduckgo.com/");

        System.out.println("Executing Firefox Driver in Headless mode..");
        System.out.println("Page Title : " + driver.getTitle());
        System.out.println("Page URL  : " + driver.getCurrentUrl());

        // Close the driver
        driver.quit();
    }

}
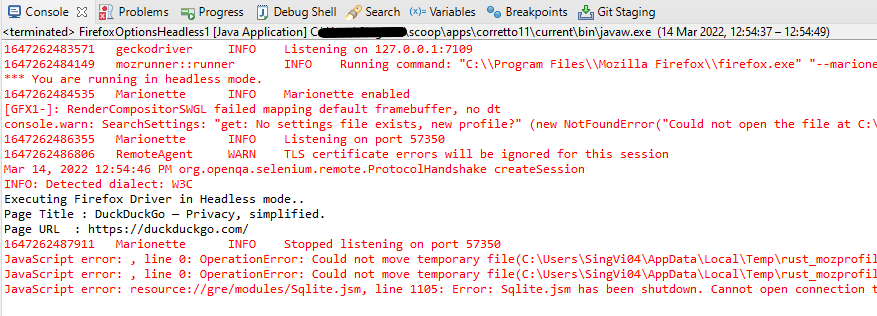
The output of the above program is

Selenium 3
Add the below dependencies to pom.xml or build.gradle.
<!-- https://mvnrepository.com/artifact/org.seleniumhq.selenium/selenium-java -->
    <dependency>
      <groupId>org.seleniumhq.selenium</groupId>
      <artifactId>selenium-java</artifactId>
      <version>3.141.59</version>
    </dependency>
What is headless browser?
A headless browser is like any other browser, but without a GUI (Graphical User Interface). A headless browser is used to automate the browser without launching the browser. While the tests are running, we could not see the browser, but we can see the test results coming on the console. This makes the test execution faster than normal execution. This is suitable for parallel testing as UI tests needs a lot of memory and resources.
The path of Gecko Driver (used for Firefox browser) needs to be set up in the Test using System.setProperty().Here, we use the methods setHeadless (true) of the FirfoxOptions class provided by Selenium WebDriver.
The complete program looks like as shown below:
import org.openqa.selenium.WebDriver;
import org.openqa.selenium.firefox.FirefoxDriver;
import org.openqa.selenium.firefox.FirefoxOptions;

public class FirefoxOptionsHeadless1 {

	public static void main(String[] args) {

		// Set the path of GeckoDriver
		System.setProperty("webdriver.gecko.driver",
				"C:\\Users\\Vibha\\Software\\geckodriver\\geckodriver.exe");

		// Create an object of Firefox Options class
		FirefoxOptions options = new FirefoxOptions();

		// Set Firefox Headless mode as TRUE
		options.setHeadless(true);

		// Create an object of WebDriver class and pass the Firefox Options object
		// as an argument
		WebDriver driver = new FirefoxDriver(options);

		// Navigate to site url
		driver.get("https://duckduckgo.com/");

		System.out.println("Executing Firefox Driver in Headless mode..");
		System.out.println("Page Title : " + driver.getTitle());
		System.out.println("Page URL  : " + driver.getCurrentUrl());

		// Close the driver
		driver.close();
	}
}
The output of the above program is
How to run headless Firefox Tests in Selenium using WebDriverManager?
WebDriverManager
<!-- https://mvnrepository.com/artifact/io.github.bonigarcia/webdrivermanager -->
<dependency>
    <groupId>io.github.bonigarcia</groupId>
    <artifactId>webdrivermanager</artifactId>
    <version>5.1.0</version>
</dependency>
WebDriverManager.firefoxdriver().setup(): checks for the latest version of the specified WebDriver binary. If the binaries are not present on the machine, then it will download the WebDriver binaries. In this case, it is not needed to download Firefox binary and set up the path
import org.openqa.selenium.WebDriver;
import org.openqa.selenium.firefox.FirefoxDriver;
import org.openqa.selenium.firefox.FirefoxOptions;

import io.github.bonigarcia.wdm.WebDriverManager;

public class FirefoxOptionsHeadless2 {

	public static void main(String[] args) {

		WebDriverManager.firefoxdriver().setup();

		// Create an object of Firefox Options class
		FirefoxOptions options = new FirefoxOptions();

		// Set Firefox Headless mode as TRUE
		options.setHeadless(true);

		// Create an object of Firefox Driver class and pass the Firefox Options object
		// as an argument
		WebDriver driver = new FirefoxDriver(options);

		// Navigate to the url
		driver.get("https://duckduckgo.com/");

		System.out.println("Executing Firefox Driver in Headless mode..");
		System.out.println("Page Title : " + driver.getTitle());
		System.out.println("Page URL  : " + driver.getCurrentUrl());

		// Close the driver
		driver.close();
	}

}
Congratulations!! We have run the tests in headless mode in FireFox.
Basic Selenium Tutorials
Selenium is an open-source tool. It is not a single automation tool like QTP. Instead, it is a suite of software or a set of JAR files. These tools automate web browsers across various browsers. Selenium is used by many companies, but a few to mention are Netflix, Google, HubSpot, Fitbit, Accenture, IBM, and more.
Selenium – Introduction, Installation, Test Script
Locators in Selenium
Launching Browsers and headless Browser
WebDriver Commands
Waits in Selenium
| Chapter 1 Implicit and Explicit Wait in Selenium WebDriver | |
| Chapter 2 What is Fluent Wait in Selenium WebDriver |
Handle Window and Alerts
| Chapter 1 Switch Window Commands in Selenium WebDriver | |
| Chapter 2 How to handle Alerts in Selenium WebDriver | |
| Chapter 3 How to Switch Between Frames in Selenium WebDriver |
Working with UI – Font, Color, Background color, Border
| Chapter 1 How to Retrieve Text and Background Colors with Selenium in Java – NEW |
| Chapter 2 Retrieve Font Properties with Selenium in Java – NEW |
| Chapter 3 Retrieve Border Color with Selenium in Java – Coming Soon |
| Chapter 4 Highlighting Elements in Selenium Java – NEW |
Advance Selenium Tutorials
Interview Questions
How to run Selenium 3 on Docker
What is Docker and Container?
Docker is an open platform for developing, shipping, and running applications.
Docker provides the ability to package and run an application in a loosely isolated environment called a container. A container is a runnable instance of an image. You can create, start, stop, move, or delete a container using the Docker API or CLI. You can connect a container to one or more networks, attach storage to it, or even create a new image based on its current state.
By default, a container is relatively well isolated from other containers and its host machine
It contains multiple components such as Docker Daemon, Docker Clients, Docker Registry, and Docker Compose. It works on a client-server architecture. The Docker client communicates with the Docker Daemon handles the complex part of building, running, and distributing the Docker containers.
Docker Desktop is an easy-to-install application for your Mac or Windows environment that enables you to build and share containerized applications and microservices. Docker Desktop includes the Docker daemon (dockerd), the Docker client (docker), Docker Compose, Docker Content Trust, Kubernetes, and Credential Helper.
Why use Selenium with Docker for web application testing
When Selenium is used with Docker, there is no need to install the necessary browsers and browser drivers on the host machine. Overall, it is significantly quicker to get started with Selenium web automation testing using pre-made Docker containers. A range of Docker images (with Selenium) on the Docker Hub can be used by running a few commands on the terminal. Some of these images on the Docker Hub were developed and maintained by Selenium HQ.
One of the most common uses of Docker containers in selenium testing is cross-browser testing. Setting up test setups with all of the Browser-OS combinations gets difficult. These can be set up on the go and taken down once the tests are completed using Docker containers.
Another use of Docker containers in Selenium testing is parallel testing. Because there are so many sorts of tests to conduct, doing them sequentially takes a long time. As a result, parallelizing the testing saves time and provides faster feedback. Parallel testing, on the other hand, necessitates a significant amount of infrastructure setup. This would have a direct bearing on the price. Multiple containers can be launched on a single server using docker containers, making the most of the underlying hardware while also allowing for concurrent testing
Let’s discuss how to set up docker and run Selenium tests on it.
Setting up Window Docker
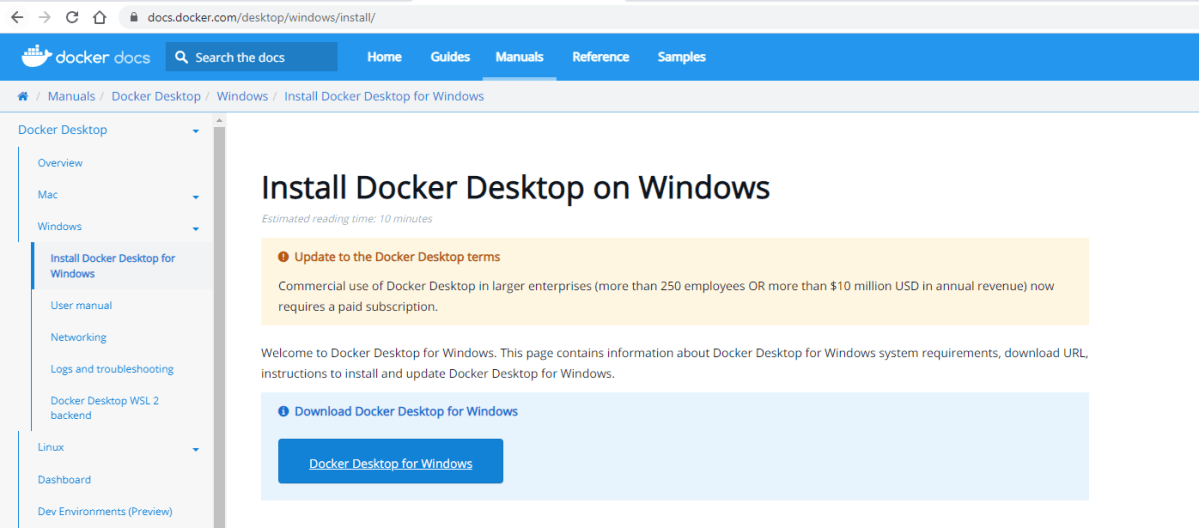
Step 1 – Download the Docker Installer
Docker provides an installer for Windows which can be downloaded from the official docker website.
Step 2 – Install Docker
Launch the installer by double-clicking on it. Select the Enable Hyper-V Windows Features option on the configuration page.

If the user account and admin accounts are different, the user account must be added to the docker-users group as shown below:
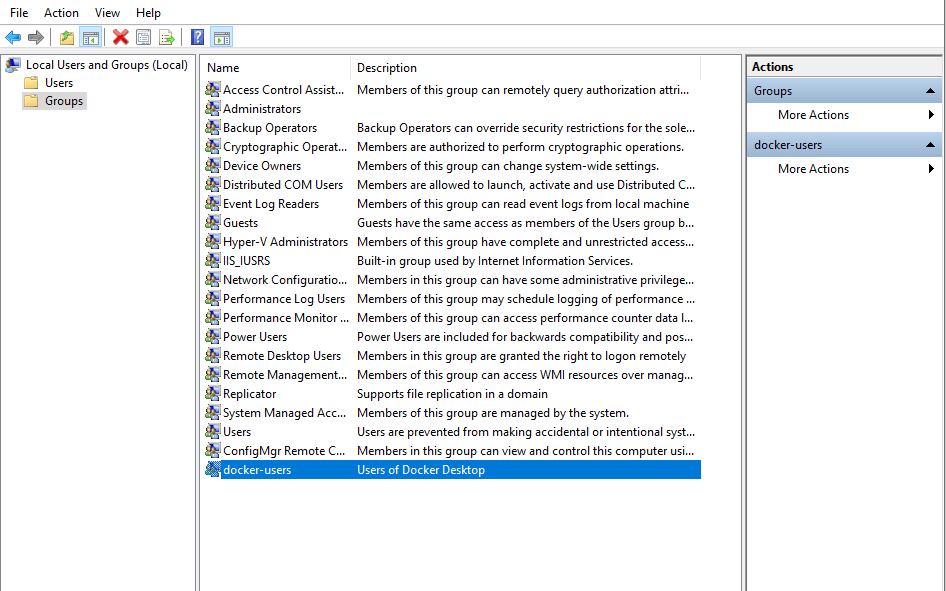
To do that, you will need to run Computer Management as an administrator and navigate to Local Users and Groups > Groups > docker-users. Then right-click to add the user to the group. You will need to log and log back in for the changes to take effect.
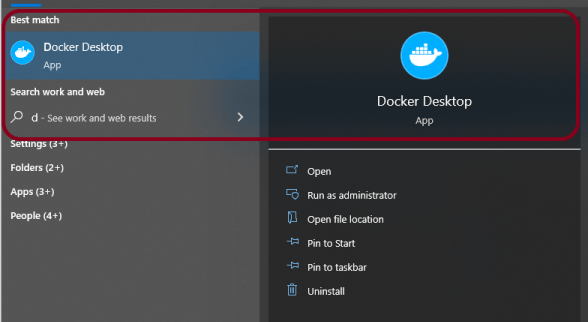
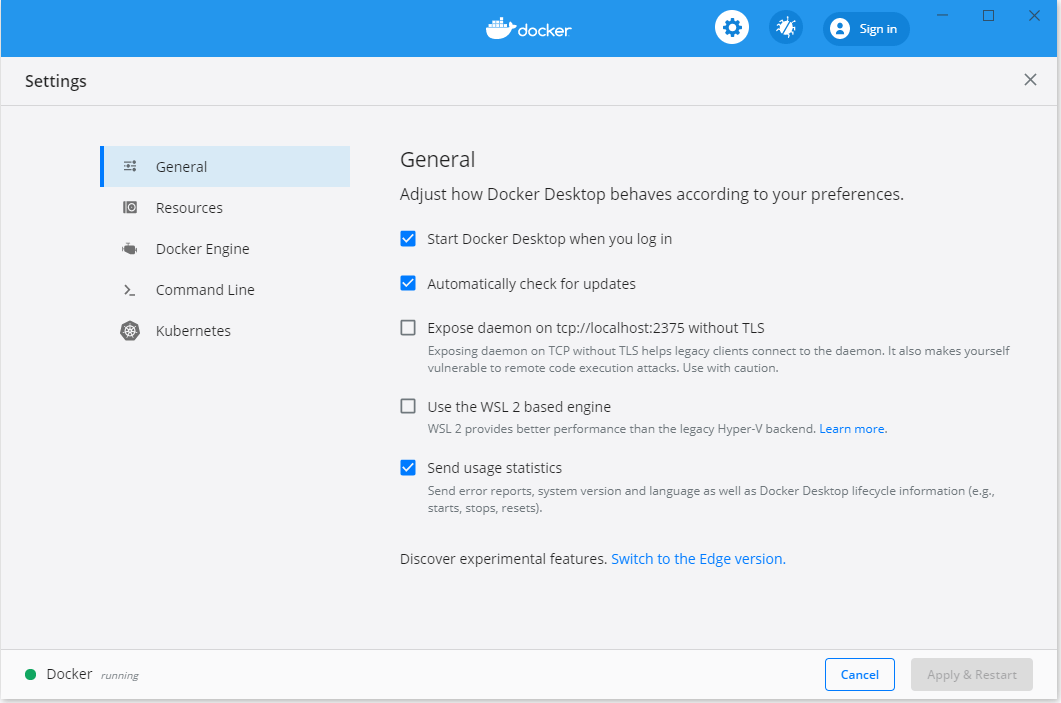
Step 3 – Start Docker Desktop
After the installation process is complete, the tool does not start automatically. To start the Docker tool, search for the tool, and select Docker Desktop in your desktop search results or Docker Desktop can be started from the start menu.
Docker is free for small businesses, personal usage, education, and non-commercial purposes.
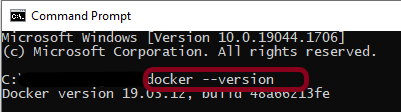
Step 4 – Verify the installation of Desktop Docker
To see if Docker is correctly configured, run the following line in Command Prompt. The version of Docker installed on the system is provided.
docker --version
Running Selenium Tests in Docker
The Docker Desktop can execute a few docker images after it is installed. You can either build a Docker image from the scratch or start with a pre-configured base image from the Docker hub and add to it.
The selenium/standalone-firefox image hosted by selenium on DockerHub is used in this tutorial.
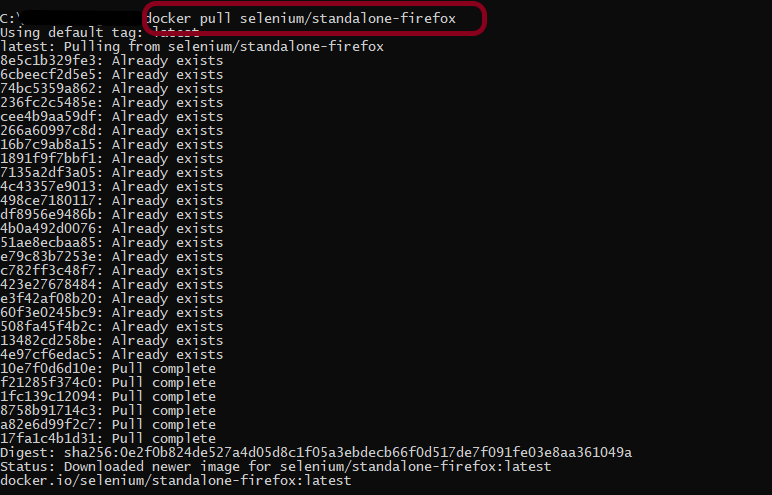
Step 1 – Pull the docker image
Run the following command to download a copy of the image onto the system.
docker pull selenium/standalone-firefox
Step 2 – Running the Selenium Webdriver Docker container
Upon pulling the selenium/standalone-firefox image onto the system, start the container by running the following command:
docker run -d -p 4444:4444 -v /dev/shm:/dev/shm selenium/standalone-firefox
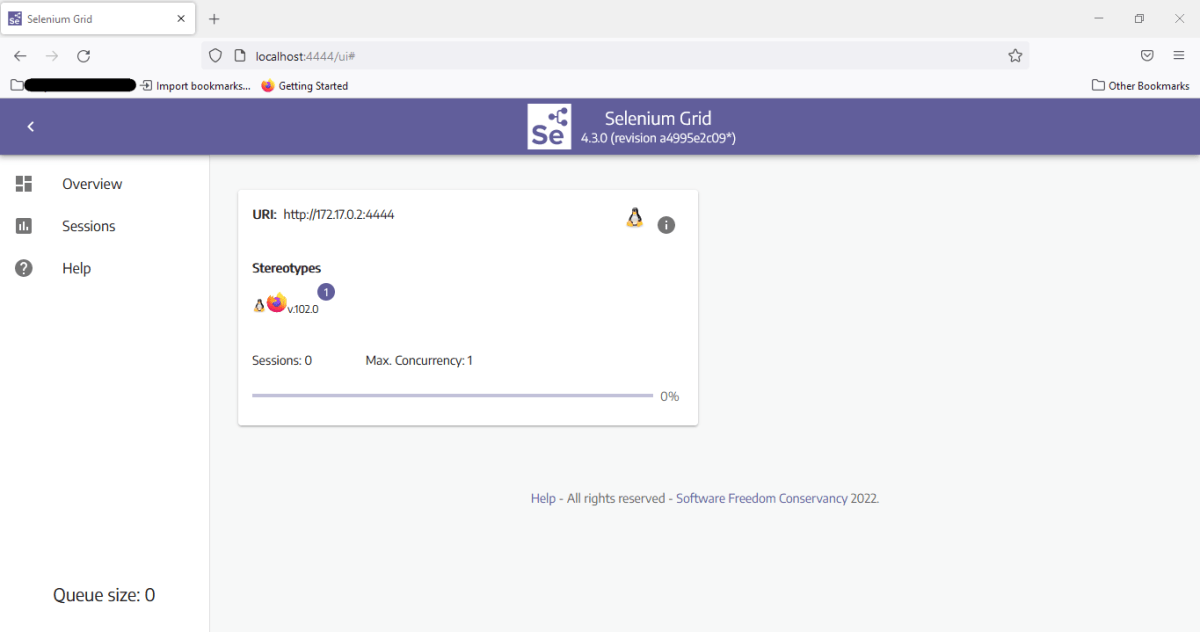
The above command starts a container from the image specified in detached mode (background mode). It also maps Port 4444 on the container to Port 4444 on your local browser.

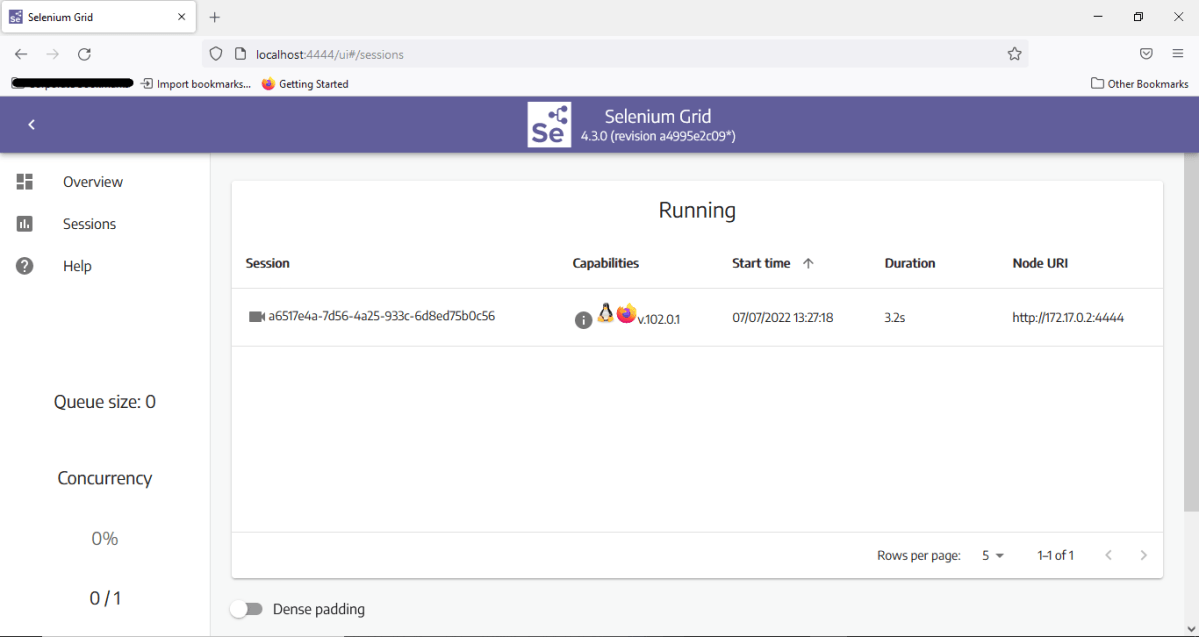
Open the browser and navigate to http://localhost:4444/. It reflects Selenium Grid UI, as shown below.
Step 3 – Add the dependencies to the POM.xml
<?xml version="1.0" encoding="UTF-8"?>

<project xmlns="http://maven.apache.org/POM/4.0.0" xmlns:xsi="http://www.w3.org/2001/XMLSchema-instance"
  xsi:schemaLocation="http://maven.apache.org/POM/4.0.0 https://maven.apache.org/xsd/maven-4.0.0.xsd">
  <modelVersion>4.0.0</modelVersion>

  <groupId>org.example</groupId>
  <artifactId>SeleniumDockerDemo</artifactId>
  <version>0.0.1-SNAPSHOT</version>

  <name>SeleniumDockerDemo</name>
  <url>http://www.example.com</url>

  <properties>
    <project.build.sourceEncoding>UTF-8</project.build.sourceEncoding>
    <maven.compiler.source>11</maven.compiler.source>
    <maven.compiler.target>11</maven.compiler.target>
  </properties>

<dependencies>

  <dependency>
     <groupId>org.seleniumhq.selenium</groupId>
     <artifactId>selenium-java</artifactId>
     <version>3.141.59</version>
  </dependency>

  <dependency>
     <groupId>io.github.bonigarcia</groupId>
     <artifactId>webdrivermanager</artifactId>
     <version>5.1.0</version>
   </dependency>

    <dependency>
      <groupId>junit</groupId>
      <artifactId>junit</artifactId>
      <version>4.13.2</version>
      <scope>test</scope>
    </dependency>

</dependencies>
Step 4 – Create a sample test
I have created a base class where the WebDriver is initialized and at the end is closed.
import io.github.bonigarcia.wdm.WebDriverManager;
import org.junit.After;
import org.junit.Before;
import org.openqa.selenium.WebDriver;
import org.openqa.selenium.firefox.FirefoxOptions;
import org.openqa.selenium.remote.RemoteWebDriver;
import java.net.MalformedURLException;
import java.net.URL;

public class BaseTest {
    protected static ThreadLocal<RemoteWebDriver> driver = new ThreadLocal<>();
    public static String remote_url_firefox = "http://localhost:4444/wd/hub";


    @Before
    public void setDriver() throws MalformedURLException {

        WebDriverManager.firefoxdriver().setup();
        FirefoxOptions options = new FirefoxOptions();
        options.addArguments("window-size=1920,1200");
        driver.set(new RemoteWebDriver(new URL(remote_url_firefox), options));
        driver.get().get("https://opensource-demo.orangehrmlive.com/");

    }

    public WebDriver getDriver() {
        return driver.get();
    }

    @After
    public  void closeBrowser() {
        driver.get().quit();
        driver.remove();
    }
}
The below class contains the various tests. The tests are related to verifying the login to the application, verifying the title of the current page, verifying the error message generated on providing the invalid credentials, verifying the LinkedIn link, and verifying the heading of forgot password page.
import org.junit.Test;
import org.openqa.selenium.By;
import static org.junit.Assert.assertEquals;
import static org.junit.Assert.assertTrue;

public class LoginPageTest extends BaseTest{

    @Test
    public void validCredentials() {

        getDriver().findElement(By.name("txtUsername")).sendKeys("Admin");
        getDriver().findElement(By.name("txtPassword")).sendKeys("admin123");
        getDriver().findElement(By.id("btnLogin")).click();
        String newPageText = getDriver().findElement(By.xpath("//*[@id='content']/div/div[1]/h1")).getText();
        System.out.println("newPageText :" + newPageText);
        assertEquals(newPageText,"Dashboard");

    }

    @Test
    public void invalidCredentials() {

        getDriver().findElement(By.name("txtUsername")).sendKeys("1234");
        getDriver().findElement(By.name("txtPassword")).sendKeys("12342");
        getDriver().findElement(By.id("btnLogin")).click();
        String actualErrorMessage = getDriver().findElement(By.id("spanMessage")).getText();
        System.out.println("Actual ErrorMessage :" + actualErrorMessage);
        assertEquals(actualErrorMessage,"Invalid credentials");

    }

    @Test
    public void loginPageHeading() {

        String loginText = getDriver().findElement(By.id("logInPanelHeading")).getText();
        System.out.println("Actual loginText :" + loginText);
        assertEquals(loginText,"LOGIN Panel");

    }

    @Test
    public void forgotPasswordPageHeading() {

        getDriver().findElement(By.xpath("//*[@id='forgotPasswordLink']/a")).click();
        String forgetPasswordTitle= getDriver().findElement(By.xpath(" //*[@id='content']/div[1]/div[2]/h1")).getText();
        System.out.println("Actual Page Title of Forgot Password Page :" + forgetPasswordTitle);
        assertEquals(forgetPasswordTitle,"Forgot Your Password?");
    }

    @Test
    public void verifyLinkedIn() {

        Boolean linkedInIcon = getDriver().findElement(By.xpath("//*[@id='social-icons']/a[1]/img")).isEnabled();
        System.out.println("Actual linkedIn Text :" + linkedInIcon);
        assertTrue(linkedInIcon);

    }

}
Step 5 – Executing the test case
To run it from the command prompt, open a command prompt and run the following command:
mvn clean test
Navigate to the sessions tab on the Selenium Grid UI upon running the command. It would reflect an active session.
The logs can be viewed in the command prompt as shown below:

The same test can be run using Chrome browser too. To run the tests using Chrome browser, we need to make 2 changes.
1 Firstly, download selenium/standalone-chrome image hosted by selenium on DockerHub.
Use the below command to pull the image in Docker
docker pull selenium/standalone-chrome
Start the container by running the following command:
docker run -d -p 4444:4444 -v /dev/shm:/dev/shm selenium/standalone-chrome
2. Secondly make the changes in the test code.
WebDriverManager.chromedriver().setup();
ChromeOptions options = new ChromeOptions();
Congratulations!!. The above steps allow running Selenium tests in Docker seamlessly. Happy Learning
