The implementation of a test framework is considered successful and effective, if the test framework supports test execution in multiple ways.
The tests in a Gradle Cucumber Framework can be executed as JUnit Tests, Gradle Tests and Gradle commands from Command Line.
In this tutorial, I will explain to run Gradle tests from Command Line.
Versions Used
- Cucumber – 7.5.0
- Java – 11
- JUnit – 4.13.2
- Rest Assured – 4.3.3
To execute tests using JUnit Tests and Gradle Tests, we need to create a JUnit TestRunner.
Steps to follow
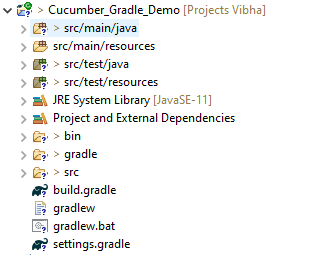
- Create a Gradle Java Project.
- Add Rest-Assured and Cucumber dependencies to the Gradle project
- Add Configuration to build.gradle
- Add Gradle Cucumber Task to build.gradle
- Create a feature file under src/test/resources
- Create the Step Definition class or Glue Code for the Test Scenario
- Run the tests from Command Line
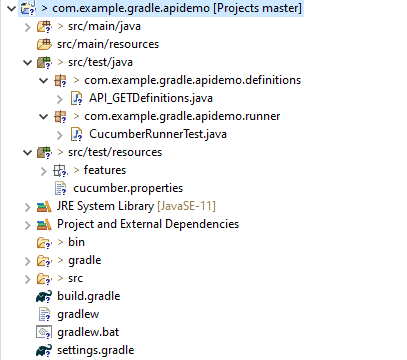
Step 1 – Create a Gradle project
Step 2 – Add the below-mentioned dependencies in the Gradle project in build.gradle.
plugins {
    // Apply the java-library plugin to add support for Java Library

    id 'java-library'

}

repositories {
    // Use jcenter for resolving dependencies.
    // You can declare any Maven/Ivy/file repository here.
    jcenter()
    mavenCentral()
}

dependencies {
    // This dependency is exported to consumers, that is to say found on their compile classpath.
    api 'org.apache.commons:commons-math3:3.6.1'

    // This dependency is used internally, and not exposed to consumers on their own compile classpath.
    implementation 'com.google.guava:guava:29.0-jre'

    // Use JUnit test framework
    testImplementation 'junit:junit:4.13'
    testImplementation 'io.cucumber:cucumber-java:6.6.1'
    testImplementation 'io.cucumber:cucumber-junit:6.6.1'
    testImplementation 'io.rest-assured:rest-assured:4.3.3'
}
Step 3 – Add Configuration to build.gradle
configurations {
    cucumberRuntime {
        extendsFrom testImplementation
    }
}
Step 4 – Add Gradle Cucumber Task to build.gradle
task cucumber() {
    dependsOn assemble, testClasses
    doLast {
        javaexec {
            main = "io.cucumber.core.cli.Main"
            classpath = configurations.cucumberRuntime + sourceSets.main.output + sourceSets.test.output
            args = ['--plugin', 'pretty','--glue', 'Cucumber_Gradle_Demo.definitions', 'src/test/resources']
        }
    }
}

task getexample() {
    dependsOn assemble, compileTestJava
    doLast {
        javaexec {
            main = "io.cucumber.core.cli.Main"
            classpath = configurations.cucumberRuntime + sourceSets.main.output + sourceSets.test.output
            args = ['--plugin', 'pretty', '--glue', 'Cucumber_Gradle_Demo.definitions', 'src/test/resources/features/', '--tags', '@getexample']
        }
    }
}

task postexample() {
    dependsOn assemble, compileTestJava
    doLast {
        javaexec {
            main = "io.cucumber.core.cli.Main"
            classpath = configurations.cucumberRuntime + sourceSets.main.output + sourceSets.test.output
            args = ['--plugin', 'pretty', '--glue', 'Cucumber_Gradle_Demo.definitions', 'src/test/resources/features/', '--tags', '@postexample']
        }
    }
}
Here, task cucumber will execute all the tests present in the project irrespective of the number of feature files and scenarios within the feature file.
Step 5 – Create a feature file under src/test/resources
I have created 2 sample feature files – API_GetExample.feature and API_PostExample.feature.
Below is the API_GetExample.feature
@getexample
Feature: Validation of get method
@GetUserDetails
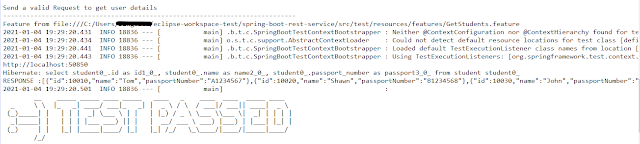
Scenario Outline: Send a valid Request to get user details
Given I send a request to the URL to get user details
Then the response will return status 200 and id <id> and salary <employee_salary> and name "<employee_name>" and age <employee_age> and message "<message>"
Examples:
|id |employee_salary|employee_name |employee_age |message |
|1 |320800 |Tiger Nixon |61 |Successfully! Record has been fetched. |
@GetAllUsers
Scenario Outline: Send a valid Request to get the details of all the users
Given I send a request to the URL to get the details of all the users
Then the response will return status 200 and message "<message>"
Examples:
|message |
| Successfully! All records has been fetched. |
API_PostExample.feature
@postexample
Feature: Validation of POST method

  @CreateUser
  Scenario Outline: Send Request to create a user

  Given I send a request to the URL to create a new user
  Then the response will return status 200 and name "<employee_name>" and message "<message>"

Examples:
    |employee_name |message                                |
    |posttest      |Successfully! Record has been added.   |
1. Run Test from Command Line
1. Open the command prompt and change the directory to the project location.
cd C:\Users\Vibha\Projects\Vibha_Personal\Cucumber_Gradle_Demo
2. All feature files should be in src/test/resources and create the Cucumber Runner class as CucumberRunnerTest.
Note:- The Runner class name should end with Test to execute the tests from Command Line
2. Running all Feature files or Tests from Command Line
The below command will run all the tests present in the project. As you can see, there are 2 feature files – API_GetExample.feature contains 2 scenarios, and API_PostExample.feature contains 1 scenario.
gradle cucumber
The below screenshot shows that Task: Cucumber is triggered.
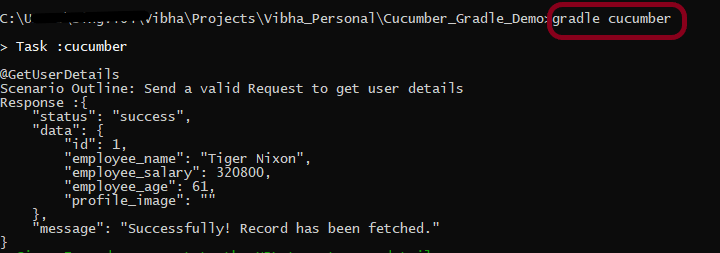
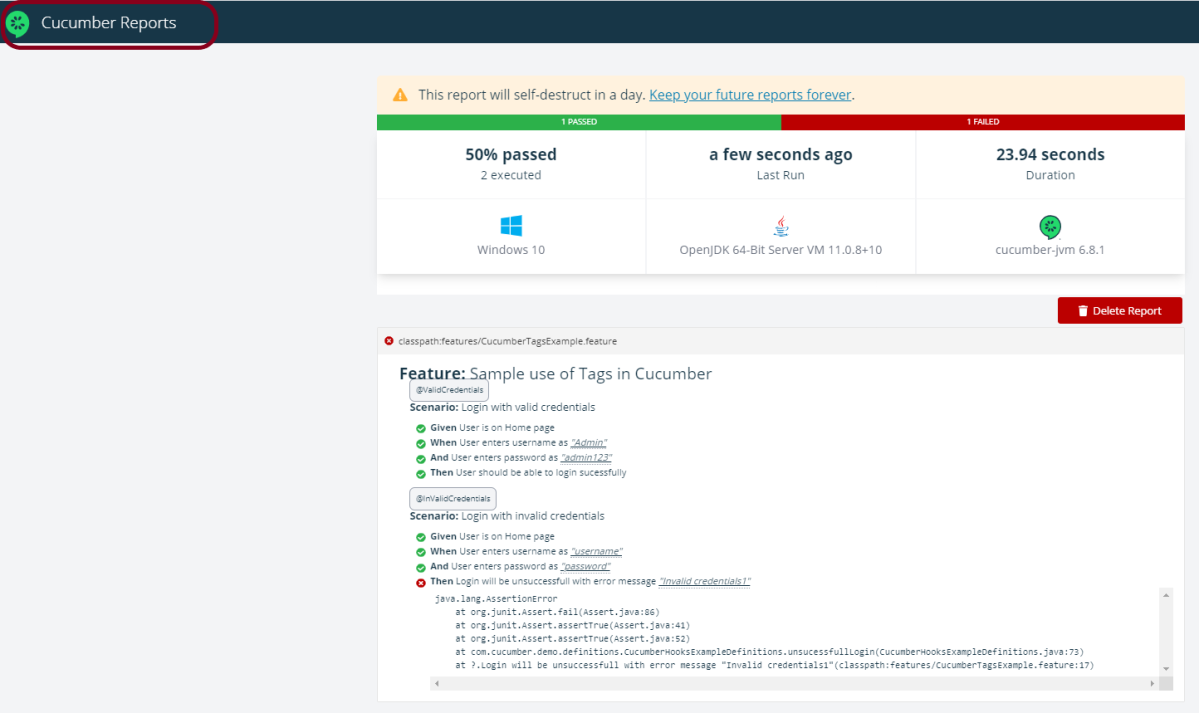
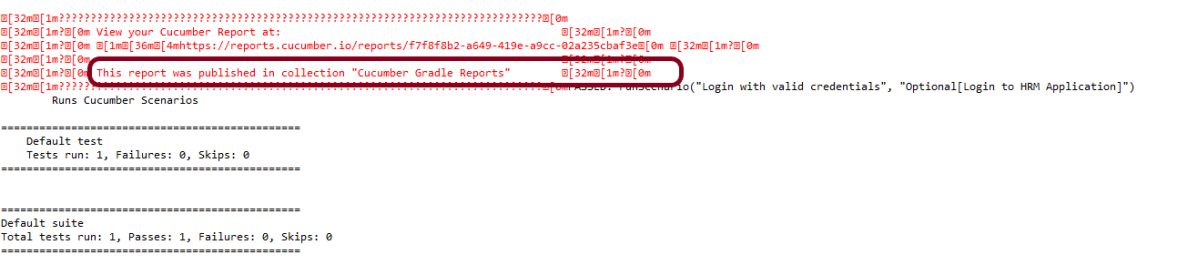
The below screenshot shows that the tests are executed and the status of the tests.

3. Running a Feature file from Command Line
To run a particular feature, create a task – postexample for that feature in the build.gradle as shown in the below example.
task postexample() {
    dependsOn assemble, compileTestJava
    doLast {
        javaexec {
            main = "io.cucumber.core.cli.Main"
            classpath = configurations.cucumberRuntime + sourceSets.main.output + sourceSets.test.output
            args = ['--plugin', 'pretty', '--glue', 'Cucumber_Gradle_Demo.definitions', 'src/test/resources/features/', '--tags', '@postexample']
        }
    }
}
Add this task as a feature tag name and use it to run the test of that particular feature file.
@postexample
Feature: Validation of POST method
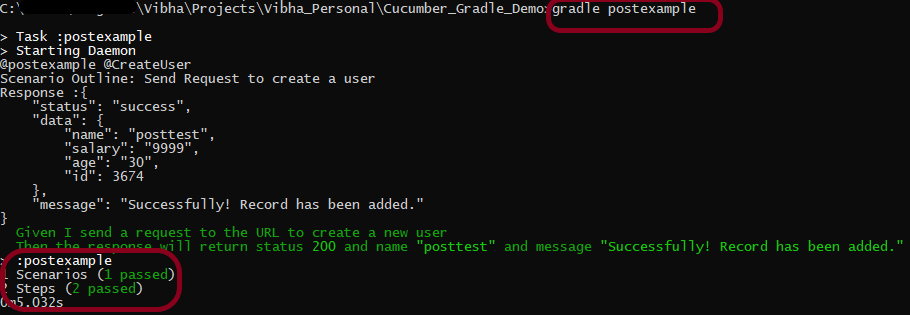
Use the below command to run the tests of API_PostExample.feature.
gradle postexample
4. Running Scenarios using Tags from Command Line
To execute the tests using tags, we need to add ‘–tags’, “${tags}” in build.gradle
task cucumber() {
    dependsOn assemble, testClasses
    doLast {
        javaexec {
            main = "io.cucumber.core.cli.Main"
            classpath = configurations.cucumberRuntime + sourceSets.main.output + sourceSets.test.output
            args = ['--plugin', 'pretty','--tags', "${tags}",'--glue', 'Cucumber_Gradle_Demo.definitions', 'src/test/resources']
        }
    }
}
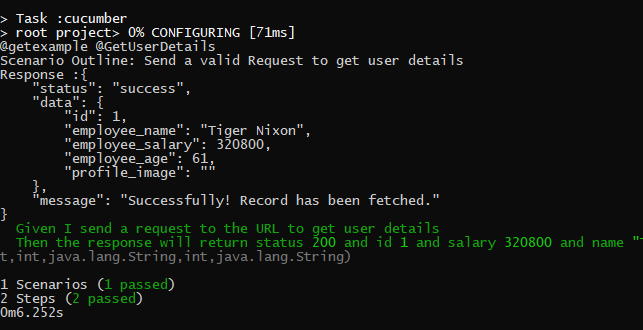
Use the below-mentioned command to run the tests tagged with tag = GetUserDetails.
gradle cucumber -P tags=@GetUserDetails
5. Running a group of tests from Command Line
Below is the feature file
@getexample
Feature: Validation of get method

  @GetUserDetails @SmokeTest
  Scenario Outline: Send a valid Request to get a user details

  Given I send a request to the URL to get user details
  Then the response will return status 200 and id <id> and salary <employee_salary> and name "<employee_name>" and age <employee_age> and message "<message>"

Examples:
    |id  |employee_salary|employee_name |employee_age  |message                                  |
    |1   |320800         |Tiger Nixon   |61            |Successfully! Record has been fetched.   |

  @GetAllUsers
  Scenario Outline: Send a valid Request to get the details of all the users

  Given I send a request to the URL to get the details of all the users
  Then the response will return status 200 and message "<message>"

Examples:
    |message                                        |
    | Successfully! All records has been fetched.   |


  @GetInvalidUsers @SmokeTest
  Scenario Outline: Send a valid Request to get the details of the invalid users

  Given I send a request to the URL to get the details of the invalid user
  Then the response will return status 200 and message "<message>"

Examples:
    | message                                  |
    | Successfully! Record has been fetched.   |

  @GetInvalidUsers
  Scenario Outline: Send a valid Request to get the details of the user with id 0

  Given I send a request to the URL to get the details of the user with id 0
  Then the response will return status 200 and message "<message>" and error "<errorMessage>"

Examples:
    | message             | errorMessage  |
    | Not found record.   | id is empty   |

  @Test3
  Scenario: Test 3

  Given I send a request to the URL to get the details of the user3
  Then the response will return successfully


  @Test4
  Scenario: Test 4

  Given I send a request to the URL to get the details of the user4
  Then the response will return successfully
I want to run 2 tests – @GetUserDetails and @GetInvalidUsers. I can create a task with the name of @SmokeTest and assign these scenarios wit h the same tag. The task will look like as shown below:
task smokeTest() {
    dependsOn assemble, compileTestJava
    doLast {
        javaexec {
            main = "io.cucumber.core.cli.Main"
            classpath = configurations.cucumberRuntime + sourceSets.main.output + sourceSets.test.output
            args = ['--plugin', 'pretty', '--glue', 'com.example.definitions', 'src/test/resources/features/', '--tags', '@SmokeTest']
        }
    }

}
Use the below-mentioned command to run the tests.
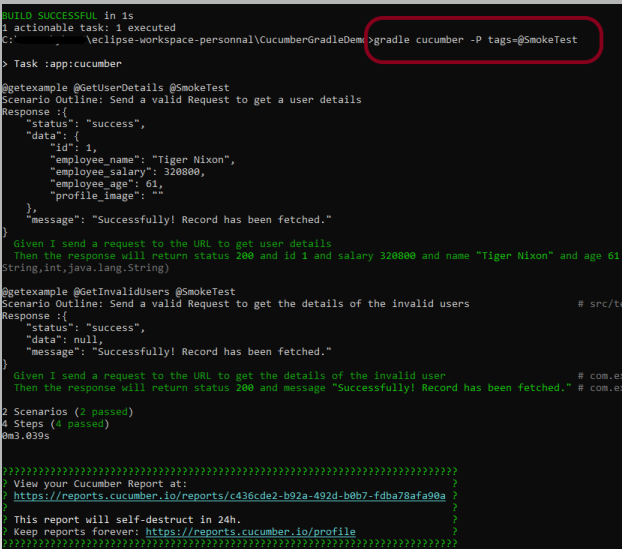
gradle cucumber -P tags=@SmokeTest
The output of the above program is
6. Skipping the execution of a group of tests from Command Line
In the below feature file, I have marked 4 tests as “@Ignore” and 2 are valid.
Feature: Validation of get method

  @GetUserDetails @SmokeTest
  Scenario Outline: Send a valid Request to get a user details

  Given I send a request to the URL to get user details
  Then the response will return status 200 and id <id> and salary <employee_salary> and name "<employee_name>" and age <employee_age> and message "<message>"

Examples:
    |id  |employee_salary|employee_name |employee_age  |message                                  |
    |1   |320800         |Tiger Nixon   |61            |Successfully! Record has been fetched.   |


  @GetAllUsers @Ignore
  Scenario Outline: Send a valid Request to get the details of all the users

  Given I send a request to the URL to get the details of all the users
  Then the response will return status 200 and message "<message>"

Examples:
    |message                                        |
    | Successfully! All records has been fetched.   |


  @GetInvalidUsers @SmokeTest @Ignore
  Scenario Outline: Send a valid Request to get the details of the invalid users

  Given I send a request to the URL to get the details of the invalid user
  Then the response will return status 200 and message "<message>"

Examples:
    | message                                  |
    | Successfully! Record has been fetched.   |

  @GetInvalidUsers @Ignore
  Scenario Outline: Send a valid Request to get the details of the user with id 0

  Given I send a request to the URL to get the details of the user with id 0
  Then the response will return status 200 and message "<message>" and error "<errorMessage>"

Examples:
    | message             | errorMessage  |
    | Not found record.   | id is empty   |

  @Test3 @Ignore
  Scenario: Test 3

  Given I send a request to the URL to get the details of the user3
  Then the response will return successfully


  @Test4
  Scenario: Test 4

  Given I send a request to the URL to get the details of the user4
  Then the response will return successfully
Add the below-mentioned tag in the build.gradle.
def tags = (findProperty('tags') == null) ? 'not @Ignore' : findProperty('tags') + ' and not @Ignore'
Use the below-mentioned command to run the tests.
gradle cucumber
The program will execute only 2 tests and will skip the rest 4 tests. The output of the above program is

If I use the tag @SmokeTest here in the command line, then it will run all the tests tagged with @SmokeTest, but will ignore the tests tagged with @Ignore. So, in this case, it will run only 1 test – @GetUserDetails.
gradle cucumber -P tags=@SmokeTest

7. Run multiple tags
Add the below code to build.gradle
test {
    systemProperty "cucumber.filter.tags", System.getProperty("cucumber.filter.tags")
     testLogging {
     showStandardStreams = true
 }
}
This will help us to run multiple tags in cucumber. (Cucumber6 and above uses, cucumber.filter.tags , so for the lower version use cucumber.options).
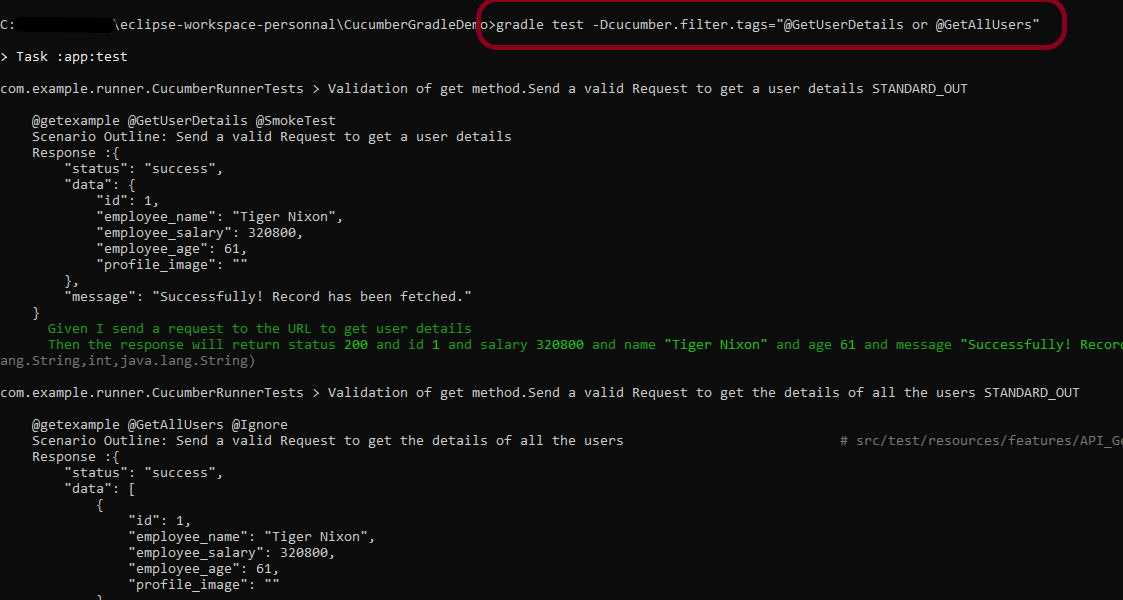
Use the below command to run 2 tests in gradle.
gradle test -Dcucumber.filter.tags="@GetUserDetails or @GetAllUsers"
or means that test tagged with either of these tags can be run. So, here 2 tests should run.

Congratulations on making it through this tutorial and hope you found it useful! Happy Learning!! Cheers!!


