HOME
1. What is CI/CD Pipeline?
CI/CD stands for Continuous Integration and Continuous Delivery (or Continuous Deployment), and it refers to a set of software development practices aimed at improving the efficiency, reliability, and speed of the software development and release process.
2. What’s the difference between continuous integration, continuous delivery, and continuous deployment?
Continuous Integration (CI) is a development practice wherein developers frequently merge their code modifications into a central repository. This integration occurs multiple times throughout the day and is validated through automated tests and a build procedure. This approach helps in mitigating integration issues, identifying and rectifying bugs early in the development phase, and iteratively testing and refining the code.
Continuous Delivery (CD) extends CI by automating the delivery of code changes up to a staging or pre-production environment. The goal is to ensure that code is always deployment-ready by the time it reaches these environments. Every change that passes all automated tests in the pipeline is prepared for deployment, though the actual release into production might still require manual approval.
Continuous Deployment (CD): The most critical stage of the pipeline is continuous deployment. Continuous Deployment takes CD a step further by automating the deployment of code changes directly to production. Every change that passes all pipeline stages is automatically released to users without manual intervention. Code changes can be made live much more quickly at this stage because there is little human interaction.
3. What are the benefits of the CI/CD Pipeline?
1. CI encourages frequent integration of code changes, promoting collaboration among team members. Developers can work on their features independently, knowing that automated processes will catch integration issues.
2. CI/CD automates the software delivery process, reducing manual interventions and streamlining workflows. This results in quicker development cycles and faster releases to production.
3. Automated testing in the CI phase helps identify bugs, errors, and integration issues early in the development cycle. This allows for prompt resolution and prevents the accumulation of issues that could be more challenging to address later.
4. CI improves transparency by detecting early-stage failures like build failures, merge issues, integration test failures, etc.
5. Automation in the CI/CD pipeline reduces the need for manual steps, minimizing the risk of human error and freeing up developers and operators to focus on more strategic and creative tasks. This also increases the quality of the code.
4. What are the popular CI/CD Tools?
There are several popular CI/CD (Continuous Integration/Continuous Delivery) tools available that help automate various stages of the software development lifecycle. Here are some widely used CI/CD tools:
1. Jenkins is an open-source automation server that supports building, deploying, and automating any project. It has a large and active community, extensive plugin support, and is highly customizable.
2. Travis CI is a cloud-based CI service that integrates with GitHub repositories. It’s known for its simplicity and ease of use, and it’s commonly used for open-source projects.
3. GitLab provides built-in CI/CD capabilities as part of its platform. It allows users to define CI/CD pipelines using a .gitlab-ci.yml file in the repository. GitLab CI/CD is tightly integrated with GitLab’s version control features.
4. CircleCI is a cloud-based CI/CD platform that supports the automation of the software development process. It integrates with popular version control systems, such as GitHub and Bitbucket.
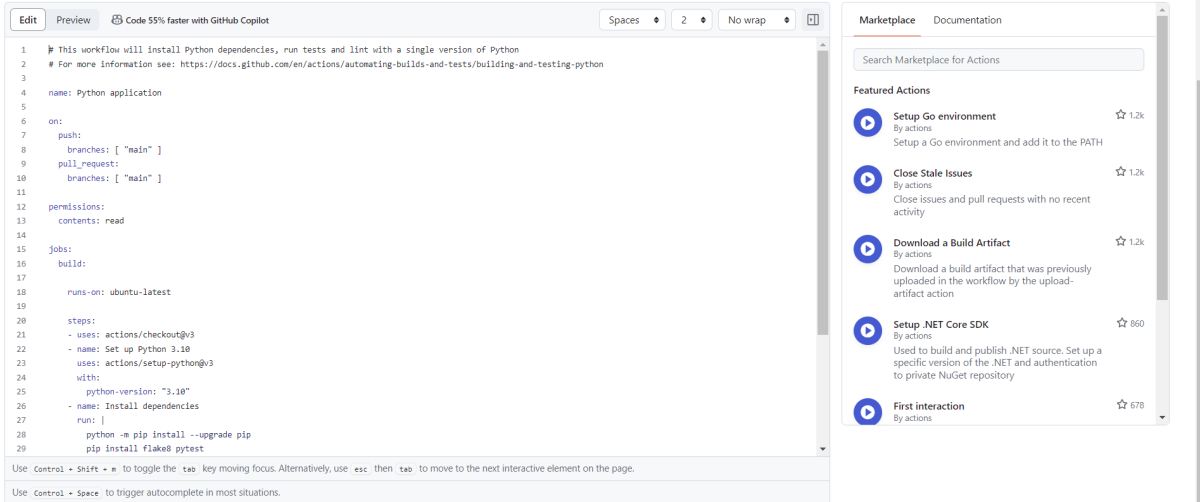
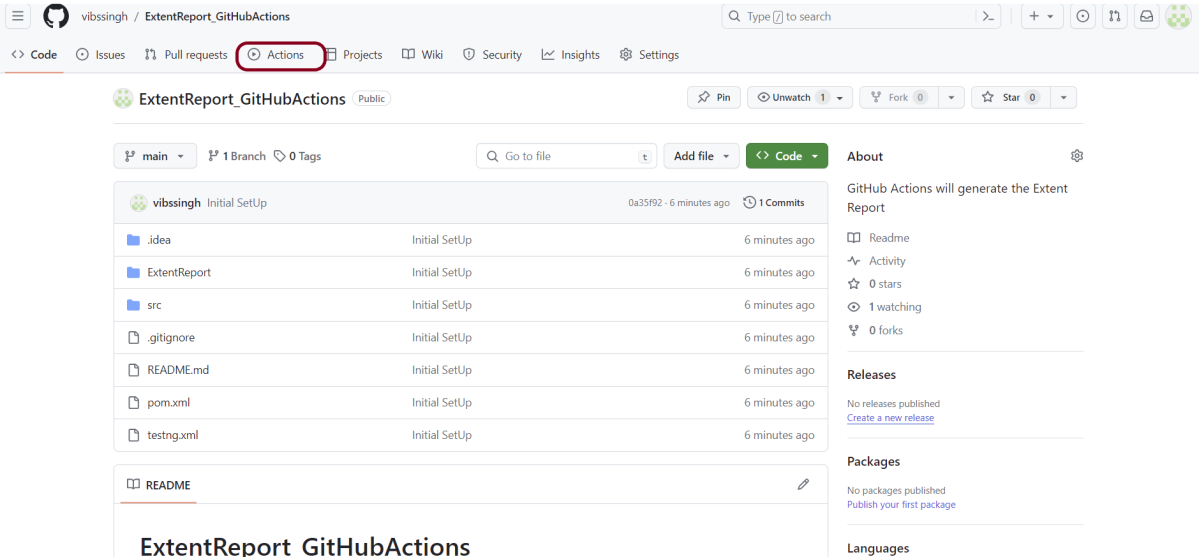
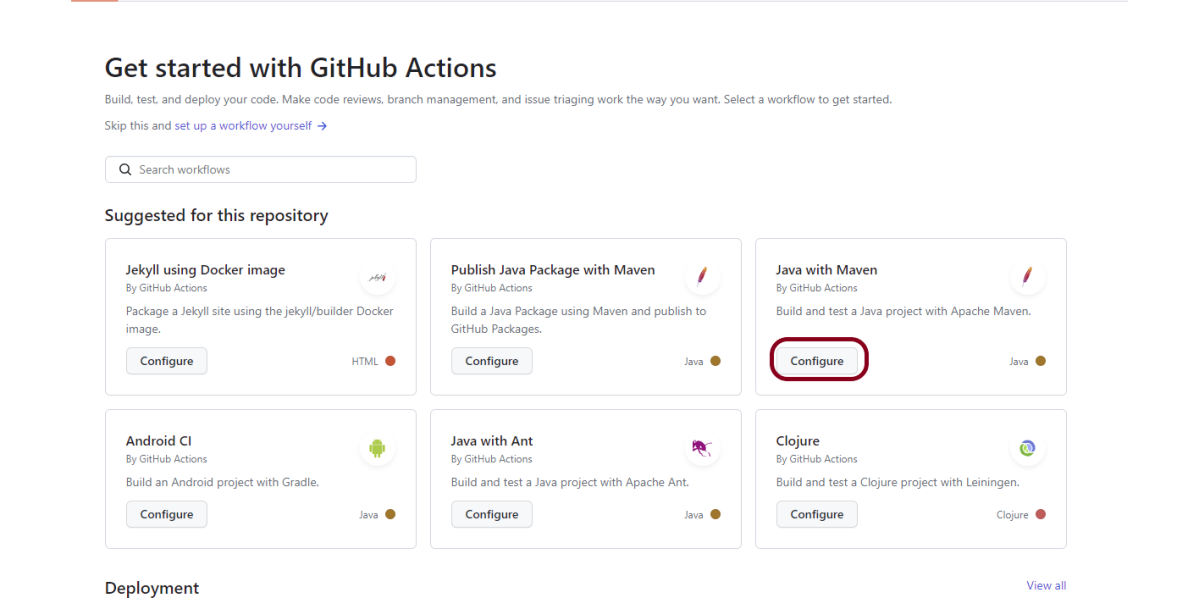
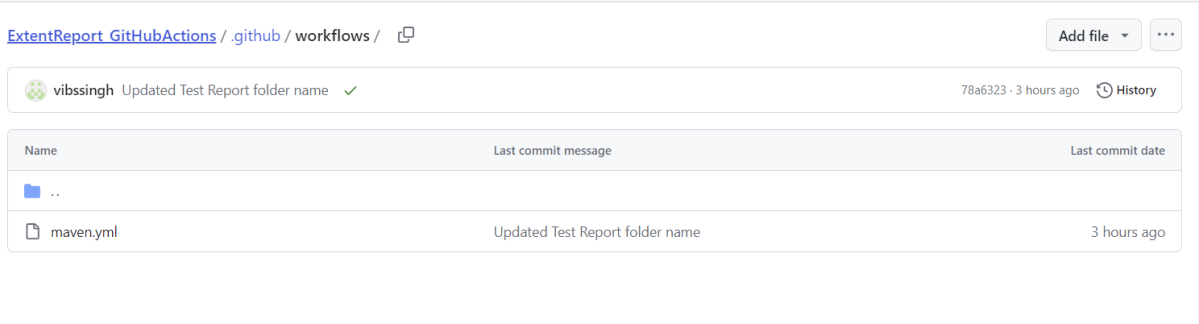
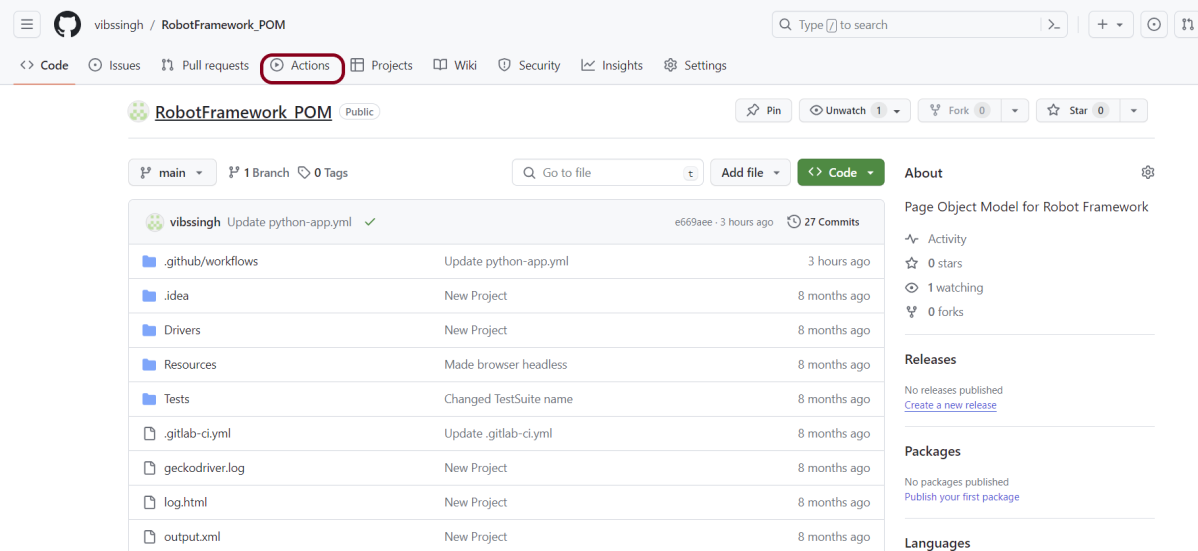
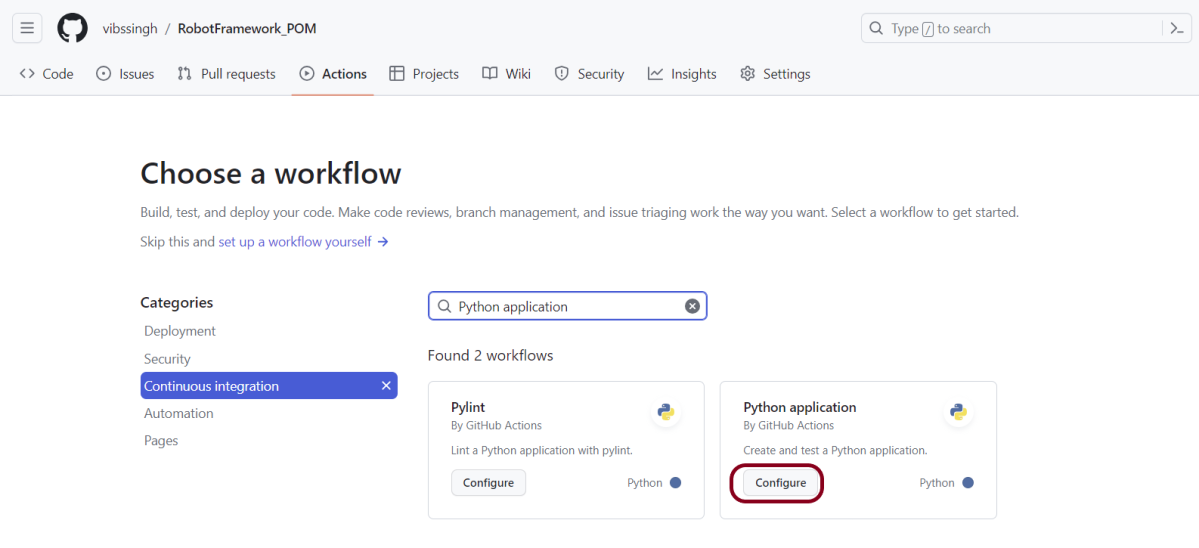
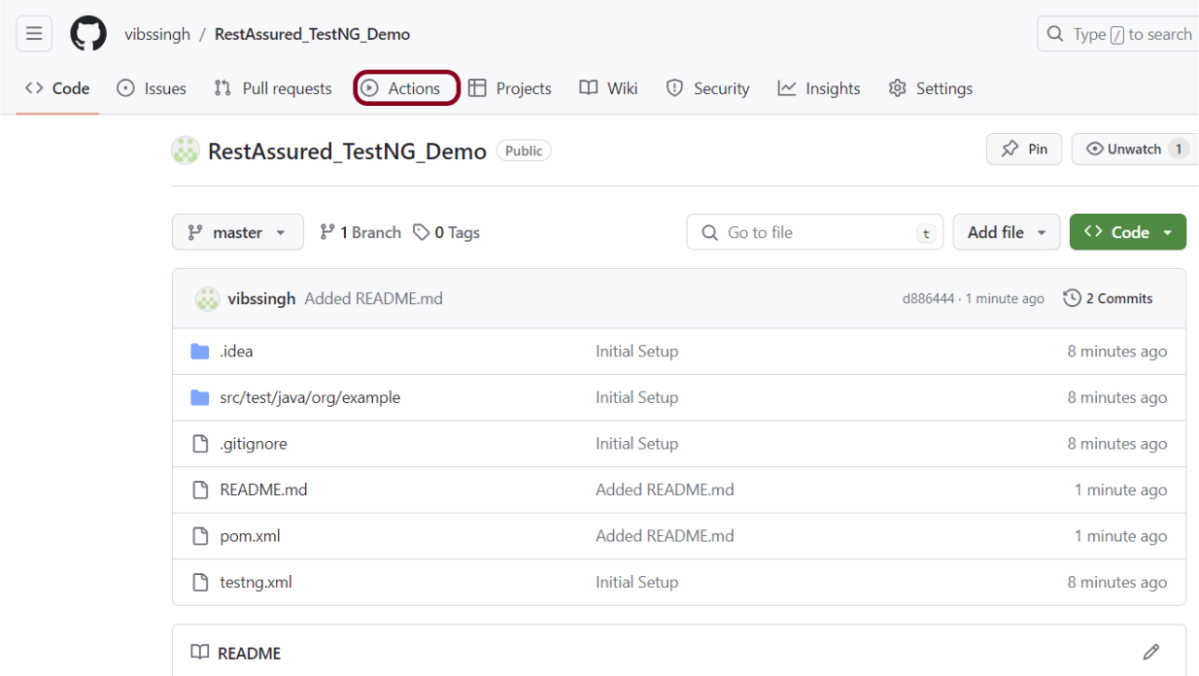
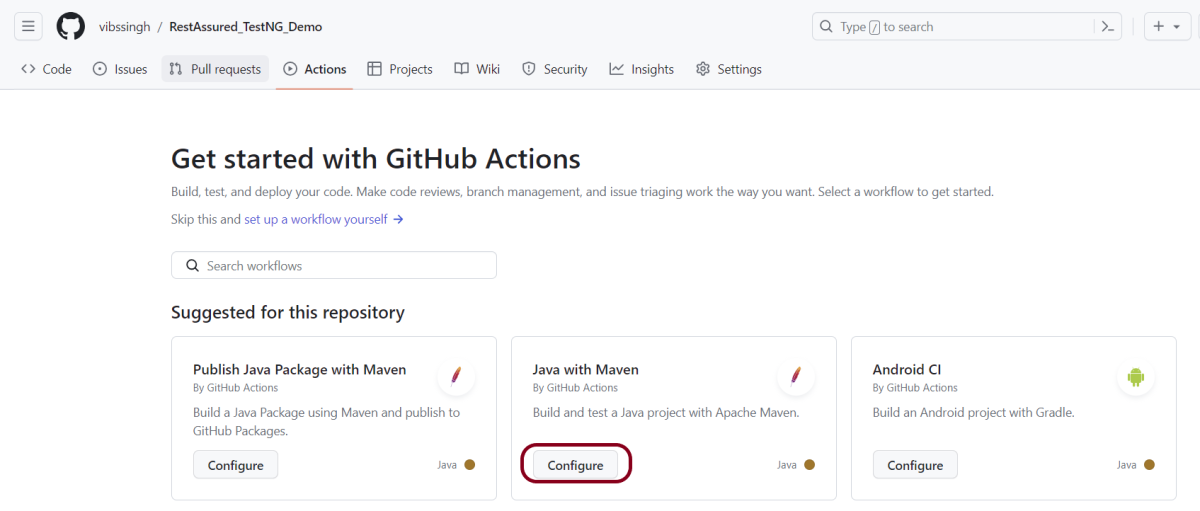
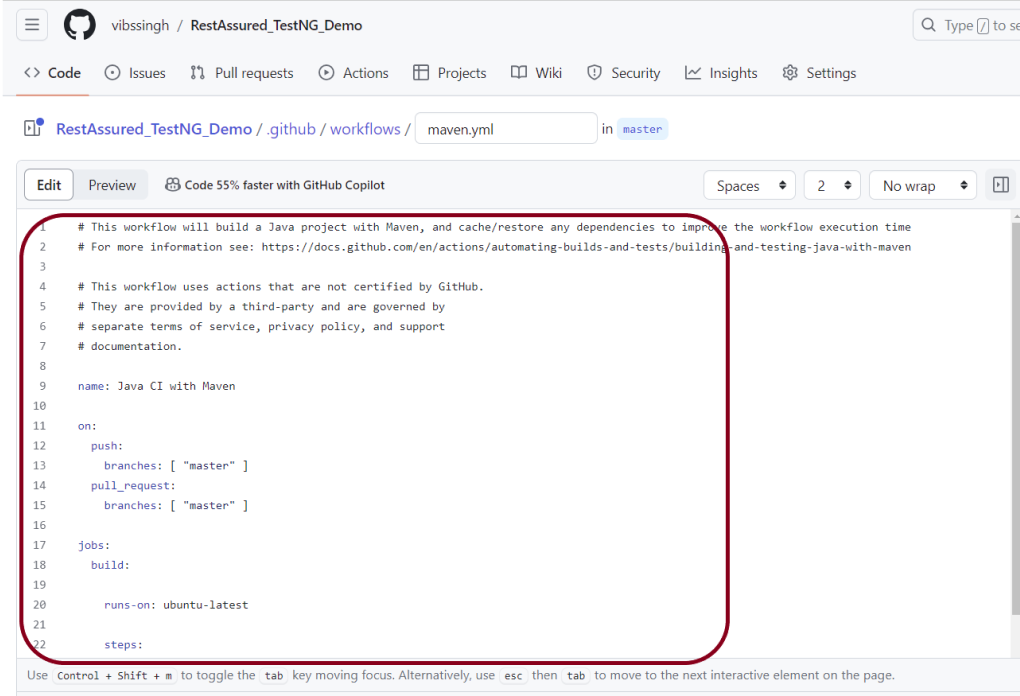
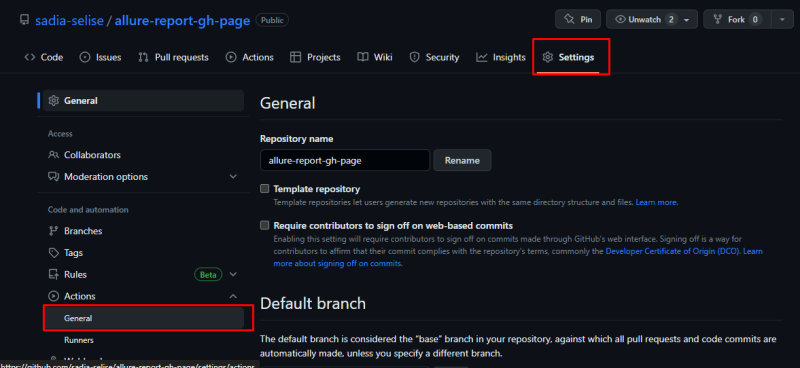
5. GitHub Actions is a CI/CD and automation service provided by GitHub. It allows developers to define workflows using YAML files within the repository. GitHub Actions seamlessly integrates with GitHub repositories.
6. Atlassian Bamboo is a CI/CD server that integrates with other Atlassian tools like Jira and Bitbucket. It supports building, testing, and deploying applications.
TeamCity:
7. TeamCity, developed by JetBrains, is a CI/CD server with support for various build and deployment scenarios. It has a user-friendly interface and integrates with popular version control systems.
8. Azure DevOps, previously known as Visual Studio Team Services (VSTS), provides a set of development tools, including CI/CD capabilities. It integrates with Microsoft’s Azure cloud services.
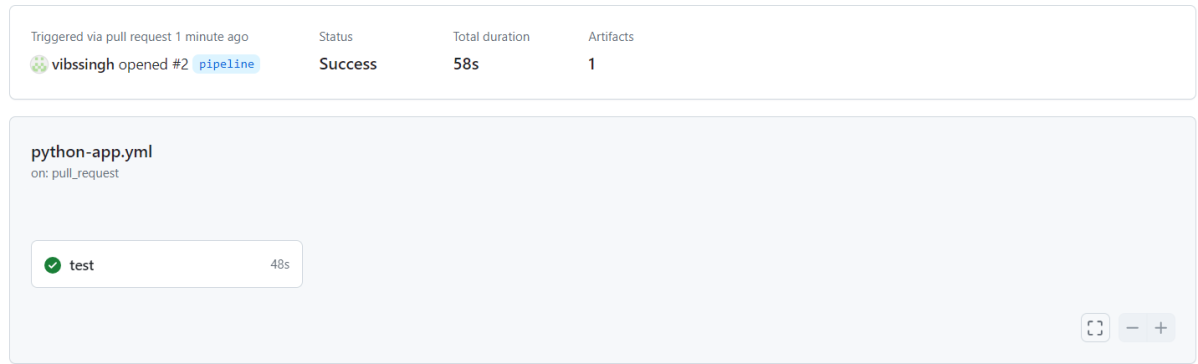
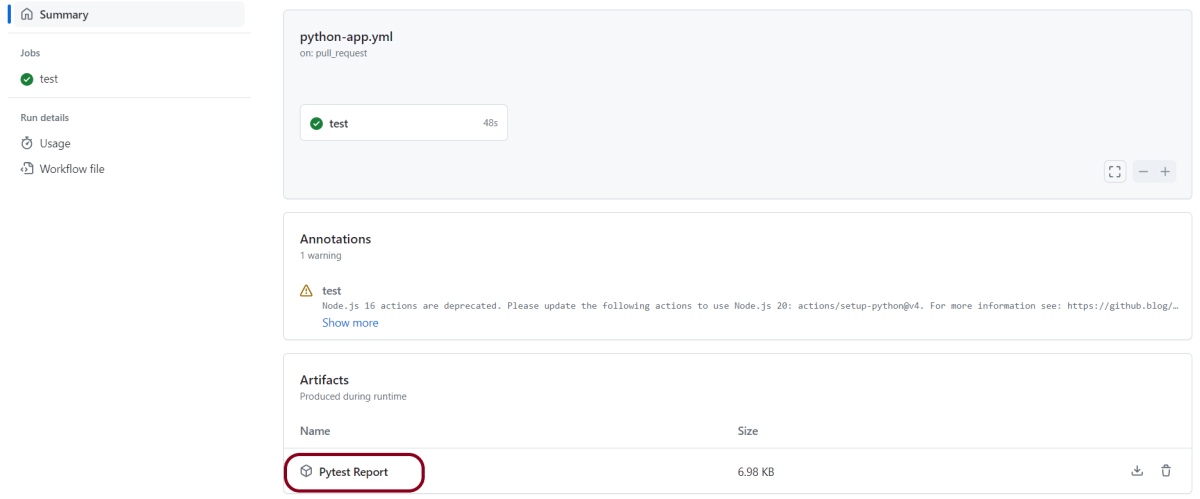
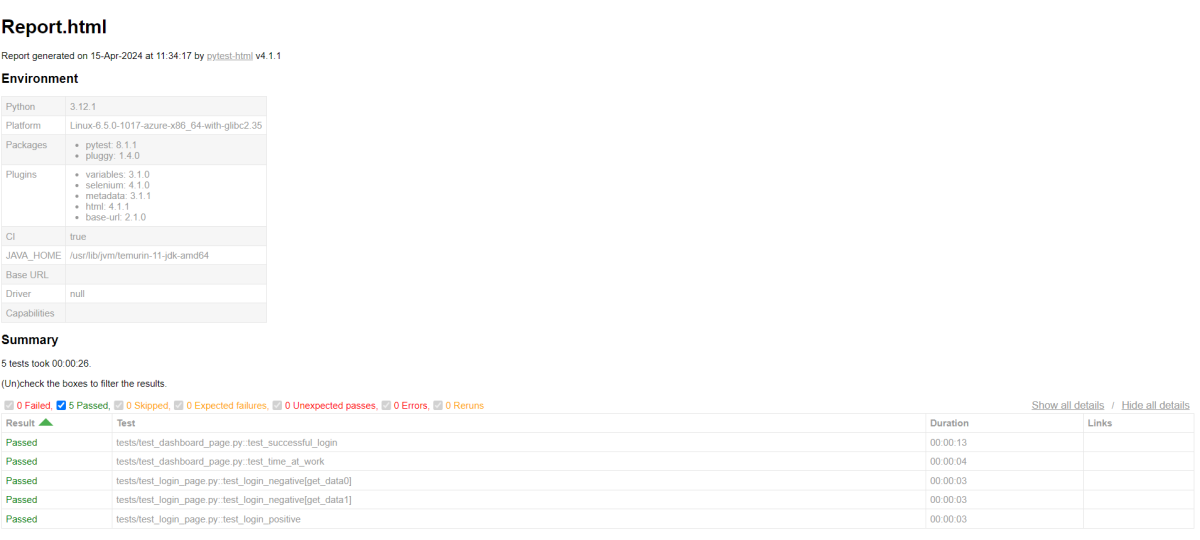
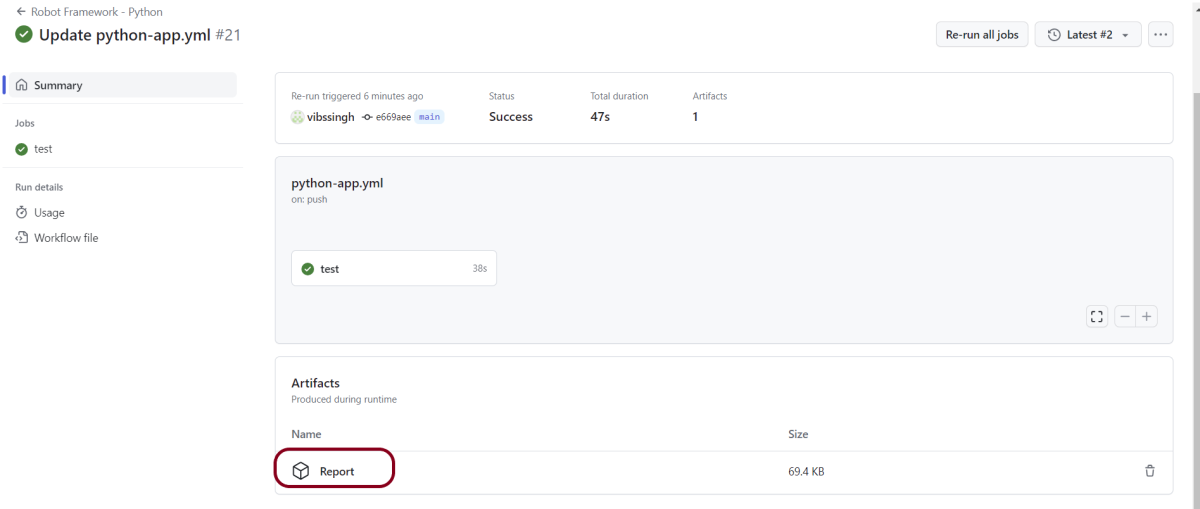
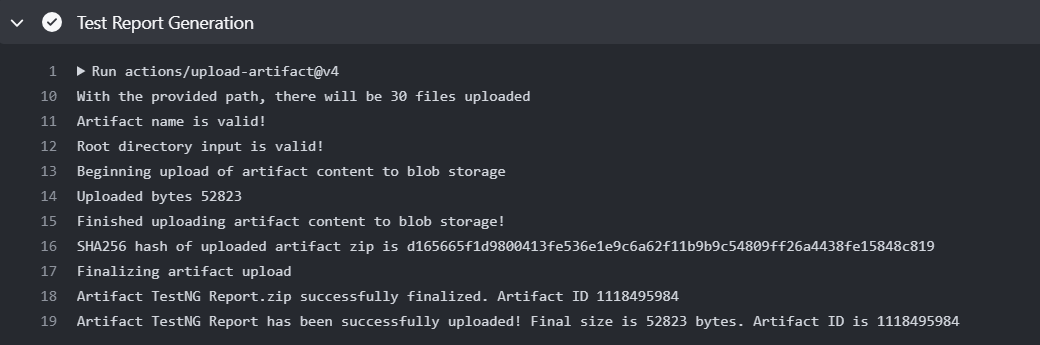
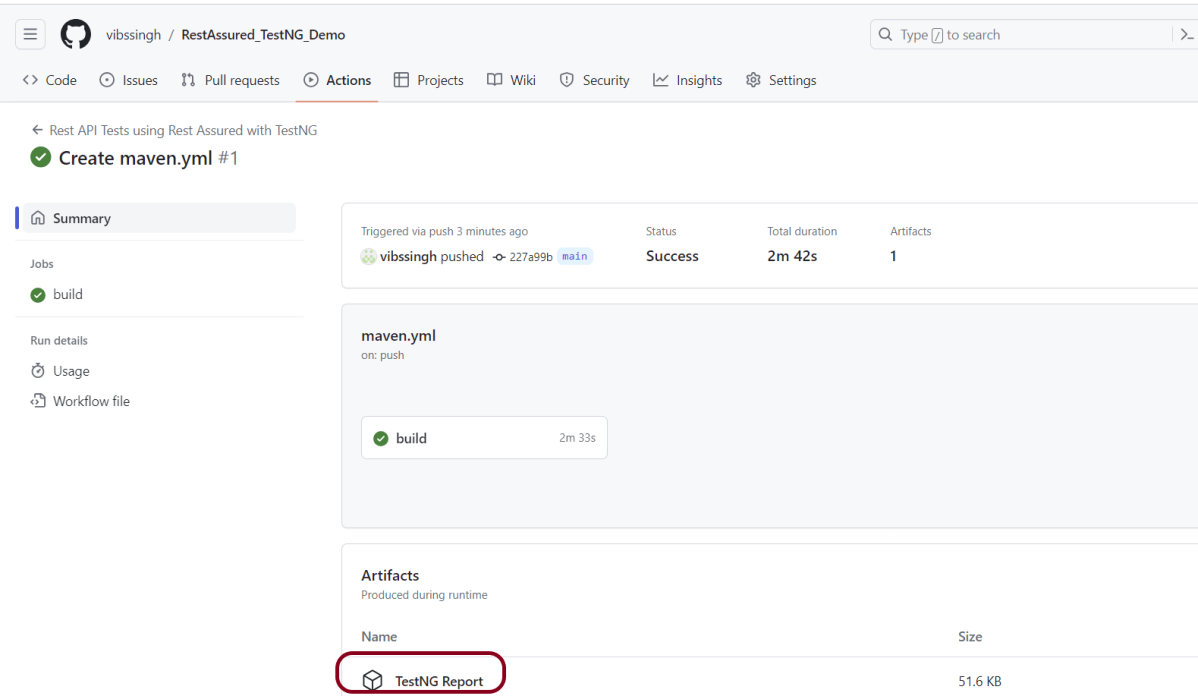
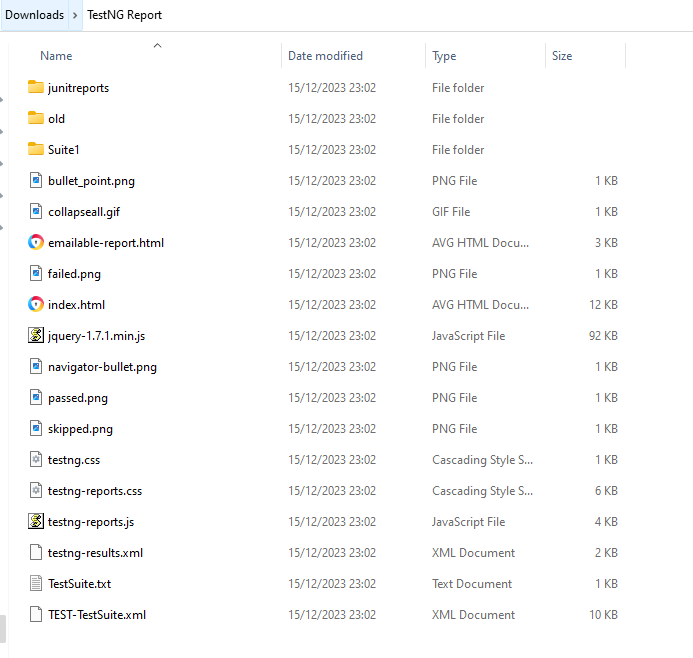
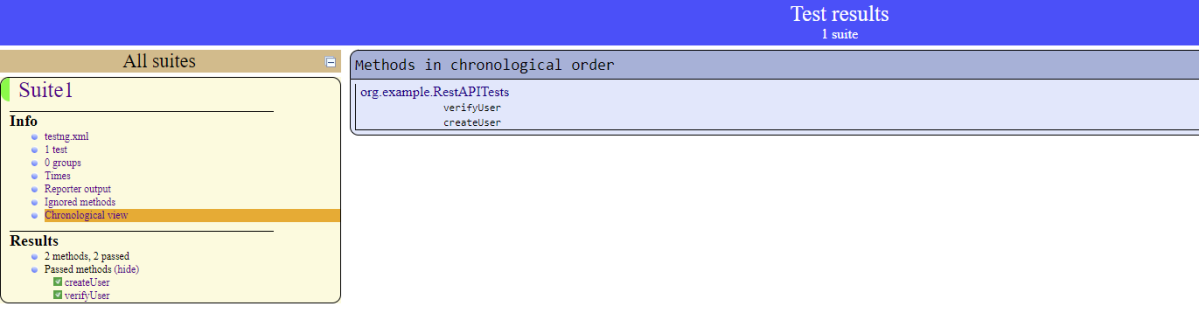
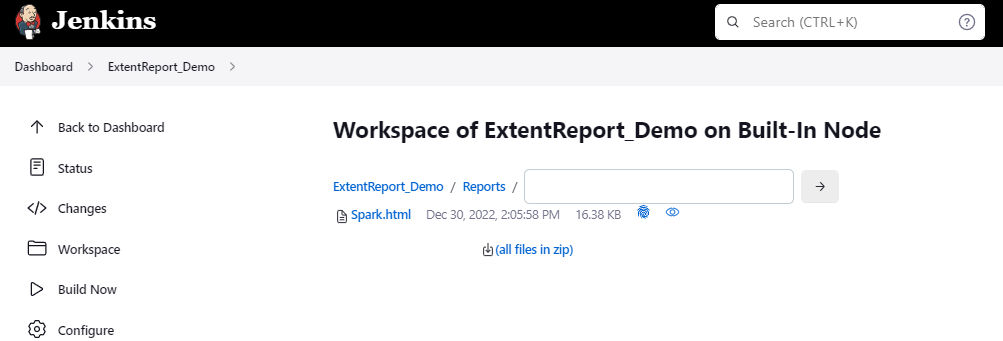
5. What are “Artifacts” in the context of CI/CD, and why are they important?
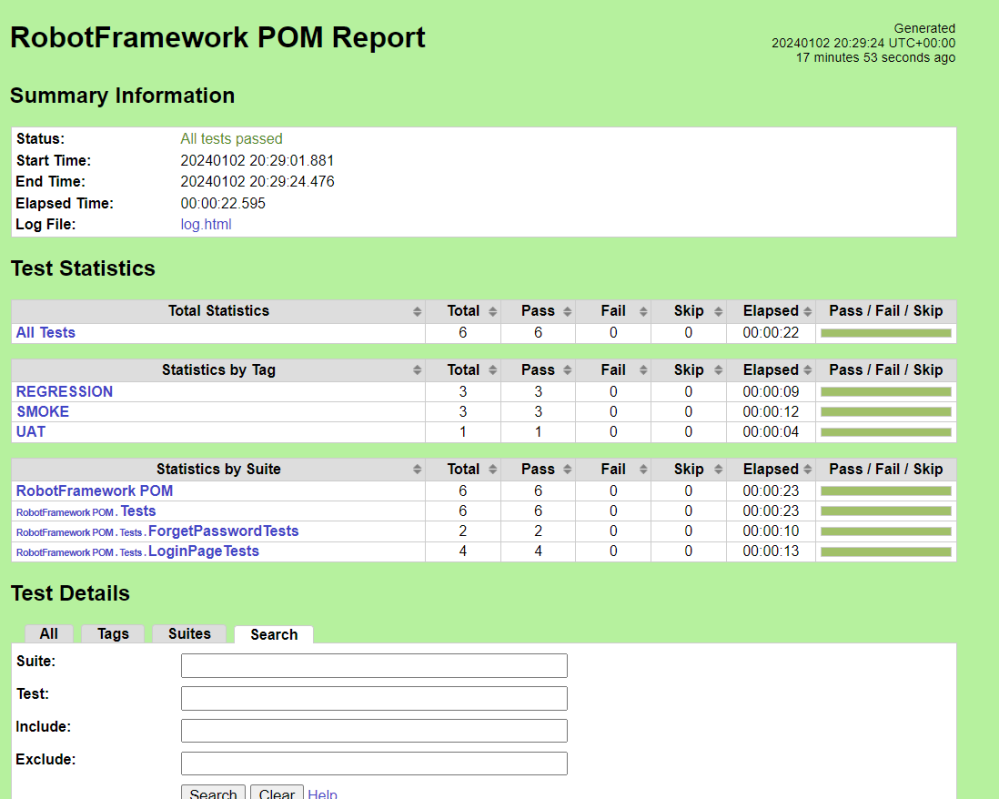
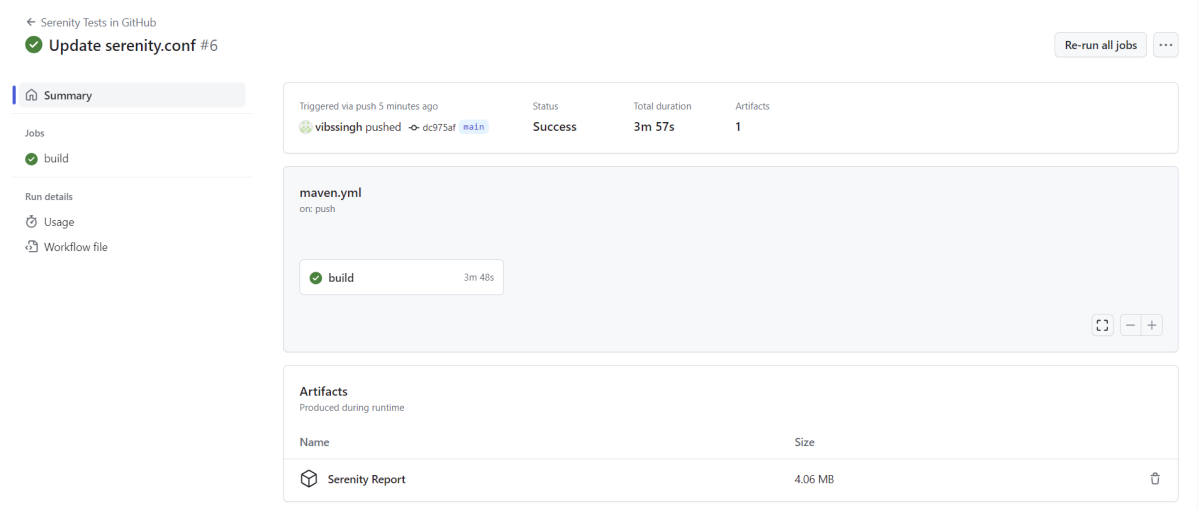
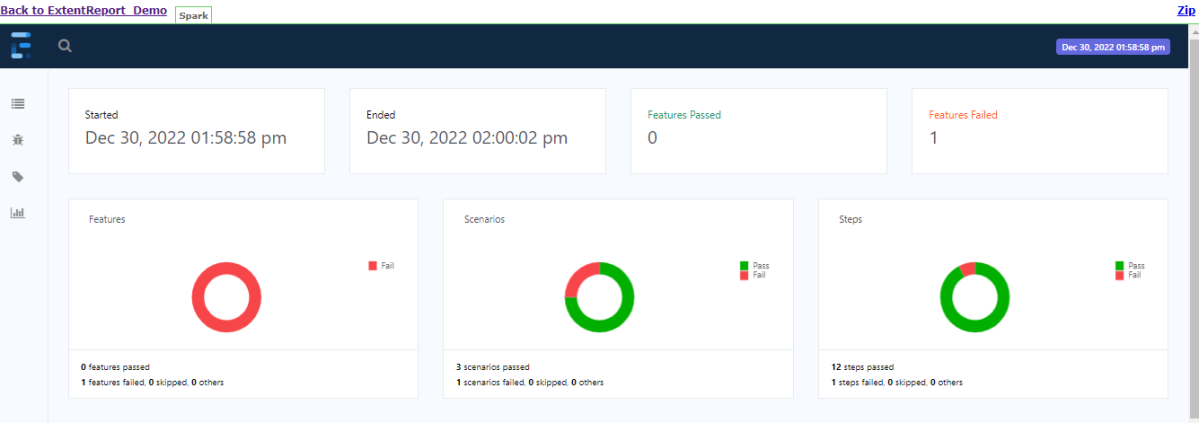
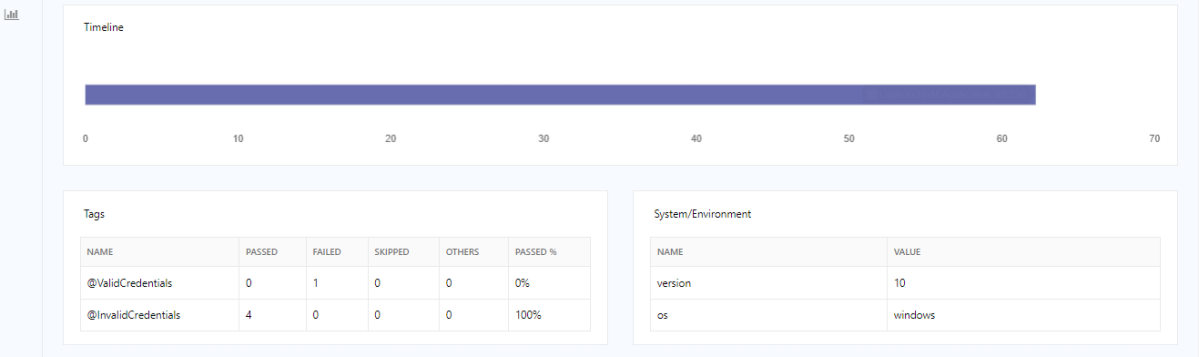
Artifacts are the output of a CI/CD pipeline, typically binary or deployable files such as executables, libraries, Docker images, or Reports.
1. Storing artifacts in dedicated repositories enables easy access and sharing among team members involved in the CI/CD pipeline.
2. Artifacts ensure that deployments are consistent and reproducible across different environments.
3. Artifacts provide a way to track and manage different versions of your software.
6. What are the major phases of the CI/CD pipeline?
There are four phases of the CI/CD pipeline. These are as follows.
1. Source – The first phase in a CI/CD pipeline is the creation of source code. During this phase, developers translate requirements into functional algorithms. They also create behaviors and features.
2. Build – The build process draws source code from a repository, establishes links to relevant libraries, modules, and dependencies, and compiles (builds) all these components into an executable (.exe) file.
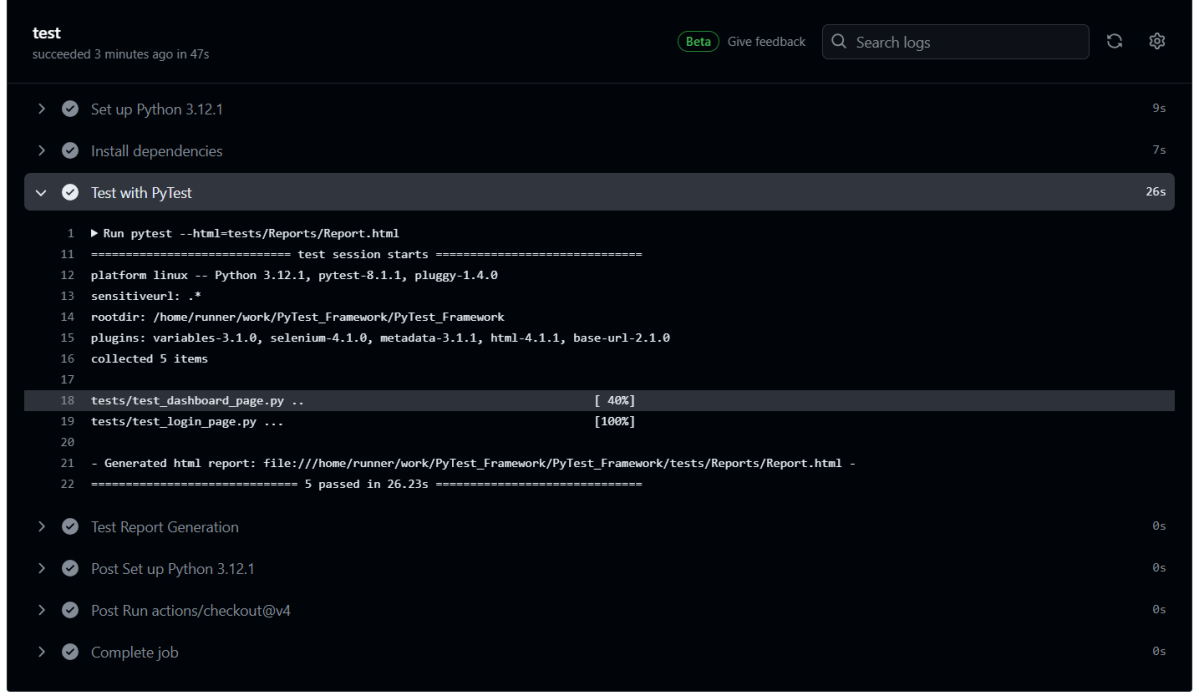
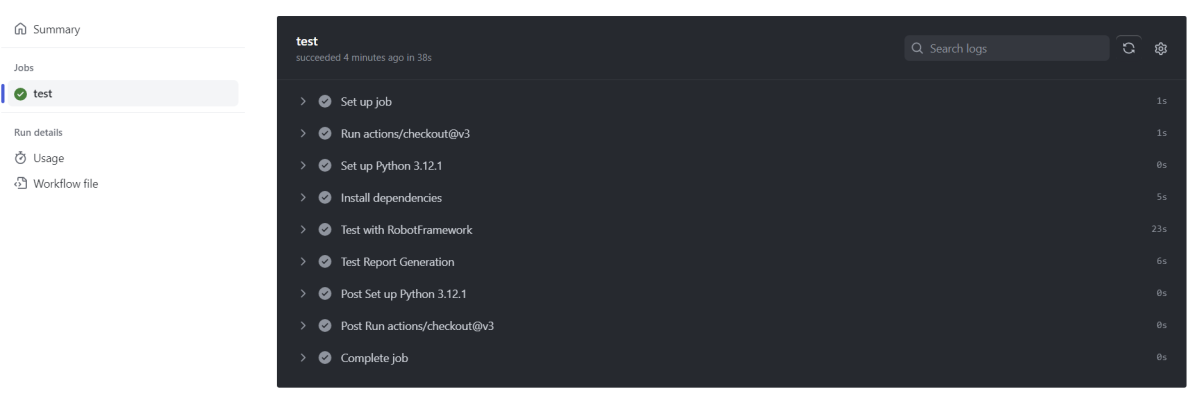
3. Test – The source code has already completed some static testing. The completed build now enters the next CI/CD phase of comprehensive dynamic testing. This usually starts with basic functional or unit testing. This verifies that new features and functions work as intended. Regression testing is also conducted. This ensures that new changes or additions do not accidentally break any previously working features.
4. Deploy – The deployment step typically involves creating a deployment environment — for example, provisioning resources and services within the data center — and moving the build to its deployment target, such as a server.
7. What are the vital steps in designing a CI/CD pipeline?
Designing a CI/CD pipeline involves several key steps:
1. Define Objectives and Scope – Outline the goals of implementing CI/CD. These goals can include improving deployment frequency, reducing errors, or enhancing collaboration. Determine the scope of the pipeline: which projects, applications, or services it will cover.
2. Set up a Version Control System (VCS) – We need to establish a version control system. This ensures all code changes are tracked and promotes collaborative development. A tool like Git is commonly used for this purpose.
3. Choose the Right Tools – Select appropriate CI/CD tools based on your technology stack and team expertise. Popular tools include Jenkins, GitLab CI/CD, CircleCI, and AWS CodePipeline. Make sure of integration with version control systems (e.g., Git), build tools, and other development tools you use.
4. Automate Code Builds – We need to set up a build system. Design build scripts to automatically compile code and handle dependencies. Ensure the build process is reproducible and consistent across different environments. Most commonly used tools suited to the programming language, such as Maven or Gradle for Java, or npm for JavaScript.
5. Implement Automated Testing – We need robust automated testing mechanisms. Immediately after a successful build, you want to run all your unit tests. As the code progresses through the pipeline, additional tests come into play. These include integration, functional, and security checks. Quality assurance at every stage reduces the risk of potential bugs getting into the production.
6. Incorporate Code Analysis and Security Checks – Apply static and dynamic analysis tools within the pipeline to enforce code quality standards and detect security vulnerabilities early. Tools like SonarQube, OWASP ZAP, or Checkmarx can be useful for this purpose.
7. Set Up Deployment Automation – Automate the deployment process to various environments (development, testing, and production). Use configuration management tools such as Ansible or Terraform. Decide on deployment strategies, such as blue-green deployments or canary releases, to minimize downtime and risk.
8. Implement Monitoring and Logging – Integrate monitoring tools to track the performance and reliability of your applications post-deployment.
9. Define Rollback Procedures – Prepare for failure scenarios by defining clear rollback and remediation procedures. Automated rollbacks can help reduce downtime in case of deployment issues.
10. Regularly Review and Optimize – Continuously review and update the CI/CD pipeline to address bottlenecks, improve efficiency, and adapt to changing requirements.
8. How do you trigger a CI/CD pipeline?
A CI/CD pipeline can be triggered in several ways. It can be activated by Code Push, scheduled trigger, manual initiation, and Continuous Integration.
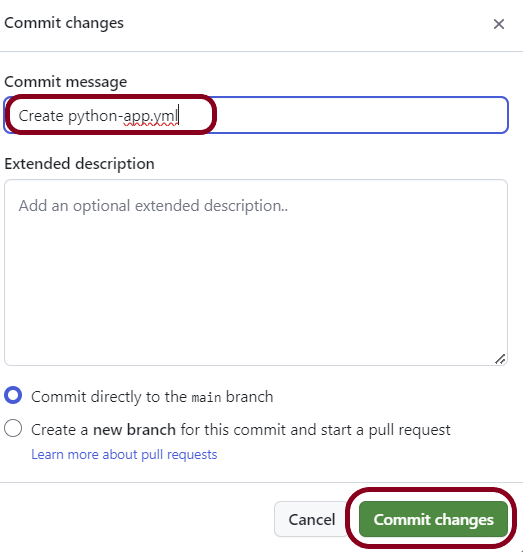
1.Code Pushes – Pipelines can be triggered automatically when code is pushed to a particular branch in a version control system like Git.
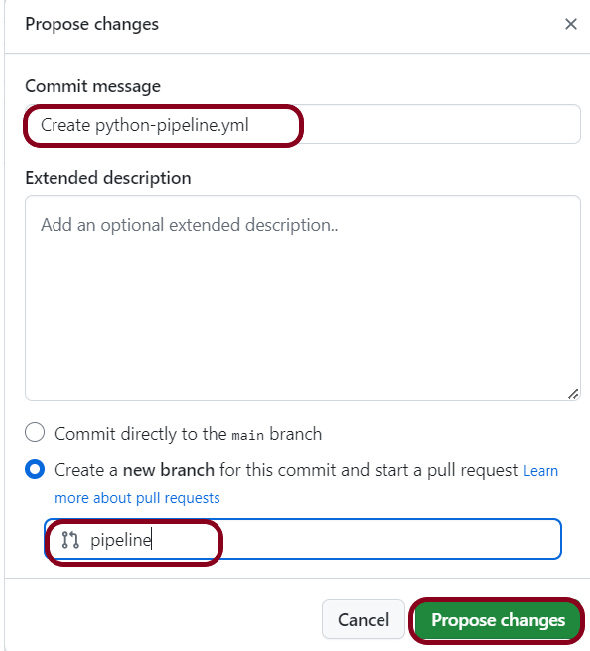
2. Pull Requests/Merge Requests – Another frequent trigger is the creation or updating of pull requests or merge requests. Pipelines can run tests and checks on feature branches before they are merged into the main branch.
3. Scheduled Triggers – Pipelines can be set to run at regular intervals using scheduled jobs. This might be used to perform nightly builds, run daily tests, or generate periodic reports.
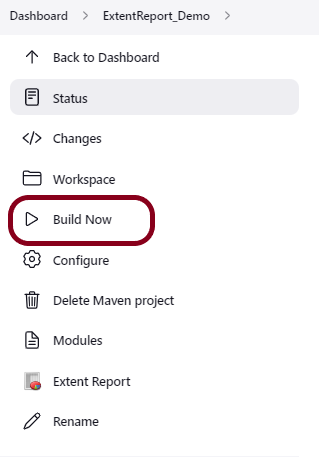
4. Manual Triggers – Users can manually trigger pipelines or specific pipeline stages. This flexibility is useful for executing on-demand tasks, such as deploys to specific environments or running full test suites.
5. CI/CD Tool-Specific Triggers – Many CI/CD tools, such as Jenkins, GitLab CI/CD, and CircleCI, provide specific interfaces and jobs that can be configured to start pipelines under particular conditions defined within the toolsets.
6. External Event Integration – Triggers can be set up based on external events, like infrastructure changes (e.g., changes in cloud resource state) which can kick off a deployment pipeline.
9. In what situations would a Continuous Deployment strategy not be appropriate?
Continuous Deployment offers numerous benefits. These include rapid iterations, faster time to market, and accelerated feedback. However, it is not suitable for every scenario.
1. Highly Regulated Industries – In regulated industries such as finance or healthcare, there are often stringent regulations. Compliance requirements include intensive manual reviews and audits before each software release. Automated, frequent changes could be risky in such scenarios.
2. Critical Systems with High Reliability Requirements – The product’s users are businesses that heavily depend on your application. Examples include avionics software or medical devices. These users may prefer stability. Sudden changes could disrupt their workflow. Continuous deployment may not be the best approach. These users would likely prefer scheduled updates to prepare for changes.
3. Complex Approval Processes – If the organization requires a complex set of approval steps, it might not be feasible to implement a continuous deployment strategy. These steps can involve multiple stakeholders, such as legal, marketing, or compliance departments.
4. Limited Test Automation – If the organization lacks sufficient test automation to confidently validate changes before they reach production, continuous deployment could introduce unnecessary risks and potential for increased defects in production.
5. Lack of skilled resources – If your team is not accustomed to high-frequency changes, it may struggle. Teams also may lack the skillset to manage such a fast-paced environment. Forcing continuous deployment might lead to more problems. This continues until the processes and team have matured.
10. How do you monitor a CI/CD pipeline?
Monitoring a CI/CD pipeline is crucial to ensuring it works efficiently, reliably, and is always ready for a new deployment.
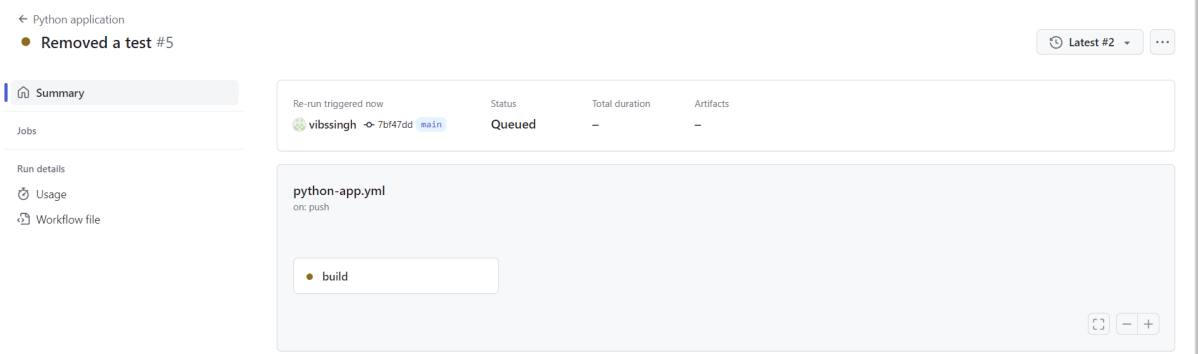
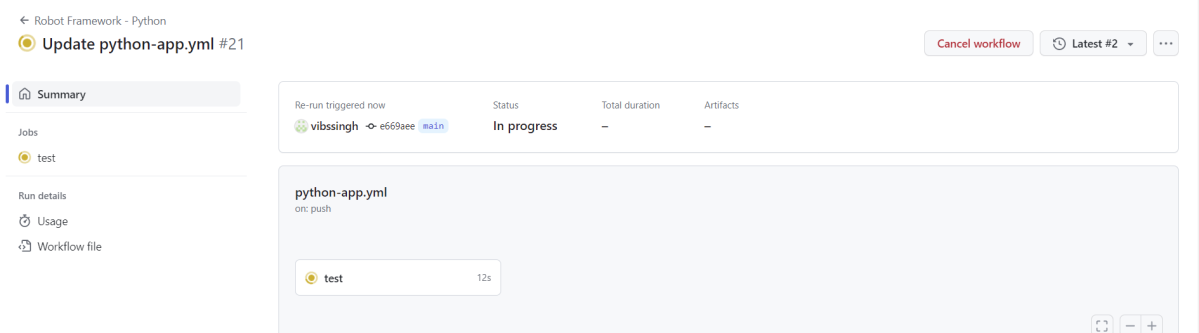
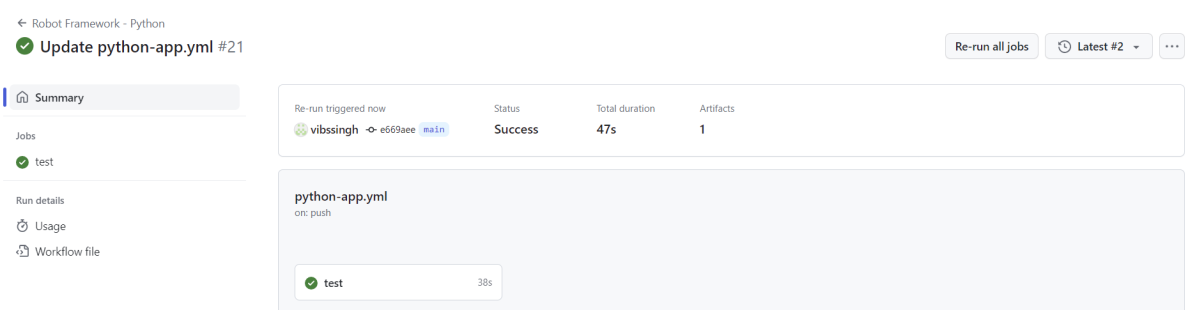
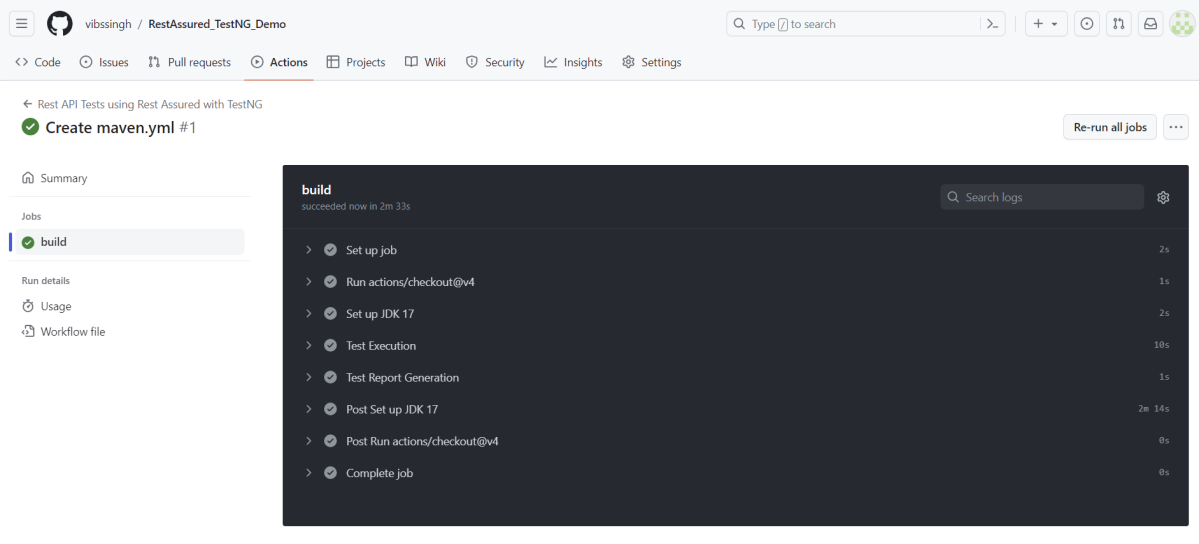
1. Utilize Integrated Monitoring Tools – Many CI/CD platforms come with built-in monitoring tools that provide real-time insights into pipeline operations. These tools can track the status of builds, deployments, and test executions.
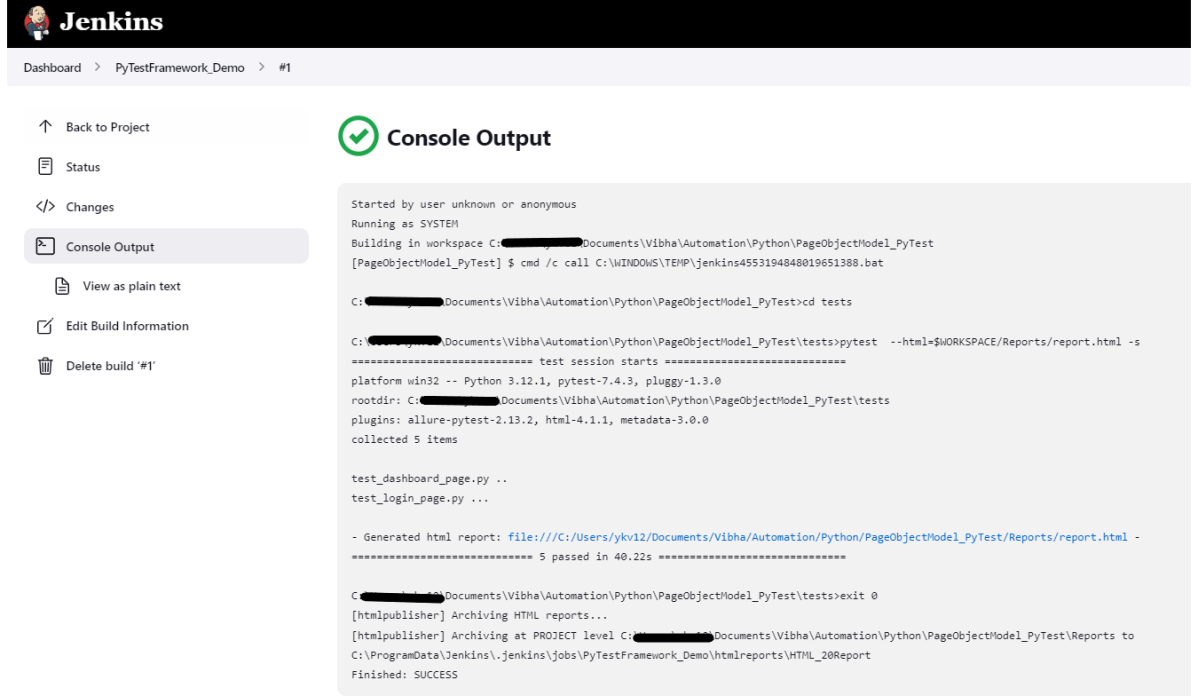
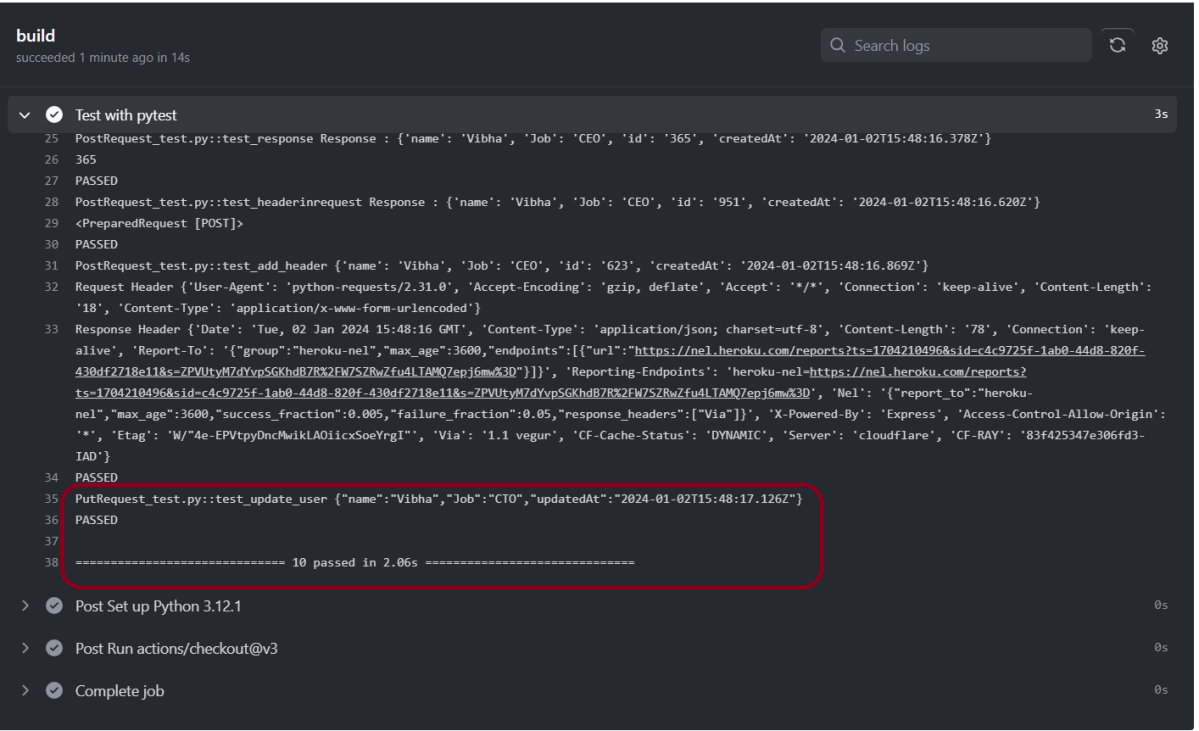
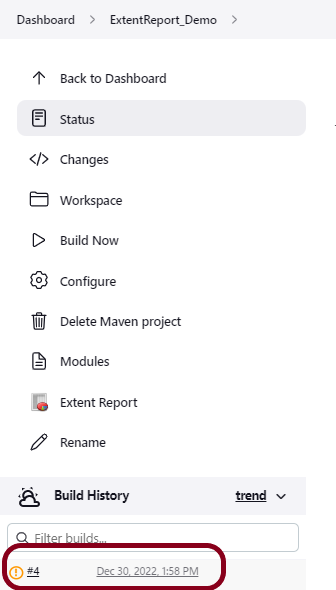
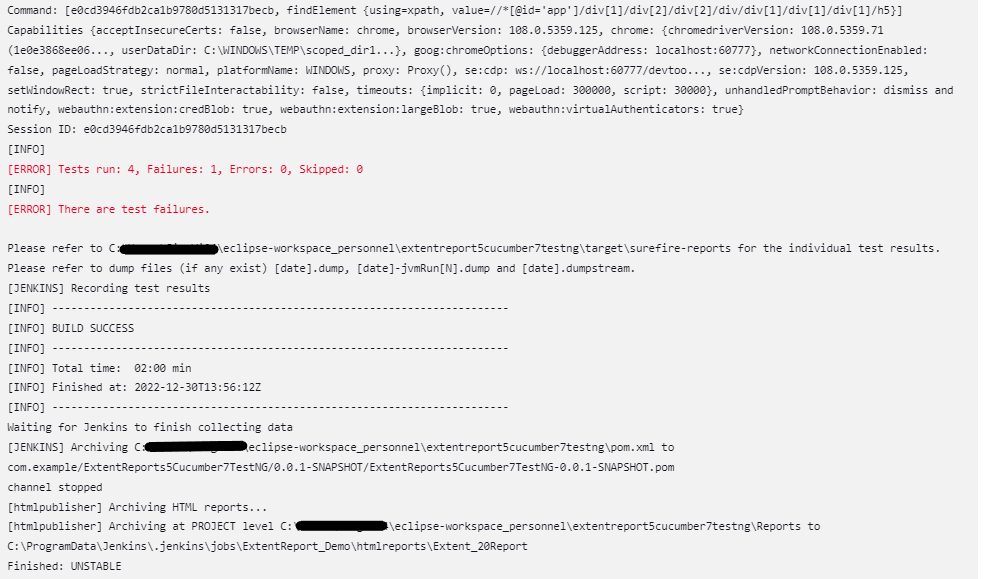
2. Set Up Alerts and Notifications – Configure alerts and notifications for key events, such as build failures, deployment issues, or test result anomalies. For instance, in the Jenkins platform, each job’s status can be visually tracked and logs accessed directly. If a job fails, Jenkins can notify users automatically via email or other messaging platforms.
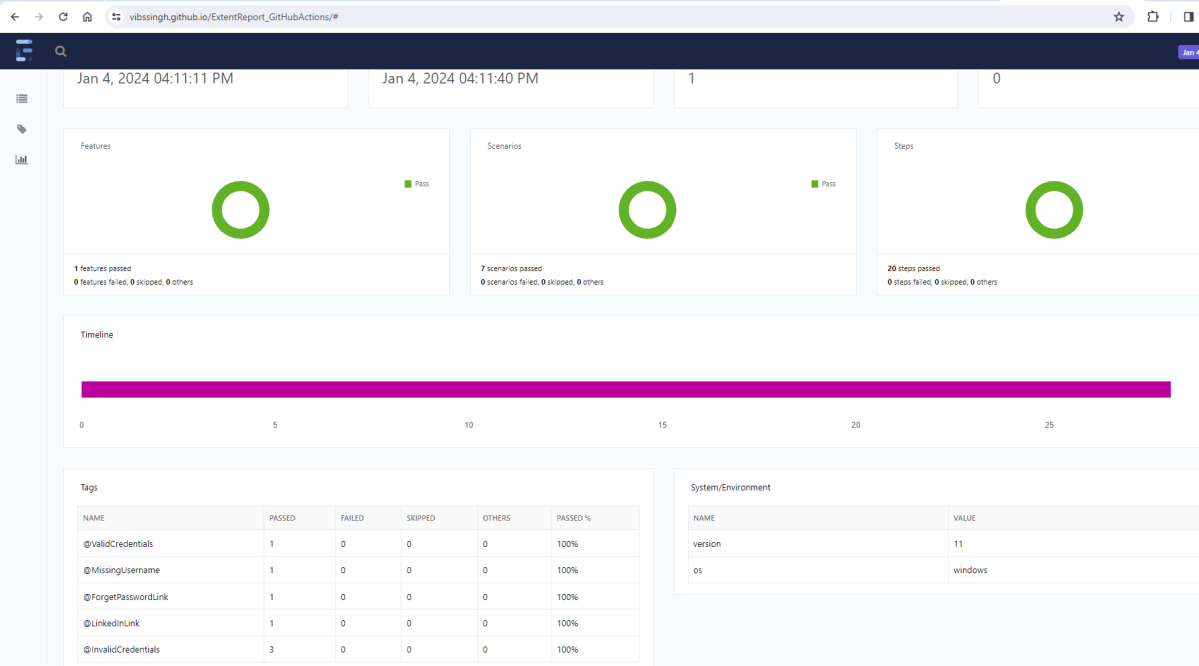
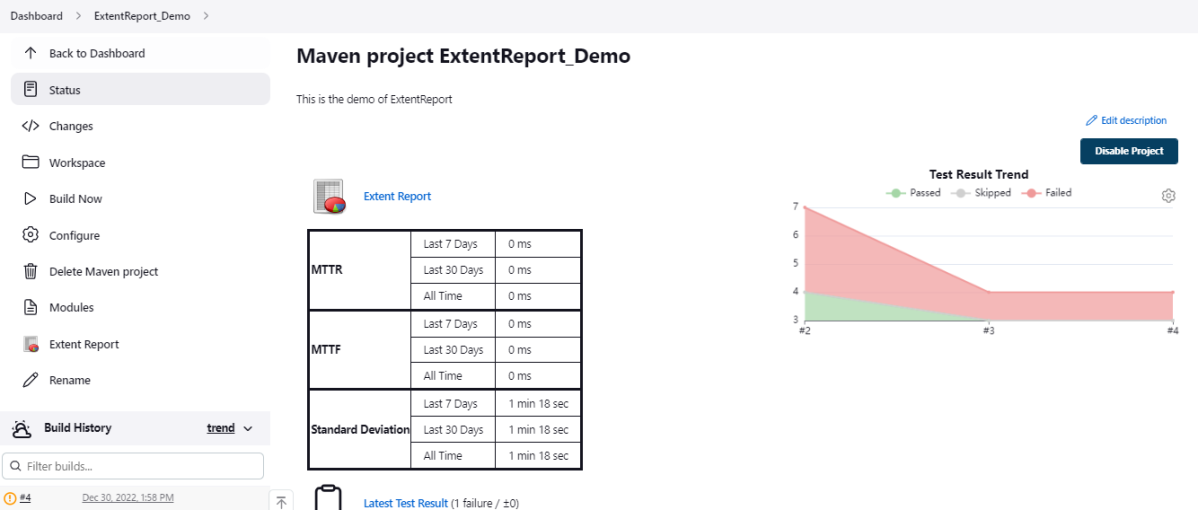
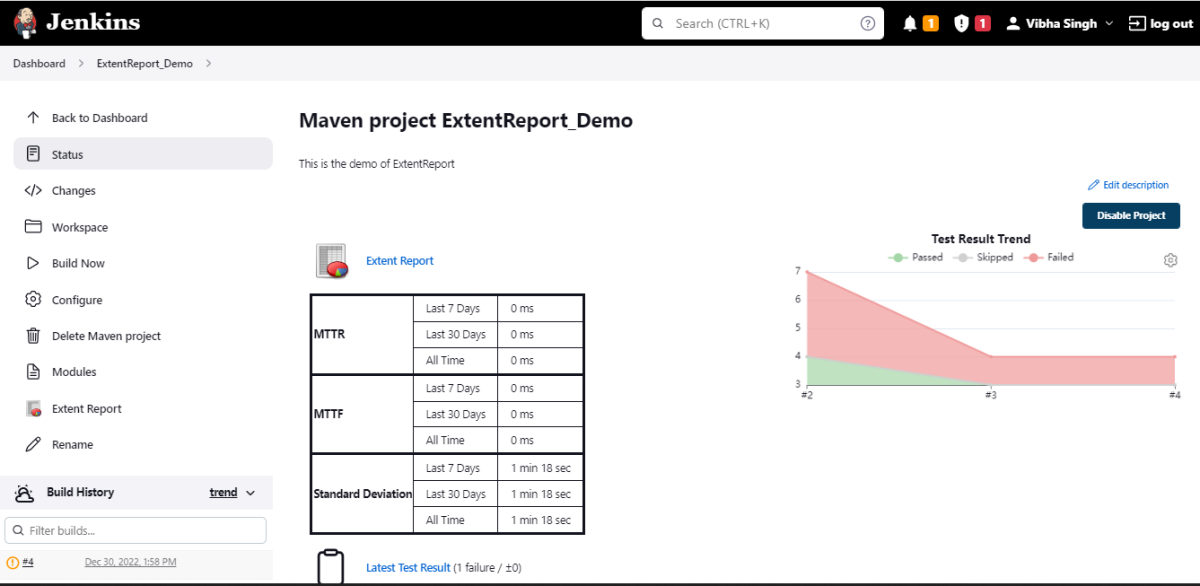
3. Monitor Key Metrics – Track important metrics, including build duration, success/failure rate, deployment frequency, and test result trends. These metrics give insight into the pipeline’s health and efficiency. It helps in identifying bottlenecks in the process and guides optimization efforts.
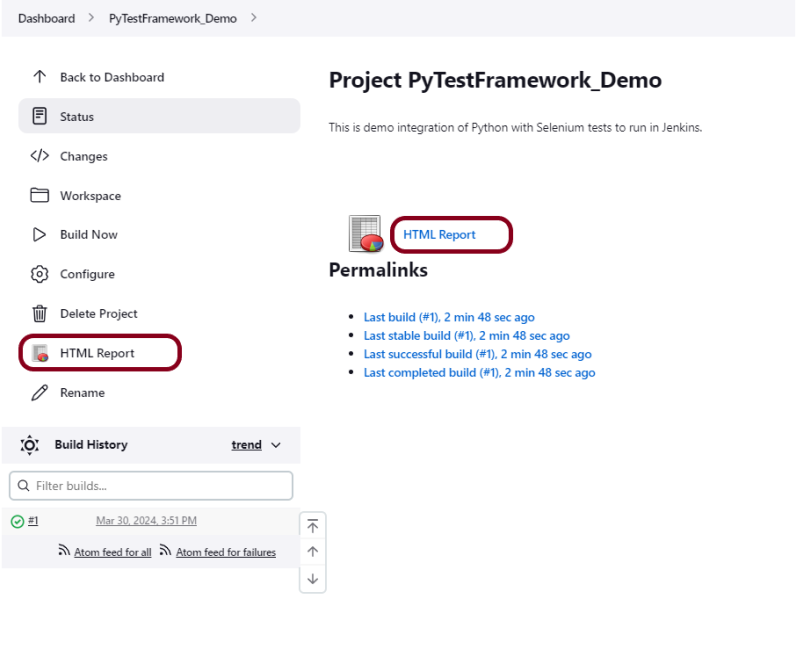
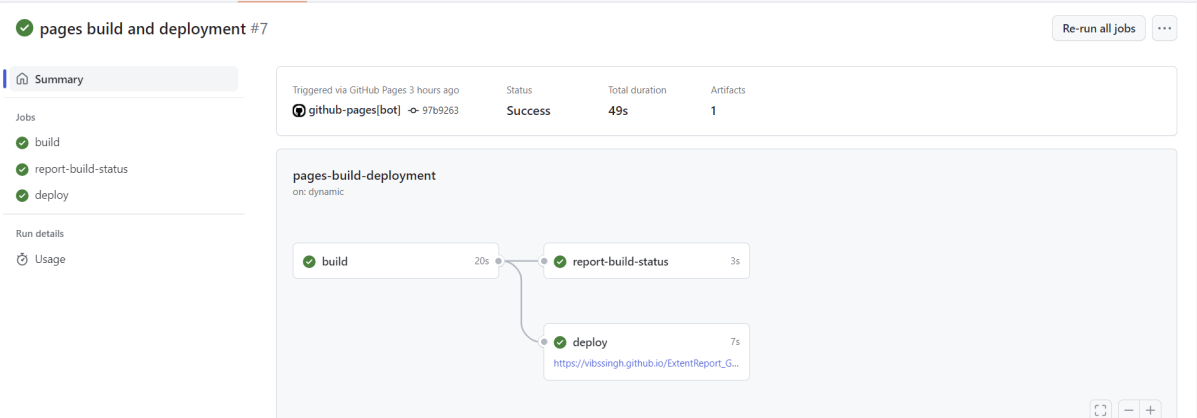
4. Visualize Pipeline Status – Use dashboards to provide a holistic view of the pipeline’s status, showing the progress of builds, tests, and deployments.
5. Log Monitoring and Analysis – Implement logging for all stages of the pipeline, capturing detailed information about build processes, errors, and test outputs. Tools like Prometheus, Grafana, or ELK stack can come in handy for this purpose.
6. Continuous Feedback Loops – Establish feedback loops for capturing input from developers and operations teams about ongoing runs. This helps in proactively identifying areas for improvement.
11. What are common causes of failures in CI/CD pipelines, and how can they be mitigated?
1. Code Quality Issues – Poor code quality can lead to build failures, failed tests, or runtime errors. Implement static code analysis tools (e.g., SonarQube, ESLint) to identify issues early.
2. Flaky Tests – Tests that intermittently pass or fail lead to unreliable pipeline results. Analyze and refactor flaky tests to make them more reliable. Review dependencies and test setup to ensure consistency. Use isolation approaches, such as mocking dependencies.
3. Dependency Issues – Update in the version of external libraries or services can introduce incompatibilities or failures. Specify dependency versions and use dependency management tools to maintain control over updates.
4. Resource Constraints – Insufficient resources, such as CPU, memory, or disk space, can lead to pipeline slowdowns or failures. Monitor resource usage and scale resources as necessary, especially with cloud-based solutions. Optimize pipeline scripts for efficiency.
5. Configuration Errors – Misconfigurations in the pipeline setup, such as incorrect paths, environment variables, or deployment settings, can cause failures. Use versioned configuration files and document configurations clearly. Implement configuration validation checks in the pipeline.
6. Security Vulnerabilities – Introduction of vulnerabilities during builds can halt deployments due to failed security checks. Integrate security scanning and testing within the pipeline to automatically detect vulnerabilities. Tools like OWASP ZAP or Checkmarx can be useful.
12. What is version control?
Version control involves the use of a central repository where teammates can commit changes to files and sets of files. The purpose of version control is to track every line of code, and to share, review, and synchronize changes between team members. The following are some of the most popular version control tools:
- Mercurial
- Subversion (SVN)
- Concurrent Version System (CVS)
- Perforce
- Bazaar
- Bitkeeper
- Fossil
13. What is git?
Git is a mature, actively maintained open-source revision control system used by thousands of developers around the world.
It enables developers to track changes in their source code during software development.
14. What is git repository?
A Git repository is a storage where all the code alterations and version histories for a particular project are kept. A Git repository is the .git/ folder inside a project. This repository tracks all changes made to files in your project, building a history over time. Meaning, if you delete the .git/ folder, then you delete your project’s history.
15. What is git branch?
In Git, a branch is a parallel line of development that represents an independent line of work within a Git repository. Branches let developers code without affecting the work of other team members.
16. What is merging?
Merging in Git refers to the process of integrating changes from one branch into another. When developers work on separate branches to implement features, bug fixes, or other changes, merging is used to combine those changes back into a common branch, often the main or default branch.
17. What is test coverage?
Test coverage is a metric that measures how much of the codebase is covered by tests. A 100% coverage means that every line of the code is tested at least by one test case.
18. What is the role of automation in CI/CD?
1. Automation is used to trigger and execute builds automatically whenever changes are made to the version control repository.
2. It also ensures process uniformity and lowers the possibility of human error.
3. Automation is used to set up and configure monitoring and observability tools. Automated monitoring provides insights into the health and performance of applications in real-time.
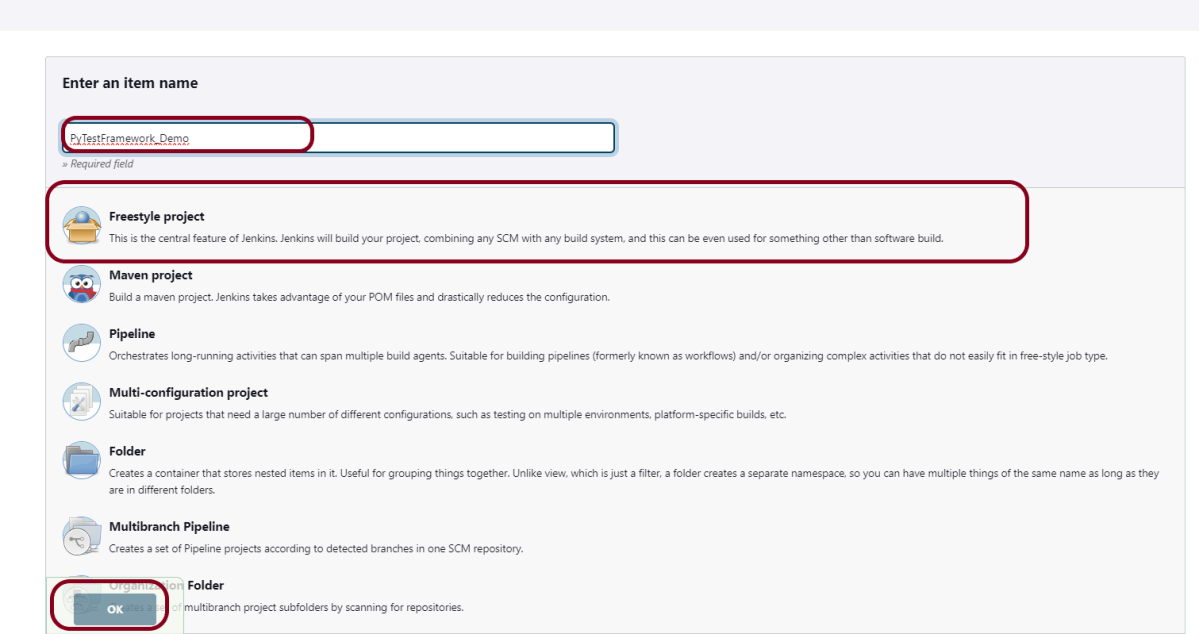
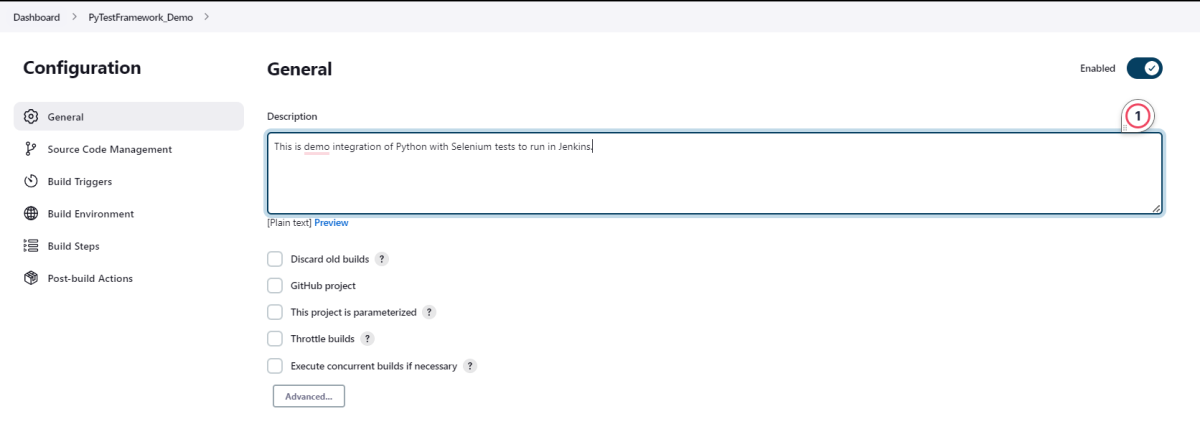
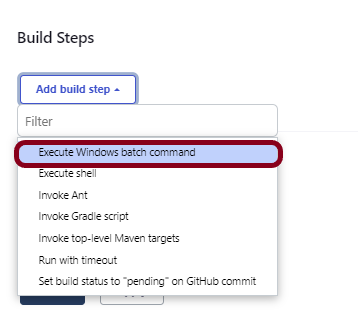
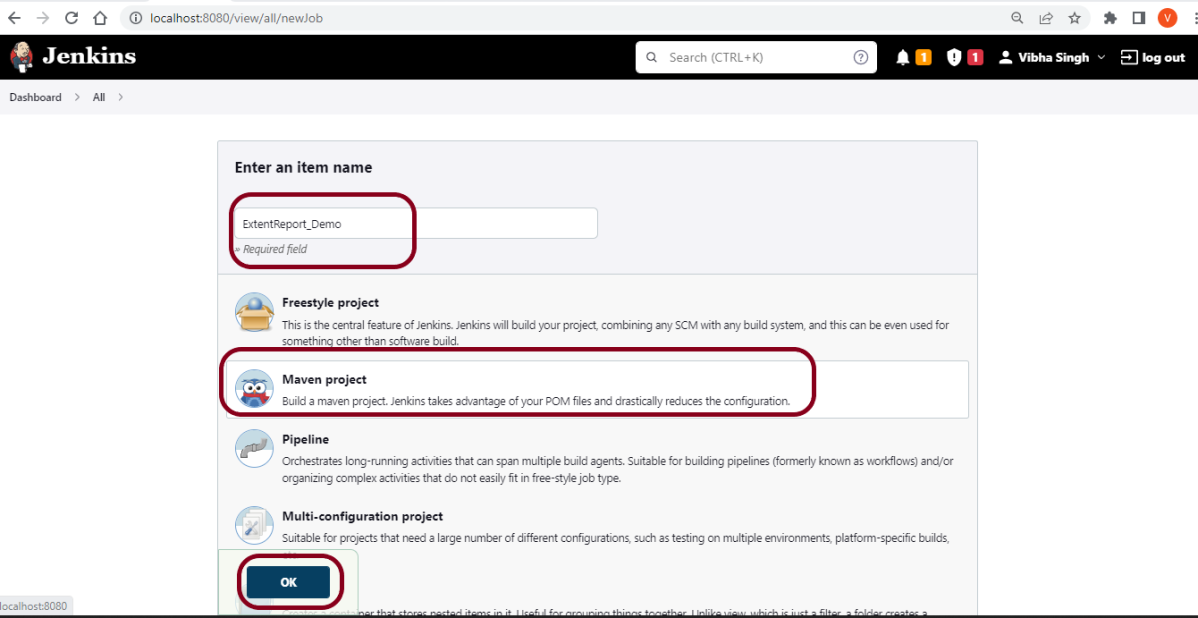
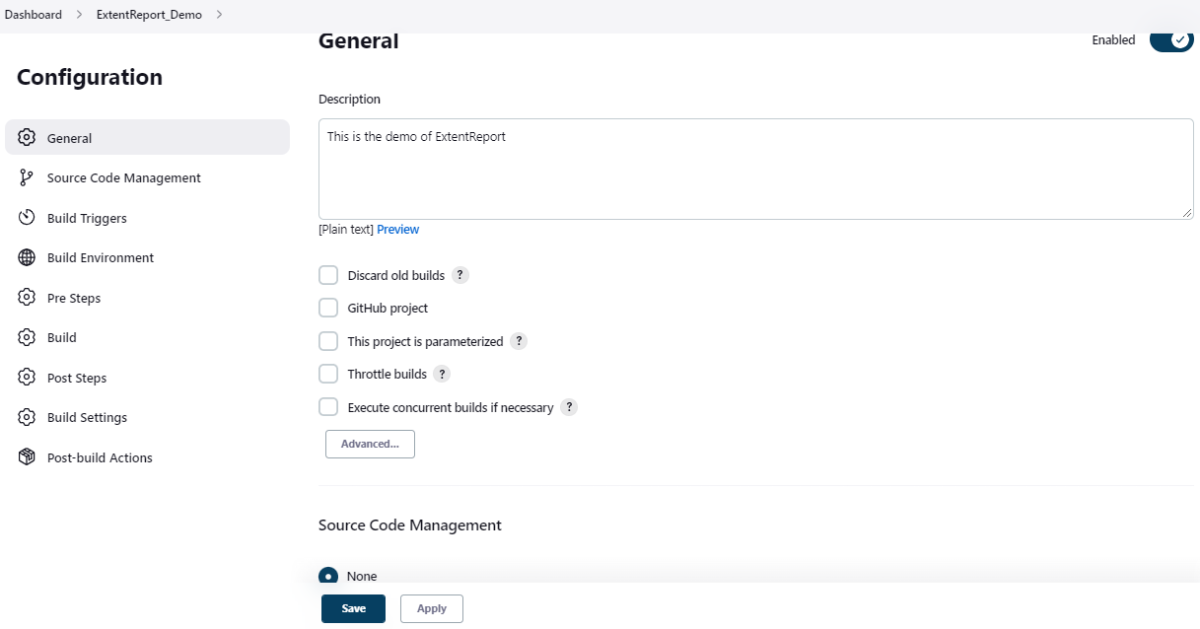
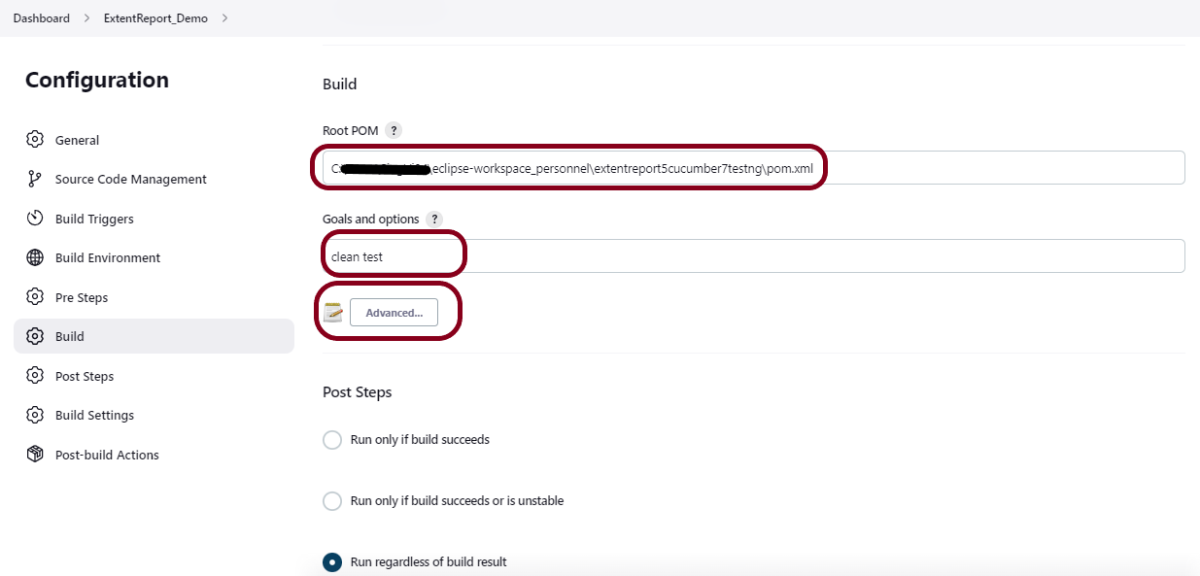
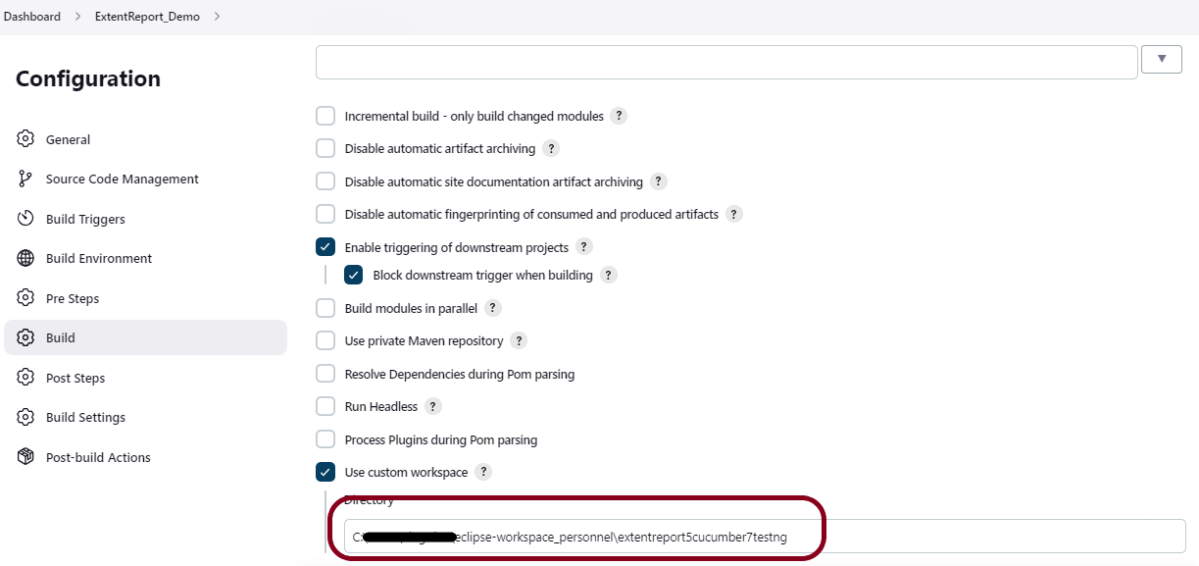
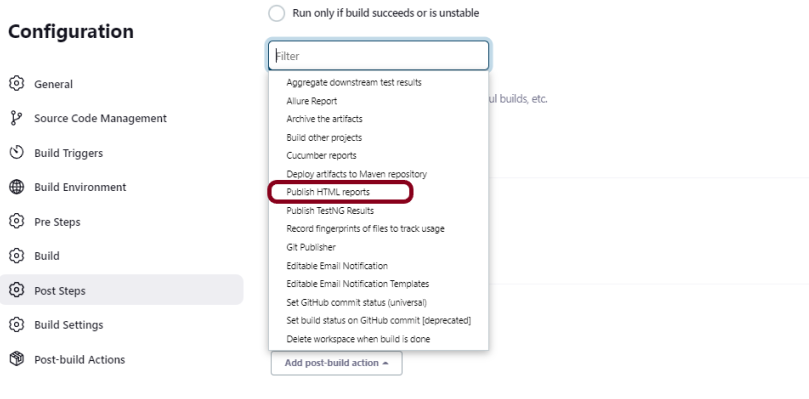
19. How to write CI/CD pipeline in Jenkins?
To write a CI/CD pipeline in Jenkins, Install Jenkins and required plugins, Set up version control such as Git, Create a Jenkins file with build, test, and deploy stages, and Save Jenkinsfile to the repository. Then, Create a Jenkins job linked to the Jenkinsfile and trigger the job for the automated CI/CD process.
20. What is a Jenkins file?
A Jenkins file is a text file that contains a pipeline’s configuration. It outlines the pipeline’s stages, such as build, test, and deployment, as well as the actions that must be taken at each one.
Example of a Jenkins File:
pipeline {
agent any
stages {
stage('Test') {
steps {
bat "mvn -D clean test"
}
post {
// If Maven was able to run the tests, even if some of the test
// failed, record the test results and archive the jar file.
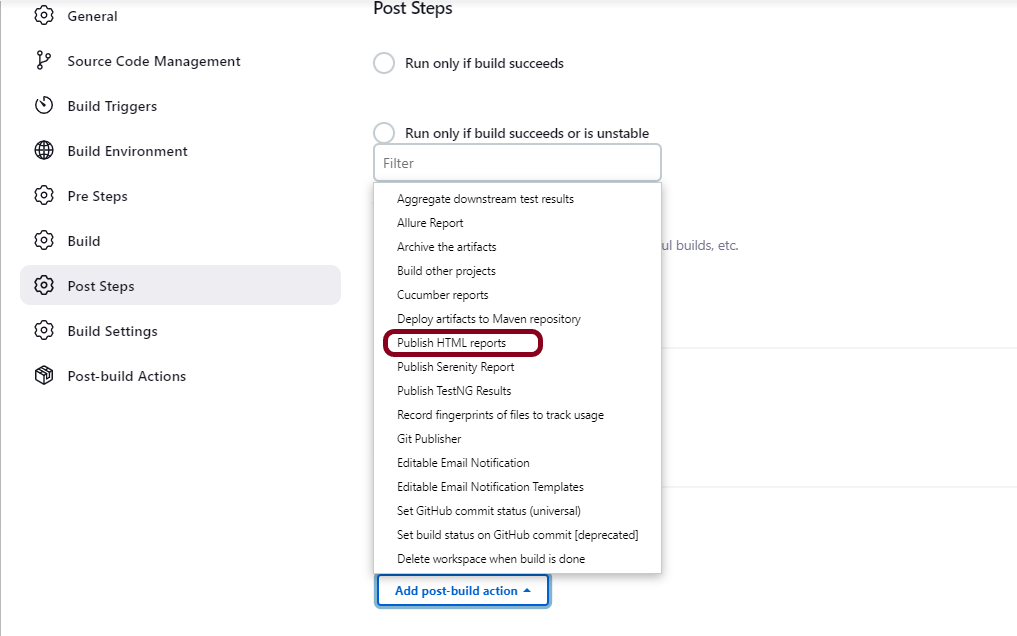
success {
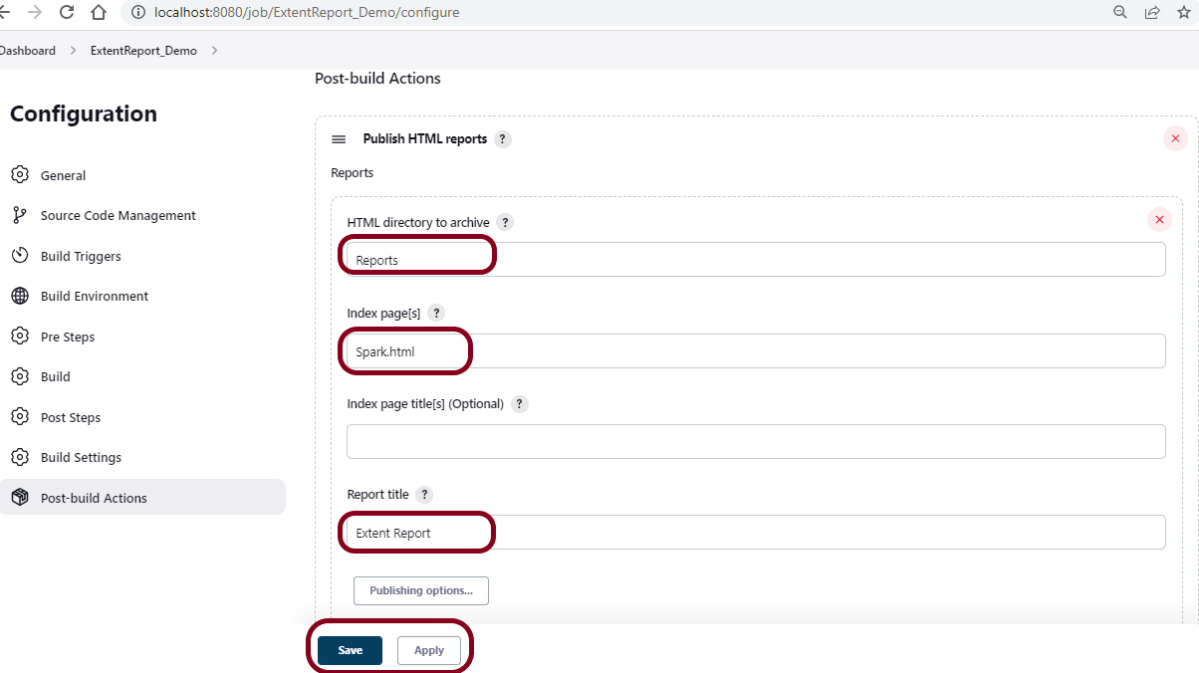
publishHTML([
allowMissing: false,
alwaysLinkToLastBuild: false,
keepAll: false,
reportDir: 'target/surefire-reports/',
reportFiles: 'emailable-report.html',
reportName: 'HTML Report',
reportTitles: '',
useWrapperFileDirectly: true])
}
}
}
}
}
21. What is docker?
Docker is an open platform for developing, shipping, and running applications using containers. Containers allow a developer to package up an application with all the parts it needs, such as libraries and other dependencies, and ship it all out as one package. This ensures that the application runs consistently across different environments.
A Dockerfile is a text file that contains instructions for building a Docker image. It specifies the base image, the application code, dependencies, and other configuration settings needed to create the image.
22. What role does Docker play in CI/CD?
Docker plays a significant role in CI/CD processes by providing a consistent and efficient environment for developing, testing, and deploying applications.
1. Consistency Across Environments – Docker enables the creation of containerized environments that are consistent across different stages of the CI/CD pipeline.
2. Efficiency – Docker containers are lightweight and can be quickly started, stopped, or replicated, which speeds up the testing and deployment processes. This efficiency is crucial for rapid iterations in a CI/CD pipeline.
3. Automation and Integration – Docker easily integrates with various CI/CD tools and platforms like Jenkins, GitLab CI, and AWS CodePipeline. This allows automated builds, tests, and deployments to be carried out within containers, streamlining the entire process.
4. Simplified Setup and Configuration – With Docker, you can define the entire environment setup in a single Dockerfile, which automates the creation of the development and deployment environments. This reduces setup time and configuration errors.
5. Scalability – Docker supports horizontal scaling by allowing you to deploy multiple instances of an application component across different containers. This helps manage increased load and optimize resource usage.
6. Version Control for Environments – Docker images can be version-controlled, allowing you to track changes to application environments, roll back to previous versions, and maintain a history of environment configurations
7. Resource Optimization – Docker helps in optimizing resource utilization by sharing the host operating system’s kernel and reducing the need for duplicating system libraries and files, which is a common issue in full-fledged virtual machines.
23. What are the best practices for using Docker in a CI/CD pipeline?
1. Use a Dockerfile – Create a well-structured Dockerfile for building your application images. Ensure that it is clean, efficient, and uses layers effectively to minimize the build time and size of the images.
2. Version Control Docker Images – Tag Docker images with both version numbers and descriptive tags (e.g., `version-1.0`, `latest`) to keep track of different builds and ensure you can revert or deploy specific versions when needed.
3. Implement Automated Builds and Tests – Set up automated processes to build Docker images and run tests as part of your CI/CD pipeline. This ensures that images are always up-to-date and validated through consistent testing.
4. Security Scans – Regularly scan Docker images for vulnerabilities using security tools such as Clair or Trivy. Address any identified security issues promptly and ensure compliance with security policies.
5. Environment Variables – Use environment variables to configure different environments (development, staging, production). Avoid hardcoding sensitive information directly in Dockerfiles or codebases.
6. Network Best Practices – Use Docker’s network abilities smartly to segregate services within containers and implement proper network security measures like firewalls or network policies.
7. Logging and Monitoring – Integrate logging mechanisms within Docker containers to capture logs for monitoring and troubleshooting.
8. Regular Cleanup – Implement processes to regularly clean up unused Docker images and containers on your CI/CD servers to avoid storage bloat and keep the environment clean.
24. What is a container?
A container is a standard unit of software that packages up code and all its dependencies so the application runs quickly and reliably from one computing environment to another.
25. How can containerization improve the CI/CD process?
Containerization can greatly enhance the CI/CD process by providing consistent, isolated, and reproducible environments for developing, testing, and deploying applications.
1. Consistency Across Environments – Containers ensure consistent application performance. They run the same regardless of where they are deployed. This is achieved by bundling the application with its dependencies and environment configurations.
2. Rapid Deployment and Scaling – Containers are lightweight and fast to start, enabling rapid deployment and scalability of applications. This quick start-up time is particularly beneficial in CI/CD pipelines where frequent builds and deployments are common.
3. Efficient Resource Utilization – Containers use system resources more efficiently than traditional virtual machines, reducing overhead and lowering costs. This efficiency allows more applications and services to be tested and deployed simultaneously within CI/CD processes.
4. Integration with Orchestration Tools – Container orchestration platforms like Kubernetes provide advanced features. These include automated scaling, load balancing, and rolling updates. These platforms offer robust support for managing containerized applications in a CI/CD workflow.
5. Easier Rollbacks – The immutability of container images ensures quick rollbacks to previous application versions. This is done by redeploying earlier image versions. It simplifies the rollback process in case of issues.
6. Improved Testing Process – Containers can create environments that closely mimic production. This facilitates better quality assurance. It also enhances testing within the CI/CD pipeline. Automated tests can be run consistently across development, staging, and production stages.
26. What is Kubernetes?
Kubernetes, often abbreviated as K8s, is an open-source container orchestration platform designed to automate the deployment, scaling, and management of containerized applications. Kubernetes can automatically scale the number of containers based on demand. It can also distribute incoming network traffic across multiple containers to ensure optimal performance and availability.
1. Service discovery and load balancing Kubernetes can expose a container using the DNS name or using their own IP address. If traffic to a container is high, Kubernetes can load balance and distribute the network traffic so that the deployment is stable.
2. Kubernetes supports rolling updates, allowing applications to be updated with minimal downtime. If an update causes issues, Kubernetes supports easy rollbacks to a previous version.
3. Kubernetes restarts containers that fail, replaces containers, kills containers that don’t respond to your user-defined health check, and doesn’t advertise them to clients until they are ready to serve.
4. Kubernetes lets you store and manage sensitive information, such as passwords, OAuth tokens, and SSH keys. You can deploy and update secrets and application configuration without rebuilding your container images, and without exposing secrets in your stack configuration.
27. What is blue-green deployment?
Blue-green deployment is a deployment approach in which new versions of an application are deployed and tested in two identical environments, blue and green.
The old version can be called the blue environment while the new version can be known as the green environment.
The new version in the Green environment is verified. Once it is considered stable, traffic is switched from the Blue environment to the Green environment.
If any issues arise with the new version shortly after switching, the team can quickly switch traffic back to the Blue environment. This reverts to the previous version.
Tools like Kubernetes, AWS Elastic Beanstalk, and some Continuous Delivery platforms offer built-in support for blue-green deployments.
28. What is canary deployment?
Canary deployment is a method of application deployment in which just a small percentage of production traffic is sent to a new version of the application, with the majority of traffic still being handled by the older version. As a result, the new version can be tested and validated before being implemented across the board in the production environment.
29. What is observability?
Observability is the ability to understand and diagnose the behavior of a complex system, such as a software application, using real-time monitoring and metrics.
30. What is Grafana?
- Grafana is an open-source analytics and monitoring platform that integrates with various data sources to help users visualize and understand their data. It is widely used for monitoring and observability in IT systems, providing a flexible and customizable interface for creating dashboards, charts, and graphs.
- Users can create dashboards that display real-time or historical data through the use of panels and visualizations.
- Grafana allows users to set up alert rules based on defined thresholds or conditions. When an alert is triggered, Grafana can send notifications via various channels, such as email, Slack, or other supported notification services.
- Grafana supports user authentication and authorization. Users can be organized into teams with specific access permissions, ensuring secure access control to dashboards and data sources.
31. What is Prometheus?
Prometheus is an open-source systems monitoring and alerting toolkit originally built at SoundCloud.
Prometheus employs a pull-based model, where it regularly scrapes (pulls) metrics from endpoints exposed by the systems being monitored. This model is well-suited for dynamic and containerized environments.
Prometheus Query Language (PromQL) is a powerful query language that allows users to retrieve and analyze metrics data. It supports various aggregation functions, filtering, and mathematical operations.
Prometheus includes a built-in alerting system that allows users to define alert rules based on metric thresholds or conditions. When an alert is triggered, Prometheus can send notifications to external systems.
32. How do you ensure the security of the CI/CD pipeline? or
How do you handle secret management in your CI/CD pipelines?
1. Access Control and Authentication – To prevent unauthorized access to the pipeline and its components, access controls are essential. Authentication procedures must also be put in place. Use strong authentication mechanisms, such as multi-factor authentication (MFA), for accessing CI/CD tools.Implement strict access controls to ensure only authorized personnel can access sensitive parts of the pipeline. This can be managed by using role-based access control (RBAC).
2. Code Review and Static Analysis – Finding security flaws by checking code and dependencies for vulnerabilities and using static and dynamic analysis methods. Make sure all code changes undergo peer review to identify potential vulnerabilities before integration.
3. Secure Secrets Management – Avoid storing sensitive information, such as API keys and credentials, directly in CI/CD configuration files or scripts. Use secure vaults or secret management tools to store and retrieve secrets securely. Ensure that secrets are not exposed in logs. Rotate secrets regularly and audit access to secrets to prevent unauthorized usage.
4. Environment Security – Segregate environments used for development, testing, and production to minimize the risk of cross-environment leakages. Apply network security best practices, such as firewalls and intrusion detection systems, to protect the infrastructure.
5. Dependencies and Third-party Libraries – Utilize tools that can identify and report on security vulnerabilities in third-party dependencies. Update dependencies to patched versions to mitigate potential risk. Use package managers with integrated security tools that automatically check for vulnerabilities.
6. Automated Testing – Add automated security tests to the CI/CD pipeline. These tests can include penetration testing and vulnerability scanning. They should be part of the continuous integration process.
33. What are some challenges in implementing CI/CD?
1. Integrating CI/CD practices into existing legacy systems can be challenging.
2. Managing dependencies, especially in large projects, can be complex. Dependency management issues may arise from compatibility problems, version conflicts, or unavailability of required dependencies.
3. Security is a critical aspect of software development, and integrating security into CI/CD pipelines is a challenge. Ensuring secure coding practices, vulnerability scanning, and compliance checks requires careful consideration.
4. Integrating CI/CD pipelines with external tools, services, or platforms can be challenging. Ensuring compatibility and smooth interactions with tools like version control systems, issue trackers, and cloud services is essential.
34. Can you explain the concept of “Infrastructure as Code” (IaC) and provide an example of an IaC tool?
Infrastructure as Code (IaC) is the practice of managing and provisioning infrastructure using code and automation. Instead of manually configuring servers, networks, and other infrastructure components, IaC allows developers to define and manage their infrastructure through code. One popular example of an IaC tool is Terraform which uses a domain-specific language (HCL — HashiCorp Configuration Language) to describe infrastructure resources and their relationships. With Terraform, you can create, update, and manage infrastructure as code, making it easier to version control and maintain infrastructure configurations.
35. Is CI/CD pipeline can be targeted by attackers?
Yes, CI/CD pipeline can be targeted by the attackers. CI/CD pipelines have access to various sensor data, such as server passwords, repositories, API keys, and so on. If the CI/CD system is not properly secured, then it can be targeted by attackers. A few ways of securing the CI/CD systems are as follows.
Finding security flaws by checking code and dependencies for vulnerabilities and using static and dynamic analysis methods.
To prevent unauthorized access to the pipeline and its components, access controls and authentication procedures must be put in place.
36. What is the meaning of trunk-based development in CI/CD?
Trunk-based development is a software development approach that emphasizes frequent integration of code changes into a shared main branch, often referred to as the “trunk” or “master” branch. In the context of CI/CD, trunk-based development promotes continuous integration by encouraging developers to merge their changes into the main branch multiple times throughout the day.
37. Describe the role of container orchestration tools in CI/CD.
Container orchestration tools like Kubernetes automate the deployment, scaling, and management of containerized applications in CI/CD pipelines.
38. What is chaos engineering?
Chaos engineering is the practice of intentionally introducing failures and chaos into a system to test its resilience and reliability. The practice involves identifying potential weaknesses in a system. This is done by intentionally injecting faults in a controlled manner. It also involves simulating failures to find failure points.
Popular tools for implementing chaos engineering include Gremlin and Chaos Monkey. Chaos Monkey was originally from Netflix. These tools are designed to introduce controlled failure scenarios into systems. They test the systems’ resiliency.
39. What is a microservices architecture?
A microservices architecture divides an application into smaller, independent services that can be developed, deployed, and scaled separately.
40. Can you explain the concept of “canary releases” in the context of CI/CD??
A canary release is a deployment strategy used to gradually roll out new software changes. Initially, it is provided to a small subset of users before making it available to the entire user base. This is used for uptime and user experience in web applications. Canary releases are suitable for frequent deployments with low-risk exposure.
Benefits:
Risk Mitigation: Deploy the new version to a limited audience initially. This way, you can identify potential issues without affecting all users. This controlled release helps in reducing the risk of widespread disruptions.
Real-World Testing: Canary releases provide an opportunity to test software in real-world conditions. These conditions can be more revealing than test environments.
Feedback Loop: Early adopters can provide feedback on the new release. This feedback can be used to make additional improvements. It can also be used for fixes before a full rollout.
41. Can you describe a scenario where a CI/CD pipeline failed and how you resolved it?
Absolutely. One day, the pipeline started failing consistently at the build stage. The failure logs indicated issues related to dependency mismatches, resulting in errors about incompatible versions. The problem arose after an external library that the project relied on received a major update with introduced breaking changes.
As a quick fix, the team pinned the dependencies to the previous stable versions by updating the project’s dependency management file (like `package.json` for JavaScript or `requirements.txt` for Python).
To ensure future stability, the team added a task to the pipeline to run automated dependency checks regularly. This task alerts developers to any new breaking changes in external libraries.
We have updated documentation and workflow processes. These updates remind developers to always explicitly define dependencies. They should consider version changes carefully.
42. What are some best practices for handling external dependencies in CI/CD pipelines?
1.Use a Central Dependency Management Tool – We should use a dependency management tool specific to the programming environment. Examples include Maven for Java, npm for JavaScript, or pip with requirements.txt for Python. These tools help automate dependency resolution and version management.
2. Specify Dependency Versions – We should specify exact versions for all dependencies rather than using latest or wildcard versions (e.g., `1.2.3` instead of `^1.2.3`). This prevents unexpected breaking changes due to updates in external libraries.
3. Implement Local/Cached Repositories – We should use local or proxied repositories (e.g., JFrog Artifactory, Nexus Repository) to cache dependencies, ensuring builds do not rely on external network availability and reducing download times.
4. Automate Dependency Updates – It is recommended to use tools like Dependabot or Renovate to automate the process of checking for and updating dependency versions. These tools create pull requests with updates, allowing for review and integration testing before merging.
5. Conduct Dependency Audits and Security Scans – Regularly audit dependencies for known vulnerabilities. Use tools like OWASP Dependency-Check, Snyk, or npm audit. Automate these checks within the CI/CD pipeline to catch vulnerabilities early.
6. Regularly Clean Up Unused Dependencies – Periodically review unused dependencies. Remove them to minimize the attack surface. This will reduce complexity in the project.


