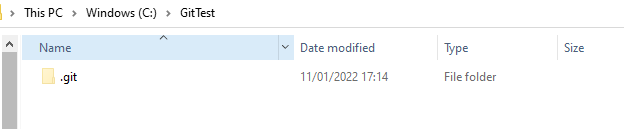
The previous tutorial explains the creation of a Git Repository. This tutorial explains the steps to stage the changes in the Git Repository.
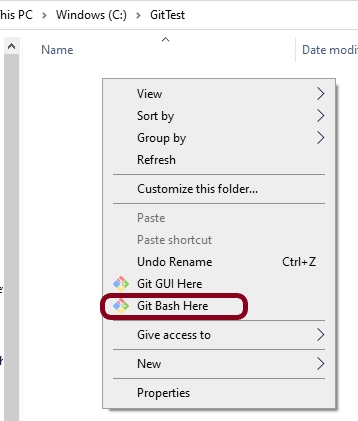
We have a new Git Repository named as GitTest. Go to the Git Repository and Right-click and select “Git Bash Here”.
To know how to create a new empty Git Repository, refer to this tutorial – How to create a new Git Repository – git init Command.
Type “git status” command on Git Bash and press enter.
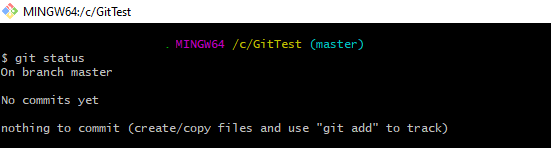
This shows that there is no uncommitted file available in the Git Repository.
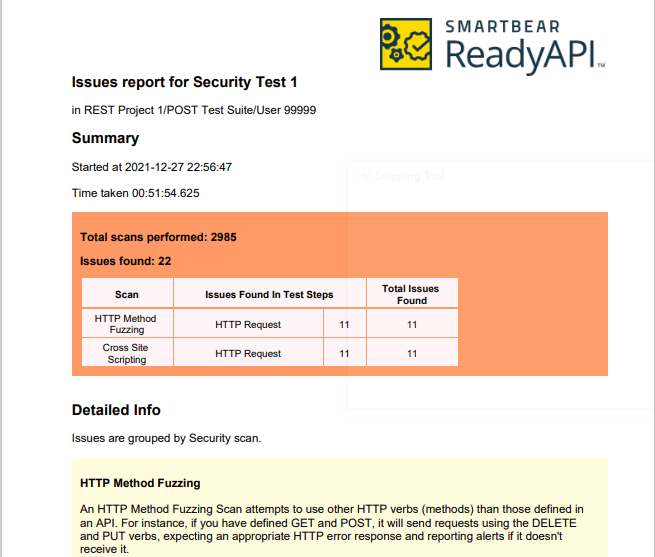
Scenario 1 – Adding/Staging a new file to Git
Now, let us create a new file called – ReadMe.txt in the Git Repository. Again, type the command – “git status”.

When we have added a new file and use the Git Status command, Git shows that the newly created file is an untracked file, since it is not yet tracked by GIT. It is showing a suggestion to use the “git add” command with the file name so that it can be included as a part of the next commit.
As suggested by Git, let us use the “git add” command to commit the file and then use “git status” command to see the status of Git.

When we ran the “git add” command, then changes from the working directory were copied (not moved) to the staging area.
The primary function of the git add command is to promote pending changes (new file or altered file) in the working directory, to the git staging area. The staging area is one of Git’s more unique features.
Scenario 2 – Adding a new file to git and updating the already staged file
I have created another new file – “Index.txt” and updated the already staged file – “ReadMe.txt”. Type the command “git status” and see the message provided by Git.
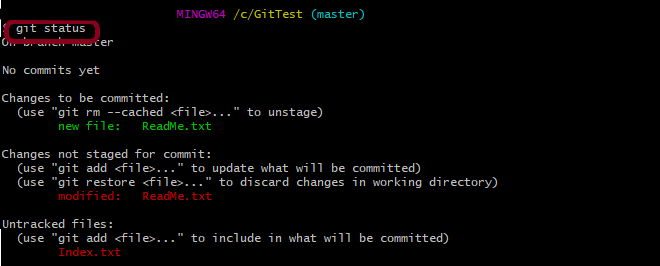
This image provides 4 suggestions
- If we want to unstage the old file – ReadMe.txt, we can do that by using command “git rm”.
- The latest changes are not staged for ReadMe.txt file. This can be done by using “git add” command.
- If we want to move the latest changes from staging area to working directory, use “git restore” command.
- The new file Index.txt is not at all staged. So, it can be staged by using the command “git add“.
There are multiple ways to stage multiple files in Git.
The first way is to add the name of all the files, as shown below.
git add ReadMe.txt Index.txt
The second way is to use the below command. This will stage all the unstaged files available in Git.
git add .

Staging Files – This diagram helps you to remember the difference between Staging Area and Git Repository.
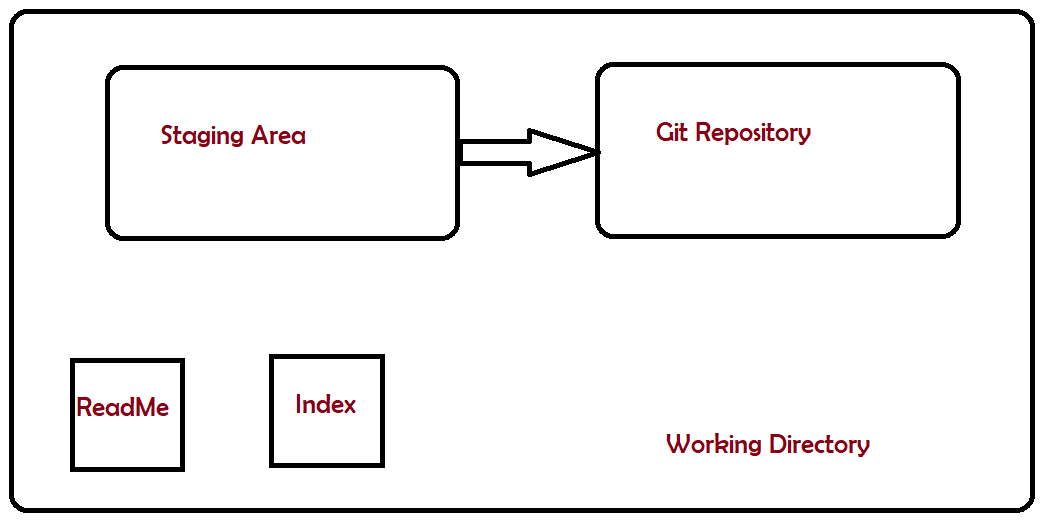
I hope this has helped you to understand the difference between Staging Area and Git Repository.