ReadyAPI can be used to perform functional tests of SOAP, RESTful, GraphQL, Kafka, JMS or other API or web services. ReadyAPI functional tests verify that an API or a web service follows the required business logic.
This tutorial provides a detailed description of steps to be followed for creating a Functional Test
- Create a Functional Test.
- Run the Functional Test
- Test Result of a Functional Test
- Test Report Generation
- Sample Test Report
Create a Functional Test
Step 1 – Open the start page, click Create Functional Test

Step 2 – Select Endpoint option in this dialog.

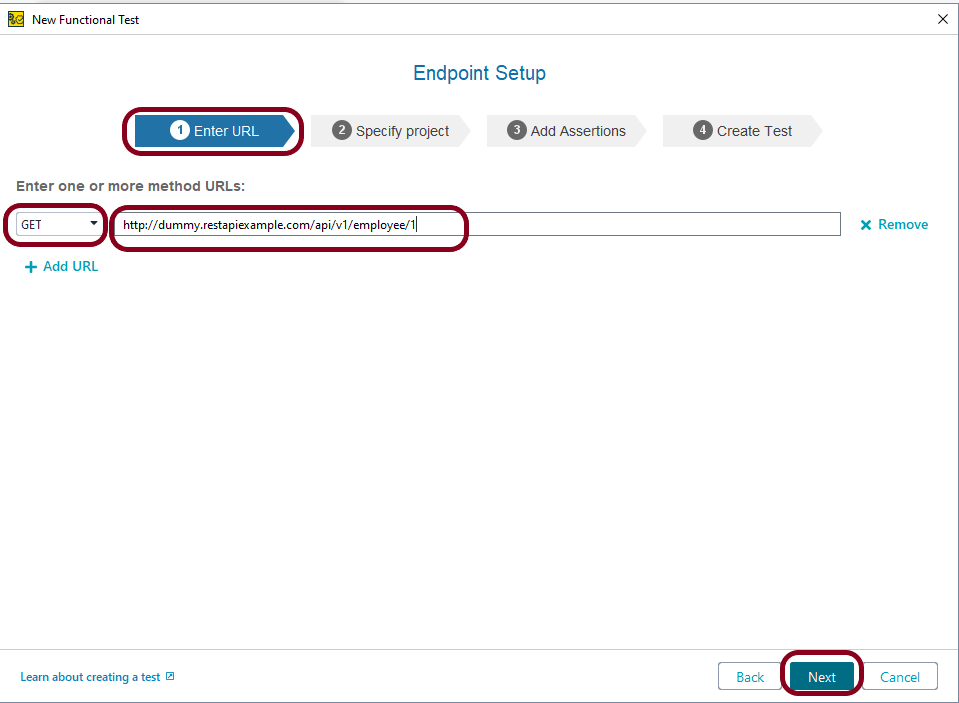
Step 3 – In the subsequent wizard, specify the method, URL of the web service’s definition. Then select the Next Button.
Endpoint – http://dummy.restapiexample.com/api/v1/employee/1
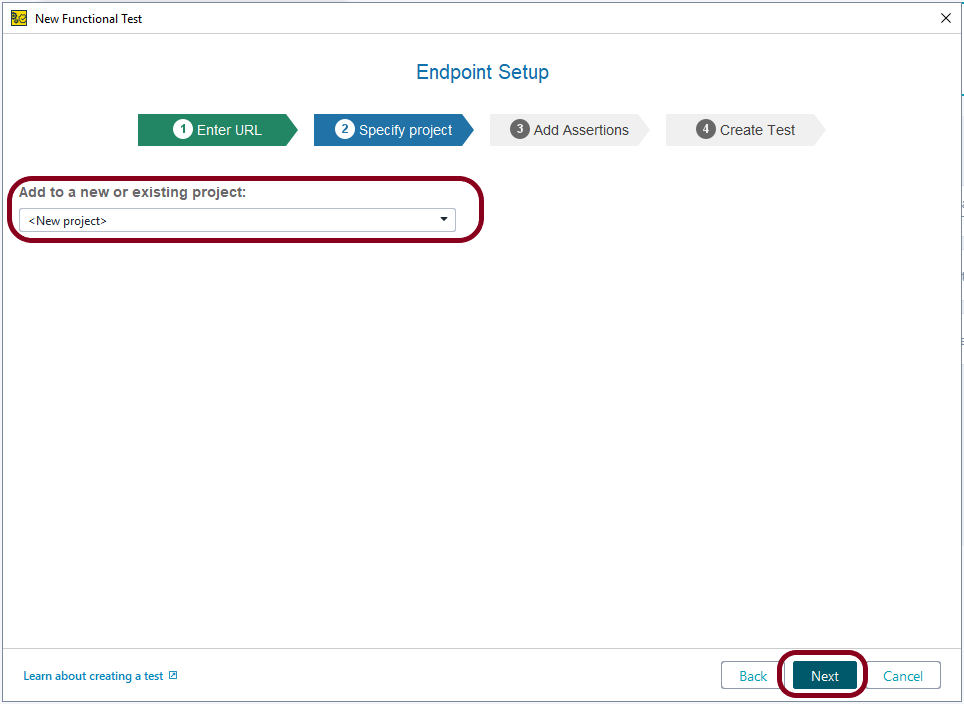
Step 4 – Select if you want to create a new project for the definition you have added, or add it to the existing project. Click the Next button to continue.
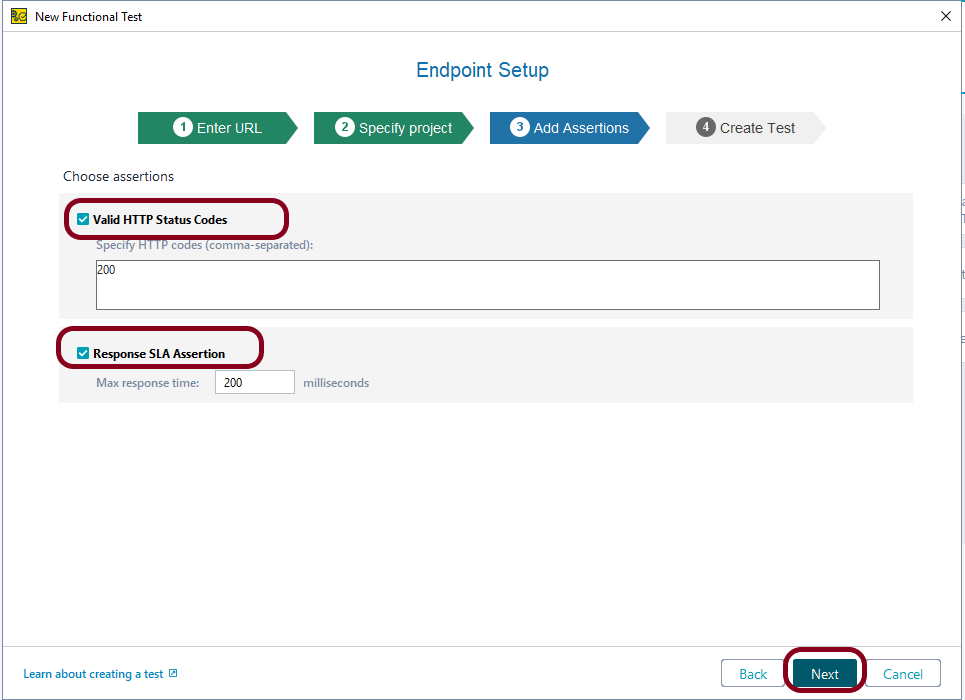
Step 5 – On this page of the wizard, you can select assertions to be added to the test. ReadyAPI adds the selected assertions to new test requests.
Assertions verify that your API works as expected. Select the selection and click the Next button.
Run the Functional Test
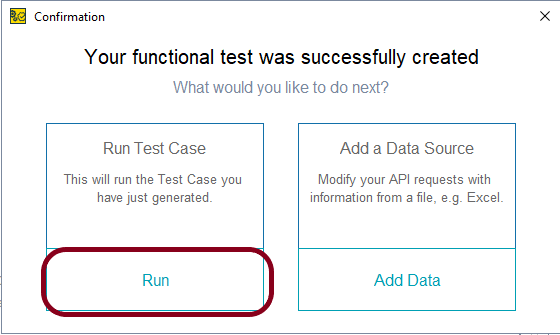
Step 6 – ReadyAPI will create a test project and add test cases to it. After that, it will display one more dialog box, where you can run the created tests or add a data source to them. Assume you don’t want to add a data source, so can run the tests by clicking the “Run” option.
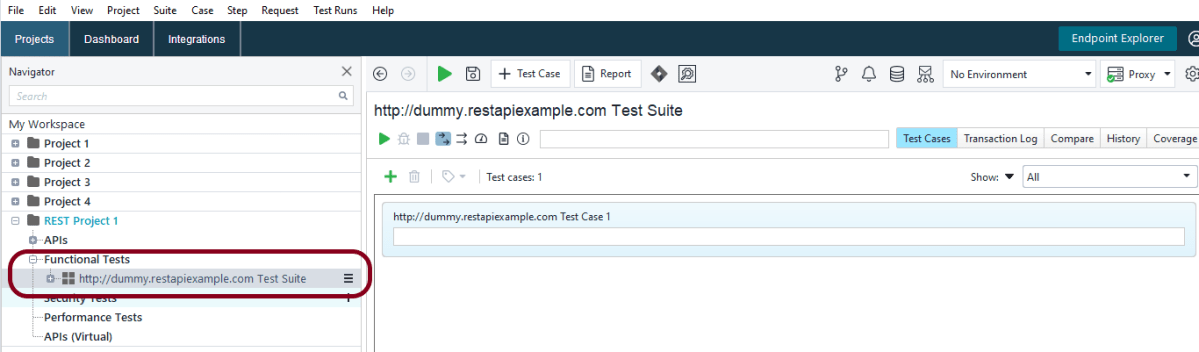
Step 7 – This screen shows that a new project is created and a new functional test as shown in the image is created.
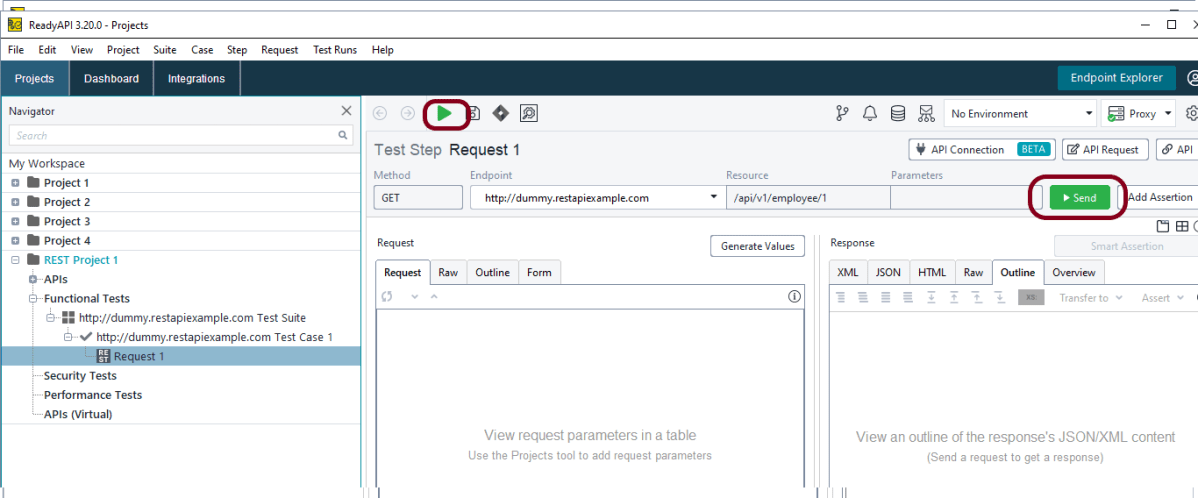
Step 8 – To run an individual request test step, select it in the Navigator panel on the left, and then click Green arrow on the main toolbar or click on Send button on the request editor toolbar.
Test Result of a Functional Test
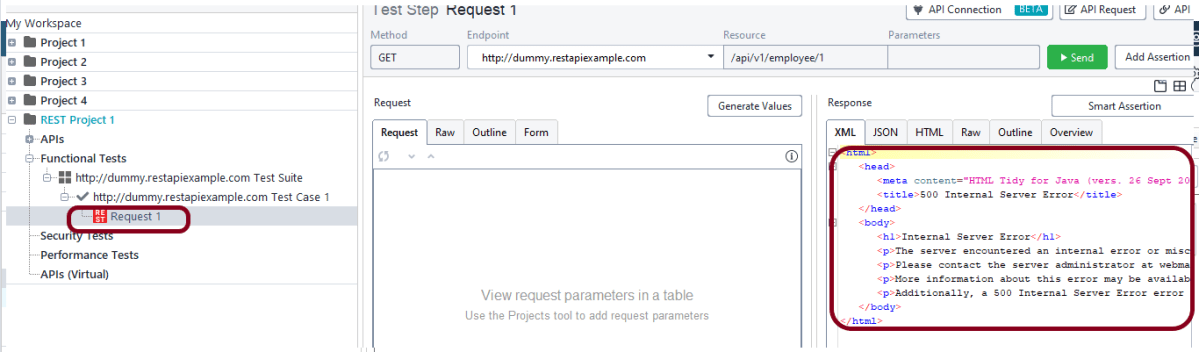
Step 9 – Image of a failed test result. When the test fails, the Request color as shown in the image will be red.
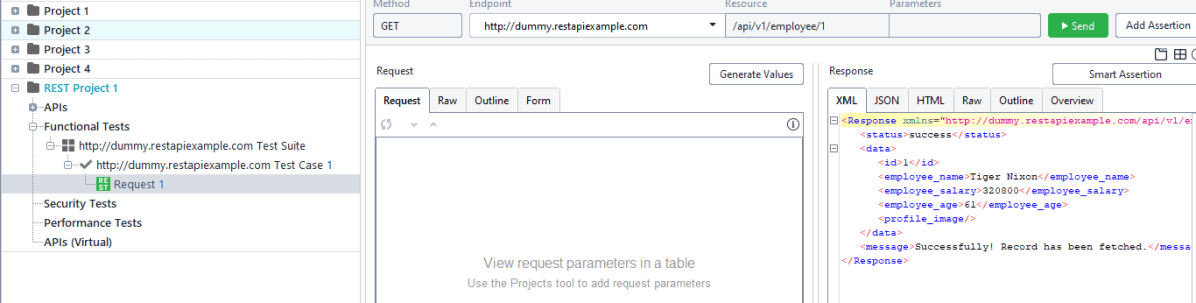
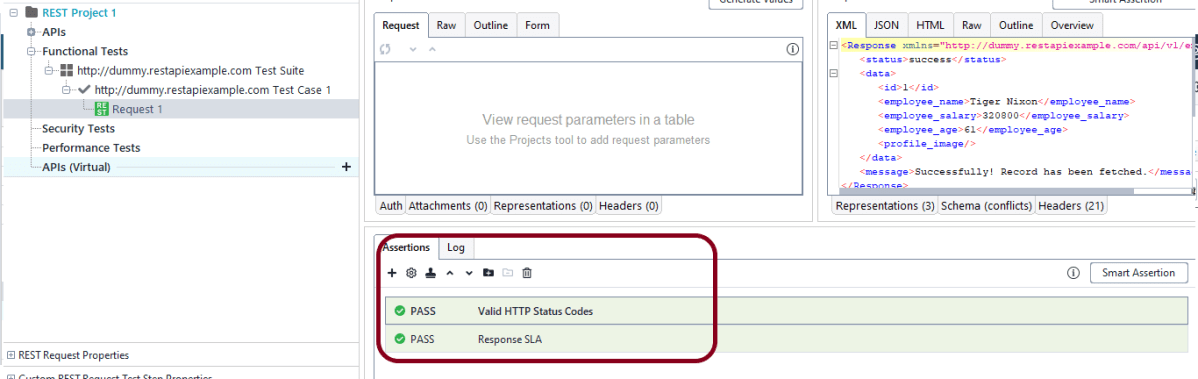
Step 10 – When the test is passed, the Request icon shown in the image will be green.
Step 11 – The Assertions panel lists the assertions you added to a test step or operation. Here, you can add and modify the assertions.
Test Report Generation
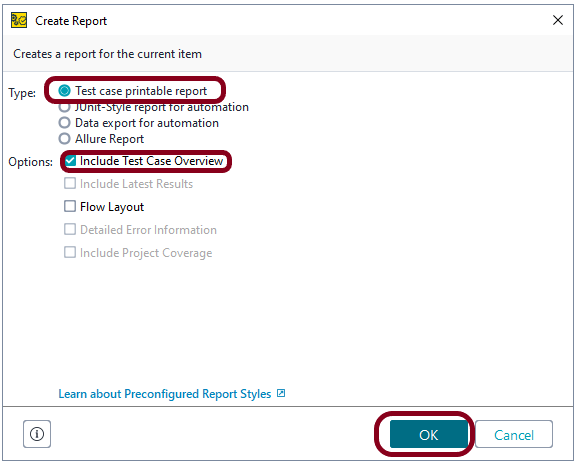
Step 12 – To open the Create Report dialog, click Report in functional tests at any level. Here, I have clicked on the Test Case – (http://dummy//rest..) and a Report tab is displayed.

Step 13 – The Create Report dialog configuration varies depending on the report type you select. You can create project reports only on the level of the Functional test in the Navigator. After selecting the required options, click on the OK button. This generates a Test Report as shown in the below image.
Sample Test Report

Congratulations!! We are able to create, run a Functional Test as well as able to generate the Test Report.
