The previous tutorial has explained the creation of a new Security Test. This tutorial explains the process to create a Security test from the existing Functional Test.
Steps to be followed to create a security test from a functional test case:
- Create the Security Test from Functional Test
- Run the Security Test
- Analyse Security Test Results
- Generation of Security Test Report
- Sample Test Report
- Analyse Security Test Report
Create the Security Test from Functional Test
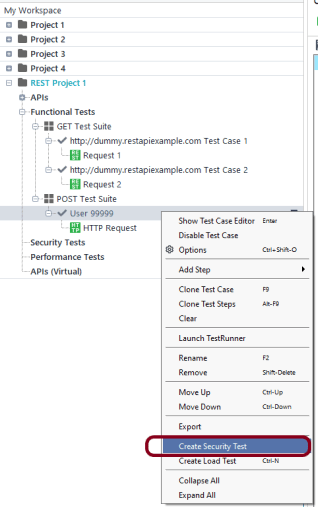
Step 1 – Right-click the test case present under Functional Tests in the Navigator and select Create Security Test.
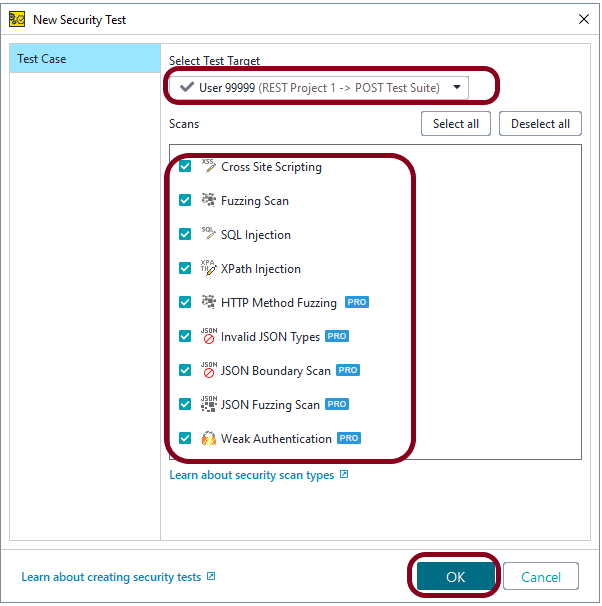
Step 2 – Click Select Test Target. Select the test case you want to apply the security scan to. All the applicable scans are selected by default
Leave the scans you want to have in your test checked and uncheck the other scans.
There is a list of Scans, you can select either one scan or multiple scans. I have selected all the scans.
- Boundary Scan
- Cross Site Scripting
- Fuzzing Scan
- Invalid Types
- SQL Injection
- XPath Injection
- HTTP Method Fuzzing
- Sensitive Files Exposure
- Weak Authentication
Click the OK button.
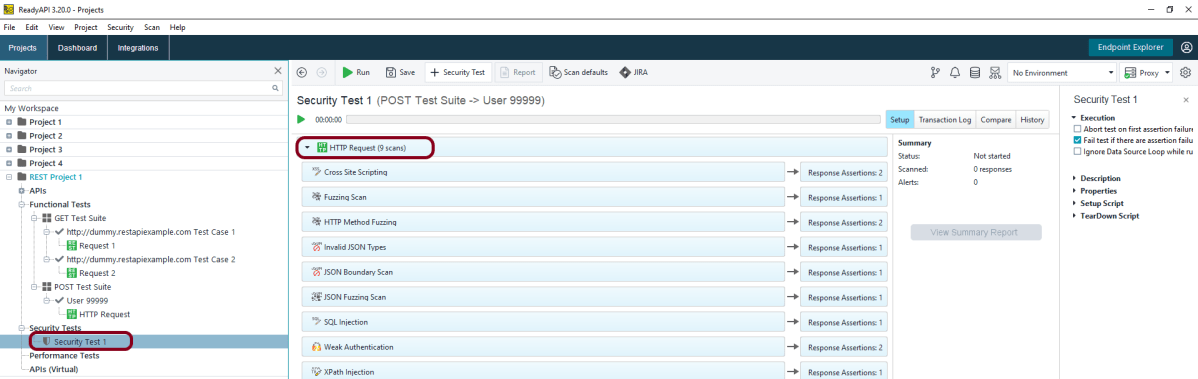
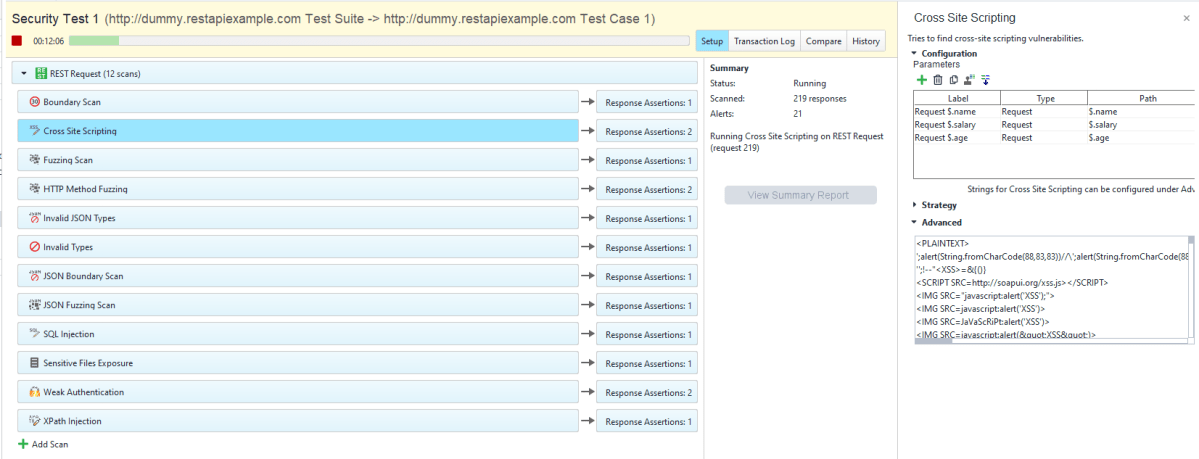
Step 3 – This screen shows all the scans added to the Security Test.
Run the Security Test
Step 4 – Click the Green arrow “Run” to start the test.

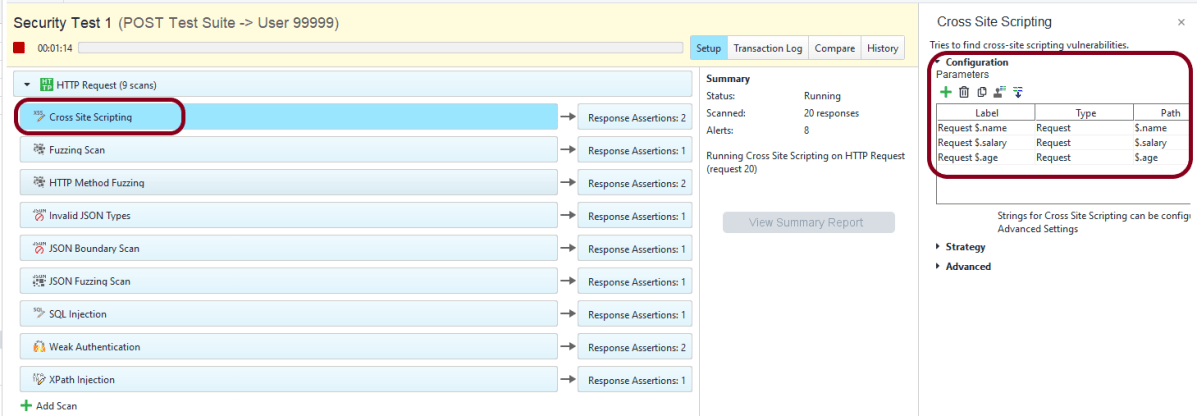
Step 5 – ReadyAPI will start sending modified requests and checking responses.

Step 6 – The security test window shows the progress of each test step and matching security scans. This screen shows all the configurations of Cross Site Scripting. Similarly, all the scans have their own in-built configurations.
Analyse Security Test Results
Step 7 – The Transaction Log shows additional information about security scans.
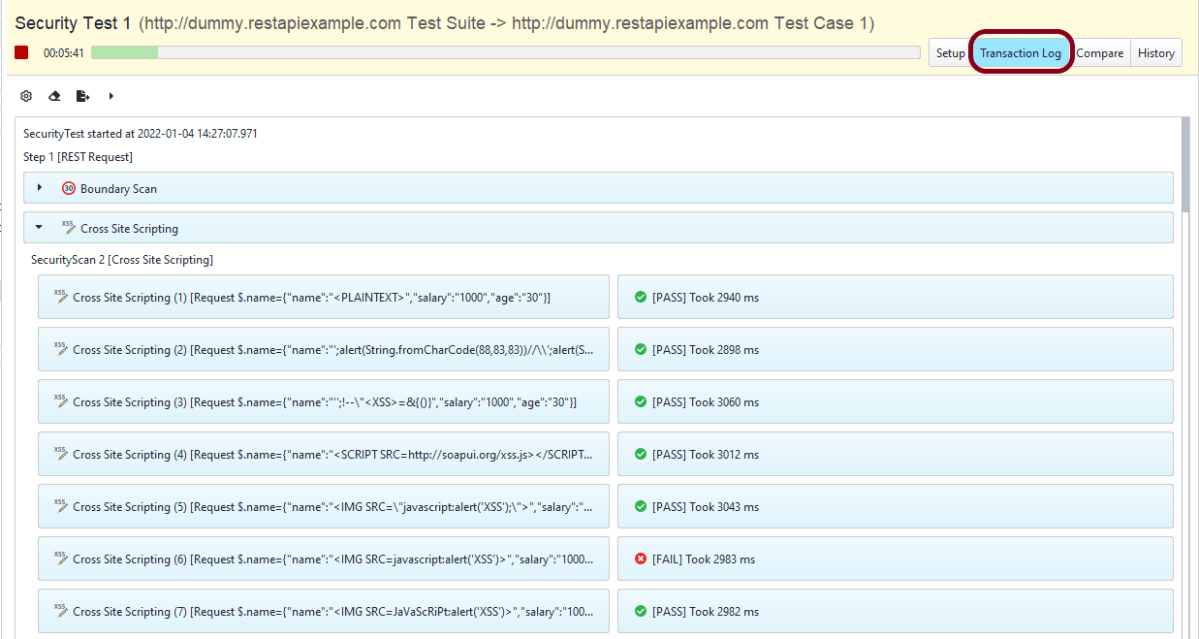
Step 8 – The details of a particular request or response are available in the inspector.
The Setup pane contains the detail about the configuration used for the tests.
Generation of Security Test Report
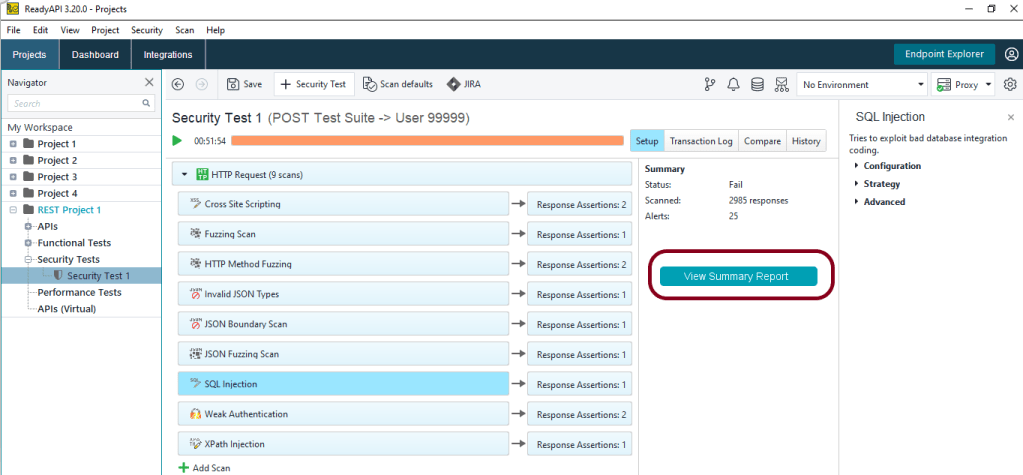
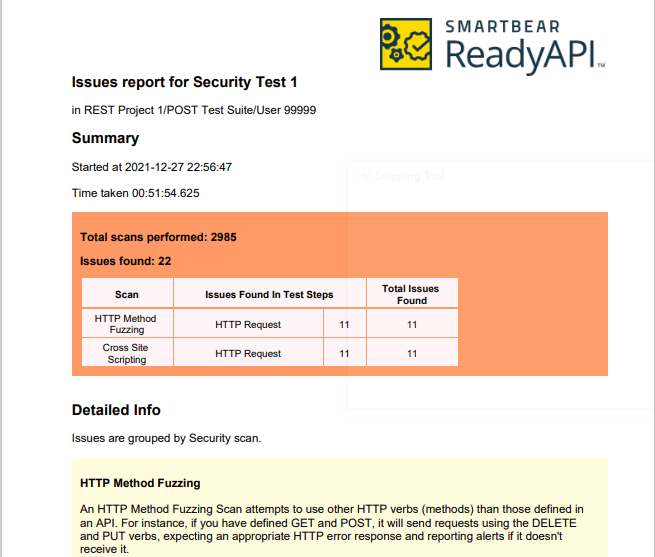
Step 9 – After the security test run finishes, click View Summary Report:
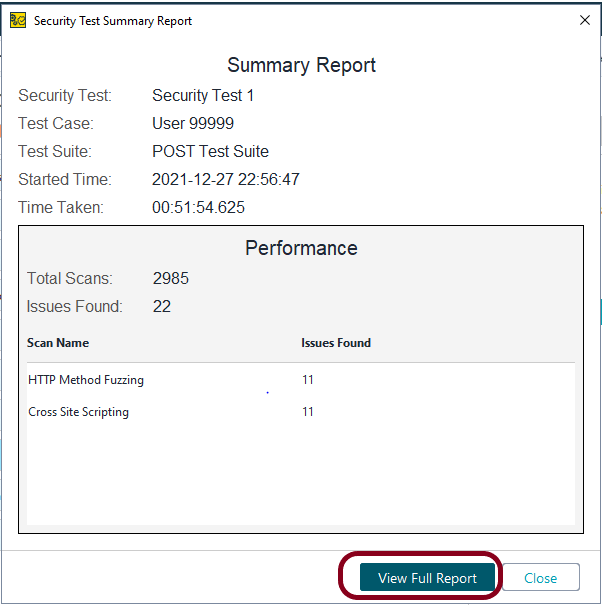
Step 10 – In the dialog that appears, click View Full Report.
Step 11 – After that, ReadyAPI will open the report in the default PDF viewer.
Sample Test Report
Analyse Security Test Report
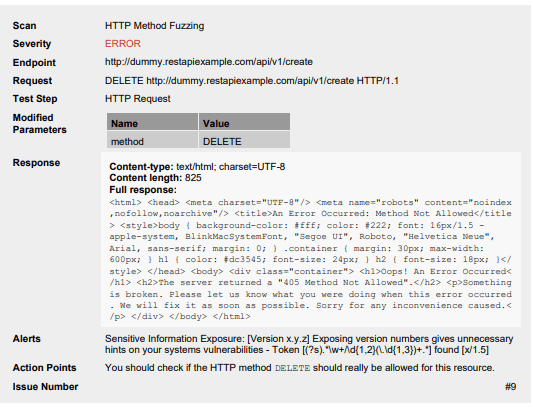
Step 12 – Example of HTTP Method Fuzzing
Example of Cross Site Scripting
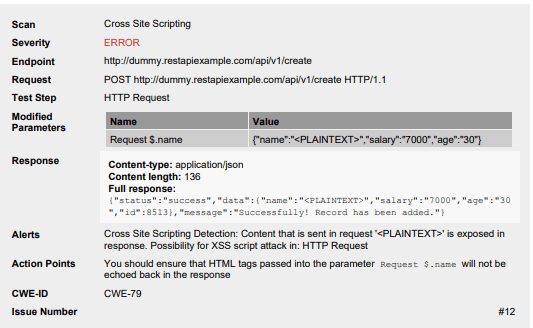
Congratulations!! We have successfully created the Security Test from the Functional Test. We are also run the test and generated the Security Test Report also. That’s a great accomplishment.
