Security tests in ReadyAPI include various types of security scans. Each of them detects a specific vulnerability. With multiple security scans in one test, you guarantee your service is well-protected against possible attacks.
This tutorial explains the steps to create the Security tests in ReadyAPI.
To know how to install ReadyAPI, refer to the installation tutorial.
A version of ReadyAPI used for this tutorial- 3.20.0
This tutorial explains the below steps:-
- Create a Security Test
- Run the Security Test
- Analyse Security Test Results
- Generation of Security Test Report
- Sample Test Report
- Analyse Security Test Report
Create a Security Test
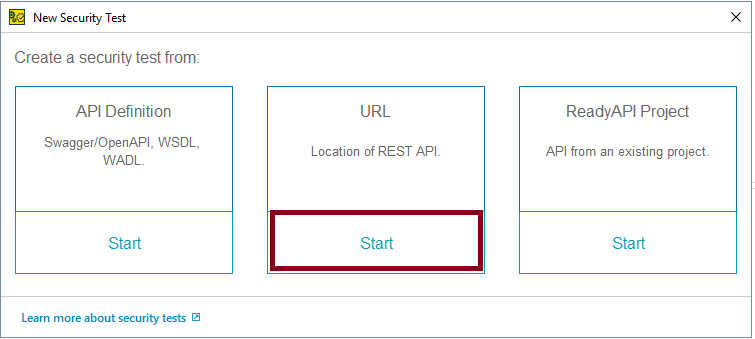
Step 1 – Select File ->New Security Test.

Step 2 – Select the URL option.
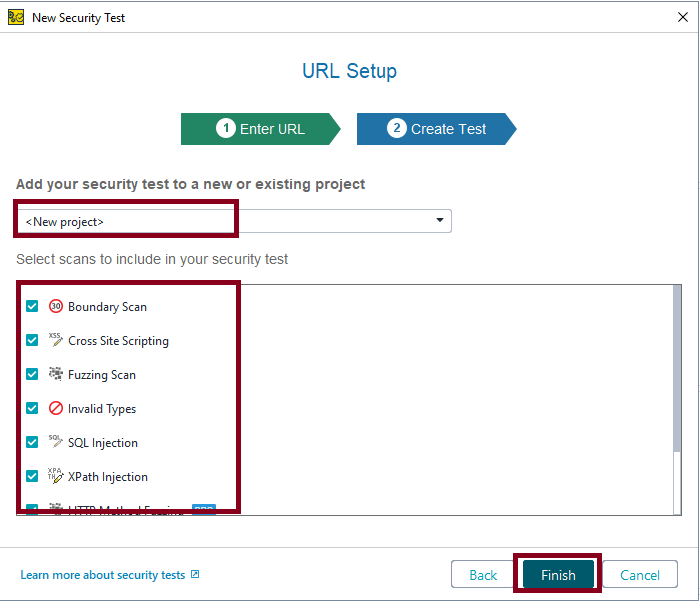
Step 3 – Enter the following URL and click the Next button:
URL – http://dummy.restapiexample.com/api/v1/employee/1

Step 4 – Select the scans you need and click the Finish button.
Another thing to keep in mind is to select whether you want to create a new project or add the test to an existing project. Here, I’m creating a new project.
There is a list of Scans, you can select either one scan or multiple scans. I have selected all the scans.
- Boundary Scan
- Cross Site Scripting
- Fuzzing Scan
- Invalid Types
- SQL Injection
- XPath Injection
- HTTP Method Fuzzing
- Sensitive Files Exposure
- Weak Authentication
Run the Security Tests
Step 5 – We have created a security test. ReadyAPI will offer you to run the security test immediately or edit it before running. We do not need to configure anything, so select the Run Security Test option.
If you want to edit the test before running it, then select the Edit Security Test option.

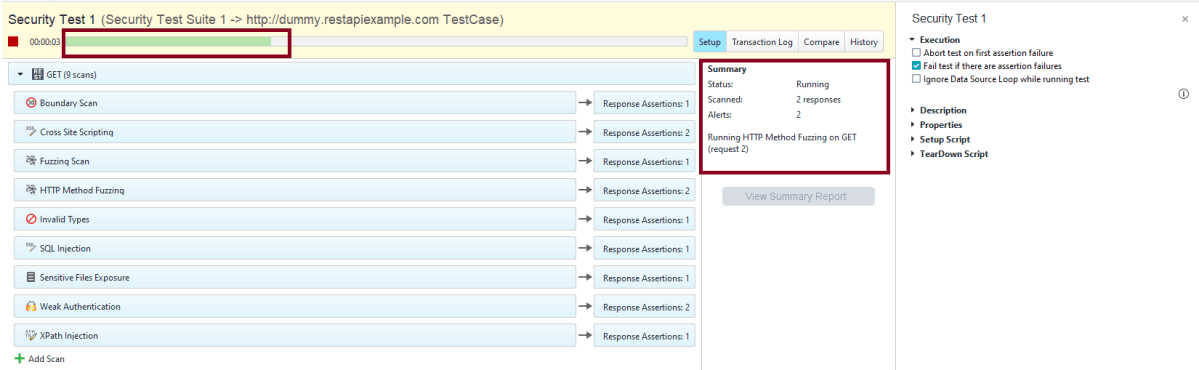
Step 6 – ReadyAPI will start sending modified requests and checking responses.
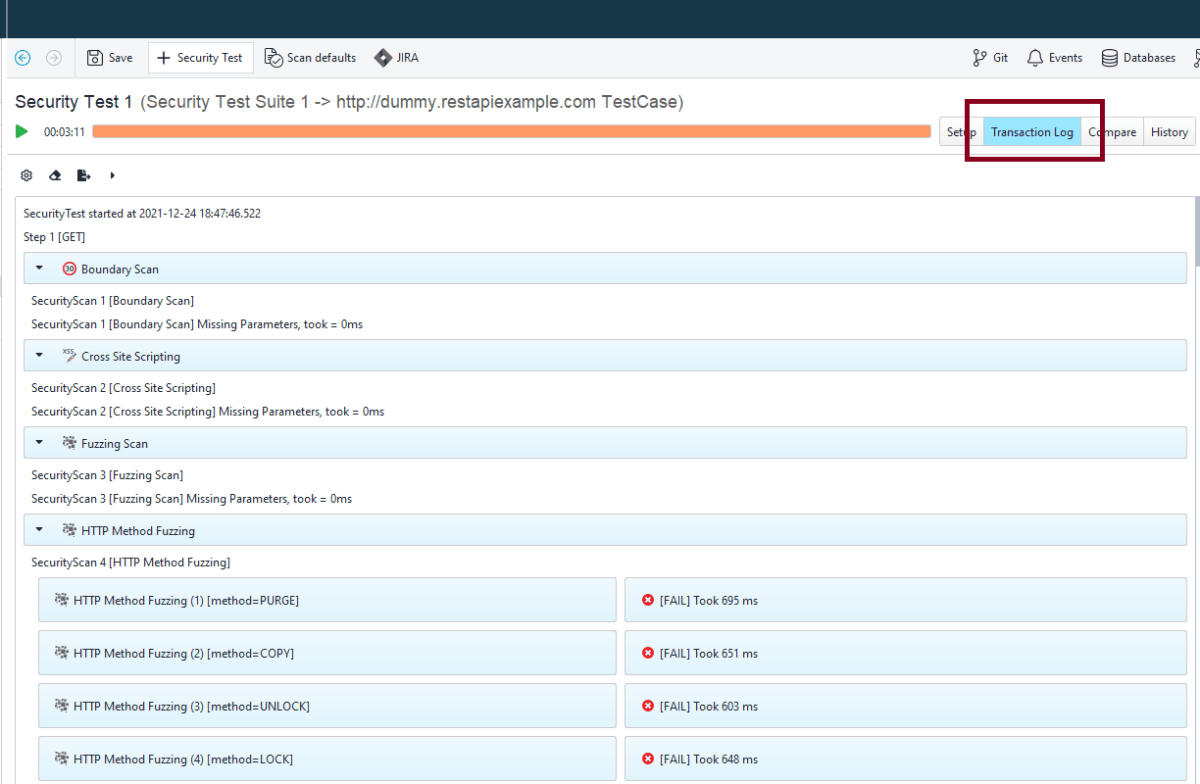
The security test window shows the progress of each test step and matching security scans:
The Summary pane contains a short overview of the currently running security test.
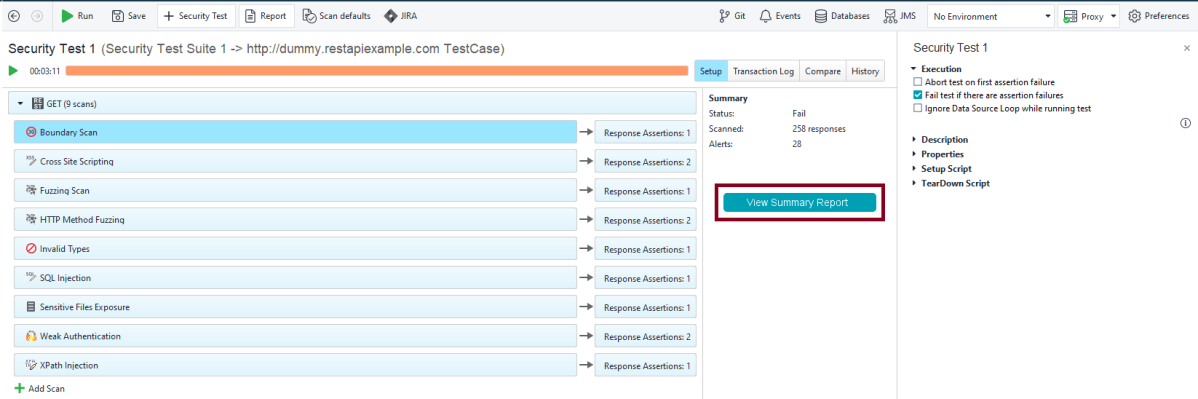
Step 7 – After the security test run finishes, click View Summary Report:
Analyse Security Test Results
Step 8 – The Transaction Log shows additional information about security scans.
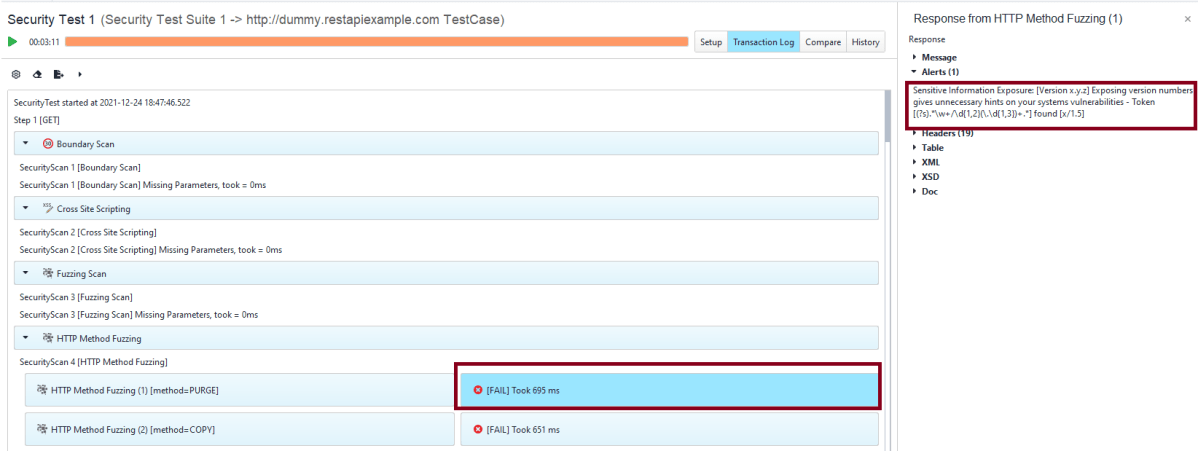
Step 9 – The details of a particular request or response are available in the inspector.
Generation of Security Test Report
Step 10 – In the dialog that appears, click View Full Report:

After that, ReadyAPI will open the report in the default PDF viewer.
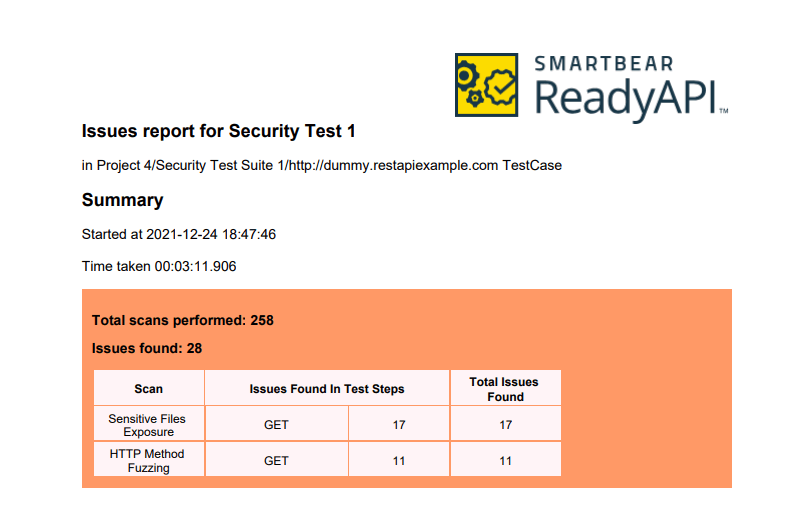
This Summary Report shows there was a total of 258 scans and 28 issues are found. Out of 28 issues, 17 issues were Sensitive Files Exposure, and 11 issues are HTTP Method Fuzzing.
Sample Test Report

Analyse Security Test Report
Step 12 – Sensitive Files Exposure

Example of HTTP Method Fuzzing

Congratulations!! We have successfully created a Security test, run it as well as generating the Test Report, and analyzed the result too. Cheers!!!
