In the previous tutorial, I have explained about Integration Testing of SpringBoot Application with Serenity BDD and Cucumber in Maven project. This tutorial describes the creation of the Gradle Java Project to test a web application using Cucumber6 and JUnit4.
In this tutorial, I will explain creating a framework for the testing of Web Applications in Cucumber BDD.
Pre-Requisite
- Java 11 installed
- Gradle installed
- Eclipse or IntelliJ installed
This framework consists of:
- Serenity – 2.6.0
- Serenity Cucumber – 2.6.0
- Java 11
- JUnit – 4.13.2
- Gradle – 7.2
Steps to setup Gradle Java Project for Web Application using Serenity, Cucumber6 and JUnit4
- Download and Install Java on the system
- Download and setup Eclipse IDE on the system
- Setup Gradle on System and create a new Gradle Project
- Update repositories, plugins, and dependencies to the Gradle project
- Create a feature file under src/test/resources
- Create the Step Definition class or Glue Code for the Test Scenario
- Create a Serenity Cucumber Runner class
- Create serenity.conf file under src/test/resources
- Create serenity.properties file at the root of the project
- Run the tests through commandline which generates Serenity Report
Step 1- Download and Install Java
Cucumber and Rest-Assured need Java to be installed on the system to run the tests. Click here to know How to install Java.
Step 2 – Download and setup Eclipse IDE on system
The Eclipse IDE (integrated development environment) provides strong support for Java developers. Click here to know How to install Eclipse.
Step 3 – Setup Gradle
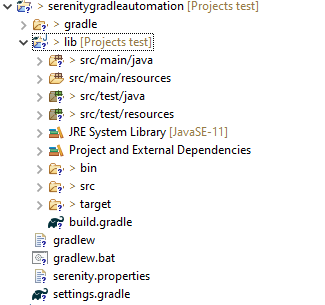
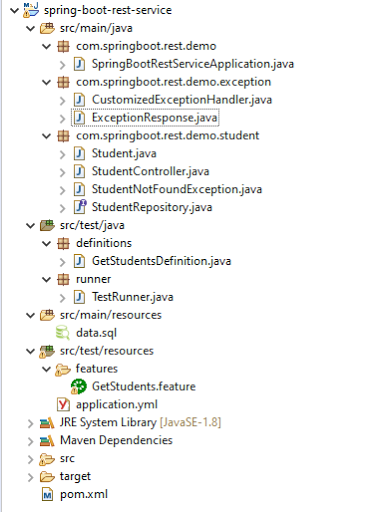
To build a test framework, we need to add several dependencies to the project. This can be achieved by any build Tool. I have used Gradle Build Tool. Click here to know How to install Gradle. Click here to know How to create a Gradle Java project. Below is the structure of the Gradle project.
Step 4 – Update repositories, plugin, and dependencies to the Gradle project
defaultTasks 'clean', 'test', 'aggregate'

repositories {
    mavenLocal()
    jcenter()
}

buildscript {
    repositories {
        mavenLocal()
        jcenter()
    }
    dependencies {
        classpath("net.serenity-bdd:serenity-gradle-plugin:2.4.24")
    }
}

apply plugin: 'java'
apply plugin: 'eclipse'
apply plugin: 'idea'
apply plugin: 'net.serenity-bdd.aggregator'

sourceCompatibility = 11
targetCompatibility = 11

dependencies {

    testImplementation 'net.serenity-bdd:serenity-core:2.6.0'
    testImplementation 'net.serenity-bdd:serenity-cucumber6:2.6.0'
    testImplementation 'net.serenity-bdd:serenity-screenplay:2.6.0'
    testImplementation 'net.serenity-bdd:serenity-screenplay-webdriver:2.6.0'
    testImplementation 'junit:junit:4.13.1'
}

test {
    testLogging.showStandardStreams = true
    systemProperties System.getProperties()
}

gradle.startParameter.continueOnFailure = true

test.finalizedBy(aggregate)
Step 5 – Create a feature file under src/test/resources
A Feature File is an entry point to the Cucumber tests. This is a file where you will describe your tests in Descriptive language (Like English). A feature file can contain a scenario or can contain many scenarios in a single feature file. Below is an example of Feature file.
Feature: Login to HRM

   @ValidCredentials
   Scenario: Login with valid credentials

    Given User is on Home page
    When User enters username as "Admin"
    And User enters password as "admin123"
    Then User should be able to login successfully
Step 6 – Create the Step Definition class or Glue Code for the Test Scenario
The steps definition file stores the mapping between each step of the test scenario defined in the feature file with a code of the function to be executed. So, now when Cucumber executes a step of the scenario mentioned in the feature file, it scans the step definition file and figures out which function is to be called.
Create a StepDefinition class for LoginPage.feature
public class LoginPageDefinitions {

    @Steps
    StepLoginPage loginPage;

    @Steps
    StepDashboardPage dashPage;

    @Steps
    StepForgetPasswordPage forgetpasswordPage;

    @Given("User is on Home page")
    public void openApplication() {
        loginPage.open();
        System.out.println("Page is opened");
    }

    @When("User enters username as {string}")
    public void enterUsername(String userName) {
        System.out.println("Enter Username");
        loginPage.inputUserName(userName);
    }

    @When("User enters password as {string}")
    public void enterPassword(String passWord) {
        loginPage.inputPassword(passWord);

        loginPage.clickLogin();
    }

    @Then("User should be able to login successfully")
    public void clickOnLoginButton() {
        dashPage.loginVerify();
    }

}
Serenity Step Libraries integrate smoothly into Cucumber Step Definition files; all you need to do is to annotate a step library variable with the @Steps annotation. Methods that represent a business task or action (inputUserName()), and that will appear in the reports as a separate step, are annotated with the @Step annotation. Here, I have created two StepClasses – StepLoginPage and StepDashboardPage
public class StepLoginPage extends PageObject {

    @Step("Enter Username")
    public void inputUserName(String userName) {
        $(By.name("txtUsername")).sendKeys((userName));
    }

    @Step("Enter Password")
    public void inputPassword(String passWord) {
        $(By.name("txtPassword")).sendKeys((passWord));
    }

    @Step("Click Submit Button")
    public void clickLogin() {
        $(By.name("Submit")).click();
    }

}
StepDashboardPage
public class StepDashboardPage extends PageObject {

    @Step("Successful login")
    public void loginVerify() {
        String dashboardTitle = $(By.id("welcome")).getText();
        assertThat(dashboardTitle, containsString("Welcome"));
    }
}
Step 7 – Create a Serenity Cucumber Runner class
import org.junit.runner.RunWith;

import io.cucumber.junit.CucumberOptions;
import net.serenitybdd.cucumber.CucumberWithSerenity;

@RunWith(CucumberWithSerenity.class)
@CucumberOptions(plugin = {}, features = "lib/src/test/resources/features", glue = "serenitygradleautomation.definitions")

public class CucumberTestSuite {

}
Step 8 – Create serenity.conf file under src/test/resources
Serenity.conf file is used to specify various features like the type of webdriver used, various test environments, run tests in headless mode, and many more options.
webdriver {
    driver = firefox
}


environments {
  default {
    webdriver.base.url = "https://opensource-demo.orangehrmlive.com/"
  }
  dev {
    webdriver.base.url = "https://opensource-demo.orangehrmlive.com/dev"
  }
  staging {
    webdriver.base.url = "https://opensource-demo.orangehrmlive.com/staging"
  }
  prod {
    webdriver.base.url = "https://opensource-demo.orangehrmlive.com/prod"
  }
}
Step 9 – Create serenity.properties file at the root of the project
serenity.project.name = Serenity and Cucumber Gradle Demo
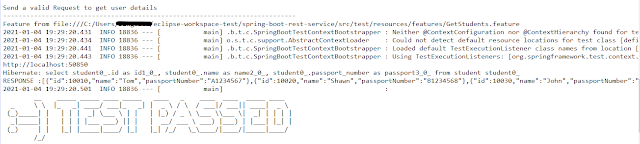
Step 10 – Run the tests through commandline which generates Serenity Report
Open the command line and go to the location where gradle.build of the project is present and type the below command.
gradle test

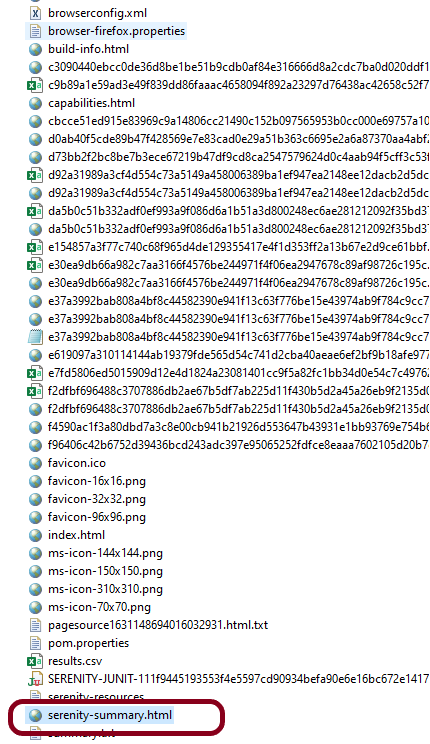
The Serenity report is generated under /lib/target/site/serenity.
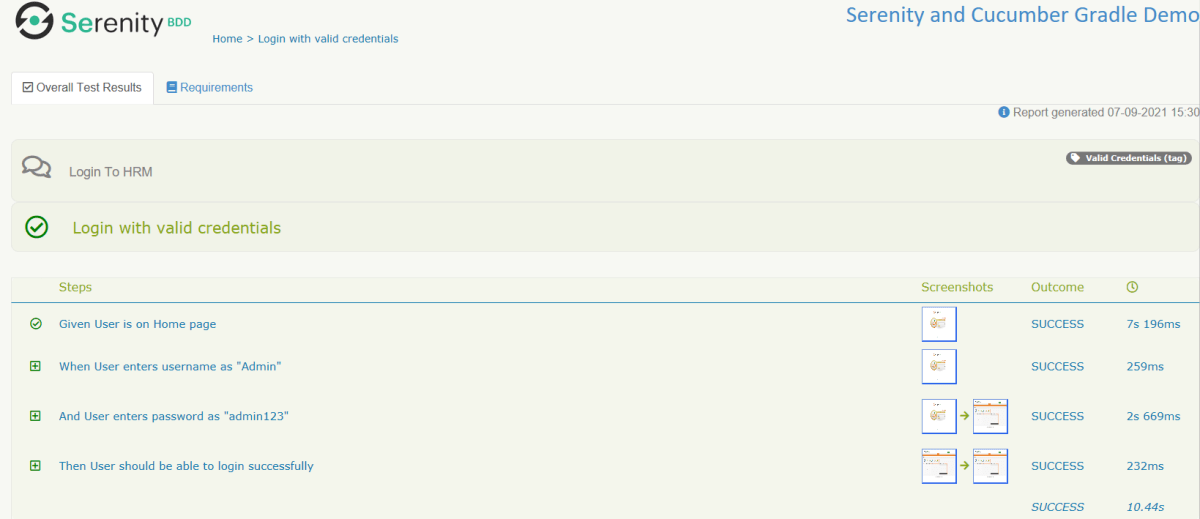
Serenity Report

Below is the image of Overall Test Result with steps and screenshots.
That’s it! Congratulations on making it through this tutorial and hope you found it useful! Happy Learning!!


