Playwright is a modern and powerful end-to-end testing framework developed by Microsoft, specifically designed for the automation of web applications. It supports programming languages like Java, Python, C#, and NodeJS. Playwright comes with Apache 2.0 License and is most popular with NodeJS with Javascript/Typescript.
Playwright is a modern and powerful end-to-end testing framework developed by Microsoft, specifically designed for the automation of web applications. It supports programming languages like Java, Python, C#, and NodeJS. Playwright comes with Apache 2.0 License and is most popular with NodeJS with Javascript/Typescript.
An XML file contains data between the tags. This makes it complex to read compared to other file formats like docx and txt. There are two types of parsers which parse an XML file:
In this article, we will discuss how to create a XML document using Java DOM parser. There is another tutorial to read XML – How to read XML using Java DOM Parser.
Java DOM parser API has methods, interfaces and classes to create XML documents. Using this API, we can create XML documents from the scratch through our Java applications. The createElement() method creates new elements and the appendChild() method appends the created elements to already existing elements.
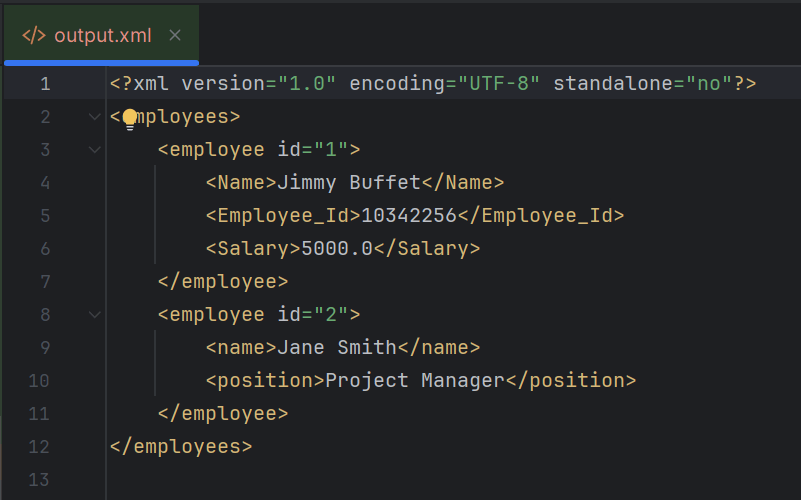
Below is the sample XML which is created and saved in resources/Payloads as output.xml.
The complete program looks like as shown below:
import org.w3c.dom.Document;
import org.w3c.dom.Element;

import javax.xml.parsers.DocumentBuilder;
import javax.xml.parsers.DocumentBuilderFactory;
import javax.xml.parsers.ParserConfigurationException;
import javax.xml.transform.Transformer;
import javax.xml.transform.TransformerException;
import javax.xml.transform.TransformerFactory;
import javax.xml.transform.dom.DOMSource;
import javax.xml.transform.stream.StreamResult;
import java.io.File;
import javax.xml.transform.OutputKeys;

public class CreateXMLDocument {

    public static void main(String[] args) {
        try {

            // Step 1: Create a DocumentBuilderFactory and DocumentBuilder
            DocumentBuilderFactory factory = DocumentBuilderFactory.newInstance();
            DocumentBuilder builder = factory.newDocumentBuilder();

            // Step 2: Create a new Document
            Document document = builder.newDocument();

            // Step 3: Create and append root element
            Element root = document.createElement("employees");
            document.appendChild(root);

            // Step 4: Create and append employee elements
            Element employee1 = document.createElement("employee");
            employee1.setAttribute("id", "1");
            Element name1 = document.createElement("Name");
            name1.appendChild(document.createTextNode("Jimmy Buffet"));
            Element id1 = document.createElement("Employee_Id");
            id1.appendChild(document.createTextNode(String.valueOf(10342256)));
            Element salary1 = document.createElement("Salary");
            salary1.appendChild(document.createTextNode(String.valueOf(5000.00)));
            employee1.appendChild(name1);
            employee1.appendChild(id1);
            employee1.appendChild(salary1);
            root.appendChild(employee1);

            Element employee2 = document.createElement("employee");
            employee2.setAttribute("id", "2");
            Element name2 = document.createElement("name");
            name2.appendChild(document.createTextNode("Jane Smith"));
            Element position2 = document.createElement("position");
            position2.appendChild(document.createTextNode("Project Manager"));
            employee2.appendChild(name2);
            employee2.appendChild(position2);
            root.appendChild(employee2);

            // Step 5: Write the content into an XML file
            TransformerFactory transformerFactory = TransformerFactory.newInstance();
            Transformer transformer = transformerFactory.newTransformer();

            transformer.setOutputProperty(OutputKeys.INDENT, "yes"); // Pretty print the XML
            transformer.setOutputProperty("{http://xml.apache.org/xslt}indent-amount", "4");

            DOMSource domSource = new DOMSource(document);

            // Write XML to file
            StreamResult fileResult = new StreamResult(new File("src/test/resources/Payloads/output.xml"));
            transformer.transform(domSource, fileResult);

           // Print XML to console
            StreamResult consoleResult = new StreamResult(System.out);
            transformer.transform(domSource, consoleResult);

            System.out.println("XML file created successfully!");

        } catch (ParserConfigurationException | TransformerException e) {
            e.printStackTrace();
        }
    }
}
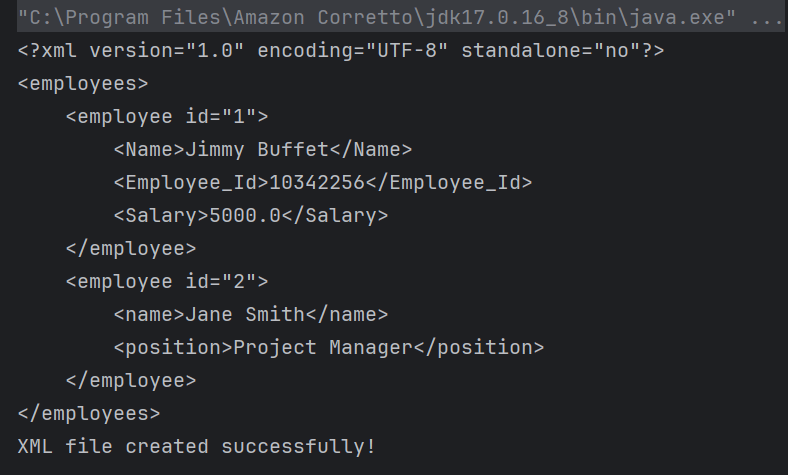
The output of the above program is
Explanation
1. Creating a DocumentBuilder Object
It has ‘newDocumentBuilder()’ method that creates an instance of the class ‘DocumentBuilder’. This DocumentBuilder class is used to get input in the form of streams, files, URLs and SAX InputSources.
Using DocumentBuilder object created in the above step, create a new document with newDocument()function.
Document document = builder.newDocument();
3. Creating the root element
Every XML document should possess a single root element , which is also called a parent element. We can create the root element using createElement() method and append it to the document created in the previous step.
Element root = document.createElement("employees");
document.appendChild(root);
4. Appending elements to the root element
Inside the root element, we can create any number of child elements. We append them the same way we appended the root element to the document.
To write text content inside an element, we can use createTextNode() method.
We can also create attributes for elements using createAttribute() method.
Element employee1 = document.createElement("employee");
employee1.setAttribute("id", "1");
Element name1 = document.createElement("Name");
name1.appendChild(document.createTextNode("Jimmy Buffet"));
Element id1 = document.createElement("Employee_Id");
id1.appendChild(document.createTextNode(String.valueOf(10342256)));
Element salary1 = document.createElement("Salary");
salary1.appendChild(document.createTextNode(String.valueOf(5000.00)));
employee1.appendChild(name1);
employee1.appendChild(id1);
employee1.appendChild(salary1);
root.appendChild(employee1);

Element employee2 = document.createElement("employee");
employee2.setAttribute("id", "2");
Element name2 = document.createElement("name");
name2.appendChild(document.createTextNode("Jane Smith"));
Element position2 = document.createElement("position");
position2.appendChild(document.createTextNode("Project Manager"));
employee2.appendChild(name2);
employee2.appendChild(position2);
root.appendChild(employee2);
5. Writing the content into XML file
After building the elements inside the document with their corresponding attributes, we must write this content into an XML file. We do this by creating a Transformer object, which transforms our source document into StreamResult. It then stores the result in the specified file path with the given name.
TransformerFactory transformerFactory = TransformerFactory.newInstance();
Transformer transformer = transformerFactory.newTransformer();

transformer.setOutputProperty(OutputKeys.INDENT, "yes"); // Pretty print the XML
transformer.setOutputProperty("{http://xml.apache.org/xslt}indent-amount", "4");

DOMSource domSource = new DOMSource(document);

 // Write XML to file
 StreamResult fileResult = new StreamResult(new File("src/test/resources/Payloads/output.xml"));
transformer.transform(domSource, fileResult);
6. Printing the output on the console
We can test our XML file by printing it on the console. This is an optional step.
StreamResult consoleResult = new StreamResult(System.out);
transformer.transform(domSource, consoleResult);
Summary:
1. DocumentBuilderFactory and DocumentBuilder: These are used for creating new DOM `Document` instances. 2. Document Object:Represents the XML in memory, and methods like `createElement()` and `createTextNode()` are used to build the XML structure. 3. Transformer: Converts the DOM representation to a file. 4. StreamResult: Used to specify the output file where the XML content will be written.
We are done! Congratulations on making it through this tutorial and hope you found it useful! Happy Learning!!
An XML file contains data between the tags. This makes it complex to read compared to other file formats like docx and txt. There are two types of parsers which parse an XML file:
DOM stands for Document Object Model. The DOM API provides the classes to read and write an XML file. DOM reads an entire document. It is useful when reading small to medium size XML files. It is a tree-based parser. It is a little slow when compared to SAX. It occupies more space when loaded into memory. We can insert and delete nodes using the DOM API.
How to retrieve tag name from XML?
Below is the sample JSON which is used as an example . I have saved this file in resources/Payloads as SimpleXML.xml.
package XML.DOM;

import org.w3c.dom.Document;
import org.w3c.dom.Element;
import org.w3c.dom.NodeList;
import org.xml.sax.SAXException;

import javax.xml.parsers.DocumentBuilder;
import javax.xml.parsers.DocumentBuilderFactory;
import javax.xml.parsers.ParserConfigurationException;
import java.io.File;
import java.io.IOException;

public class XMLParserTagNameExample {

    public static void main(String[] args) {
        try {
            // Create a DocumentBuilderFactory
            DocumentBuilderFactory factory = DocumentBuilderFactory.newInstance();

            // Obtain a DocumentBuilder from the factory
            DocumentBuilder builder = factory.newDocumentBuilder();

            // Parse the XML file into a Document
            Document document = builder.parse(new File("src/test/resources/Payloads/SimpleXML.xml"));

            // Normalize XML structure
            document.getDocumentElement().normalize();

            // Get the root element
            Element root = document.getDocumentElement();
            System.out.println("Root Element: " + root.getNodeName());
            System.out.println("-----------------------");

            // Retrieve the first employee element for extracting tag names
            NodeList nodeList = document.getElementsByTagName("employee");
            if (nodeList.getLength() > 0) {
                // If there is at least one employee, use it to print the element and attribute names
                Element employee = (Element) nodeList.item(0);

                    // Print the tag names
                    System.out.println("Employee ID Attribute Name: id");
                    System.out.println("Name Tag: " + employee.getElementsByTagName("name").item(0).getNodeName());
                    System.out.println("Position Tag: " + employee.getElementsByTagName("position").item(0).getNodeName());
                    System.out.println("-----------------------");
            }
        } catch (ParserConfigurationException e) {
            System.out.println("Parser configuration error occurred: " + e.getMessage());
        } catch (SAXException e) {
            System.out.println("SAX parsing error occurred: " + e.getMessage());
        } catch (IOException e) {
            System.out.println("IO error when loading XML file: " + e.getMessage());
        } finally {
            System.out.println("XML parsing operation completed.");
        }
    }
}
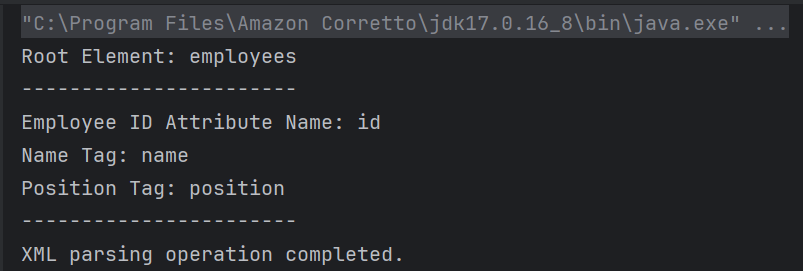
The output of the above program is
Explanation
1. Creating a DocumentBuilder Object
It has ‘newDocumentBuilder()’ method that creates an instance of the class ‘DocumentBuilder’. This DocumentBuilder class is used to get input in the form of streams, files, URLs and SAX InputSources.
DocumentBuilder created in above steps is used to parse the input XML file. It contains a method named parse() which accepts a file or input stream as a parameter and returns a DOM Document object. If the given file or input stream is NULL, this method throws an IllegalArgumentException.
The `normalize` method is called on the document’s root element. This step ensures that the XML structure is uniform, often by merging adjacent text nodes and removing empty ones.
document.getDocumentElement().normalize();
4. Get root node
We can use getDocumentElement() to get the root node and the element of the XML file.
Element root = document.getDocumentElement();
System.out.println("Root Element: " + root.getNodeName());
System.out.println("-----------------------");
5. Retrieving Root Element Name
A `NodeList` containing all elements with the tag name `employee` is obtained using `getElementsByTagName`. This list can be used to iterate over all employee entries in the XML.
NodeList nodeList = document.getElementsByTagName("employee");
            if (nodeList.getLength() > 0) {
                // If there is at least one employee, use it to print the element and attribute names
                Element employee = (Element) nodeList.item(0);

                    // Print the tag names
                    System.out.println("Employee ID Attribute Name: id");
                    System.out.println("Name Tag: " + employee.getElementsByTagName("name").item(0).getNodeName());
                    System.out.println("Position Tag: " + employee.getElementsByTagName("position").item(0).getNodeName());
                    System.out.println("-----------------------");
            }
        }
getTagName() returns the name of the root element in the form of a string. Retrieve the first employee element for extracting tag names and print the tag names.
getNodeName() is used to get the name of the node. It returns the node name in the form of a string.
6. Implement Exception Handling
The program catches `ParserConfigurationException`, `SAXException`, and `IOException`, addressing specific issues that might occur during parsing. Each exception type is followed by a custom message that explains the nature of the error. At the end, a message is printed to confirm the completion of the XML parsing operation by using finally block.
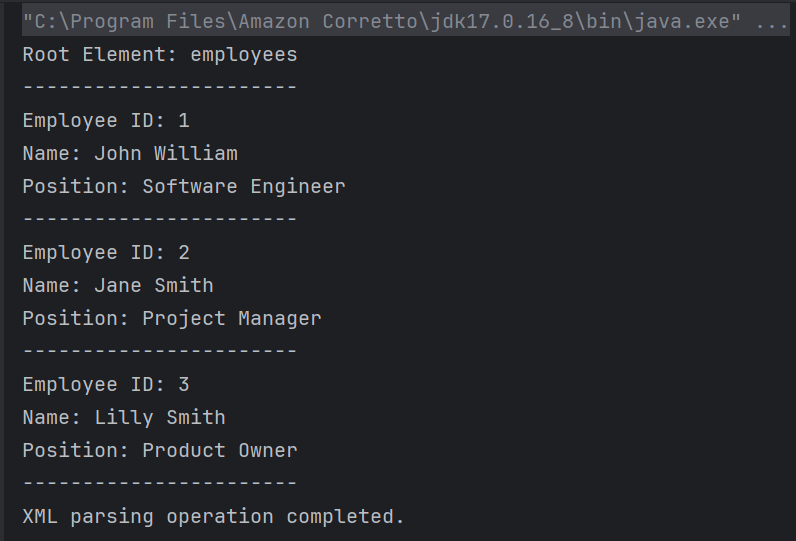
The program loops through each node in the `NodeList`. Each node is checked if it is an `ELEMENT_NODE`. For each valid employee element, it extracts: – Attribute: The `id` attribute value using `getAttribute(“id”)`. – Text Content: The contents of child elements “name” and “position” using `getElementsByTagName(“name”).item(0).getTextContent()` and similarly for “position”.
 for (int i = 0; i < nodeList.getLength(); i++) {
                Node node = nodeList.item(i);

                if (node.getNodeType() == Node.ELEMENT_NODE) {
                    Element employee = (Element) node;

                    // Get the attribute and text content
                    String id = employee.getAttribute("id");
                    String name = employee.getElementsByTagName("name").item(0).getTextContent();
                    String position = employee.getElementsByTagName("position").item(0).getTextContent();

                    System.out.println("Employee ID: " + id);
                    System.out.println("Name: " + name);
                    System.out.println("Position: " + position);
                    System.out.println("-----------------------");
                }
            }
        }
getTextContent() is used to get the text content of elements.
7. Implement Exception Handling
This is same as the step 6 of the above program.
We are done! Congratulations on making it through this tutorial and hope you found it useful! Happy Learning!!
The JSON-simple is a light weight library which is used to process JSON objects. Using this you can read or, write the contents of a JSON document using a Java program.
JSON.simple is available at the Central Maven Repository. Maven users add this to the POM.
import com.github.cliftonlabs.json_simple.JsonArray;
import com.github.cliftonlabs.json_simple.JsonObject;
import com.github.cliftonlabs.json_simple.Jsoner;

import java.io.FileWriter;
import java.io.IOException;

public class WriteSimpleJson {
    public static void main(String[] args) {

        // JSON String
        JsonObject jsonObject = new JsonObject();
        jsonObject.put("Name", "Vibha");
        jsonObject.put("Salary", 4500.00);

        // JSON Array
        JsonArray list = new JsonArray();
        list.add("Monday");
        list.add("Tuesday");
        list.add("Wednesday");

        jsonObject.put("Working Days", list);
        System.out.println(Jsoner.serialize(jsonObject));

        try (FileWriter fileWriter = new FileWriter("src/test/resources/Payloads/Employee.json")) {
            Jsoner.serialize(jsonObject, fileWriter);

        } catch (IOException e) {
            throw new RuntimeException(e);
        }
    }
}
The output of the above program is
Explanation
1. Creating a JSON Object
A `JsonObject` named `jsonObject` is created to hold data. Using `put()`, the code adds a “Name” field with the value “Vibha” and a “Salary” field with the value `4500.00` to the JSON object.
JsonObject jsonObject = new JsonObject();
jsonObject.put("Name", "Vibha");
jsonObject.put("Salary", 4500.00);
2. Creating a JSON Array
A `JsonArray` named `list` is created to contain multiple values. The days “Monday”, “Tuesday”, and “Wednesday” are added to the `list`. The JSON array list is added to the jsonObject under the key “Working Days”.
JsonArray list = new JsonArray();
list.add("Monday");
list.add("Tuesday");
list.add("Wednesday");
jsonObject.put("Working Days", list);
3. Writing JSON to a File
A FileWriter is used to open the file src/test/resources/Payloads/Employee.json for writing. The Jsoner.serialize() method serializes the jsonObject and writes it to the file, capturing the constructed JSON structure.
 try (FileWriter fileWriter = new FileWriter("src/test/resources/Payloads/Employee.json")) {
            Jsoner.serialize(jsonObject, fileWriter);

  }
Write Complex JSON to File using JSON.simple
Below is the complex JSON which will be generated.
import com.github.cliftonlabs.json_simple.JsonArray;
import com.github.cliftonlabs.json_simple.JsonObject;
import com.github.cliftonlabs.json_simple.Jsoner;

import java.io.FileWriter;
import java.io.IOException;

public class WriteComplexJson {

    public static void main(String[] args) {

        JsonObject jsonObject = new JsonObject();

        //Name
        JsonObject name = new JsonObject();
        name.put("Forename", "Vibha");
        name.put("Surname", "Singh");
        jsonObject.put("Name", name);

        //Salary
        JsonObject salary = new JsonObject();
        salary.put("Fixed", 4000.00);

        //Bonus
        JsonObject bonus = new JsonObject();
        bonus.put("Monthly", 45.00);
        bonus.put("Quaterly", 125.00);
        bonus.put("Yearly", 500.00);

        salary.put("Bonus",  bonus);
        jsonObject.put("Salary", salary);

        // JSON Array
        JsonArray list = new JsonArray();
        list.add("Monday");
        list.add("Tuesday");
        list.add("Wednesday");
        jsonObject.put("Working Days", list);

        System.out.println(Jsoner.serialize(jsonObject));

        try (FileWriter fileWriter = new FileWriter("src/test/resources/Payloads/EmployeeDetails.json")) {
            Jsoner.serialize(jsonObject, fileWriter);
        } catch (IOException e) {
            throw new RuntimeException(e);
        }
    }
}
The output of the above program is
I have saved this file in resources/Payloads as EmployeeDetails.json.
Explanation
1.Creating JSON Objects
Serves as the root JSON object to encapsulate all the other JSON objects and arrays
JsonObject jsonObject = new JsonObject();
2. Name Object
A JsonObjectnamed name is created. It contains two properties: “Forename” with the value “Vibha” and “Surname” with the value “Singh”. This nameobject is then added to the root jsonObjectunder the key “Name”.
JsonObject name = new JsonObject();
name.put("Forename", "Vibha");
name.put("Surname", "Singh");
jsonObject.put("Name", name);
3. Salary Object
A `JsonObject` named `salary` is created with a property “Fixed” representing a fixed salary amount of 4000.00.
//Salary
JsonObject salary = new JsonObject();
salary.put("Fixed", 4000.00);
4. Bonus Object
A `JsonObject` named `bonus` is created. It contains properties for different types of bonuses: “Monthly” (45.00), “Quarterly” (125.00), and “Yearly” (500.00).
The `bonus` object is then added as a property of the `salary` object under the key “Bonus”.
The complete `salary` object, now including the bonus details, is added to the root `jsonObject` under the key “Salary”.
A `JsonArray` named `list` is created to represent the working days. The days “Monday”, “Tuesday”, and “Wednesday” are added to this array. This `list` is added to the root `jsonObject` under the key “Working Days”.
// JSON Array
JsonArray list = new JsonArray();
list.add("Monday");
list.add("Tuesday");
list.add("Wednesday");

jsonObject.put("Working Days", list);
6. Serialization of JSON
The entire `jsonObject` is serialized using `Jsoner.serialize()` and printed to the console, which converts the Java JSON structure into a JSON string.
The `try-with-resources` statement is used to ensure the `FileWriter` is closed automatically. A `FileWriter` writes the serialized JSON object to a file at `src/test/resources/Payloads/EmployeeDetails.json`.
 try (FileWriter fileWriter = new FileWriter("src/test/resources/Payloads/Employee.json")) {
            Jsoner.serialize(jsonObject, fileWriter); }
We are done! Congratulations on making it through this tutorial and hope you found it useful! Happy Learning!!
3. The code accesses the nested “store” object using jsonObject.get(“store”) and casts it to a JsonObject. It then retrieves specific fields from this “store” object.
JsonObject store = (JsonObject) jsonObject.get("store");
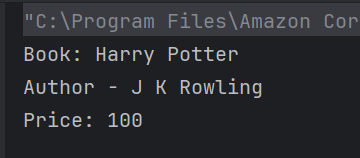
4. Extracts the “book” field and casts it to a String, then prints it.
String book = (String) store.get("book");
System.out.println("Book: " + book);
5. Extracts the “author” field and casts it to a String, then prints it.
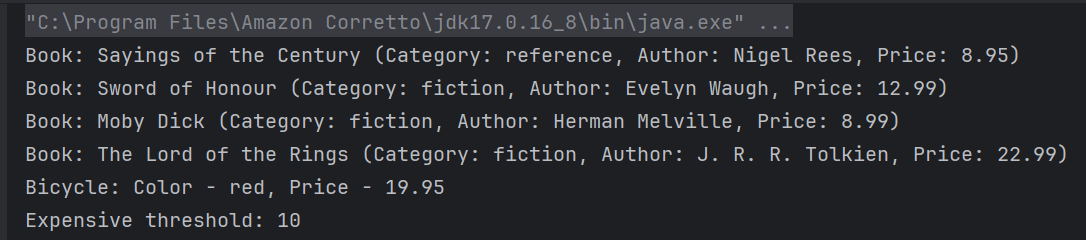
3. The code assumes that within the “store” object, there is a key “book” which corresponds to a JSON array. It retrieves this array and stores it in a JsonArray variable named books.
 // Accessing the "store" object
JsonObject store = (JsonObject) jsonObject.get("store");

// Accessing the "book" array
JsonArray books = (JsonArray) store.get("book");
4. A for-each loop iterates over each element in the books array. Each element is considered an object, and it’s cast to JsonObject named book. Within each iteration, several attributes of the book JSON object are accessed like category, author, title, price
5. The code accesses the nested “bicycle” object using jsonObject.get(“bicycle”) and casts it to a JsonObject. It then retrieves specific fields from this “bicycle” object. Extracts the “color” and “price” field and casts it to a String and BigDecimal, then prints it.
 // Accessing the "bicycle" object
 JsonObject bicycle = (JsonObject) store.get("bicycle");
String color = (String) bicycle.get("color");
BigDecimal bicyclePrice = (BigDecimal) bicycle.get("price");
System.out.println("Bicycle: Color - " + color + ", Price - " + bicyclePrice);
6. Extracts the “expensive” field and casts it to a BigDecimal, then prints it.
We can parse the JSON or XML response into POJO classes. After parsing into POJO classes, we can easily get values from the response easily. This is called De-serialization. For this, we can use any JSON parser APIs. Here, we are going to use Gson API.
To start with, add the below dependency to the project.
Let us create a class called Employee with a field name exactly (case-sensitive) the same as node names in the above JSON string because with the default setting while parsing JSON object to Java object, it will look on getter setter methods of field names.
public class Employee {

	// private variables or data members of POJO class
	private String firstName;
	private String lastName;
	private int age;
	private double salary;
	private String designation;
	private String contactNumber;
	private String emailId;

	// Getter and setter methods
	public String getFirstName() {
		return firstName;
	}

	public void setFirstName(String firstName) {
		this.firstName = firstName;
	}

	public String getLastName() {
		return lastName;
	}

	public void setLastName(String lastName) {
		this.lastName = lastName;
	}

	public int getAge() {
		return age;
	}

	public void setAge(int age) {
		this.age = age;
	}

	public double getSalary() {
		return salary;
	}

	public void setSalary(double salary) {
		this.salary = salary;
	}

	public String getDesignation() {
		return designation;
	}

	public void setDesignation(String designation) {
		this.designation = designation;
	}

	public String getContactNumber() {
		return contactNumber;
	}

	public void setContactNumber(String contactNumber) {
		this.contactNumber = contactNumber;
	}

	public String getEmailId() {
		return emailId;
	}

	public void setEmailId(String emailId) {
		this.emailId = emailId;
	}

}
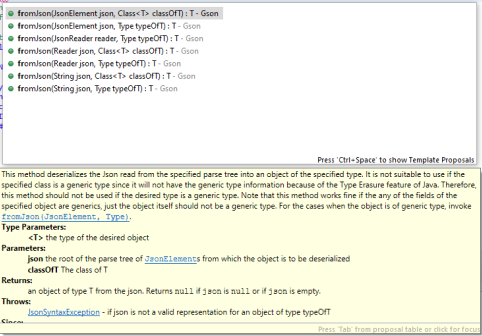
Gson class provides multiple overloaded fromJson() methods to achieve this. Below is a list of available methods:-
In the below test, I have mentioned the JSON Payload string in the test and used Gson API to deserialize the JSON payload to JAVA Object.
   @Test
	public void getDetailFromJson() {

		// De-serializing from JSON String
		String jsonString = "{\r\n" + "  \"firstName\": \"Tom\",\r\n" + "  \"lastName\": \"John\",\r\n"
				+ "  \"age\": 30,\r\n" + "  \"salary\": 50000.0,\r\n" + "  \"designation\": \"Lead\",\r\n"
				+ "  \"contactNumber\": \"+917642218922\",\r\n" + "  \"emailId\": \"abc@test.com\"\r\n" + "}";

		Gson gson = new Gson();
		// Pass JSON string and the POJO class
		Employee employee = gson.fromJson(jsonString, Employee.class);

		// Now use getter method to retrieve values
		System.out.println("Details of Employee is as below:-");
		System.out.println("First Name : " + employee.getFirstName());
		System.out.println("Last Name : " + employee.getLastName());
		System.out.println("Age : " + employee.getAge());
		System.out.println("Salary : " + employee.getSalary());
		System.out.println("designation : " + employee.getDesignation());
		System.out.println("contactNumber : " + employee.getContactNumber());
		System.out.println("emailId : " + employee.getEmailId());
		System.out.println("########################################################");

	}
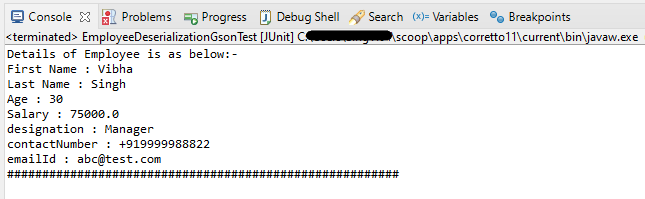
The output of the above program is
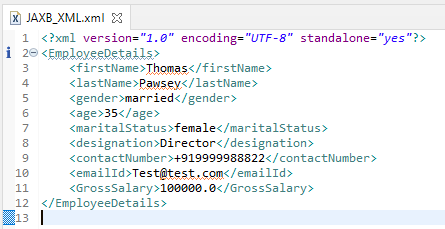
We can get the JSON payload from a file present in a project under src/test/resources as shown in the below image.
public class EmployeeDeserializationGsonTest {

	@Test
	public void fromFile() throws FileNotFoundException {

		Gson gson = new Gson();
		// De-serializing from a json file
		String userDir = System.getProperty("user.dir");
		File inputJsonFile = new File(userDir + "\\src\\test\\resources\\EmployeePayloadUsingGson.json");
		FileReader fileReader = new FileReader(inputJsonFile);
		Employee employee1 = gson.fromJson(fileReader, Employee.class);

		// Now use getter method to retrieve values
		System.out.println("Details of Employee is as below:-");
		System.out.println("First Name : " + employee1.getFirstName());
		System.out.println("Last Name : " + employee1.getLastName());
		System.out.println("Age : " + employee1.getAge());
		System.out.println("Salary : " + employee1.getSalary());
		System.out.println("designation : " + employee1.getDesignation());
		System.out.println("contactNumber : " + employee1.getContactNumber());
		System.out.println("emailId : " + employee1.getEmailId());
		System.out.println("########################################################");
	}
}
The output of the above program is
We are done! Congratulations on making it through this tutorial and hope you found it useful! Happy Learning!!
As of Java 11, JAXB is not part of the JRE anymore, and you need to configure the relevant libraries via your dependency management system, for example, either Maven or Gradle.
Configure the Java compiler level to be at least 11 and add the JAXB dependencies to your pom file.
In the previous tutorial, I provided the Introduction of Rest Assured. In this tutorial, I will explain how to set up a basic Rest Assured Maven project in Eclipse IDE. Before starting, let us recap about Rest Assured.
REST Assured is a Java DSL for simplifying testing of REST-based services built on top of HTTP Builder. It supports POST, GET, PUT, DELETE, OPTIONS, PATCH, and HEAD requests. It can be used to validate and verify the response of these requests.
The Rest Assured library also provides the ability to validate the HTTP Responses received from the server. This makes Rest-Assured a very flexible library that can be used for testing.REST Assured can be used to test XML as well as JSON-based web services. REST Assured can be integrated with JUnit and TestNG frameworks for writing test cases for our application.
What is Maven?
Apache Maven is a software project management and comprehension tool. Based on the concept of a project object model (POM), Maven can manage a project’s build, reporting and documentation from a central piece of information.
Implementation Steps
Step 1- Download and Install Java
Rest-Assured needs Java to be installed on the system to run the tests. Click here to learn How to install Java.
Step 2 – Download and setup Eclipse IDE on the system
The Eclipse IDE (integrated development environment) provides strong support for Java developers. Click here to learn How to install Eclipse.
Step 3 – Setup Maven
To build a test framework, we need to add several dependencies to the project. Click here to learn How to install Maven.
Step 4 – Create a new Maven Project
Go to File -> New Project-> Maven-> Maven project ->Next
Step 4.1 – Select “Create a simple project”. Click on the Next Button.
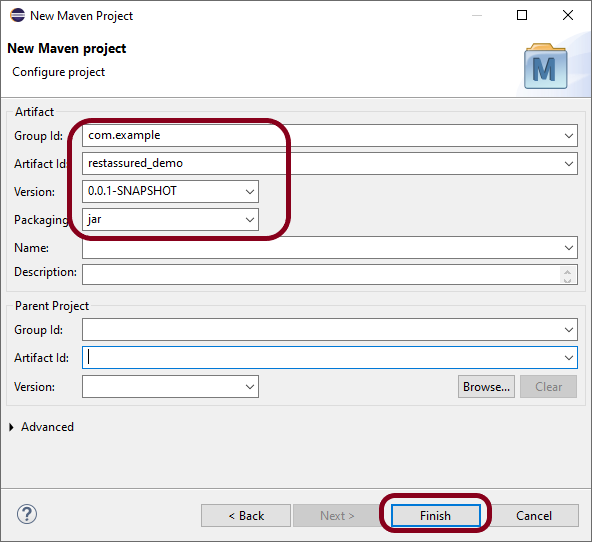
Step 4.2 – Provide Group Id and Artifact Id and click on the finish button.
Group Id – com.example Artifact Id – restassured_demo
Step 4.3 – Below is the structure of the Maven project in Eclipse.
Step 4.4– This is the structure of POM.xml created for the project.
Step 5 – Add Rest Assured, and JUnit dependencies to the project
In the Project Explorer, navigate to your Maven project and open pom.xml. Add REST Assured dependency under dependencies in the pom.xml file. The latest version can be found from here.
Right-click on your project in the Eclipse Project Explorer. Choose `Maven` -> `Update Project…` and confirm to download the specified dependencies.
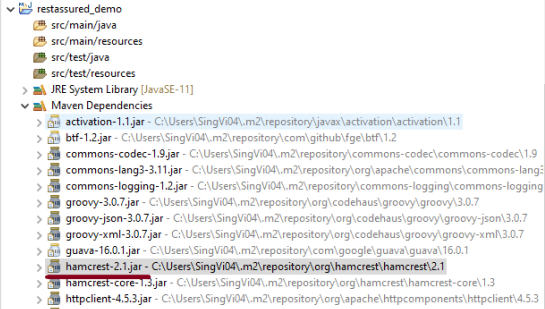
Below are the Rest Assured, and junit jar files present under Maven Dependencies.
Step 8 – Create a Test Class
Right-click on the src/test/java folder, create a new package (e.g., com.example.tests).
Create a new Java class inside this package (e.g., ApiTests.java).
Use the following example to set up a basic REST Assured GET request test.
package com.example.tests;

import org.junit.Test;

import static org.hamcrest.Matchers.equalTo;
import static io.restassured.RestAssured.given;

public class APITests {

	String BaseURL = "https://reqres.in/api/users";

	@Test
	public void getUser() {

		// Given
		given()

				// When
				.when().get(BaseURL + "/2")

				// Then
				.then().statusCode(200).statusLine("HTTP/1.1 200 OK")

				// To verify user of id 2
				.body("data.id", equalTo(2)).body("data.email", equalTo("janet.weaver@reqres.in"))
				.body("data.first_name", equalTo("Janet")).body("data.last_name", equalTo("Weaver"));
	}

}
Step 9 – Run the Test
Right-click on your test class and select Run As -> JUnit Test to execute your REST Assured tests.
The output of the above program is
Point to Remember
1. Don’t add the dependency on Hamcrest explicitly. Rest Assured includes it by default. You can see it in the Maven Dependencies folder under the project.
Congratulations on making it through this tutorial and hope you found it useful! Happy Learning!!
Spring Boot makes it easy to create stand-alone, production-grade Spring based Applications that you can “just run”. We take an opinionated view of the Spring platform and third-party libraries, so you can get started with minimum fuss. Most Spring Boot applications need minimal Spring configuration.