Selenium is an open-source tool. It is not a single automation tool like QTP. Instead, it is a suite of software or a set of JAR files. These tools automate web browsers across various browsers. Selenium is used by many companies, but a few to mention are Netflix, Google, HubSpot, Fitbit, Accenture, IBM, and more.
Selenium – Introduction, Installation, Test Script
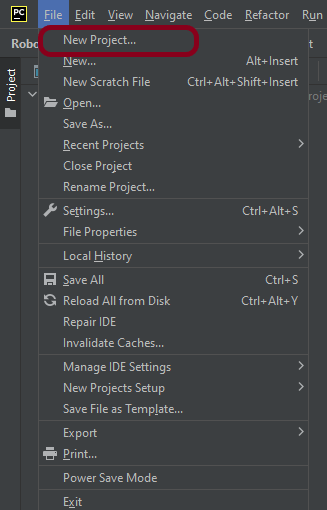
Step 1.1 – Open PyCharm and create a new project. Go to File and select New Project from the main menu.
Step 1.2 – Choose the project location. Click the “Browse” button next to the Location field and specify the directory for your project.
Deselect the Create a main.py welcome script checkbox because you will create a new Python file for this tutorial.
Click on the “Create” Button.
Step 1.3 – A new dialog appears asking to open the project using any one of the given options. I have selected New Window as I like to have separate windows for each project.
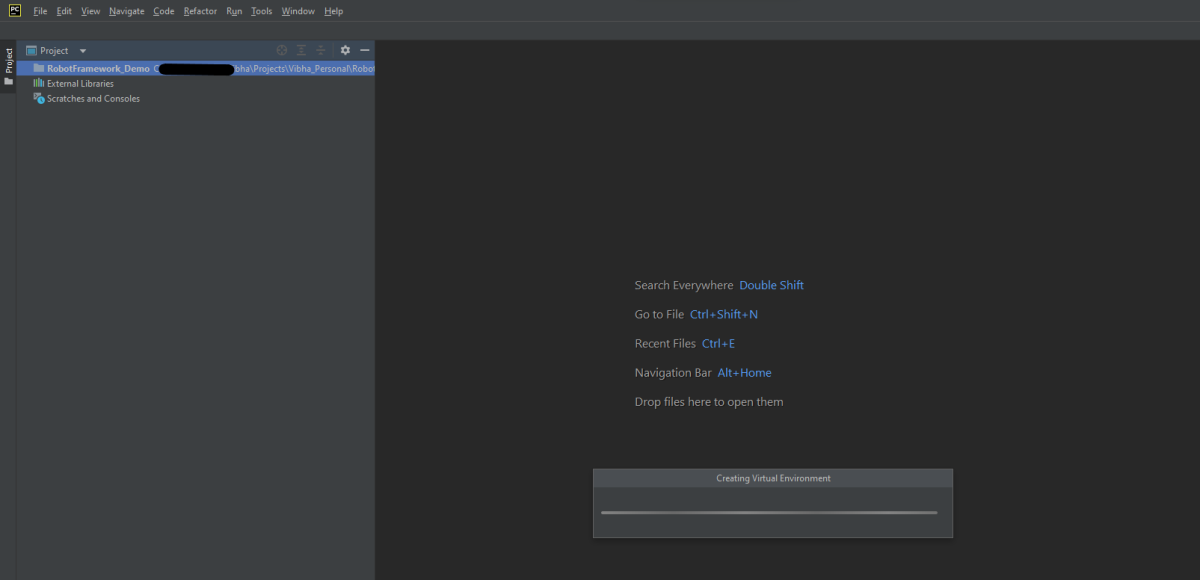
Below is the image of the new project created in PyCharms.
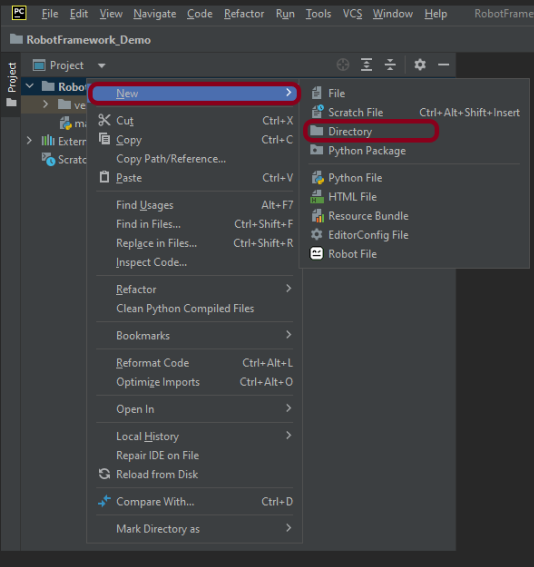
Step 2 – Create a new directory in the new project
Right-Click on the project, select New->Directory and provide name as Tests
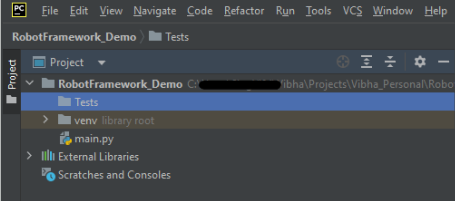
Below is the image of the new directory.
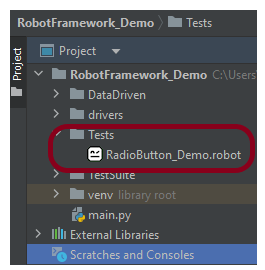
Step 3 – Create a robot Test File
Right-click on the new directory and select New File and provide the name as RadioButton_Demo.robot as shown below:
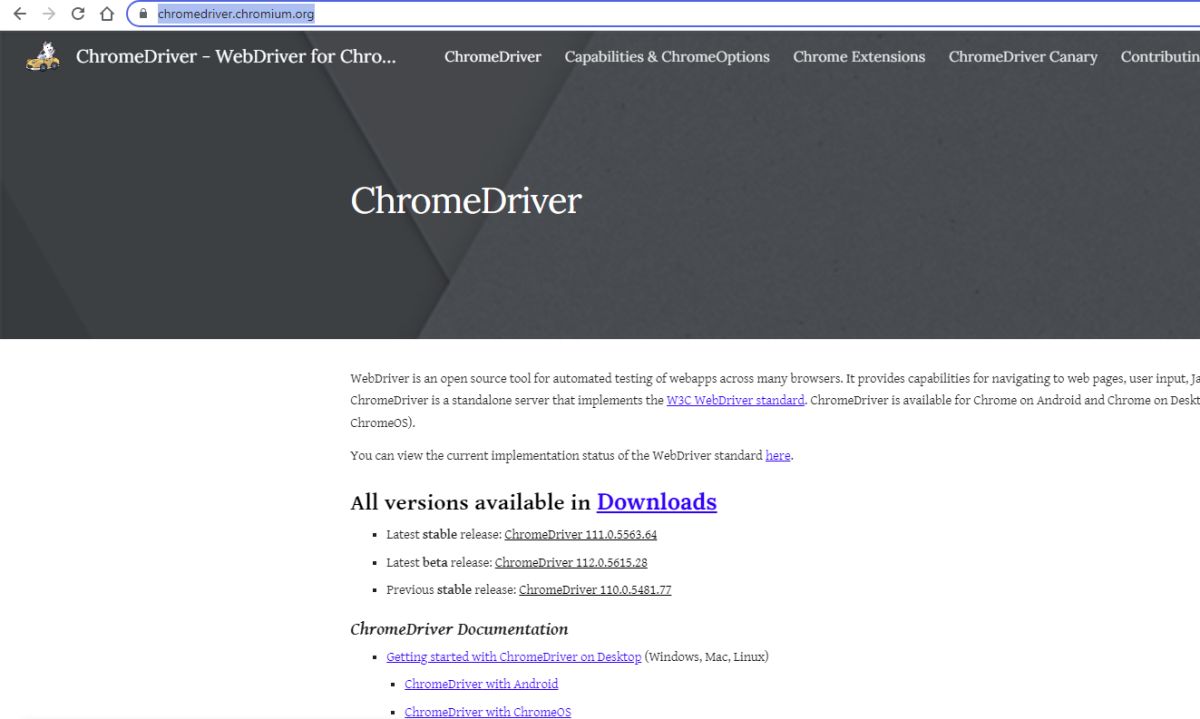
Step 4 – Download ChromeBinaries from the below location
The tests are going to use the Chrome browser, so we need to download the ChromeBinaries to open a blank browser in Chrome.
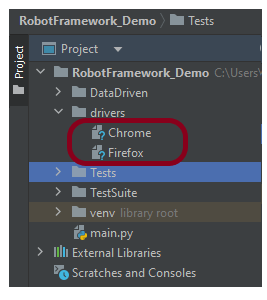
The chromedriver and geckodriver are placed in a folder name drivers in the RobotFramework_Demo project. I have renamed chromedriver to Chrome and geckodriver to Firefox.
Step 5 – Automate the selection of options for Radio Buttons
We are now going to write test cases. The test case details will be as follows −
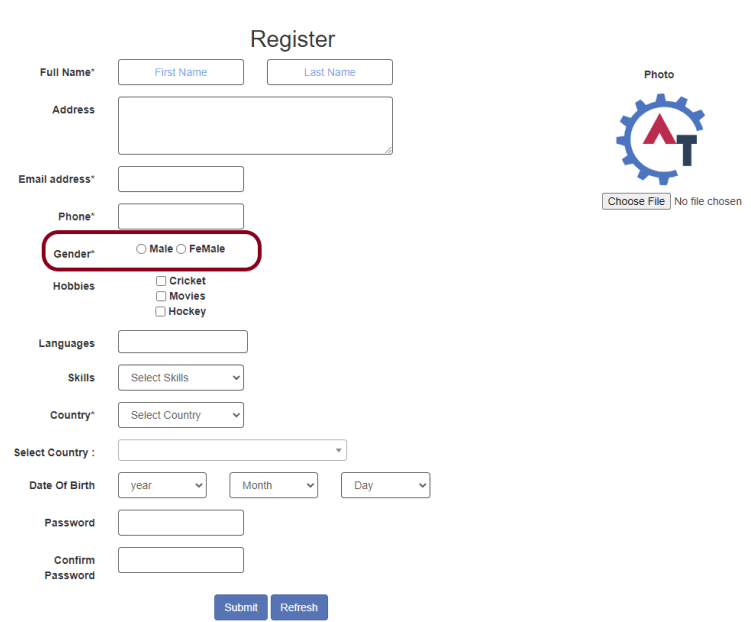
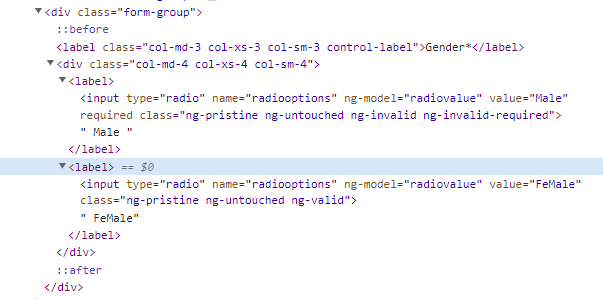
The below page shows that we have 2 Radio Buttons – Male and FeMale.
Let us inspect the locator of the Radio Button.
Below is an example of selecting the “Male” option in Radio Buttons.
*** Settings ***
Documentation    To validate the Login Form
Library     SeleniumLibrary
Test Teardown    Close Browser

*** Test Cases ***
Select an option of Radio Button
    Open the Browser with URL
    Select impressive option from 3 radio buttons
    Verify that the radio button is selected


*** Keywords ***
Open the Browser with URL
    Create Webdriver    Chrome  executable_path=/Vibha_Personal/RobotFramework_Demo/drivers/chromedriver_linux64
    Go To    https://demo.automationtesting.in/Register.html
    Maximize Browser Window
    Set Selenium Implicit Wait    2


Select impressive option from 3 radio buttons
    Page Should Contain Radio Button    name:radiooptions
    Page Should Not Contain Radio Button    id:checkbox1    #This is checkbox
    Select Radio Button    radiooptions    Male


Verify that the radio button is selected
    Radio Button Should Be Set To    radiooptions    Male
All the below-mentioned keywords are derived from SeleniumLibrary. The functionality of keywords mentioned above:
1. Create Webdriver − The keyword creates an instance of Selenium WebDriver.
To run this script, go to the command line and go to directory tests.
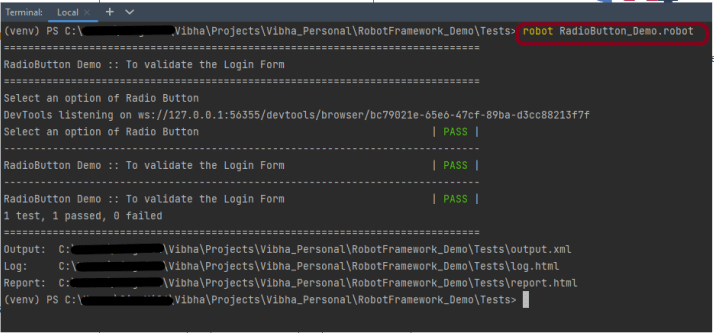
Step 6 – Execute the tests
We need the below command to run the Robot Framework script.
robot RadioButton_Demo.robot
The output of the above program is
Step 7 – View Report and Log
We have the test case passed. The Robot Framework generates log.html, output.xml, and report.html by default.
Let us now see the report and log details.
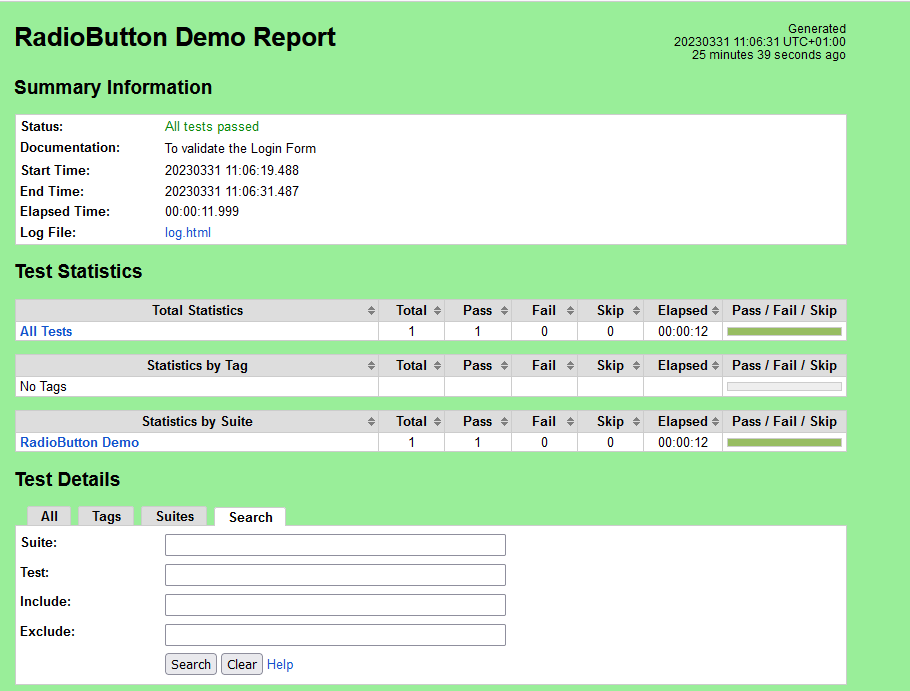
Report
Right-click on report.html. Select Open In->Browser->Chrome(any browser of your wish).
The Report generated by the framework is shown below:
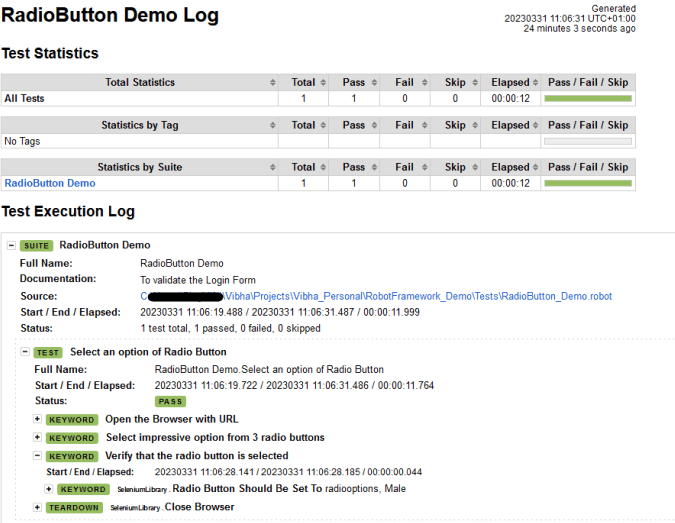
Log
Robot Framework has multiple log levels that control what is shown in the automatically generated log file. The default Robot Framework log level is INFO.
Right-click on log.html. Select Open In->Browser->Chrome(any browser of your wish).
That’s it! Congratulations on making it through this tutorial and hope you found it useful! Happy Learning!!
In this tutorial, we will see how to identify the form elements like CheckBox and Radio Button
Toggling a CheckBox or Radio Button on/off is also done using the click() method.
IsSelected – IsSelected method, let us know that the element selected or not. Assume there are two Radio Buttons/Check Boxes, one selected by default and you want to select the other one for your test. Then, we use IsSelected method. When there is a group of Radio Buttons/Check Boxes on the page then, most probably, their names are same, but values are different. Then we use the Webdriver findElements command to get the list of web elements.
Below is the working example of CheckBox.
import java.util.concurrent.TimeUnit;
import org.openqa.selenium.By;
import org.openqa.selenium.WebDriver;
import org.openqa.selenium.chrome.ChromeDriver;

public class Checkbox_Test {

      public static void main(String[] args) {
            System.setProperty("webdriver.chrome.driver","C:\\Users\\Vibha\\Desktop\\Drivers\\chromedriver_win32\\chromedriver.exe");

          WebDriver driver = new ChromeDriver();
          driver.manage().timeouts().implicitlyWait(60, TimeUnit.SECONDS);
          driver.get("https://www.seleniumeasy.com/test/basic-checkbox-demo.html");

           //Single option selection
           System.out.println("*******Single option selection *********");
           driver.findElement(By.id("isAgeSelected")).click();
           String Message = driver.findElement(By.id("txtAge")).getText();
           System.out.println("Message is :"+Message);

       // close the web browser
        driver.close();
    }
}

Output
*******Single option selection *********
Message is :Success - Check box is checked
How to click all options in the Checkbox
In the below image, there are 4 checkboxes. Initially, when checkboxes were not selected, the test mentioned on the button is – Check All and once all the options are checked, the text on button changes to – Uncheck All.
import java.util.List;
import java.util.concurrent.TimeUnit;
import org.openqa.selenium.By;
import org.openqa.selenium.WebDriver;
import org.openqa.selenium.WebElement;
import org.openqa.selenium.chrome.ChromeDriver;

public classCheckbox_Test {

     public static voidmain(String[] args) throws Exception {

 System.setProperty("webdriver.chrome.driver","C:\\Users\\Vibha\\Desktop\\Drivers\\chromedriver_win32\\chromedriver.exe");
          WebDriver driver = newChromeDriver();
          driver.manage().timeouts().implicitlyWait(60, TimeUnit.SECONDS);
          driver.get("https://www.seleniumeasy.com/test/basic-checkbox-demo.html");

          //Display the value of Button before clicking the options of checkbox
          String buttontext_beforeclick = driver.findElement(By.xpath(".//*[@id='check1']")).getAttribute("value");
          System.out.println("Text before click :"+buttontext_beforeclick);

          // Find the CheckBox by its classname
          List list = driver.findElements(By.xpath("//input[@type ='checkbox' and @class='cb1-element']") );

          // Get the number of CheckBoxes available
          int CheckBox_Size = list.size();
          System.out.println("Number of Checkbox options :"+CheckBox_Size);

          // Iterate the loop from first CheckBox to last Checkbox
          for(int i=0;i<CheckBox_Size;i++)
          {
                list.get(i).click();
           }
          String buttontext_afterclick = driver.findElement(By.xpath(".//*[@id='check1']")).getAttribute("value");
          System.out.println("Text after click :"+buttontext_afterclick);
    driver.quit();
     }
}

Output
Text before click :Check All
Number of Checkbox options :4
Text after click :Uncheck All
Similarly, below I have explained Radio Button.
import java.util.List;
import java.util.concurrent.TimeUnit;
import org.openqa.selenium.By;
import org.openqa.selenium.WebElement;
import org.openqa.selenium.firefox.FirefoxDriver;

 public class Radio_Test {

       public static void main(String[] args) {

     System.setProperty("webdriver.gecko.driver","C:\\Users\\vibha\\Downloads\\geckodriver-v0.24.0-win64\\geckodriver.exe");

          FirefoxDriver driver = new FirefoxDriver();
          driver.manage().timeouts().implicitlyWait(60, TimeUnit.SECONDS);
          driver.get("https://www.seleniumeasy.com/test/basic-radiobutton-demo.html");

          List<WebElement> Radio_Options = driver.findElements(By.name("optradio"));

          // Create a boolean variable which will hold the value (True/False)
          boolean radio_value = false;

          // This statement will return True, in case of first Radio button is selected
         radio_value = Radio_Options.get(0).isSelected();

         //Identify if Radio Button 1 is selected or not. If Button 1 is already selected, then select Button 2
         if(radio_value==true)
         {
              Radio_Options.get(1).click();
              System.out.println("Button Selected is :"+ Radio_Options.get(1).getAttribute("value"));
         }
         else
         {
               Radio_Options.get(0).click();
               System.out.println("Button Selected is :"+ Radio_Options.get(0).getAttribute("value"));
          }

          driver.findElement(By.id("buttoncheck")).click();
          String Button_Selected = driver.findElement(By.xpath("//*[@id='easycont']/div/div[2]/div[1]/div[2]/p[3]")).getText();
          System.out.println("Get Checked Value is :"+ Button_Selected);

         //Group Radio Button Selection
         driver.findElement(By.xpath(".//input[@name='gender'and @value='Female']")).click();
         driver.findElement(By.xpath(".//input[@name='ageGroup' and @value='15 - 50']")).click();
         driver.findElement(By.xpath(".//*[@id='easycont']/div/div[2]/div[2]/div[2]/button")).click();
          String Group_Radio_Message = driver.findElement(By.xpath("//*[@id='easycont']/div/div[2]/div[2]/div[2]/p[2]")).getText();

          System.out.println("Get Values are :"+Group_Radio_Message);

         // close the web browser
        driver.close();
      }
}

Output
Button Selected is :Male
Get Checked Value is :Radio button 'Male' is checked
Get Values are :Sex : Female
Age group: 15 - 50