The previous tutorials have explained the conversion of Java Objects to XML using Jackson API. This tutorial explains parsing the XML document to Java objects using Jackson API.
Table of Contents
- Maven Dependency
- What is Deserialization?
- Simple deserialized program
- Manipulating Nested Elements in XML
Maven Dependency
To parse the XML, we will use the Jackson library. Use the latest Jackson library.
<dependency>
    <groupId>com.fasterxml.jackson.dataformat</groupId>
    <artifactId>jackson-dataformat-xml</artifactId>
    <version>2.16.0</version>
</dependency>
Jackson allows us to read the contents of an XML file and deserialize the XML back into a Java object. In our example, we will read an XML document containing details about an Employee, and use Jackson to extract this data and use it to create Java objects containing the same information.
First, let us create an XML document matching our class to read from.
Create deserialize.xml with the following contents:
<Employee>
  <firstName>Vibha</firstName>
  <lastName>Singh</lastName>
  <age>35</age>
  <salary>135000.0</salary>
  <designation>Manager</designation>
  <contactNumber>+919999988822</contactNumber>
  <emailId>abc@test.com</emailId>
  <gender>female</gender>
  <maritalStatus>married</maritalStatus>
</Employee>
What is Deserialization?
Deserialization – It is the reverse of serializing. In this process, we will read the Serialized byte stream from the file and convert it back into the Class instance representation. Here, we are converting a XML to an Employee class object.
Simple deserialized program
Let us add a deserializeFromXML() function to deserialize the XML file above into a Java object:
import com.fasterxml.jackson.core.exc.StreamReadException;
import com.fasterxml.jackson.databind.DatabindException;
import com.fasterxml.jackson.dataformat.xml.XmlMapper;
import org.example.simple.Employee;
import org.junit.Test;

import java.io.File;
import java.io.IOException;

public class DeserializeXMLTest {
    @Test
    public void deserializeFromXML() {

        XmlMapper xmlMapper = new XmlMapper();
        String userDir = System.getProperty("user.dir");

        // Converting Employee XML to Employee class object
        try {
            Employee emp = xmlMapper.readValue(new File(userDir + "\\src\\test\\resources\\XMLExample.xml"),
                    Employee.class);

            System.out.println("Deserialized data: ");
            System.out.println("First Name of employee : " + emp.getFirstName());
            System.out.println("Last Name of employee : " + emp.getLastName());
            System.out.println("Age of employee : " + emp.getAge());
            System.out.println("Salary of employee : " + emp.getSalary());
            System.out.println("Designation of employee : " + emp.getDesignation());
            System.out.println("Contact Number of employee : " + emp.getContactNumber());
            System.out.println("EmailId of employee : " + emp.getEmailId());
            System.out.println("Marital Status of employee : " + emp.getMaritalStatus());
            System.out.println("Gender of employee : " + emp.getGender());

        } catch (StreamReadException e) {
            e.printStackTrace();
        } catch (DatabindException e) {
            e.printStackTrace();
        } catch (IOException e) {
            e.printStackTrace();
        }
    }
}
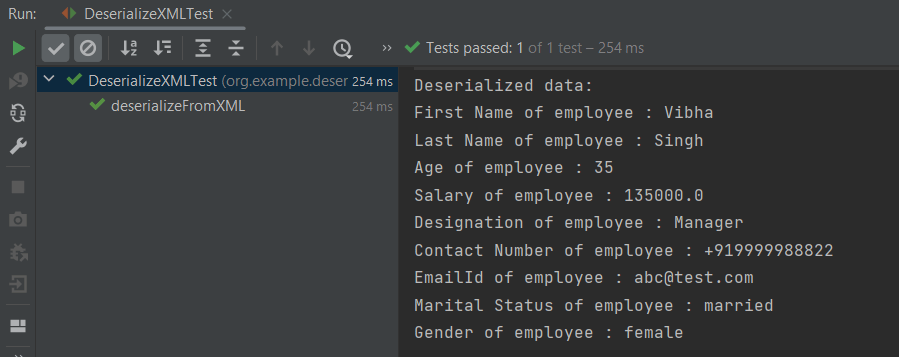
The output of the above program is shown below:
Manipulating Nested Elements in XML
Let us enhance our XML file to add nested elements and loops, and modify our code to deserialize the following updated structure.
<Employees>
  <name>
    <firtsname>John</firtsname>
    <middlename>Dave</middlename>
    <lastname>William</lastname>
  </name>
  <contactdetails>
    <deskNumber>00-428507</deskNumber>
    <mobileNumber>+917823561231</mobileNumber>
    <emergencyDetails>
      <emergency_no1>+91 1212898920</emergency_no1>
      <emergency_no2>+91 9997722123</emergency_no2>
      <emergency_no3>+91 8023881245</emergency_no3>
    </emergencyDetails>
  </contactdetails>
  <age>30</age>
  <salary>75000.0</salary>
  <designation>Manager</designation>
  <emailId>abc@test.com</emailId>
  <gender>female</gender>
  <maritalStatus>married</maritalStatus>
</Employees>
There will be a slight change in the deserializeFromXML() method for the nested XML Structure.
import com.fasterxml.jackson.core.exc.StreamReadException;
import com.fasterxml.jackson.databind.DatabindException;
import com.fasterxml.jackson.dataformat.xml.XmlMapper;
import org.example.complex.Employees;
import org.example.simple.Employee;
import org.junit.Test;
import java.io.File;
import java.io.IOException;

public class DeserializeComplexXMLTest {
    @Test
    public void deserializeFromXML() {

        XmlMapper xmlMapper = new XmlMapper();

        String userDir = System.getProperty("user.dir");

        // Converting Employee XML to Employee class object
        try {
            Employees employee2 = xmlMapper
                    .readValue(new File(userDir + "\\src\\test\\resources\\NestedXMLExample.xml"), Employees.class);
            System.out.println("Deserialized data: ");
            System.out.println("First Name of employee : " + employee2.getName().getFirtsname());
            System.out.println("Middle Name of employee : " + employee2.getName().getMiddlename());
            System.out.println("Last Name of employee : " + employee2.getName().getLastname());
            System.out.println("Age of employee : " + employee2.getAge());
            System.out.println("Salary of employee : " + employee2.getSalary());
            System.out.println("Designation of employee : " + employee2.getDesignation());
            System.out.println("Desk Number of employee : " + employee2.getContactdetails().getDeskNumber());
            System.out.println("Mobile Number of employee : " + employee2.getContactdetails().getMobileNumber());
            System.out.println("Emergency Number1 of employee : "
                    + employee2.getContactdetails().getEmergencyDetails().getEmergency_no1());
            System.out.println("Emergency Number2 of employee : "
                    + employee2.getContactdetails().getEmergencyDetails().getEmergency_no2());
            System.out.println("Emergency Number3 of employee : "
                    + employee2.getContactdetails().getEmergencyDetails().getEmergency_no3());
            System.out.println("EmailId of employee : " + employee2.getEmailId());
            System.out.println("Gender of employee : " + employee2.getGender());
            System.out.println("Marital Status of employee : " + employee2.getMaritalStatus());

        } catch (StreamReadException e) {
            e.printStackTrace();
        } catch (DatabindException e) {
            e.printStackTrace();
        } catch (IOException e) {
            e.printStackTrace();
        }
    }
}
The output of the above program is shown below:

Here, you can see that when we need to serialize the nested attributes like Firstname, we have called the first Name class and then getFirstName().
System.out.println("First Name of employee : " + employee2.getName().getFirtsname());
To know about Serialization – Conversion of Java Objects to XML, you can refer to this tutorial – Serialization – How to convert Java Objects to XML using Jackson API.
We are done! Congratulations on making it through this tutorial and hope you found it useful! Happy Learning!!