Setup Basic REST Assured Gradle Project In Eclipse IDE

HOME

In the previous tutorial, I have provided the Introduction of Rest Assured. In this tutorial, I will explain how to setup basic Rest Assured Gradle project in Eclipse IDE. Before going through this tutorial, it is recommended to go through previous tutorial to know about Rest Assured.

What is Gradle?

Gradle is an open-source build automation tool that is designed to be flexible enough to build almost any type of software. A build automation tool is used to automate the creation of applications. The building process includes compiling, linking, and packaging the code. The process becomes more consistent with the help of building automation tools.

Steps to setup Rest Assured Gradle Project in Eclipse

  1. Download and Install Java on the system
  2. Download and setup Eclipse IDE on the system
  3. Setup Gradle on System
  4. Create a new Gradle Project
  5. Add Rest-Assured dependencies to the project

Step 1- Download and Install Java

Rest-Assured needs Java to be installed on the system to run the tests. Check if Java is installed on your machine or not by using the below command on Command Prompt.

java -version

If Java is not installed, then click here to know How to install Java.

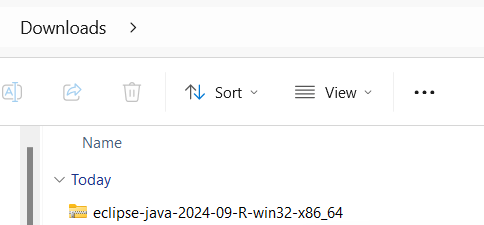
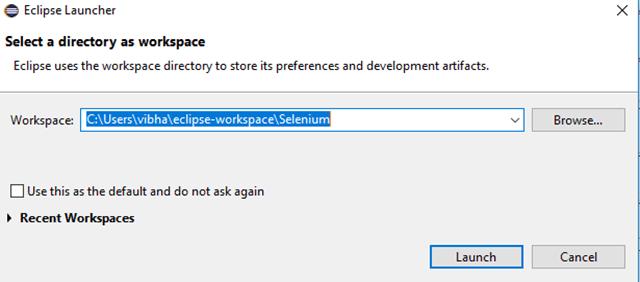
Step 2 – Download and setup Eclipse IDE on the system

The Eclipse IDE (integrated development environment) provides strong support for Java developers. If Eclipse IDE is already not present on your system, then click here to know How to install Eclipse.

Step 3 – Setup Gradle

To build a test framework, we need to add several dependencies to the project. This can be achieved by any build Tool. I have used Gradle Build Tool. Click here to know How to install Gradle.

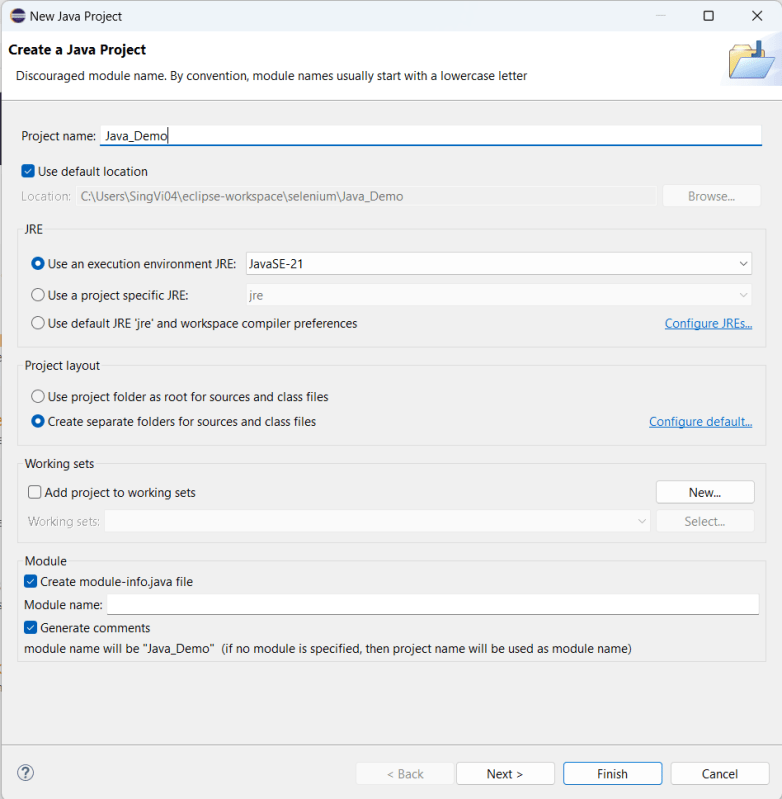
Step 4 – Create a new Gradle Project

To know, in detail, how to create a Gradle project in Eclipse, refer to this link.

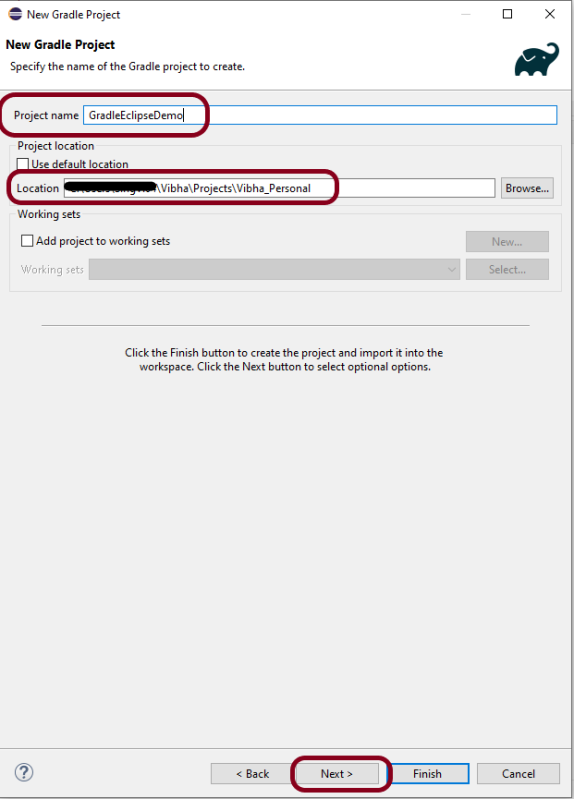
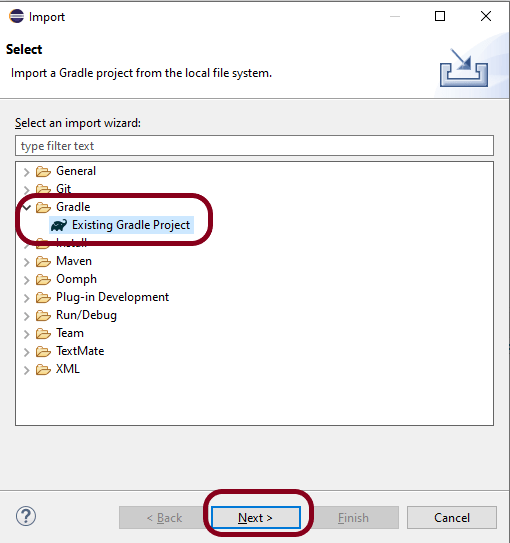
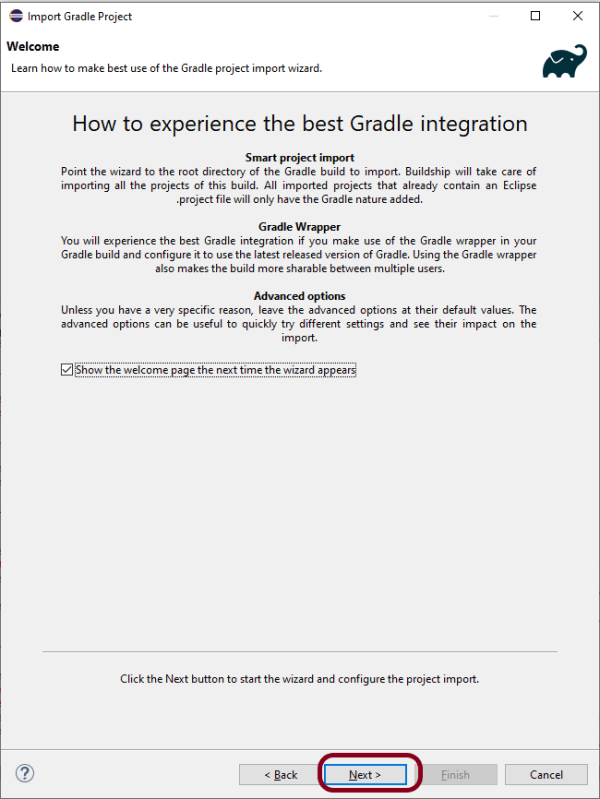
File ->New Project ->Gradle Project ->Next.

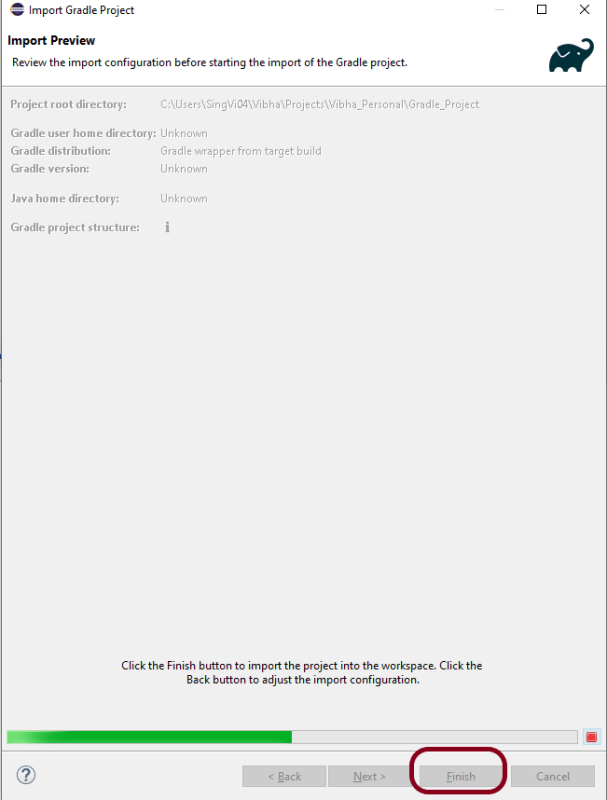
Provide projectname and location where you want to save the project on your system. Click the Finish Button.

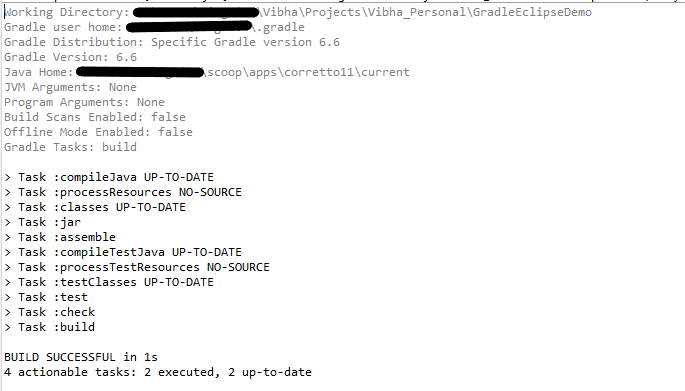
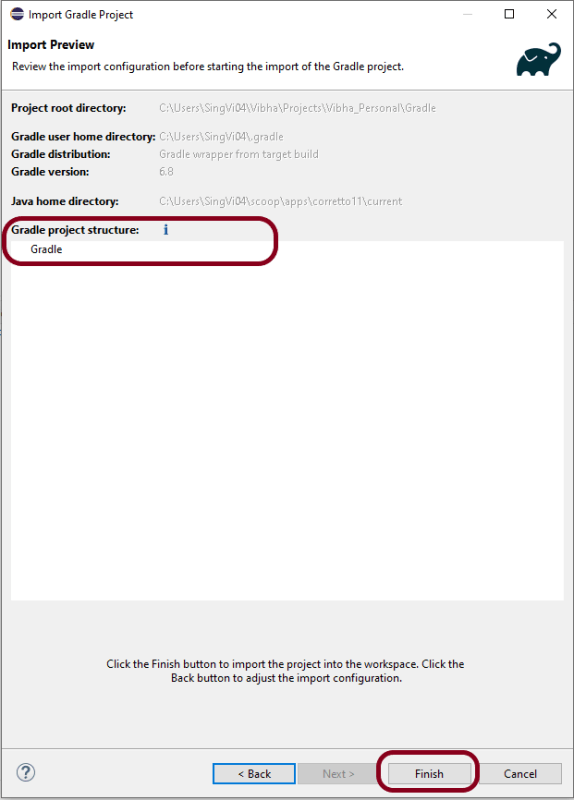
Verify the Gradle Version and Gradle project structure name. Click the Finish Button.

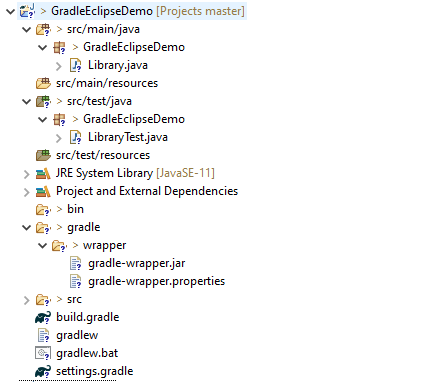
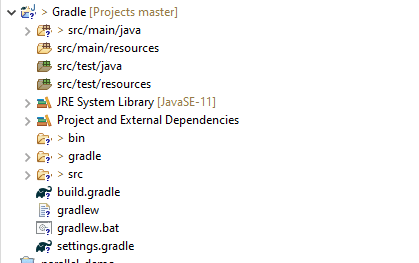
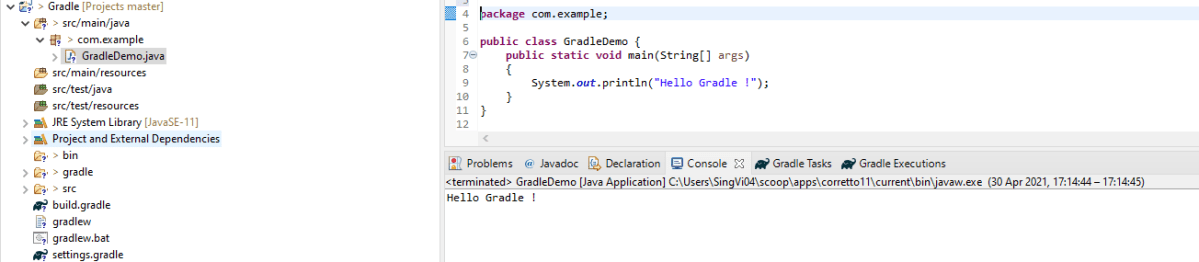
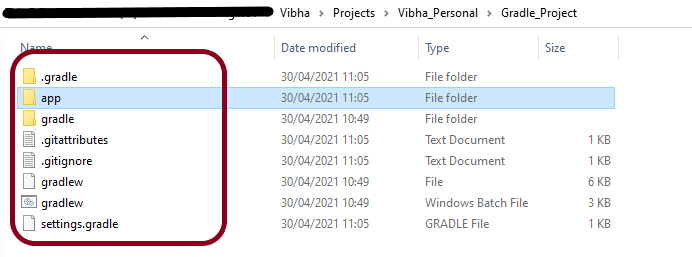
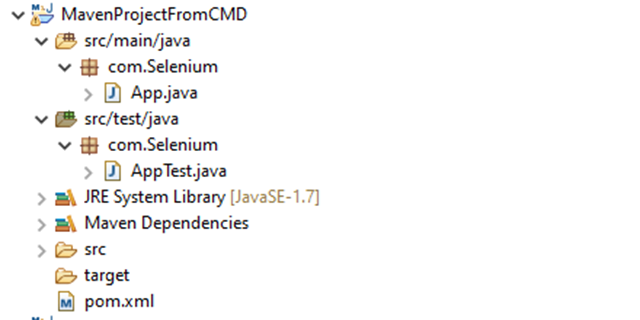
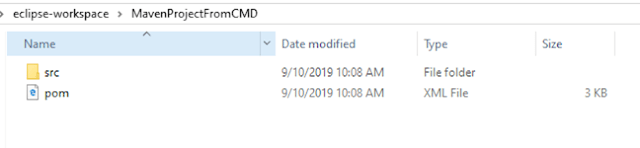
Below is the structure of the new Gradle project.

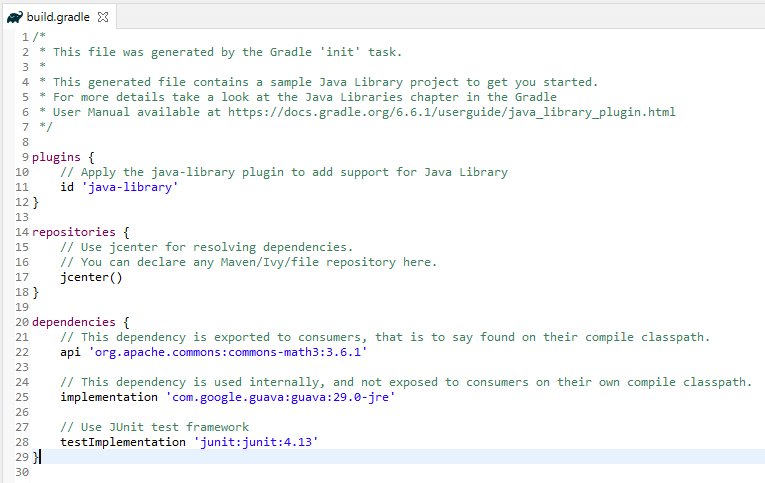
Below is the structure and content of the build.gradle of the new project.

Step 5 – Add Rest-Assured dependencies to the project

Add Rest-Assured, JSON Schema Validator, and JUnit dependencies to the project.

    // Use rest assured
    testImplementation 'io.rest-assured:rest-assured:4.3.3'
    testImplementation 'io.rest-assured:json-schema-validator:4.3.3'

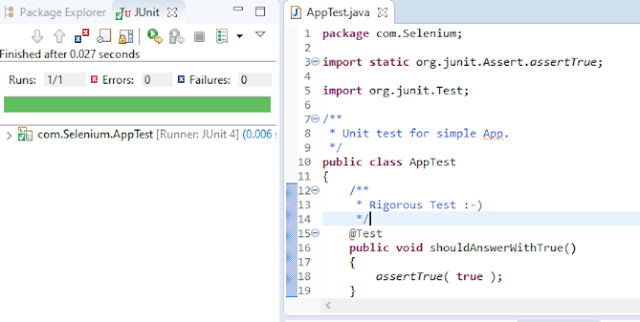
Step 6 – Below are the Rest Assured, json schema validator, junit jar files present under Maven Dependencies.

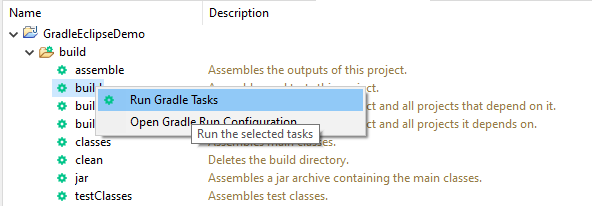
Make sure you right-click on project -> Select Gradle ->Refresh Gradle Project. It is needed to see the new jar files in the project.

That’s it! Congratulations on making it through this tutorial and hope you found it useful! Happy Learning!! Cheers

How to create Java Gradle project in Eclipse

HOME

In the previous tutorial, I have explained how to create a Java Gradle project in IntelliJ. In this tutorial, I will explain about creating a Java Gradle project Eclipse. I have used Gradle 6.6 to create the project.

Steps to follow:-

Step 1 To create a new project – Click on the “New” and then select  – Project”.

Step 2 Select the Gradle Project” and click on the Next” button.

Step 3A welcome screen will appear. You can uncheck the box – Show the welcome page the next time the wizard appears. This is optional. Click the NEXT button.

Step 4 Below the screen will appear. Mention the “Project Name – GradleEclipseDemo”. Mention the location where we want to save the project in the system. Click the NEXT button.

Step 5Options screen appear. Make sure you use Gradle version 6.6 to create Gradle project in Eclipse for Version: 2021- 03 (4.19.0).

Note:- If you will try to use version higher than 6.6, then Gradle project structure will have a Gradle project with the nested project with a lib subproject in it.

Step 6 Verify the Gradle Version and Gradle project structure name.

Step 7 Below is the structure of Gradle project. The init task generates the new project with the following structure:-

  1. Generated folder for wrapper files -wrapper
  2. Gradle wrapper start scripts – gradlew, gradlew.bat
  3. Settings file to define build name and subprojects – settings.gradle
  4. Build script of lib project – build.gradle
  5. Default Java source folder – src/main/java
  6. Default Java test source folder – src/test/java

Step 8 – Below is the structure and content of the build.gradle.

/*
 * This file was generated by the Gradle 'init' task.
 *
 * This generated file contains a sample Java Library project to get you started.
 * For more details take a look at the Java Libraries chapter in the Gradle
 * User Manual available at https://docs.gradle.org/6.6/userguide/java_library_plugin.html
 */

plugins {
    // Apply the java-library plugin to add support for Java Library
    id 'java-library'
}

repositories {
    // Use jcenter for resolving dependencies.
    // You can declare any Maven/Ivy/file repository here.
    jcenter()
}

dependencies {
    // This dependency is exported to consumers, that is to say found on their compile classpath.
    api 'org.apache.commons:commons-math3:3.6.1'

    // This dependency is used internally, and not exposed to consumers on their own compile classpath.
    implementation 'com.google.guava:guava:29.0-jre'

    // Use JUnit test framework
    testImplementation 'junit:junit:4.13'
}
  1. plugins – Apply the java-library plugin for API and implementation separation.
  2. jcenter – Use JCentral for resolving dependencies. JCenter is a central repository on JFrog Bintray platform for finding and sharing popular JVM language packages in Maven format
  3. api – This dependency is exported to consumers, that is to say found on their compile classpath.
  4. implementation – This dependency is used internally, and not exposed to consumers on their own compile classpath.
  5. testImplementation – Use JUnit test framework.

Step 9 To check if the project is created successfully. In gradle tasks tab -> navigate to the project -> expand build folder -> right click on build -> Select Run Gradle tasks.

This will be the output of the Gradle Run.

That’s it. We have successfully created a Gradle Java project in Eclipse.

Congratulations on making it through this tutorial and hope you found it useful! Happy Learning!! Cheers!!

How to import Java Gradle project in Eclipse

HOME

In the previous tutorial, I explained How to create a Java Gradle project using Command Line. This tutorial will explain How to import the Java Gradle project in Eclipse.

Steps to follow:-

Step 1 Open Eclipse IDE. In Eclipse IDE, select File ->Import ->Maven ->Existing Gradle Project. Click NEXT Button.

Step 2A welcome screen will appear. You can uncheck the box – Show the welcome page the next time the wizard appears. This is optional. Click the NEXT button.

Step 3 Browse the location from where you want to import the Gradle project. Click the NEXT button.

Step 4 This screen allows us to Configure Customized Workspace Settings. This shows that Gradle Version 7.0 is used for this project. Click the Finish Button.

Step 5 – This screen allows us to review the import configuration. If you feel something is incorrect, click the BACK Button.

Step 6 – We can see that the Gradle project Name is Gradle and other details like Version. Click the FINISH Button. This will import the project structure into Workspace.

Step 7 Below is the imported project Structure in Eclipse.

Step 8To check if the project is imported successfully. Run GradleDemo.java class by right click on the Java class and Run As Java Application.

That’s it! We have imported a Gradle Project in Eclipse.

Congratulations on making it through this tutorial and hope you found it useful! Happy Learning!! Cheers!!

How to create a Java Gradle project using Command Line

HOME

In the previous tutorial, I have explained about How to create Gradle project in IntelliJ without Command Line. In this tutorial, I will explain how to create a Gradle Java project using Command Line.

Step 1 – Open Command Prompt. Change current folder to the folder where we want to create the Java project. 

 cd C:\Users\vibha\eclipse-workspace\Projects\Vibha_Personal\Gradle_Project

Step 2 – Create a Project from Gradle Template. Type the below command and press ENTER.

gradle init

Step 3 – Select the type of project to generate. I’m selecting the application option as if I select basic, it won’t create a src directory. Type 2 and press ENTER.

Step 4 – Select implementation language. This is a Java project, so TYPE 3 and press ENTER.

Step 5 – Select Split functionality across multiple subprojects. I have selected 1 as I want only 1 application. Type 1 and press ENTER.

Step 6 – Select build script DSL (Domain Specific Language) – As in Maven POM.xml (XML) is created to build a script file, here we can use Groovy or Kotlin to build the script file. Type 1 (Groovy) and press ENTER.

Step 7 – Select Test Framework – There are 4 different test frameworks. Depending on your requirement, select an option. I have selected 1 (JUnit 4) and press ENTER.

Step 8 – It needs the Project name and Source Package name. If I won’t provide the project name, it will take by default my current folder name which is Gradle_Project. Similarly, if I won’t provide the Source Package name, then it will provide the current project name as Source Package Name.

Project name – GradleDemoFromCMD
Source Package – com.example

Press ENTER. init script will run and create a Gradle project. You can see as the build is successfull.

Step 9 – Below is the project structure. As you can see, the name of the project is GradleDemoFromCMD, but that is not the name of the project folder here. But, when I’ll import this folder into Eclipse, the project name will be GradleDemoFromCMD.

Step 10 – Open app folder. There should be src folder and build.gradle. Open build.gradle.

/*
 * This file was generated by the Gradle 'init' task.
 *
 * This generated file contains a sample Java application project to get you started.
 * For more details take a look at the 'Building Java & JVM projects' chapter in the Gradle
 * User Manual available at https://docs.gradle.org/7.0/userguide/building_java_projects.html
 */

plugins {
    // Apply the application plugin to add support for building a CLI application in Java.
    id 'application'
}

repositories {
    // Use Maven Central for resolving dependencies.
    mavenCentral()
}

dependencies {
    // Use JUnit test framework.
    testImplementation 'junit:junit:4.13.1'

    // This dependency is used by the application.
    implementation 'com.google.guava:guava:30.0-jre'
}

application {
    // Define the main class for the application.
    mainClass = 'com.example.App'
}

This build.gradle contains all the information which I have provided while creating the project.

That’s it! We have created a Gradle Project using Command Line.

Congratulations on making it through this tutorial and hope you found it useful! Happy Learning!! Cheers!!

How to Download and Install Eclipse IDE

HOME

 Eclipse IDE is a software that allows you to write your programs and test scripts in multiple programming languages (with Java being the most popular one).

Download Eclipse IDE

 1. Open the below mentioned link. Latest version of Eclipse available is Eclipse IDE 2024-09 R Packages  Eclipse Download .

       
 2. Select – Eclipse IDE for Java Developers. Depending on type of Operating System, download either 32 bit or 64 bit. My system is 64 bit, so downloading 64 bit Eclipse .

3. Click on the Download button to start downloading process.

Install/Setup Eclipse

  1.  We do not need to install Eclipse, just unzip the Eclipse downloaded folder. Go to the path where Eclipse downloaded and unzip the folder .

2.    Eclipse folder have Eclipse Editor (Eclipse.exe), double click on it.

3.   Eclipse Workplace directory will get open. You can provide name to this directory. In Eclipse, all the projects saved in Eclipse Directory

4.  A folder with same Eclipse Directory name creates in same path as mentioned above.

Note: –  There are chances that you may face the issue while trying to access Eclipse IDE – Java was started but returned exit code =13. This is because there is configuration mistake in Eclipse.ini (Eclipse Configuration) file. The error will look like something below:-

To fix this issue, open the Eclipse Configuration file. It will be present in unzipped Eclipse Folder. 

Add the below mentioned line in Eclipse Configuration file:-

-vm
      C:\Program Files\Java\jre1.8.0_201\bin\java.exe

 More details can found from below link                                  

https://wiki.eclipse.org/Eclipse.ini#Specifying_the_JVM

Maven – How to import Maven Project into Eclipse


In the previous tutorial, we have seen how we can create a Java project from Command Line. In this tutorial, will see how we can import this project in Eclipse.

  1. We need to make sure if Eclipse Maven Integration(m2e) is present . Latest Eclipse IDE has bundled the m2e plugin.

2. If you are using older version of Eclipse. Then below are the steps to follow

2.1 Open Eclipse IDE and select Help ->Install New Software

2.2 Click on Add button to add a new Repository

2.3 Fill the below mentioned information in the dialog box:-

Name – M2Eclipse

Location – http://download.eclipse.org/technology/m2e/releases

2.4. After the Pending finish, select all the Plugins and press Next.

2.5. Accept the terms of the license agreement and click Finish

2.6. At the end of the installation, you will be ask to restart your Eclipse. Click Yes to perform the restart.

2.7 To check if the installation is successful, go to Help ->About Eclipse

3. In Eclipse IDE, select File ->Import ->Maven ->Existing Maven Project. 

4. The m2e plugin will analyze the pom.xml and will configure the project and generate the Eclipse files automatically.

5. Below is the code of App.java. Run this code

package com.Selenium;
 
/**
 * Hello world!
 *
 */
public class App 
{
    public static void main( String[] args )
    {
        System.out.println( "Hello World!" );
    }
}

6. Below is the code of AppTest.java. Run this code

package com.Selenium;
 
import static org.junit.Assert.assertTrue;
import org.junit.Test;
 
/**
 * Unit test for simple App.
 */
public class AppTest 
{
    /**
     * Rigorous Test 🙂
     */
    @Test
    public void shouldAnswerWithTrue()
    {
        assertTrue( true );
    }
}

Note:- Apache Maven Eclipse Plugins like eclipse:eclipse, eclipse:clean, etc are retired. To know more about it, please refer the link

7. Structure of POM.xml

<?xml version="1.0"encoding="UTF-8"?>
 
<project xmlns="http://maven.apache.org/POM/4.0.0"xmlns:xsi="http://www.w3.org/2001/XMLSchema-instance"
  xsi:schemaLocation="http://maven.apache.org/POM/4.0.0 http://maven.apache.org/xsd/maven-4.0.0.xsd">
  <modelVersion>4.0.0</modelVersion>
 
  <groupId>com.Selenium</groupId>
  <artifactId>MavenProjectFromCMD</artifactId>
  <version>1.0-SNAPSHOT</version>
 
  <name>MavenProjectFromCMD</name>
  <!-- FIXME change it to the project's website -->
  <url>http://www.example.com</url>
 
  <properties>
    <project.build.sourceEncoding>UTF-8</project.build.sourceEncoding>
    <maven.compiler.source>1.7</maven.compiler.source>
    <maven.compiler.target>1.7</maven.compiler.target>
  </properties>
 
  <dependencies>
    <dependency>
      <groupId>junit</groupId>
      <artifactId>junit</artifactId>
      <version>4.11</version>
      <scope>test</scope>
    </dependency>
  </dependencies>
 
  <build>
    <pluginManagement><!-- lock down plugins versions to avoid using Mavendefaults (may be moved to parent pom) -->
      <plugins>
        <!-- clean lifecycle, see https://maven.apache.org/ref/current/maven-core/lifecycles.html#clean_Lifecycle -->
        <plugin>
          <artifactId>maven-clean-plugin</artifactId>
          <version>3.1.0</version>
        </plugin>

        <!-- default lifecycle, jar packaging: see https://maven.apache.org/ref/current/maven-core/default-bindings.html#Plugin_bindings_for_jar_packaging -->
        <plugin>
          <artifactId>maven-resources-plugin</artifactId>
          <version>3.0.2</version>
        </plugin>

        <plugin>
          <artifactId>maven-compiler-plugin</artifactId>
          <version>3.8.0</version>
        </plugin>

        <plugin>
          <artifactId>maven-surefire-plugin</artifactId>
          <version>2.22.1</version>
        </plugin>

        <plugin>
          <artifactId>maven-jar-plugin</artifactId>
          <version>3.0.2</version>
        </plugin>

        <plugin>
          <artifactId>maven-install-plugin</artifactId>
          <version>2.5.2</version>
        </plugin>

        <plugin>
          <artifactId>maven-deploy-plugin</artifactId>
          <version>2.8.2</version>
        </plugin>

        <!-- site lifecycle, see https://maven.apache.org/ref/current/maven-core/lifecycles.html#site_Lifecycle -->
        <plugin>
          <artifactId>maven-site-plugin</artifactId>
          <version>3.7.1</version>
        </plugin>

        <plugin>
          <artifactId>maven-project-info-reports-plugin</artifactId>
          <version>3.0.0</version>
        </plugin>
      </plugins>
    </pluginManagement>
  </build>
</project>

Maven – How to create a Java project using Command Line


     In the previous tutorial, we have discussed about How to install Maven on Windows. In this tutorial, we will see how to use Maven to manage a Java project – Create and update the dependencies.

   1) Change current folder to the folder where we want to create the Java project 

   In my case I have my Eclipse Workspace mentioned at the below mentioned path 

    cd C:\Users\vibha\eclipse-workspace\Selenium

  2) Create a Project from Maven Template

This tells Maven to generate a Java project from a Maven template.

mvn archetype:generate

3) We need to mention the number as displayed on your screen in Command Prompt to proceed further. Like here, Choose a folder or apply has 1394, so I have also mentioned 1394 in command prompt.

4) We need to provide again  input in command prompt. This time program wants to know which version we want to use. I prefer to use the latest version. Here, it is 8, so I have selected version 8.

5) We need to provide 2 input here

A) Value of groupId – This serves as the group identifier of your Maven project, it should be in a form similar to Java packages, such as com.Selenium
B) Value of artifactId – This serves as the group-local identifier of my Maven project like MavenProjectFromCMD
C) Value of Version – The initial version of our project. The default is 1.0-SNAPSHOT
D) Value of package – The name of our root package. The default is groupId we have created earlier.
We will notice the INFO message about the properties. If the displayed settings are correct, then just enter Y in :: prompt.

Successful Build – Below screenshot shows that the Maven Project built successfully.

  6) Project Folder Creation – We can see a folder with the name of project – MavenProjectFromCMD in our Eclipse Workspace. In my case, it is                     

    C:\Users\vibha\eclipse-workspace\Selenium\MavenProjectFromCMD

7) Contents of Project Folder – Open folder MavenProjectFromCMD to see the contents of the folder. It should have POM file and src