In the previous tutorial, we have discussed about How to install Maven on Windows. In this tutorial, we will see how to use Maven to manage a Java project – Create and update the dependencies.
1) Change current folder to the folder where we want to create the Java project
In my case I have my Eclipse Workspace mentioned at the below mentioned path
cd C:\Users\vibha\eclipse-workspace\Selenium
2) Create a Project from Maven Template
This tells Maven to generate a Java project from a Maven template.
mvn archetype:generate

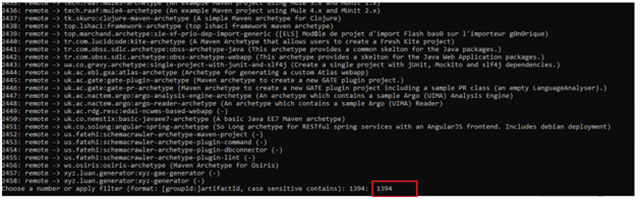
3) We need to mention the number as displayed on your screen in Command Prompt to proceed further. Like here, Choose a folder or apply has 1394, so I have also mentioned 1394 in command prompt.
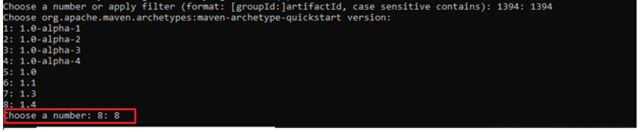
4) We need to provide again input in command prompt. This time program wants to know which version we want to use. I prefer to use the latest version. Here, it is 8, so I have selected version 8.
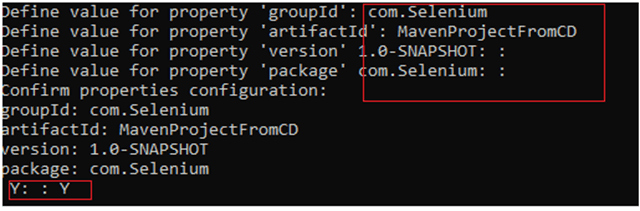
5) We need to provide 2 input here
A) Value of groupId – This serves as the group identifier of your Maven project, it should be in a form similar to Java packages, such as com.Selenium
B) Value of artifactId – This serves as the group-local identifier of my Maven project like MavenProjectFromCMD
C) Value of Version – The initial version of our project. The default is 1.0-SNAPSHOT
D) Value of package – The name of our root package. The default is groupId we have created earlier.
We will notice the INFO message about the properties. If the displayed settings are correct, then just enter Y in :: prompt.
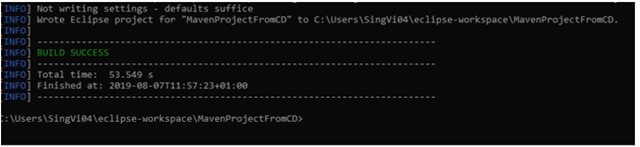
Successful Build – Below screenshot shows that the Maven Project built successfully.
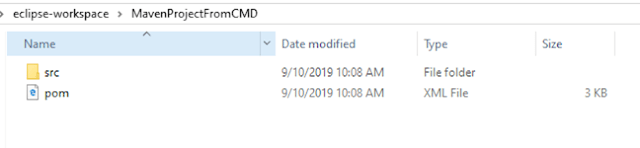
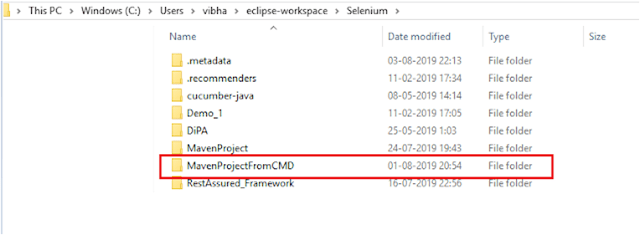
6) Project Folder Creation – We can see a folder with the name of project – MavenProjectFromCMD in our Eclipse Workspace. In my case, it is
C:\Users\vibha\eclipse-workspace\Selenium\MavenProjectFromCMD
7) Contents of Project Folder – Open folder MavenProjectFromCMD to see the contents of the folder. It should have POM file and src