The PATCH method is used to partially modify an existing resource. This operation updates an existing resource but does not require sending the entire body with the request. PUT modifies a record’s information and creates a new record if one is not available, and PATCH updates a resource without sending the entire body of the request. Unlike PUT Request, PATCH does partial update e.g. Fields that need to be updated by the client, only that field is updated without modifying the other field.
We will use the following URL for this Postman tutorial.
https://reqres.in/api/users/2
Sample Request Body
{
    "name": "Patch_Test"
}
Implementation Steps:
To create the first PATCH request in Postman, follow the following steps:
Create a Collection
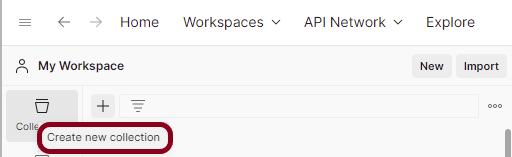
Step 1: Create a Collection, click on Collections, and then click on the “+” plus button.
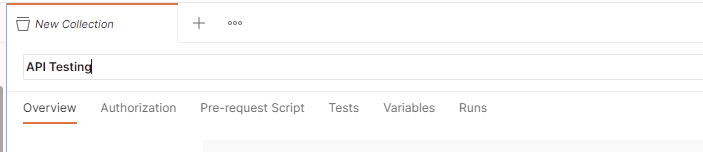
Step 2: Provide a name to the collection – “API Testing”.
Add a request to the Collection
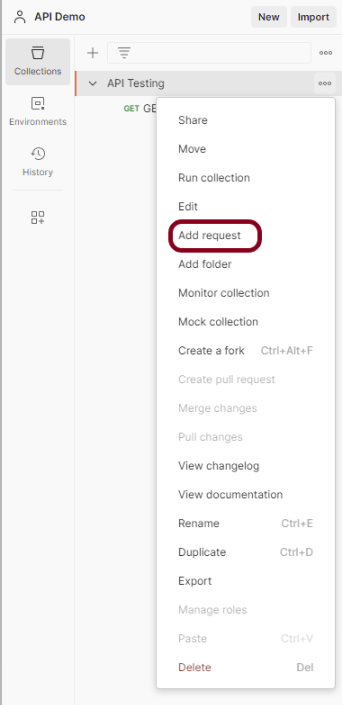
Step 3: To create a new request, click on “Add a request” if it is a new Collection. Otherwise, click on the 3 dots and select “Add request”.
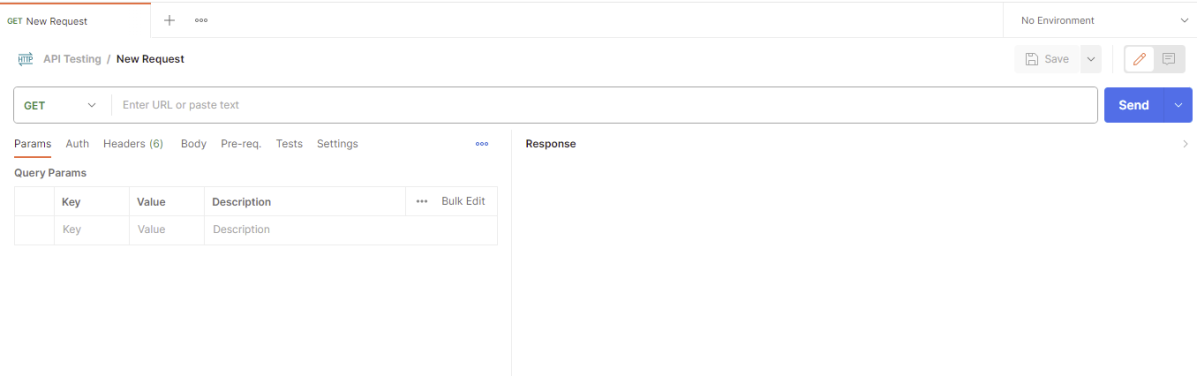
Step 4: Once you create a new request, then you will get the following window:
Enter the details of request
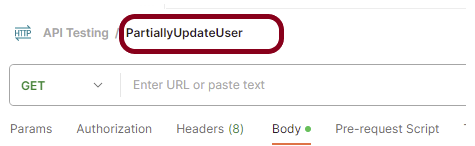
Step 5: Enter the “name” in the request. Here, the name is “PartiallyUpdateUser”.
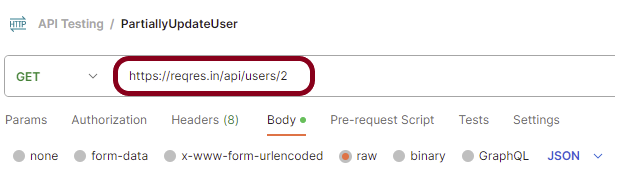
Step 6:Enter the “URL” in the address bar.
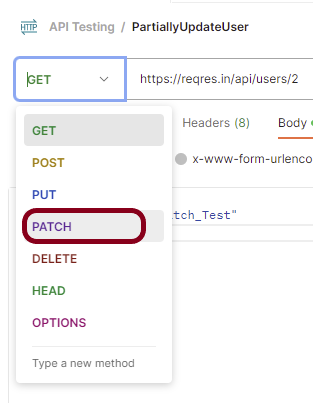
Step 7:Now, select the “PATCH” request from the list of request methods.
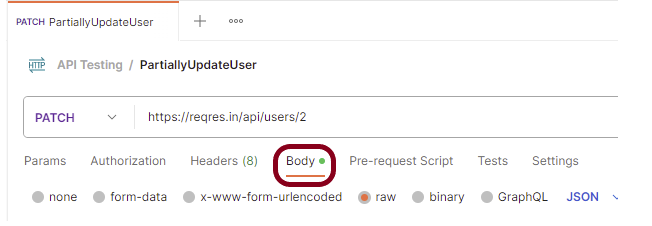
Step 8: Add a Request body to the Post request
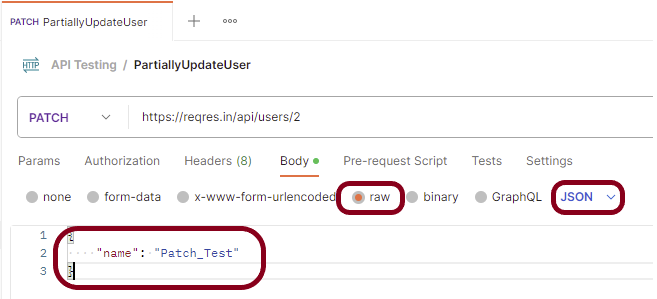
For this, select the Body tab.
Now in the Body tab, select raw and select JSON as the format type from the drop-down menu, as shown in the image below. This is done because we need to send the request in the appropriate format that the server expects. Copy and paste the request body example mentioned at the beginning of the tutorial to the postman request Body.
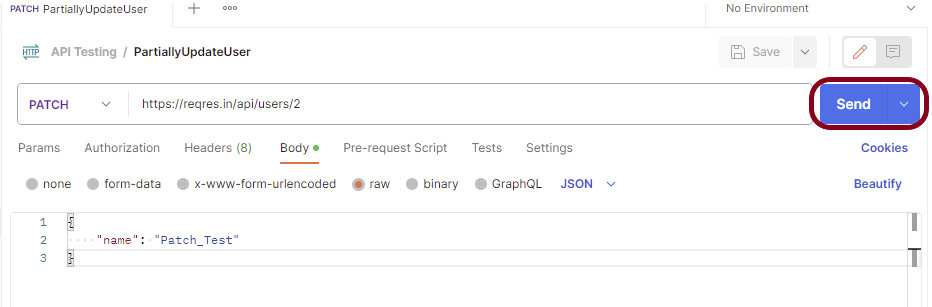
Step 9: Press the “Send” button.
Verify the Response
Step 10: Once you press the send button, you will get the response from the server. Make sure you have a proper internet connection; otherwise, you will not get a response.
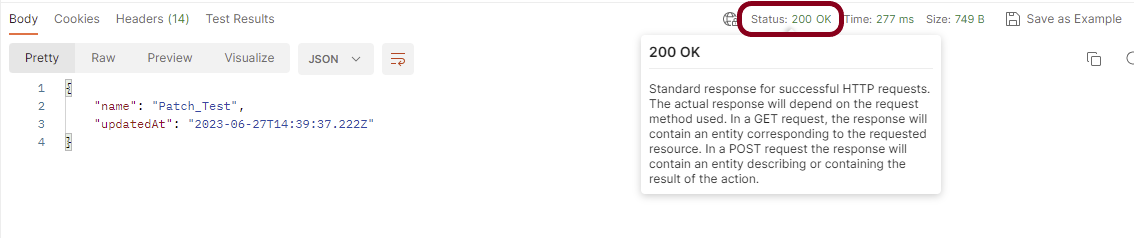
Status
You can check the status code. Here, we got the status code 200, which means we got a successful response to the request. In the case of new resource creation, the status code should be 201. But as this is a dummy API, we are getting a status code of 200.
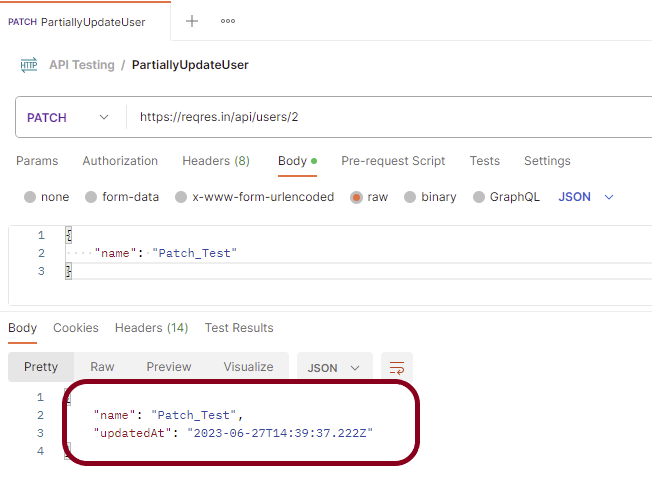
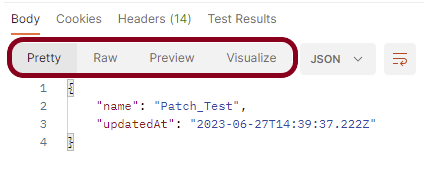
Body
In the Body tab of the response box, we have multiple options to see the response in a different format.
Format Type
Each request has a defined response to it as defined by the Content-Type header. That response can be in any format. Such as in the above example, we have JSON code file.
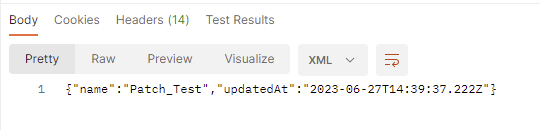
Below are the various format type present in Postman.
XML
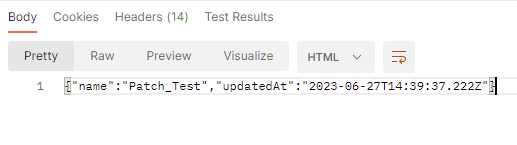
HTML
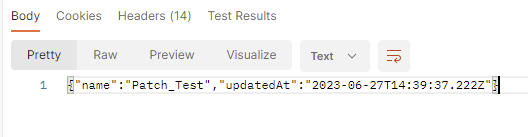
Text
Headers
Headers are the extra information that is transferred to the server or the client. In Postman, headers will show like key-value pairs under the headers tab. Click on the Headers link as shown in the below image:
We are done! Congratulations on making it through this tutorial and hope you found it useful! Happy Learning!!
As we know, REST Assured is a Java DSL for simplifying the testing of REST-based services built on top of HTTP Builder. In this tutorial, I’ll create a Test Framework for the testing of REST API using REST Assured and TestNG as the test framework.
Java needs to be present on the system to run the tests. Click here to know How to install Java. To know if Java is installed or not on your machine, type this command in the command line. This command will show the version of Java installed on your machine.
java -version
Step 2 – Download and setup Eclipse IDE on the system
The Eclipse IDE (integrated development environment) provides strong support for Java developers, which is needed to write Java code. Click here to know How to install Eclipse.
Step 3 – Setup Maven
To build a test framework, we need to add a number of dependencies to the project. It is a very tedious and cumbersome process to add each dependency manually. So, to overcome this problem, we use a build management tool. Maven is a build management tool that is used to define project structure, dependencies, build, and test management. Click here to know How to install Maven.
To know if Maven is already installed or not on your machine, type this command in the command line. This command will show the version of Maven installed on your machine.
To know more about priority in TestNG, please refer tothis tutorial.
import io.restassured.http.ContentType;
import org.json.JSONObject;
import org.testng.annotations.Test;
import static io.restassured.RestAssured.given;
import static org.hamcrest.Matchers.equalTo;

public class RestAPITests {

    @Test(description = "To get the details of user with id 3", priority = 0)
    public void verifyUser() {

        // Given
        given()

                // When
                .when()
                .get("https://reqres.in/api/users/3")

                // Then
                .then()
                .statusCode(200)
                .statusLine("HTTP/1.1 200 OK")

                // To verify user of id 3
                .body("data.email", equalTo("emma.wong@reqres.in"))
                .body("data.first_name", equalTo("Emma"))
                .body("data.last_name", equalTo("Wong"));
    }

    @Test(description = "To create a new user", priority = 1)
    public void createUser() {

        JSONObject data = new JSONObject();

        data.put("name", "RestAPITest");
        data.put("job", "Testing");

        // GIVEN
        given()
                .contentType(ContentType.JSON)
                .body(data.toString())

                // WHEN
                .when()
                .post("https://reqres.in/api/users")

                // THEN
                .then()
                .statusCode(201)
                .body("name", equalTo("RestAPITest"))
                .body("job", equalTo("Testing"));

    }

}
Step 7 – Test Execution through TestNG
Go to the Runner class and right-click Run As TestNG Test. The tests will run as TestNG tests. (Eclipse)
Right-click on the test page and select Run ‘RestAPITests’ in thecase of Intellij.
This is how the execution console will look like. (IntelliJ)
Eclipse
Step 8 – Run the tests from TestNG.xml
Create a TestNG.xml as shown below and run the tests as TestNG. Here, the tests are present in class – com.example. Selenium_TestNGDemo.API_Test.
<?xml version = "1.0"encoding = "UTF-8"?>
<!DOCTYPE suite SYSTEM "http://testng.org/testng-1.0.dtd">
<suite name = "Suite1">
    <test name = "TestNG Test Demo">
        <classes>
            <class name = "org.example.RestAPITests"/>
        </classes>
    </test>
</suite>
Step 9 – TestNG Report Generation
After the test execution, refresh the project, and a new folder with the name test-output will be generated. This folder contains the reports generated by TestNG. The structure of folder test-output looks as shown below.
Emailable-report.html
We are interested in “emailable-report.html” report. Open “emailable-report.html”, as this is an HTML report, open it with the browser. The below image shows emailable-report.html.
Index.html
TestNG also produces “index.html” report, and it resides under the test-output folder. The below image shows the index.html report. This report contains a high-level summary of the tests.
JSONArrayrepresents an immutable JSON array (an ordered sequence of zero or more values). It also provides an unmodifiable list view of the values in the array.
JSON array can store multiple value types. The values in a JSONArray can be of the following types: JsonObject, JsonArray, JsonString, JsonNumber, JsonValue.TRUE, JsonValue.FALSE, and JsonValue.NULL.
The array index begins with 0.
The square brackets [ ] are used to declare the JSON array.
An API can accept a JSON Array payload as a request body. Imagine, we want to add employee details of more than one employee in the below example. In this case, we can pass multiple JSON objects within a JSON array. I have explained 2 ways to create JSON Object – map or JsonObject. Refer to any one of the tutorials to get to know about the creation of JSON Object.
To create a JSON Array, we need to add org.jsonMaven dependency, as shown below. The latest version can be found here.
Create a JSON Object and add the first employee details.
Create another JSON Object and add second guest details.
Create a JSONArray.
Add both JSON Objects to JSONArray.
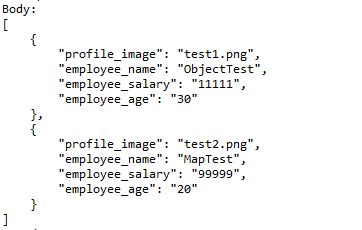
Below is an example of creating a request from JSONArray with multiple JSON Objects. I am using a logger just to print the JSON body in the Console.
import io.restassured.RestAssured;
import io.restassured.http.ContentType;
import org.json.JSONArray;
import org.json.JSONObject;
import org.junit.Test;
import static org.hamcrest.Matchers.equalTo;
public class Json_Demo {
@Test
public void passBodyAsJsonArrayDemo() {
// JSON Object for first employee
JSONObject data1 = new JSONObject();
data1.put("employee_name", "ObjectTest");
data1.put("profile_image", "test1.png");
data1.put("employee_age", "30");
data1.put("employee_salary", "11111");
// JSON Object for second employee
JSONObject data2 = new JSONObject();
data2.put("employee_name", "MapTest");
data2.put("profile_image", "test2.png");
data2.put("employee_age", "20");
data2.put("employee_salary", "99999");
// Creating JSON array to add both JSON objects
JSONArray array = new JSONArray();
array.put(data1);
array.put(data2);
// Send the request
RestAssured.given()
.contentType(ContentType.JSON)
.body(array.toString())
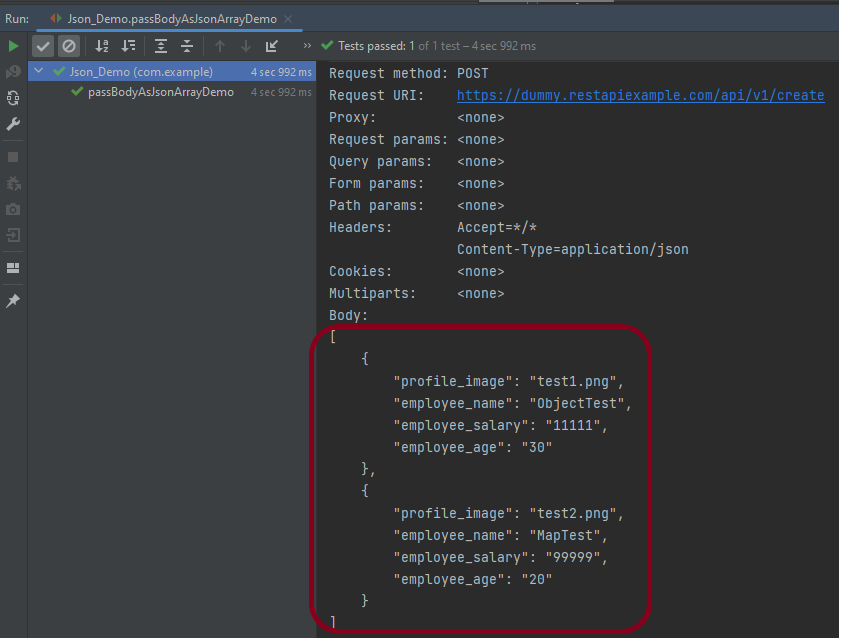
.log().all()
.when()
.post("https://dummy.restapiexample.com/api/v1/create")
.then()
.assertThat().statusCode(200)
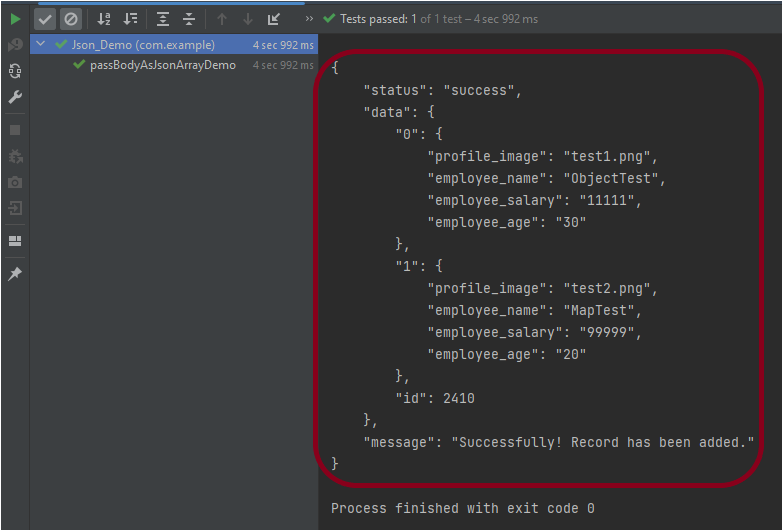
.body("message", equalTo("Successfully! Record has been added."))
.log().all();
}
}
The output of the above program is
Explanation:
1. Creating JSON Objects:
Two “JSONObject” instances (‘data1‘ and ‘data2‘) are created to represent two employees. Each JSON object contains employee details such as name, profile image, age, and salary.
       // JSON Object for first employee
        JSONObject data1 = new JSONObject();

        data1.put("employee_name", "ObjectTest");
        data1.put("profile_image", "test1.png");
        data1.put("employee_age", "30");
        data1.put("employee_salary", "11111");

        // JSON Object for second employee
        JSONObject data2 = new JSONObject();

        data2.put("employee_name", "MapTest");
        data2.put("profile_image", "test2.png");
        data2.put("employee_age", "20");
        data2.put("employee_salary", "99999");
2. Creating a JSON Array:
A JSONArrayinstance is created, and both JSON objects (data1 and data2) are added to it.
JSONArray array = new JSONArray();
array.put(data1);
array.put(data2);
3. Sending the POST Request:
3.1 The RestAssured library constructs and sends the HTTP POST request. It sets the content type of the request to JSON.
contentType(ContentType.JSON)
3.2 Converts the JSON array into a string format and sets it as the body of the request.
.body(array.toString())
3.3 Logs all details of the request for debugging purposes.
4.2 Asserts that the response status code is 200, indicating a successful request.
.assertThat().statusCode(200)
4.3 Asserts that the body of the response contains the specified message, confirming successful addition of records.
.body("message", equalTo("Successfully! Record has been added."))
4.4 Logs all details of the response for debugging purposes.
.log().all()
Complex JSON Array
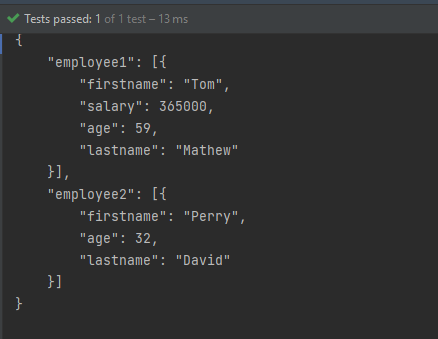
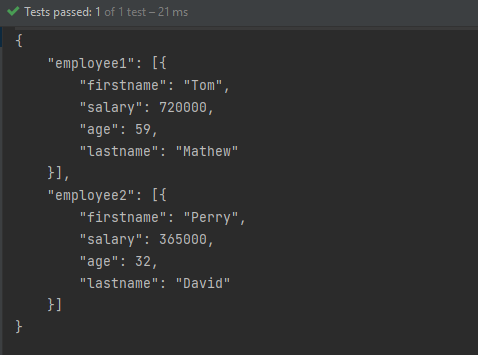
Let us see an example of a complex JSON Array. This structure represents two separate employee data sets. Each is contained within its own JSON array. The whole is encapsulated within a larger JSON object identified by keys employee1and employee2.
Two JSONArray instances (array1 and array2) are created to encapsulate each employee’s JSON object.
JSONArray array1 = new JSONArray();
array1.put(data1);

JSONArray array2 = new JSONArray();
array2.put(data2);
3. Composing The JSON Structure:
A third JSONObject, data3, is created to aggregate the two JSON arrays under separate keys: employee1 and employee2.
JSONObject data3 = new JSONObject();
data3.put("employee1", array1);
data3.put("employee2", array2);
4. Output the JSON Object:
The entire composite JSON structure (data3) is printed to the console. The toString(4) method formats the output with an indentation of 4 spaces for readability.
System.out.println(data3.toString(4));
Similarly, there is another way to create this JSON Structure.
import org.json.JSONArray;
import org.json.JSONObject;
import org.junit.Test;

public class Json_Demo {

    @Test
    public void passBodyAsJsonArray1() {

        // Creating JSON array to add first JSON object
        JSONArray array1 = new JSONArray();
        array1.put(new JSONObject().put("firstname", "Tom").put("lastname", "Mathew").put("age", 59).put("salary",
                720000));

        // Creating JSON array
        JSONArray array2 = new JSONArray();
        array2.put(new JSONObject().put("firstname", "Perry").put("lastname", "David").put("age", 32).put("salary",
                365000));

        // Create JSON Object to add JSONArrays
        JSONObject data1 = new JSONObject();
        data1.put("employee1", array1);
        data1.put("employee2", array2);

        System.out.println(data1.toString(4));

    }
}
The output of the above program is
Congratulations on making it through this tutorial and hope you found it useful! Happy Learning!! Cheers!!
Postman is an API platform for building and using APIs. It simplifies each step of the API lifecycle and streamlines collaboration, so you can create better APIs—faster.
A GET request gets the information from the server. When you make the GET request on the server, then the server responds to the request. GET requests will not affect any data on the server. This means, there is no creation, updation, addition, or deletion of data on the server when you are making a GET request.
We will use the following URL for this Postman tutorial.
http://dummy.restapiexample.com/api/v1/employees
Implementation Steps
To create the first GET request in Postman, follow the following steps:
Create a Collection
Step 1: Create a Collection, click on Collections, and then click on the “+” plus button.
Step 2: Provide a name to the collection – “API Testing”.
Add a request to the Collection
Step 3: To create a new request, click on “Add a request”, if it is a new Collection. Otherwise, click on the 3 dots and select “Add request”.
Step 4: Once you create a new request, then you will get the following window:
Enter the details of request
Step 5: Enter the “name” in the request. Here, the name is “GET Demo”.
Step 5:Enter the “URL” in the address bar.
Step 6:Now, select the “GET” request from the list of request methods.
Send the Request
Step 7: Press the “Send” button.
Verify the Response
Step 8: Once you press the send button, you will get the response from the server. Make sure you have a proper internet connection; otherwise, you will not get a response.
Status
You can check the status code. Here, we got the status code 200, which means we got a successful response to the request.
Body
In the Body tab of the response box, we have multiple options to see the response in a different format.
Format Type
Each request has a defined response to it as defined by the Content-Type header. That response can be in any format. Such as in the above example, we have JSON code file.
Below are the various format type present in Postman.
XML
HTML
Text
Headers
Headers are the extra information that is transferred to the server or the client. In Postman, headers will show like key-value pairs under the headers tab. Click on the Headers link as shown in the below image:
We are done! Congratulations on making it through this tutorial and hope you found it useful! Happy Learning!!
In this tutorial, we will integrate JMeter with Maven to support CI/CD.
Maven and jmeter-maven-plugin make it easy to integrate performance tests with CI/CD tools & technologies such as Jenkins/Jenkinsfiles or Azure/Azure pipelines and cloud build agents. It also helps to run your tests with different versions of JMeter.
Step 5 – Create a new directory src/test/jmeter and place JMeter Script in it
Create a new directory within src/test with the name jmeter.
Place the JMeter script(.jmx) file in src/test/jmeter. The steps to create a Test Plan in JMeter are mentioned at the end of the page.
Step 6 – Run JMeter Test with JMeter Maven Plugin
Go to your project directory and run the following command in the command line:
mvn clean verify
The test execution is displayed in the command line as shown below:
The test ran successfully! The results are located at /target/jmeter/reports. You will find an HTML report named “Index.html”:
Right-click on the Index.html and select Open In->Browser->Chrome (any browser of your wish).
This report provides the following metrics:
In the Dashboard of the report;
APDEX (Application Performance Index) table that computes for every transaction the APDEX based on configurable values for tolerated and satisfied thresholds
A request summary graph showing the Success and failed requests
A Statistics table providing in one table a summary of all metrics per transaction including 3 configurable percentiles:
An error table providing a summary of all errors and their proportion in the total requests
A Top 5 Errors by Sampler table providing for every Sampler (excluding Transaction Controller by default) the top 5 Errors:
You can see that there are a lot of other types of reports too. You should explore these reports.
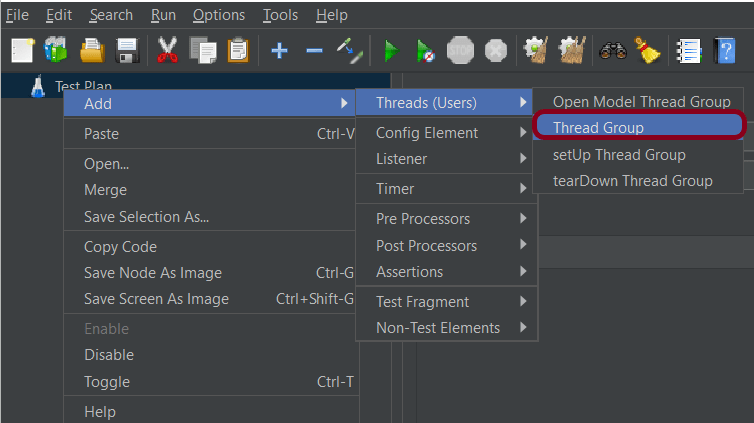
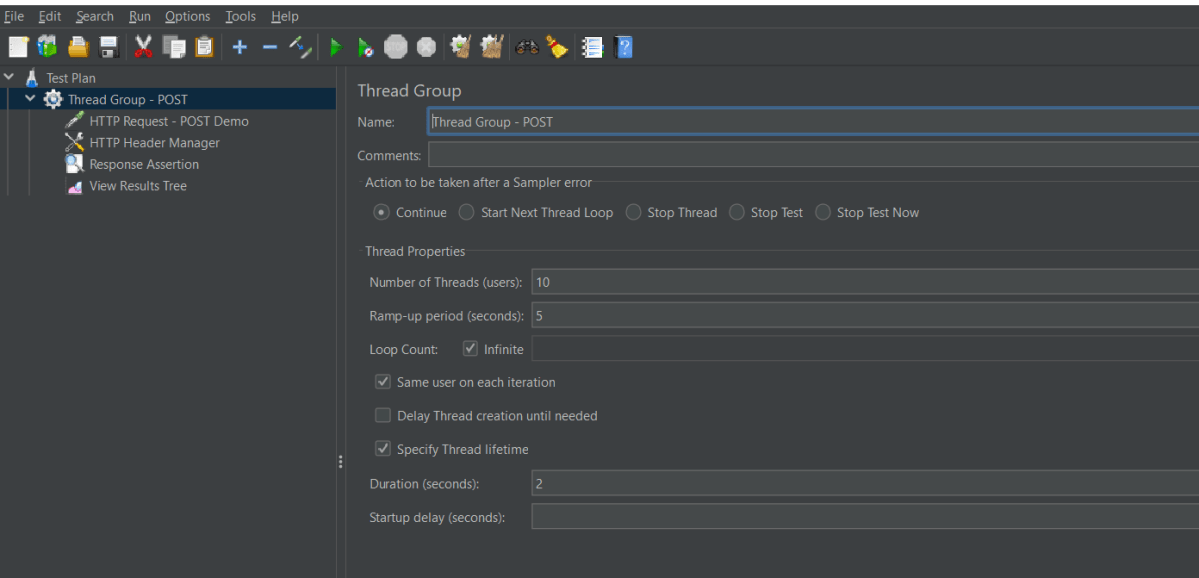
Add Thread Group To add Thread Group: Right-click on the “Test Plan” and add a new thread group: Add -> Threads (Users) -> Thread Group
In the Thread Group control panel, enter Thread Properties as follows: We will take an example of row no 5
Number of Threads: 5 – Number of users connects to the target website Loop Count:Infinite – Number of times to execute testing Ramp-Up Period: 5 – It tells JMeter how long to delay before starting the next user. For example, if we have 5 users and a 5 -second Ramp-Up period, then the delay between starting users would be 1 second (5 seconds /5 users).
Duration – 2 sec
Step 2 – Adding JMeter elements
The JMeter element used here is HTTP Request Sampler. In HTTP Request Control Panel, the Path field indicates which URL request you want to send
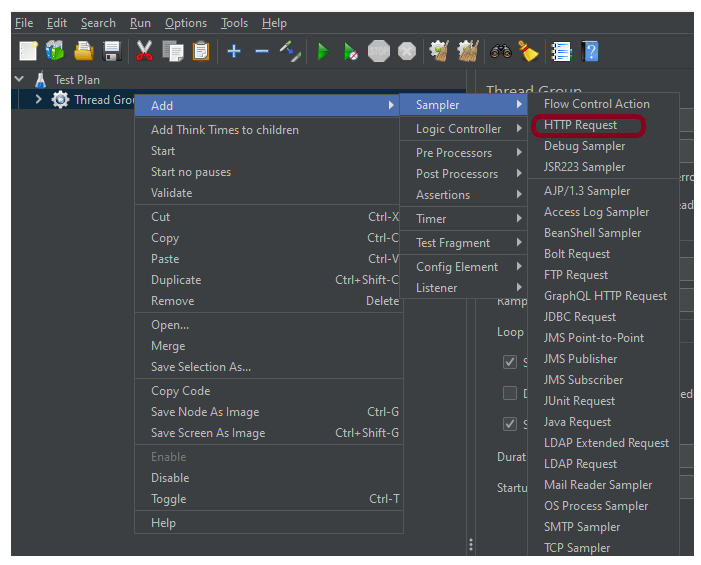
2.1 Add HTTP Request Sampler To add: Right-click on Thread Group and select: Add -> Sampler -> HTTP Request
The below-mentioned are the values used in HTTP Request to perform the test
Name – HTTP POST Request Demo
Server Name or IP – reqres.in
Port – Blank
Method – POST
Path – /api/users
2.2 Add HTTP Head Manager
The Header Manager lets you add or override HTTP request headers like can add Accept-Encoding, Accept, Cache-Control
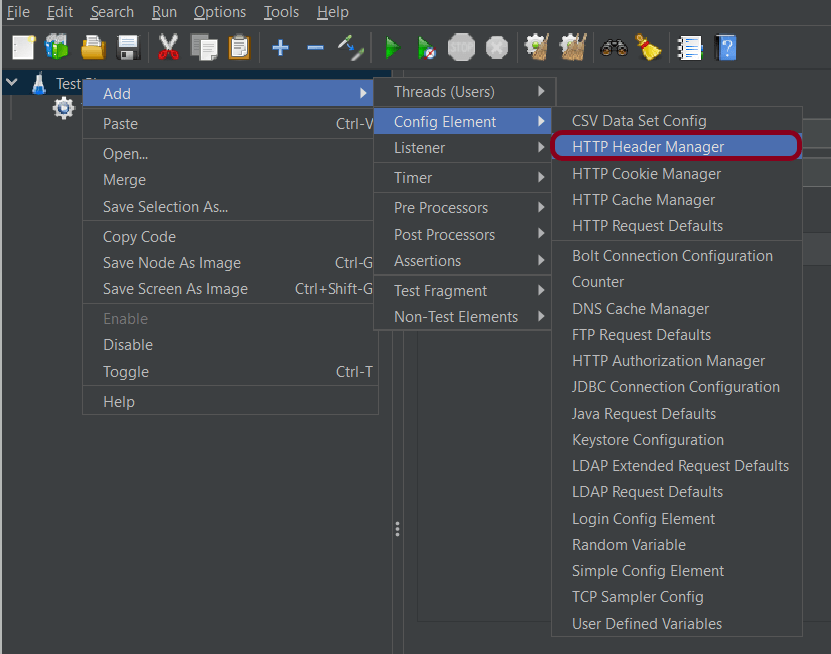
To add: Right-click on Thread Group and select: Add -> Config Element -> HTTP Read Manager
The below-mentioned are the values used in Http Request to perform the test Content-type = application/json
Step 3 – Adding Listeners to Test Plan
Listeners – They show the results of the test execution. They can show results in a different format such as a tree, table, graph, or log file We are adding the View Result Tree listener
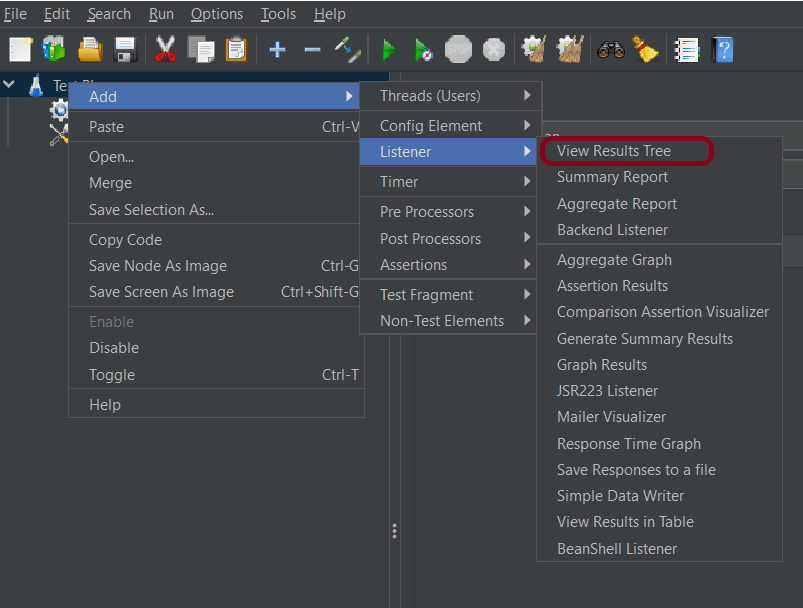
View Result Tree – View Result Tree shows the results of the user request in basic HTML format To add: Right-click on Test Plan, Add -> Listener -> View Result Tree
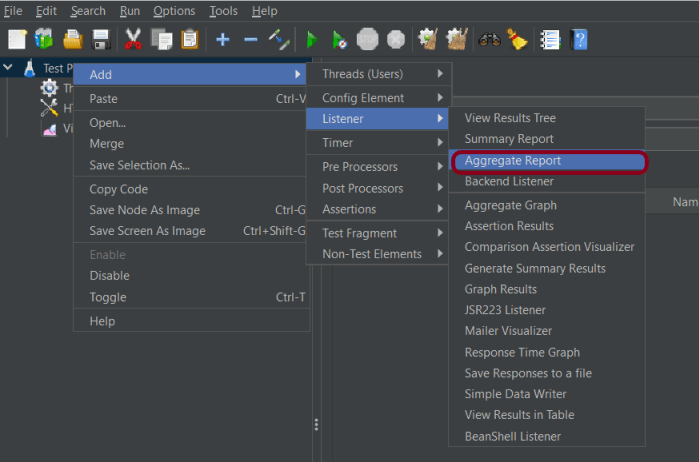
Aggregate Report
It is almost the same as Summary Report except Aggregate Report gives a few more parameters like, “Median”, “90% Line”, “95% Line” and “99% Line”.
To add: Right Click on Thread Group > Add > Listener > Aggregate Report
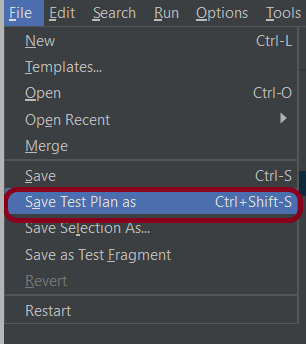
Step 4 – Save the Test Plan
To Save: Click File Select -> Save Test Plan as ->Give the name of the Test Plan (POST_LoadDemo.jmx). It will be saved in .jmx format.
We are done! Congratulations on making it through this tutorial and hope you found it useful! Happy Learning!!
JMeter supports dashboard report generation to get graphs and statistics from a test plan. In this tutorial, we will explain how to generate JMeter HTML Report.
The dashboard generator is a modular extension of JMeter. Its default behaviour is to read and process samples from CSV files to generate HTML files containing graph views. It can generate the report at the end of a load test or on demand.
Add Thread Group To add Thread Group: Right-click on the “Test Plan” and add a new thread group: Add -> Threads (Users) -> Thread Group
In the Thread Group control panel, enter Thread Properties as follows: We will take an example of row no 5
Number of Threads: 5 – Number of users connects to the target website Loop Count: 5 – Number of times to execute testing Ramp-Up Period: 5 – It tells JMeter how long to delay before starting the next user. For example, if we have 5 users and a 5 -second Ramp-Up period, then the delay between starting users would be 1 second (5 seconds /5 users).
Step 2 – Adding JMeter elements
The JMeter element used here is HTTP Request Sampler. In HTTP Request Control Panel, the Path field indicates which URL request you want to send
2.1 Add HTTP Request Sampler To add: Right-click on Thread Group and select: Add -> Sampler -> HTTP Request
The below-mentioned are the values used in HTTP Request to perform the test
Name – HTTP POST Request Demo
Server Name or IP – reqres.in
Port – Blank
Method – POST
Path – /api/users
2.2 Add HTTP Head Manager
The Header Manager lets you add or override HTTP request headers like can add Accept-Encoding, Accept, Cache-Control
To add: Right-click on Thread Group and select: Add -> Config Element -> HTTP Read Manager
The below-mentioned are the values used in Http Request to perform the test Content-type = application/json accept – application/json
Step 3 – Adding Listeners to Test Plan
Listeners – They show the results of the test execution. They can show results in a different format such as a tree, table, graph, or log file We are adding the View Result Tree listener
View Result Tree – View Result Tree shows the results of the user request in basic HTML format To add: Right-click on Test Plan, Add -> Listener -> View Result Tree
Aggregate Report
It is almost the same as Summary Report except Aggregate Report gives a few more parameters like, “Median”, “90% Line”, “95% Line” and “99% Line”.
To add: Right Click on Thread Group > Add > Listener > Aggregate Report
Step 4 – Save the Test Plan
To Save: Click File Select -> Save Test Plan as ->Give the name of the Test Plan. It will be saved in .jmx format.
The below image shows that the test is saved in Documents with the name POST_Load.jmx.
Report Generation after load test
Step 5 – Run the Test Plan from Command Line
Open the command prompt and go into JMeter’s bin folder.
cd C:\Users\Vibha\Documents\apache-jmeter-5.6\apache-jmeter-5.6\bin
Below is the detail about the commands used in the execution.
-n: This specifies JMeter is to run in cli mode
-t: [name of JMX file that contains the Test Plan]
-l: [name of JTL file to log sample results to]
–e: generate report dashboard after load test
-o: output folder where to generate the report dashboard after the load test. The folder must not exist or be empty
The test execution is displayed in the command line as shown below:
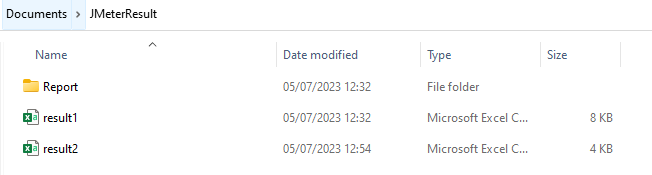
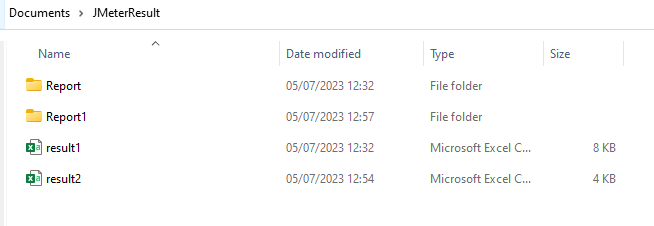
The result1.csv is saved as mentioned in the above command in the JMeterResult folder present in Documents:
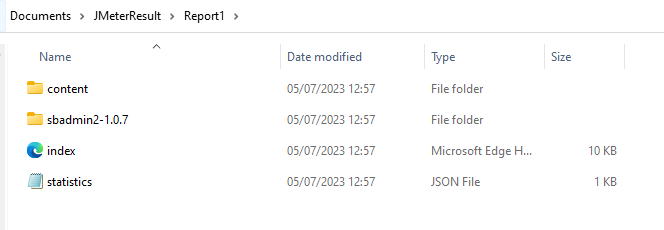
Go to the Report Folder. You can find the generated HTML files in the given report path.
This report provides the following metrics:
In the Dashboard of the report;
APDEX (Application Performance Index) table that computes for every transaction the APDEX based on configurable values for tolerated and satisfied thresholds
A request summary graph showing the Success and failed requests
A Statistics table providing in one table a summary of all metrics per transaction including 3 configurable percentiles:
An error table providing a summary of all errors and their proportion in the total requests
A Top 5 Errors by Sampler table providing for every Sampler (excluding Transaction Controller by default) the top 5 Errors:
You can see that there are a lot of other types of reports too. You should explore these reports.
Generation from an existing sample CSV log file
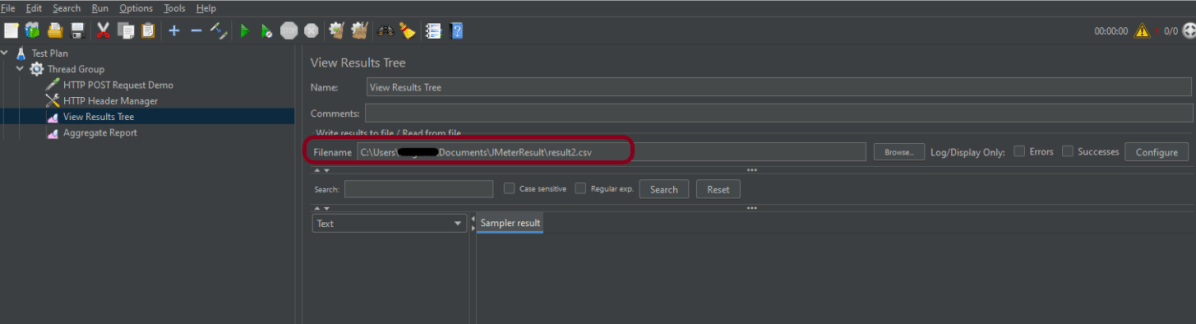
Imagine, we have run the tests from JMeter GUI. Mention the path where we want to save the result file in the Filename option of one of the listeners.
Run the tests, and we can see that the result is generated.
In this tutorial, we will explain how to run tests in JMeter in non-GUI mode (Command Line mode).
Why execute tests in non-GUI mode?
The JMeterGUI’s inability to handle huge loads and excessive resource consumption risks overloading the server, which would give you inaccurate test results information. Additionally, the less load you can generate throughout your tests, the more resource-intensive the server is.
Create a Test Plan in JMeter by following the below-mentioned steps
Step 1 – Add Thread Group
Select Test Plan on the tree
Add Thread Group To add Thread Group: Right-click on the “Test Plan” and add a new thread group: Add -> Threads (Users) -> Thread Group
In the Thread Group control panel, enter Thread Properties as follows: We will take an example of row no 5
Number of Threads: 5 – Number of users connects to the target website Loop Count: 5 – Number of times to execute testing Ramp-Up Period: 5 – It tells JMeter how long to delay before starting the next user. For example, if we have 5 users and a 5 -second Ramp-Up period, then the delay between starting users would be 1 second (5 seconds /5 users).
Step 2 – Adding JMeter elements
The JMeter element used here is HTTP Request Sampler. In HTTP Request Control Panel, the Path field indicates which URL request you want to send
2.1 Add HTTP Request Sampler To add: Right-click on Thread Group and select: Add -> Sampler -> HTTP Request
The below-mentioned are the values used in HTTP Request to perform the test
Name – HTTP POST Request Demo
Server Name or IP – reqres.in
Port – Blank
Method – POST
Path – /api/users
2.2 Add HTTP Head Manager
The Header Manager lets you add or override HTTP request headers like can add Accept-Encoding, Accept, Cache-Control
To add: Right-click on Thread Group and select: Add -> Config Element -> HTTP Read Manager
The below-mentioned are the values used in Http Request to perform the test Content-type = application/json accept – application/json
Step 3 – Adding Listeners to Test Plan
Listeners – They show the results of the test execution. They can show results in a different format such as a tree, table, graph, or log file We are adding the View Result Tree listener
View Result Tree – View Result Tree shows the results of the user request in basic HTML format To add: Right-click on Test Plan, Add -> Listener -> View Result Tree
Aggregate Report
It is almost the same as Summary Report except Aggregate Report gives a few more parameters like, “Median”, “90% Line”, “95% Line” and “99% Line”.
To add: Right Click on Thread Group > Add > Listener > Aggregate Report
Step 4 – Save the Test Plan
To Save: Click File Select -> Save Test Plan as ->Give the name of the Test Plan. It will be saved in .jmx format.
The below image shows that the test is saved in Documents with the name POST_Load.jmx.
Step 5 – Run the Test Plan from Command Line
Open the command prompt and go into JMeter’s bin folder.
cd C:\Users\Vibha\Documents\apache-jmeter-5.6\apache-jmeter-5.6\bin
RequestLibrary is a Robot Framework library aimed to provide HTTP API testing functionalities by wrapping the well-known Python Requests Library.
Implementation Steps:
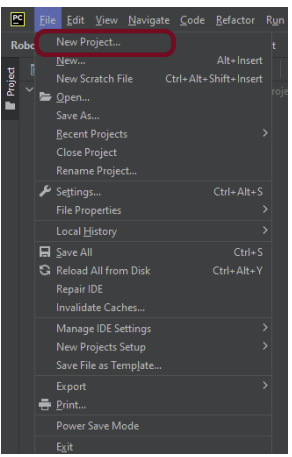
Step 1 – Create a new project
Step 1.1 – Open PyCharm and create a new project. Go to File and select New Project from the main menu.
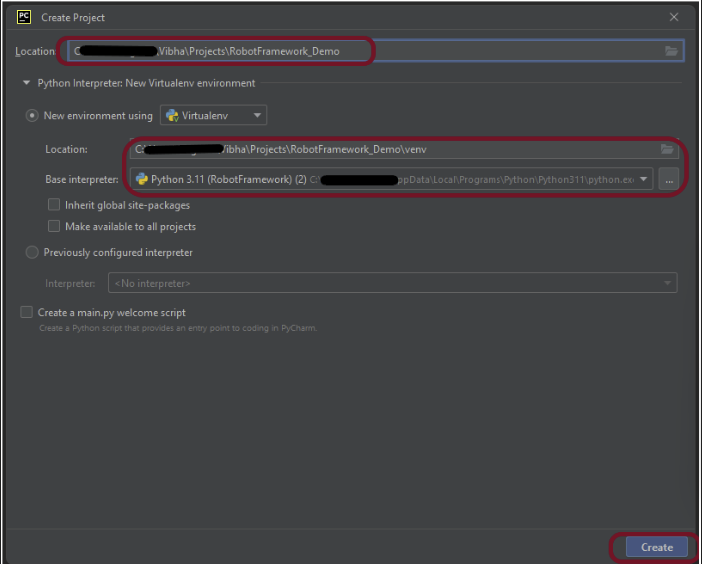
Step 1.2 – Choose the project location. Click the “Browse” button next to the Location field and specify the directory for your project.
Deselect the Create a main.py welcome script checkbox because you will create a new Python file for this tutorial.
Click on the “Create” Button.
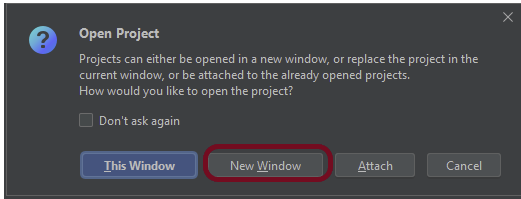
Step 1.3 – A new dialog appears asking to open the project using any one of the given options. I have selected New Window as I like to have separate windows for each project.
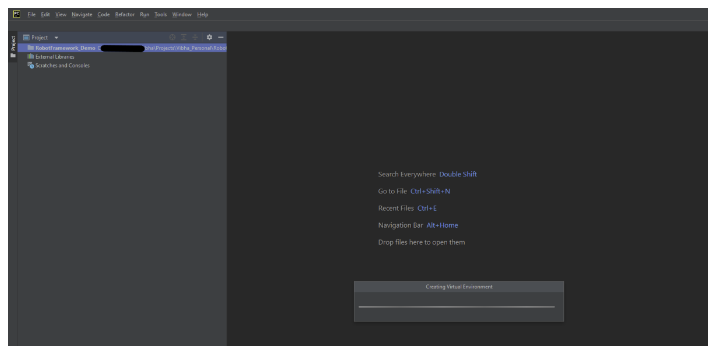
Below is the image of the new project created in PyCharms.
Step 2 – Install RequestLibrary
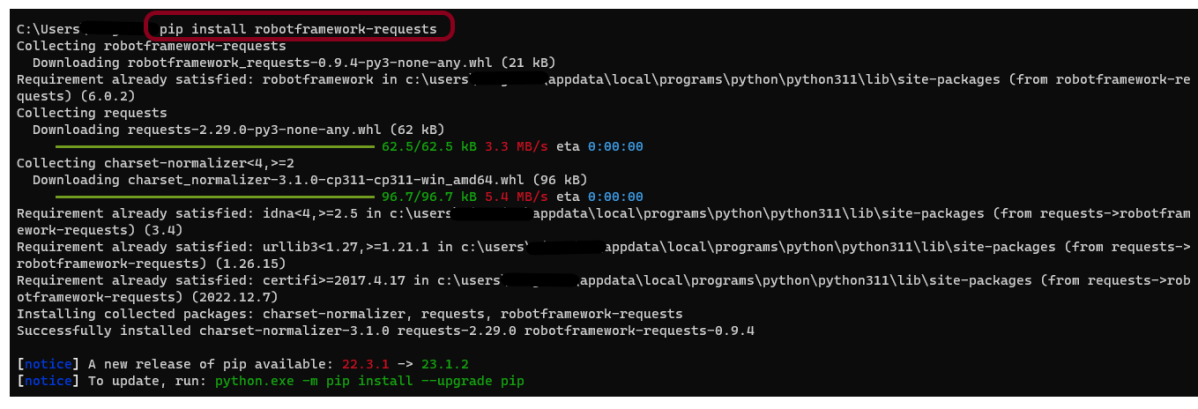
To install RequestLibrary, you need to use the below command:
pip install robotframework-requests
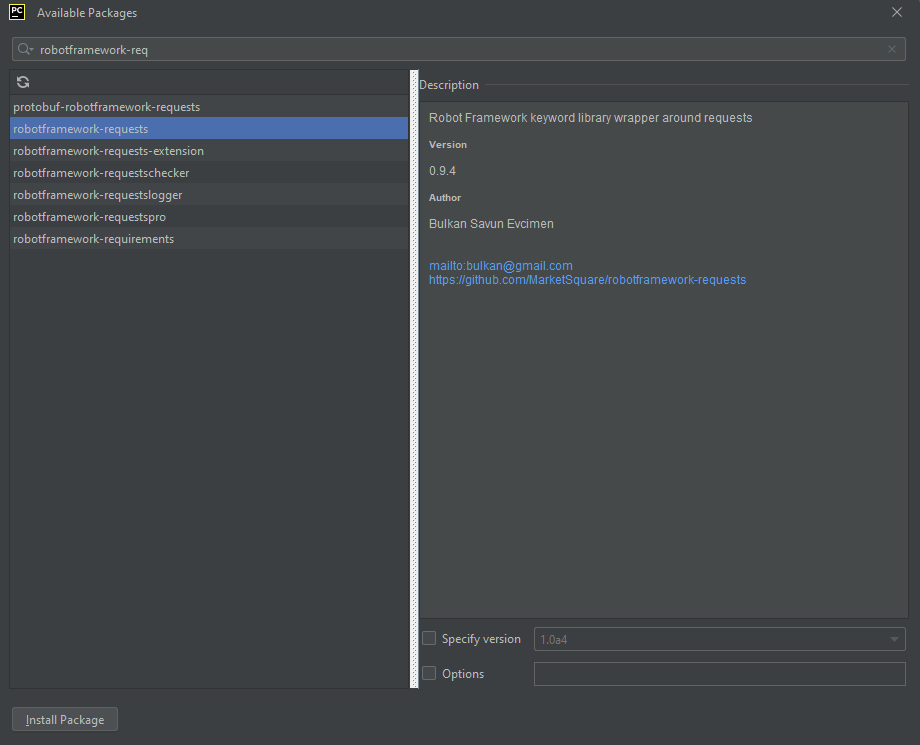
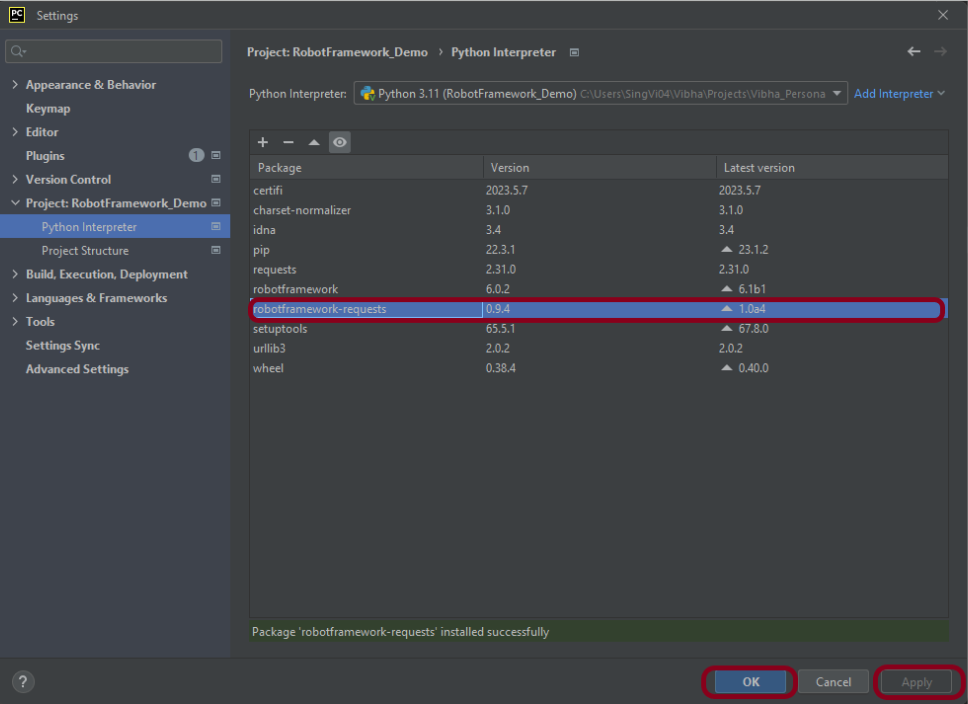
Step 3 – Add robotframework-requests package to the PyCharms
Go to File->Settings ->Project:RobotFramework_Demo ->Python Interpreter.
Click on the “+” sign and enter pabot in the search bar. It will show a list of packages. Select the “robotframework-requests” package and click on the “Install Package”.
Once the package is installed, we will see the message that the package is installed successfully.
Once the package is installed, it can be seen under the package list as shown below:
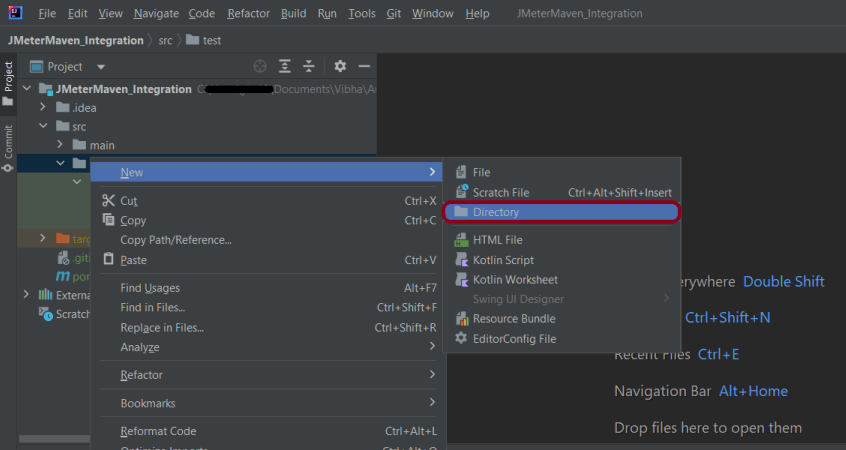
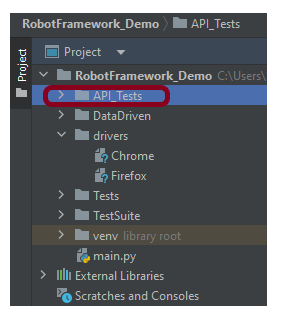
Step 4 – Create a new directory in the new project
Right-Click on the project, select New->Directory, and provide the name as API_Tests
Below is the image of the new directory.
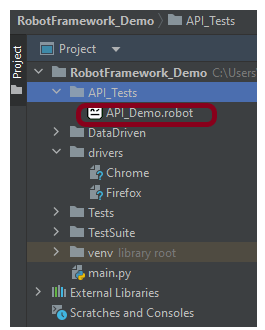
Right-click on the new directory and select New File and provide the name as API_Demo.robot as shown below:
Step 5 – Create API tests in Robot Framework
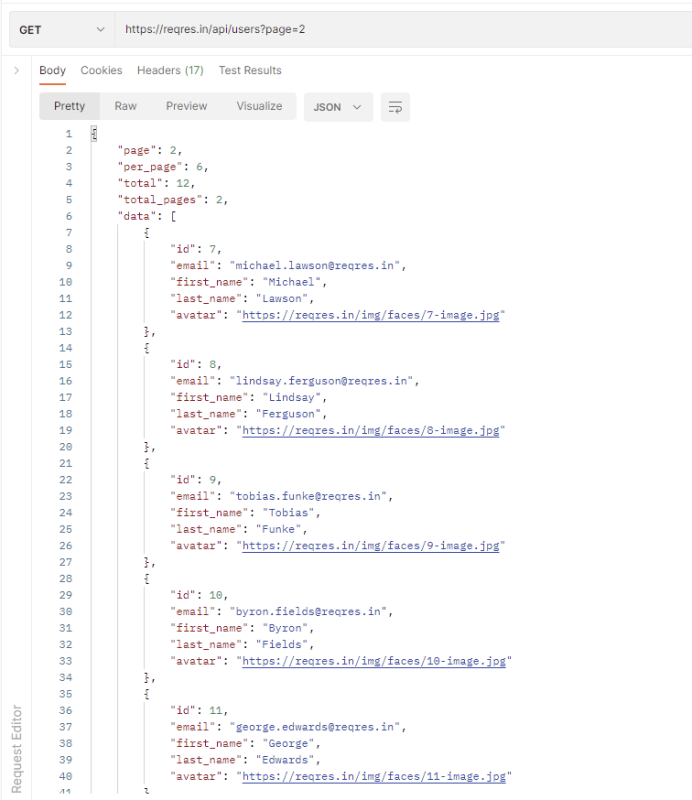
GET Request
The corresponding API Test in Robot Framework.
*** Settings ***
Library     RequestsLibrary
Library     Collections


*** Variables ***
${base_url}         https://reqres.in/api/users
${page_id}          2


*** Test Cases ***

Quick Get Request Test
    ${response}=    GET      ${base_url}     params=page=${page_id}   expected_status=200
    log    ${response.json()}
    Should Be Equal As Strings    6  ${response.json()}[per_page]
    Should Be Equal As Strings    12  ${response.json()}[total]
    Should Be Equal As Strings    7  ${response.json()}[data][0][id]
The corresponding log of this request is
${response}= We are saving the response of the GET operation in the ${response} variable.
The response is logged in the log by using the below command:
log ${response.json()}
POST Request
The corresponding API Test in Robot Framework.
*** Settings ***
Library RequestsLibrary
Library Collections
*** Variables ***
${base_url} https://reqres.in/api/users
${page_id} 2
${expectedname} test
${expectedjob} team leader
*** Test Cases ***
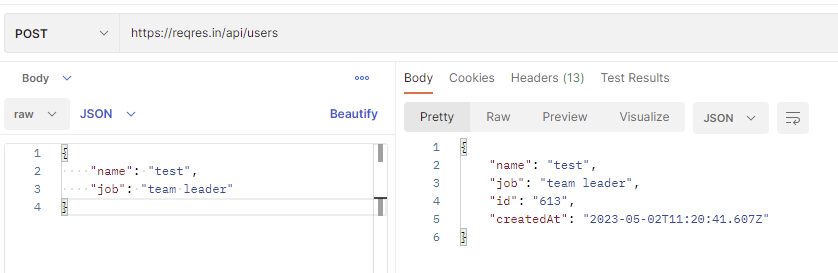
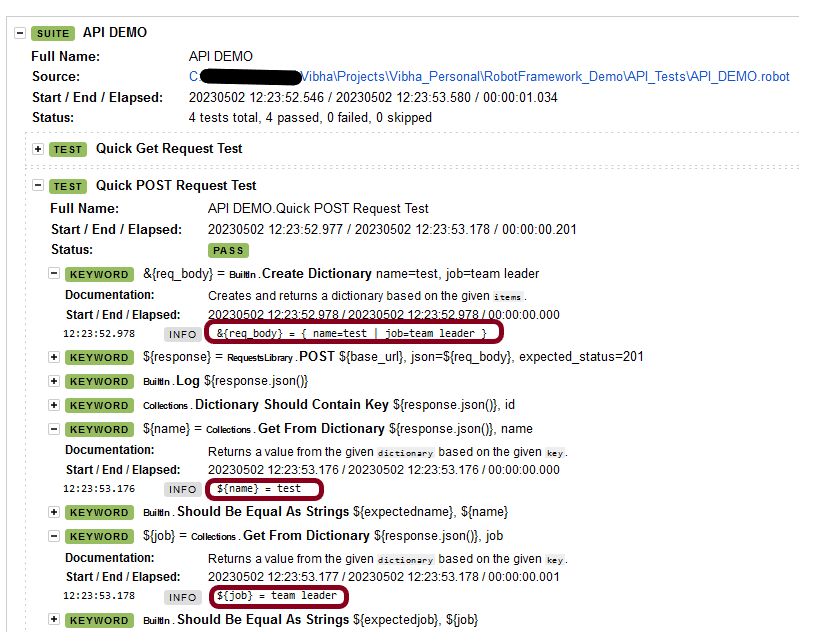
Quick POST Request Test
&{req_body}= Create Dictionary name=test job=team leader
${response}= POST ${base_url} json=${req_body} expected_status=201
log ${response.json()}
Dictionary Should Contain Key ${response.json()} id
${name}= Get From Dictionary ${response.json()} name
Should Be Equal As Strings ${expectedname} ${name}
${job}= Get From Dictionary ${response.json()} job
Should Be Equal As Strings ${expectedjob} ${job}
The corresponding log of this request is
1.Create Dictionary – This keyword is used from BuiltIn Library. It creates and returns a dictionary based on the given Items. Items are typically given using the key=value syntax.
2. Dictionary should contain key – This keyword is used from Collections library. It is used to verify if the specified key is present in the dictionary.
3. Get From Dictionary – This keyword is used from the Collections library. It is used to return a value from the given dictionary based on the given key. Here, it is used to check the values of the key name and job.
PUT Request
The corresponding API Test in Robot Framework.
*** Settings ***
Library RequestsLibrary
Library Collections
*** Variables ***
${base_url} https://reqres.in/api/users
${updated_expectedname} update_test
${updated_expectedjob} resident
*** Test Cases ***
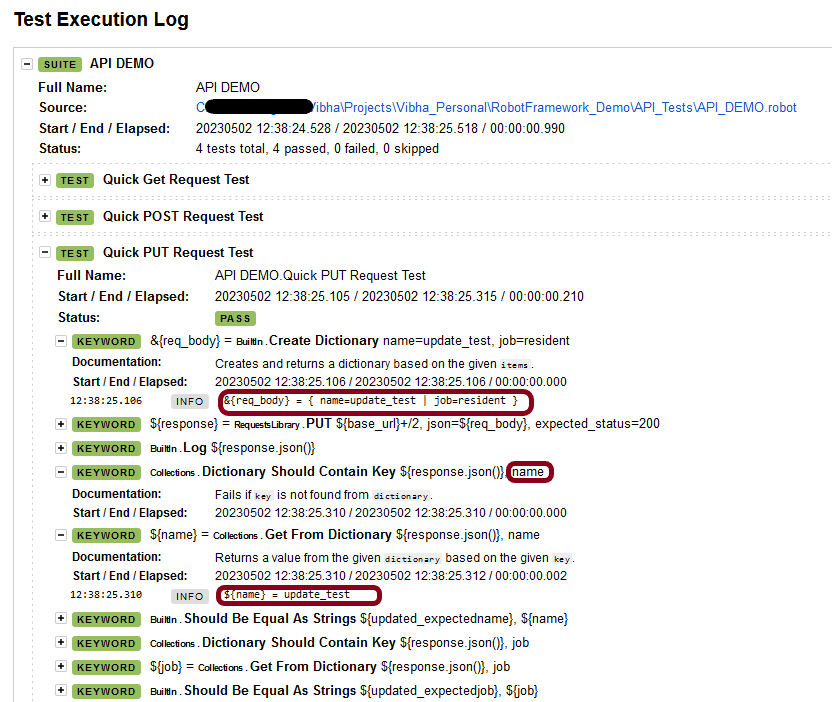
Quick PUT Request Test
&{req_body}= Create Dictionary name=update_test job=resident
${response}= PUT ${base_url}+/2 json=${req_body} expected_status=200
log ${response.json()}
Dictionary Should Contain Key ${response.json()} name
${name}= Get From Dictionary ${response.json()} name
Should Be Equal As Strings ${updated_expectedname} ${name}
Dictionary Should Contain Key ${response.json()} job
${job}= Get From Dictionary ${response.json()} job
Should Be Equal As Strings ${updated_expectedjob} ${job}
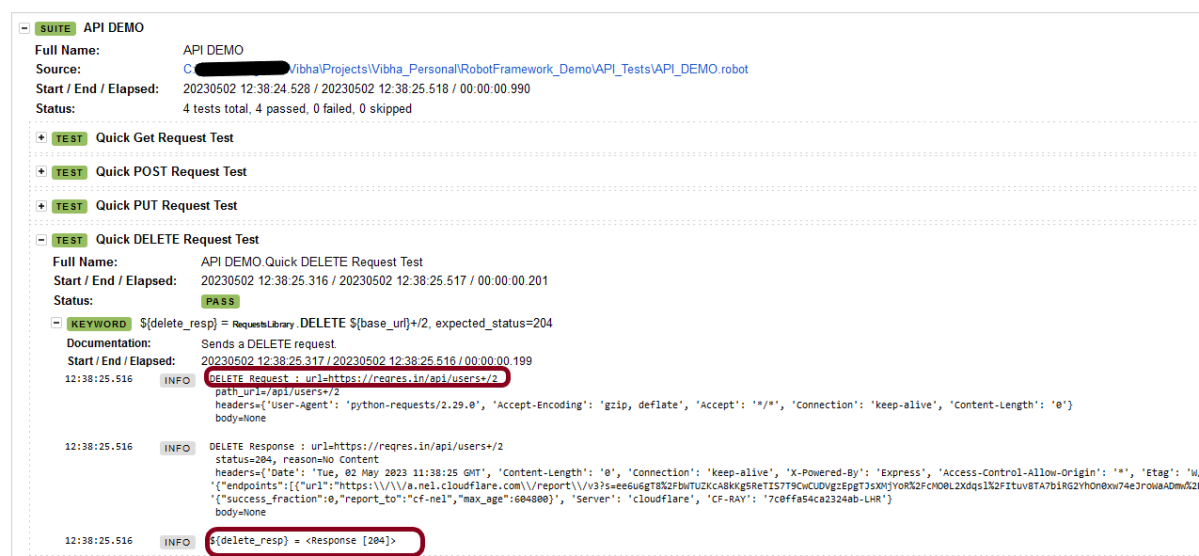
We need the below command to run the Robot Framework script.
robot API_DEMO.robot
The output of the above program is
Step 7 – View Report and Log
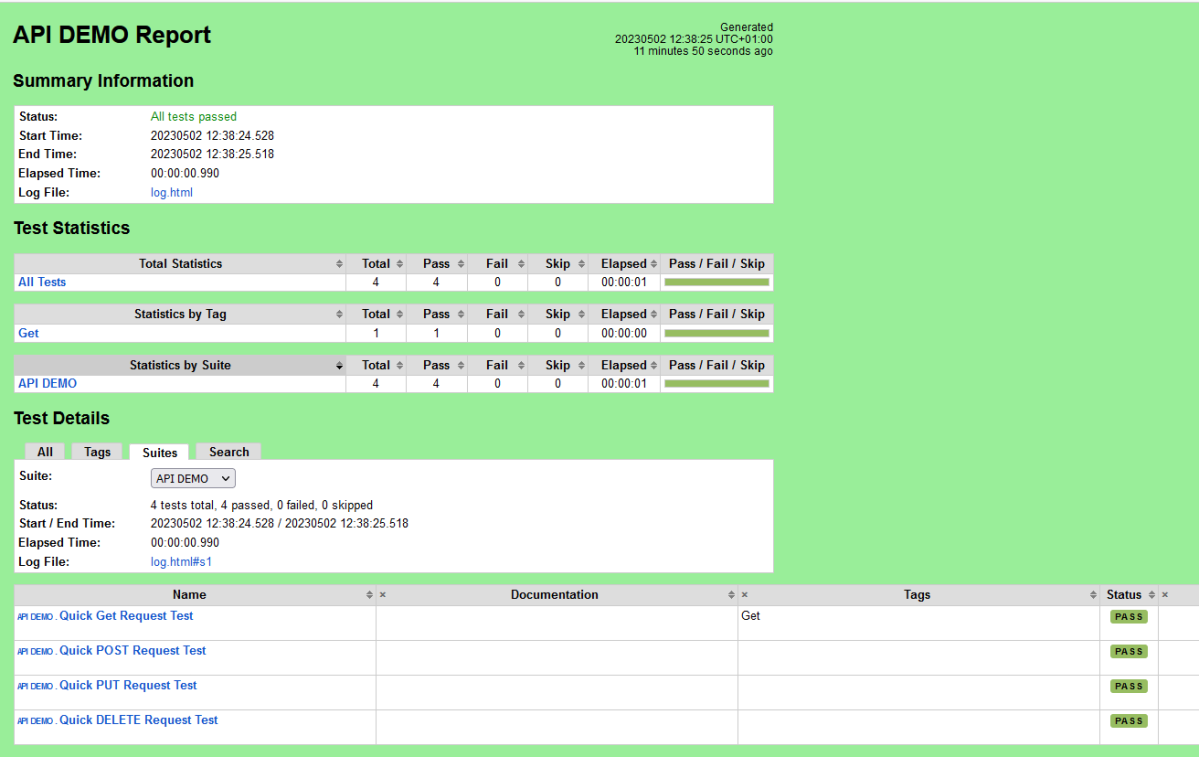
We have the test case passed. The Robot Framework generates log.html, output.xml, and report.html by default.
Let us now see the report and log details.
Report
Right-click on report.html. Select Open In->Browser->Chrome(any browser of your wish).
The Report generated by the framework is shown below:
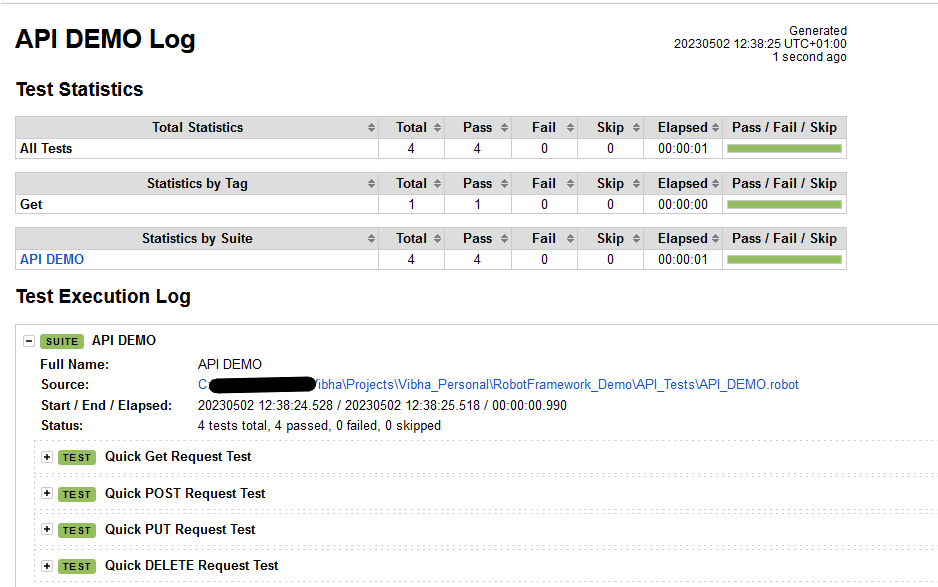
Log
Robot Framework has multiple log levels that control what is shown in the automatically generated log file. The default Robot Framework log level is INFO.
Right-click on log.html. Select Open In->Browser->Chrome(any browser of your wish).
That’s it! Congratulations on making it through this tutorial and hope you found it useful! Happy Learning!!
This dependency will also transitively add the following libraries to the classpath:
jackson-annotations
jackson-core
In the below example, let us assume that we need to create a new Employee (POST Request). To start with, we need to create a POJO class of the JSON payload (EmployeeDetails). This POJO class should contain the data members corresponding to the JSON nodes and their corresponding getter and setter methods.
public class EmployeeDetails {

	// private variables or data members of pojo class
	private String name;
	private double salary;
	private int age;

    // Getter and Setters
	public String getName() {
		return name;
	}

	public void setName(String name) {
		this.name = name;
	}

	public double getSalary() {
		return salary;
	}

	public void setSalary(double salary) {
		this.salary = salary;
	}

	public int getAge() {
		return age;
	}

	public void setAge(int age) {
		this.age = age;
	}

}
Now that we have our POJO class, we can start writing some REST Assured Serialization tests!
Let’s start with REST Assured Serialization with JSON. I want to send a POST request to my EmployeeDetails API that will add a new Employee to the database. I will send a POJO of the employee in the request body. This is what the code looks like in the test class:
import com.fasterxml.jackson.core.JsonProcessingException;
import com.fasterxml.jackson.databind.ObjectMapper;
import io.restassured.http.ContentType;
import org.junit.Test;
import static io.restassured.RestAssured.given;
import static org.hamcrest.Matchers.equalTo;
public class EmployeeTests {
@Test
public void createEmployee() {
// Create an object of POJO class
EmployeeDetails emp = new EmployeeDetails();
emp.setName("Vibha");
emp.setSalary(75000);
emp.setAge(30);
// Converting a Java class object to a JSON payload as string
ObjectMapper mapper = new ObjectMapper();
String employeePrettyJson = null;
try {
employeePrettyJson = mapper.writerWithDefaultPrettyPrinter().writeValueAsString(emp);
} catch (JsonProcessingException e) {
e.printStackTrace();
}
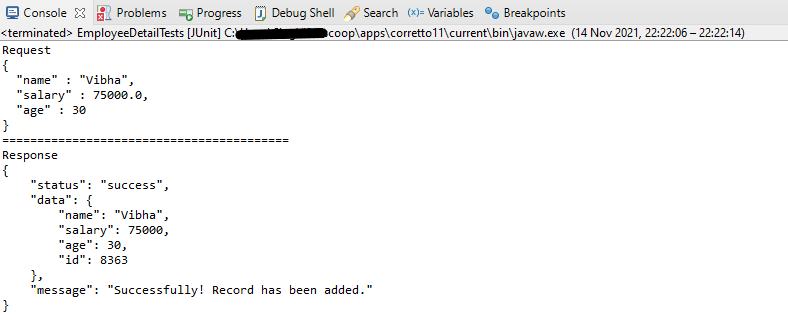
System.out.println("Request");
System.out.println(employeePrettyJson);
System.out.println("=========================================");
System.out.println("Response");
// GIVEN
given().baseUri("https://dummy.restapiexample.com/api").contentType(ContentType.JSON).body(emp)
// WHEN
.when().post("/v1/create")
// THEN
.then().assertThat().statusCode(200).body("data.name", equalTo("Vibha"))
.body("message", equalTo("Successfully! Record has been added.")).log().body();
}
}
The output of the above program is
If you want to see the structure of the Request, then add the below in the test code.
ObjectMapper mapper = new ObjectMapper();
String employeePrettyJson = mapper.writerWithDefaultPrettyPrinter().writeValueAsString(emp);
System.out.println(employeePrettyJson);
REST Assured Serialization with Jackson handled all the serialization work for us. Great! See, this has become so simple with the help of Jackson API.
We are done! Congratulations on making it through this tutorial and hope you found it useful! Happy Learning!!


