In the previous tutorial, I have explained the Integration of the Allure Report with Selenium and TestNG. In this tutorial, I will explain how to Integrate Allure Report with Selenium and JUnit4.
What is Allure Framework?
Allure is an open-source framework designed to create interactive and comprehensive test report by Yandex QA Team.
Below example covers the implementation of Allure Reports in Selenium using JUnit4, Java and Maven.
Pre-Requisite
- Java 11 installed
- Maven installed
- Eclipse or IntelliJ installed
This framework consists of:
- Selenium – 3.141.59
- Java 11
- JUnit – 4.13.2
- Maven – 3.8.1
- Allure Report – 2.14.0
- Allure JUnit4 – 2.14.0
Implementation Steps
- Update Properties section in Maven pom.xml
- Add Selenium, JUnit4 and Allure-JUnit4 dependencies in POM.xml
- Update Build Section of pom.xml in Allure Report Project.
- Create Pages and Test Code for the pages
- Run the Test and Generate Allure Report
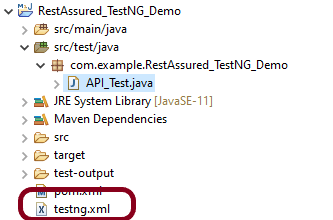
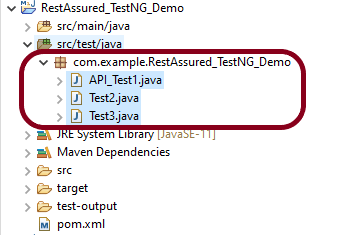
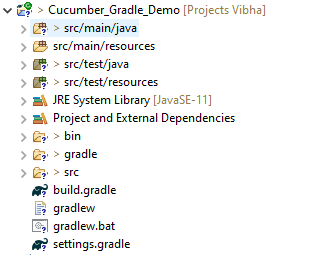
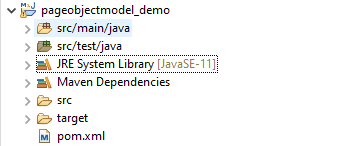
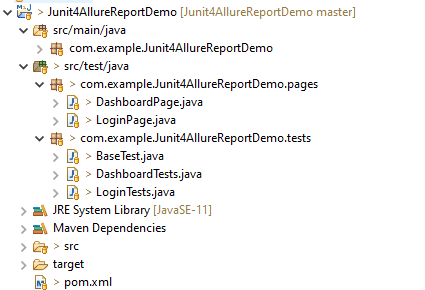
Structure of Project
Step 1 – Update Properties section in Maven pom.xml
 <properties>
    <project.build.sourceEncoding>UTF-8</project.build.sourceEncoding>
    <selenium.version>3.141.59</selenium.version>
    <junit.version>4.13.2</junit.version>
    <allure.junit4.version>2.14.0</allure.junit4.version>
    <maven.compiler.plugin.version>3.5.1</maven.compiler.plugin.version>
    <maven.compiler.source>11</maven.compiler.source>
    <maven.compiler.target>11</maven.compiler.target>
    <aspectj.version>1.9.6</aspectj.version>
    <maven-surefire-plugin-version>3.0.0-M5</maven-surefire-plugin-version>
  </properties>
Step 2 – Add Selenium, JUnit4 and Allure-JUnit4 dependencies in POM.xml
<dependencies>
   <dependency>
      <groupId>org.seleniumhq.selenium</groupId>
      <artifactId>selenium-java</artifactId>
      <version>${selenium.version}</version>
    </dependency>

    <dependency>
      <groupId>junit</groupId>
      <artifactId>junit</artifactId>
      <version>${junit.version}</version>
      <scope>test</scope>
    </dependency>

     <dependency>
        <groupId>io.qameta.allure</groupId>
        <artifactId>allure-junit4</artifactId>
        <version>${allure.junit4.version}</version>
        <scope>test</scope>
    </dependency>
  </dependencies>
Step 3 – Update Build Section of pom.xml in Allure Report Project
<build>

       <plugins>
   <!-- Compiler plug-in -->

           <plugin>
                <groupId>org.apache.maven.plugins</groupId>
                <artifactId>maven-compiler-plugin</artifactId>
                <version>${maven.compiler.plugin.version}</version>
                <configuration>
                    <source>${maven.compiler.source}</source> <!--For JAVA 8 use 1.8-->
                    <target>${maven.compiler.target}</target> <!--For JAVA 8 use 1.8-->
                </configuration>
            </plugin>

     <!-- Added Surefire Plugin configuration to execute tests -->
          <plugin>
            <groupId>org.apache.maven.plugins</groupId>
            <artifactId>maven-surefire-plugin</artifactId>
            <version>${maven-surefire-plugin-version}</version>
            <configuration>
                <testFailureIgnore>false</testFailureIgnore>
                <argLine>
                    -javaagent:"${settings.localRepository}/org/aspectj/aspectjweaver/${aspectj.version}/aspectjweaver-${aspectj.version}.jar"
                </argLine>
                <properties>
                    <property>
                        <name>listener</name>
                        <value>io.qameta.allure.junit4.AllureJunit4</value>
                    </property>
                </properties>
            </configuration>
            <dependencies>
                <dependency>
                    <groupId>org.aspectj</groupId>
                    <artifactId>aspectjweaver</artifactId>
                    <version>${aspectj.version}</version>
                </dependency>
            </dependencies>
        </plugin>
      </plugins>
  </build>
Step 4 – Create Pages and Test Code for the pages
Below is the sample project which uses Selenium and JUnit4 which is used to generate an Allure Report.
We have 2 pages. Below is the code for Login Page which contains all the web elements and methods related to that web elements.
public class LoginPage {

	WebDriver driver;

	By userName = By.name("txtUsername");

	By password = By.name("txtPassword");

	By titleText = By.id("logInPanelHeading");

	By login = By.id("btnLogin");

	By errorMessage = By.id("spanMessage");

	public LoginPage(WebDriver driver) {
		this.driver = driver;
	}

	// Set user name in textbox
	public void setUserName(String strUserName) {
		driver.findElement(userName).sendKeys(strUserName);
	}

	// Set password in password textbox
	public void setPassword(String strPassword) {
		driver.findElement(password).sendKeys(strPassword);
	}

	// Click on login button
	public void clickLogin() {
		driver.findElement(login).click();
	}

	@Step("Verify title of Login Page")
	public void verifyPageTitle() {
		String loginPageTitle = driver.findElement(titleText).getText();
		Assert.assertTrue(loginPageTitle.contains("LOGIN Panel"));
	}

	/* Failed Test */
	@Step("Verify error message when invalid credentail is provided")
	public void verifyErrorMessage() {
		String invalidCredentialErrorMessage = driver.findElement(errorMessage).getText();
		Assert.assertTrue(invalidCredentialErrorMessage.contains("Incorrect Credentials"));
	}

	@Step("Enter username and password")
	public void login(String strUserName, String strPasword) {

		// Fill user name
		this.setUserName(strUserName);

		// Fill password
		this.setPassword(strPasword);

		// Click Login button
		this.clickLogin();

	}
}
DashboardPage.java
public class DashboardPage {

	WebDriver driver;

	By dashboardPageTitle = By.id("welcome");

	By options = By.cssSelector(
			"#dashboard-quick-launch-panel-menu_holder > table > tbody > tr > td:nth-child(1) > div > a > span");

	public DashboardPage(WebDriver driver) {
		this.driver = driver;

	}

	@Step("Verify title of Dashboard page")
	public void verifyDashboardPageTitle() {
		String DashboardPageTitle = driver.findElement(dashboardPageTitle).getText();
		Assert.assertTrue(DashboardPageTitle.contains("Welcome"));
	}

	@Step("Verify Quick Launch Options on Dashboard page")
	public void verifyQuickLaunchOptions() {
		String QuickLaunchOptions = driver.findElement(options).getText();
		Assert.assertTrue(QuickLaunchOptions.contains("Assign Leave"));
	}

}
Test Classes related to various Pages
BaseTest.java
public class BaseTest {

	public static WebDriver driver;
	LoginPage objLogin;
	DashboardPage objDashboardPage;

	@Step("Start the application")
	@Before
	public void setup() {
		System.setProperty("webdriver.gecko.driver",
				"C:\\Users\\Vibha\\Software\\geckodriver-v0.26.0-win64\\geckodriver.exe");
		driver = new FirefoxDriver();
		driver.manage().window().maximize();
		driver.manage().timeouts().implicitlyWait(10, TimeUnit.SECONDS);
		driver.get("https://opensource-demo.orangehrmlive.com/");
	}

	@Step("Stop the application")
	@After
	public void close() {
		driver.close();
	}
}
LoginTests.java
@Epic("Web Application Regression Testing using JUnit4")
@Feature("Login Page Tests")
@Listeners(TestExecutionListener.class)
public class LoginTests extends BaseTest {
LoginPage objLogin;
DashboardPage objDashboardPage;
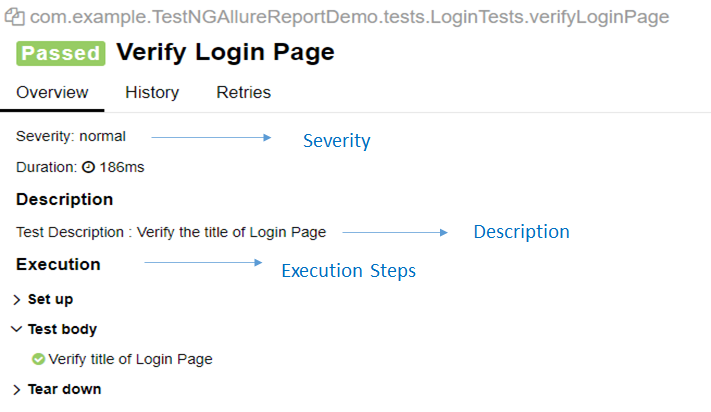
@Severity(SeverityLevel.NORMAL)
@Test(priority = 0, description = "Verify Login Page")
@Description("Test Description : Verify the title of Login Page")
@Story("Title of Login Page")
public void verifyLoginPage() {
// Create Login Page object
objLogin = new LoginPage(driver);
// Verify login page text
objLogin.verifyPageTitle();
}
@Severity(SeverityLevel.BLOCKER)
@Test(priority = 1, description = "Login with invalid username and password")
@Description("Test Description : Login Test with invalid credentials")
@Story("Unsuccessful Login to Application")
public void invalidCredentialTest() {
// Create Login Page object
objLogin = new LoginPage(driver);
objLogin.login("test", "test123");
// Verify login page text
objLogin.verifyErrorMessage();
}
}
DashboardTests.java
@Epic("Web Application Regression Testing using JUnit4")
@Feature("Dashboard Page Tests")
public class DashboardTests extends BaseTest {

	LoginPage objLogin;
	DashboardPage objDashboardPage;

	@Severity(SeverityLevel.BLOCKER)
	@Test
	@Description("Test Description : After successful login to application opens Dashboard page")
	@Story("Successful login of application opens Dashboard Page")

	public void DasboardTest() {

		objLogin = new LoginPage(driver);

		// login to application
		objLogin.login("Admin", "admin123");

		// go the dashboard page
		objDashboardPage = new DashboardPage(driver);

		// Verify dashboard page
		objDashboardPage.verifyQuickLaunchOptions();

	}

}
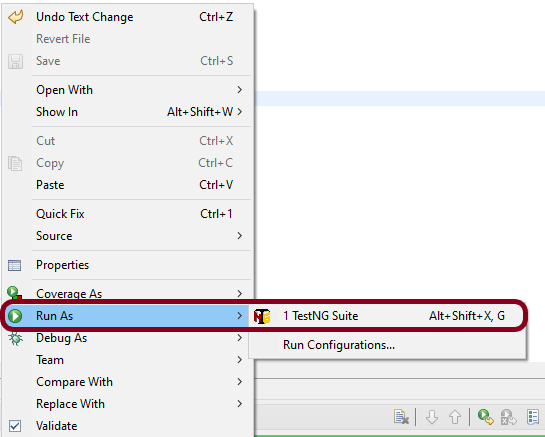
Step 5 – Run the Test and Generate Allure Report
To run the tests, use the below command
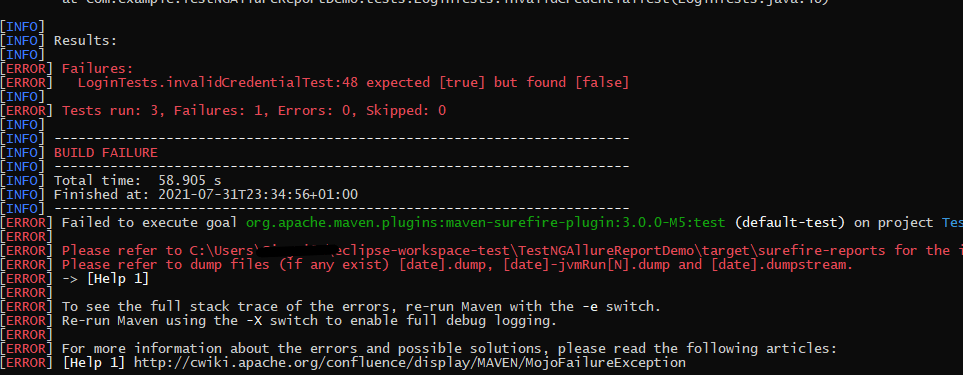
mvn clean test
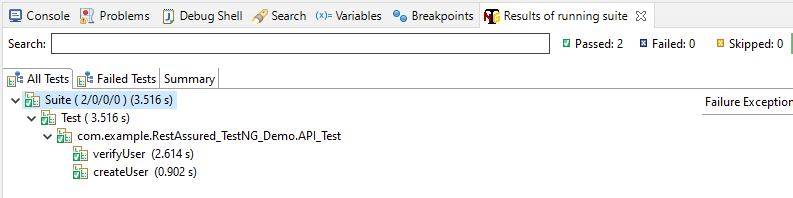
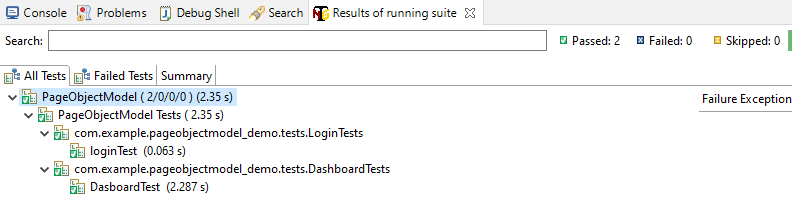
In the below image, we can see that one test is failed and two passed out of three tests.
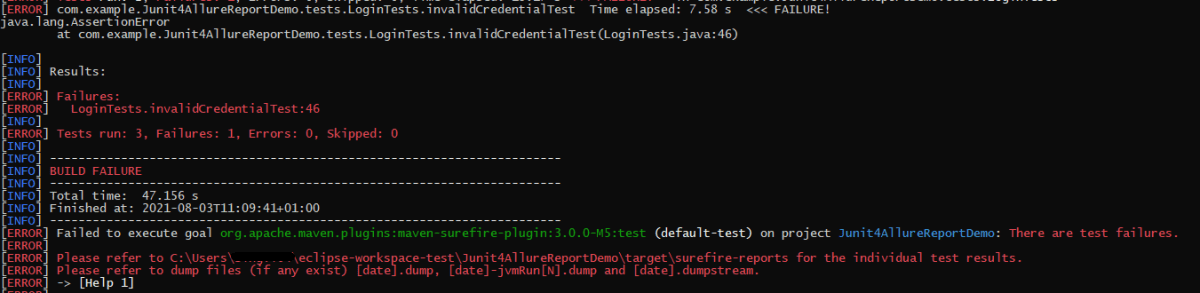
This will create allure-results folder with all the test report. These files will be use to generate Allure Report.

To create Allure Report, use the below command
allure serve

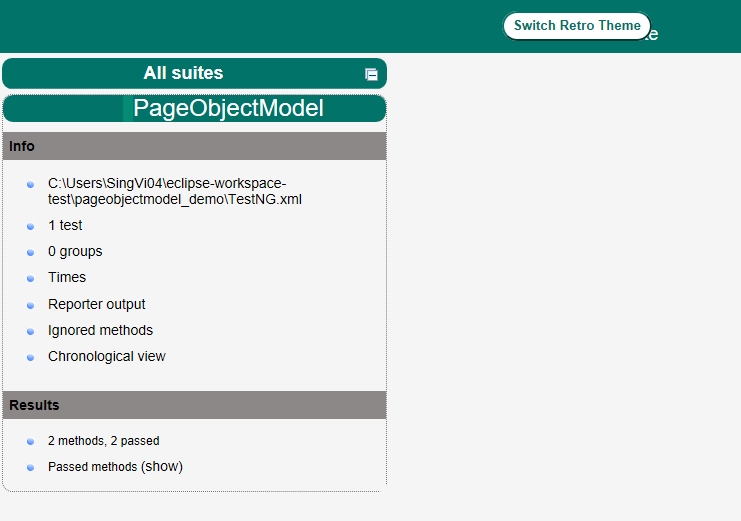
This will generate the beautiful Allure Test Report as shown below.
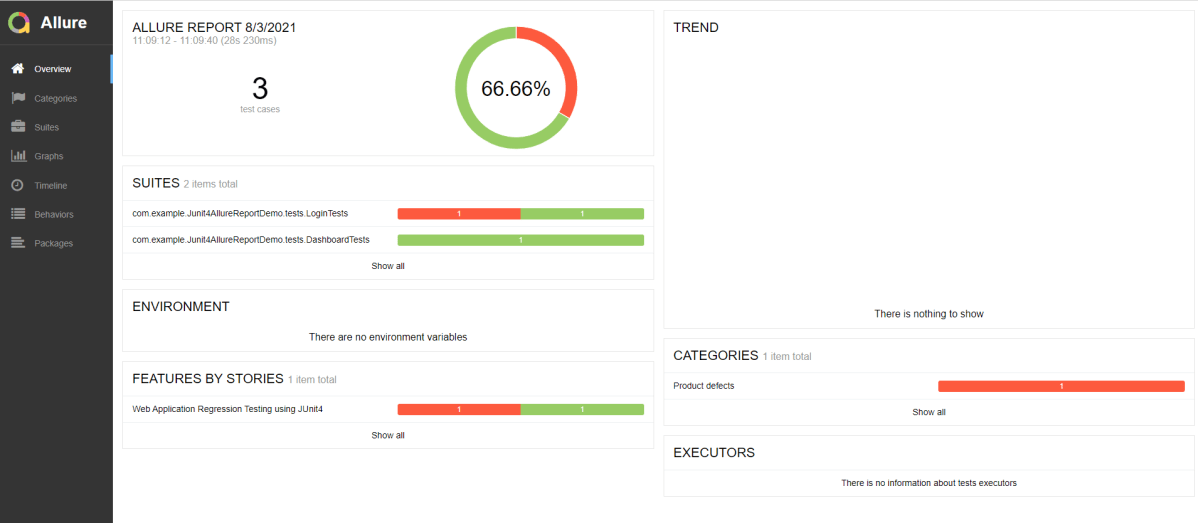
Allure Report Dashboard
Overview page hosts several default widgets representing basic characteristics of your project and test environment.
- Statistics – overall report statistics.
- Launches – if this report represents several test launches, statistics per launch will be shown here.
- Behaviors – information on results aggregated according to stories and features.
- Executors – information on test executors that were used to run the tests.
- History Trend – if tests accumulated some historical data, it’s trend will be calculated and shown on the graph.
- Environment – information on test environment.
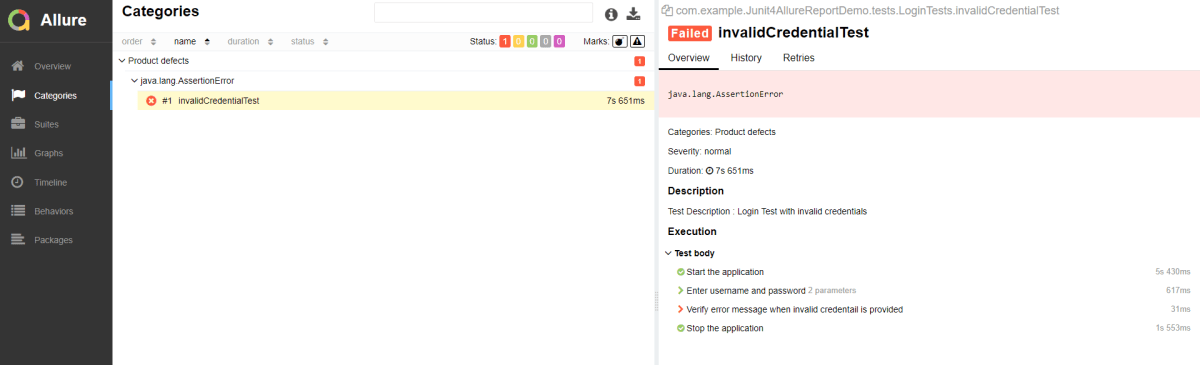
Categories in Allure Report
Categories tab gives you the way to create custom defects classification to apply for test results. There are two categories of defects – Product Defects (failed tests) and Test Defects (broken tests).
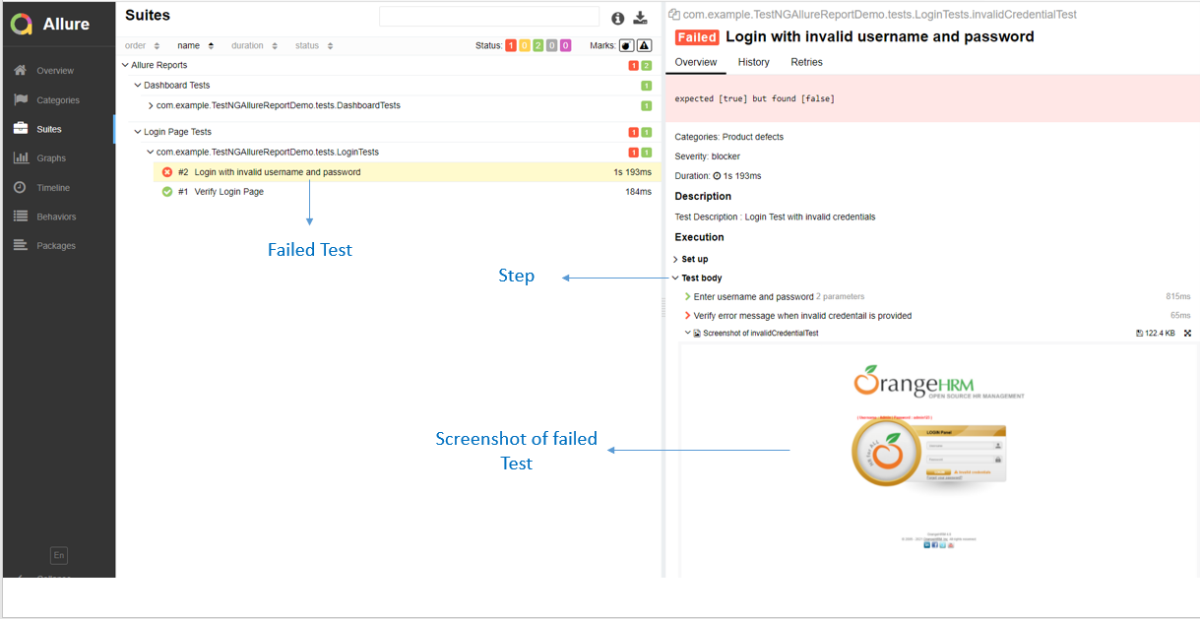
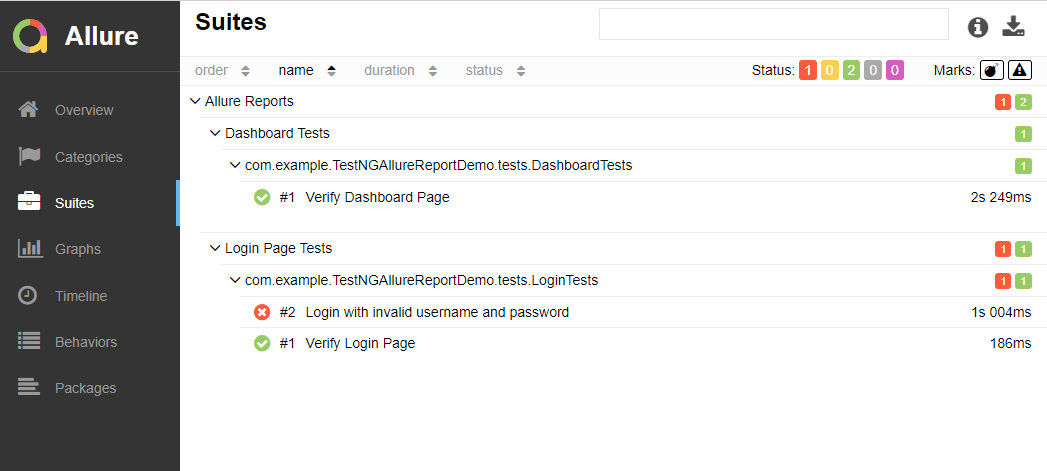
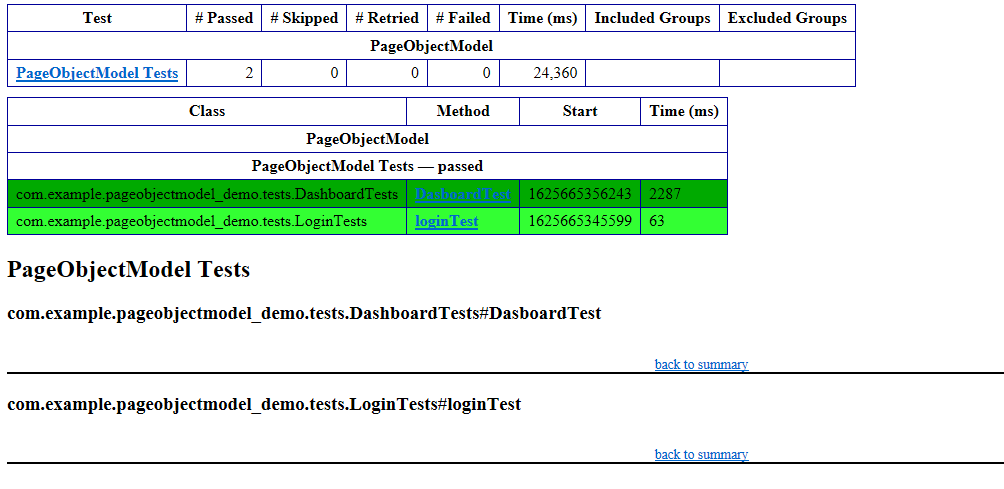
Suites in Allure Report
On the Suites tab a standard structural representation of executed tests, grouped by suites and classes can be found.

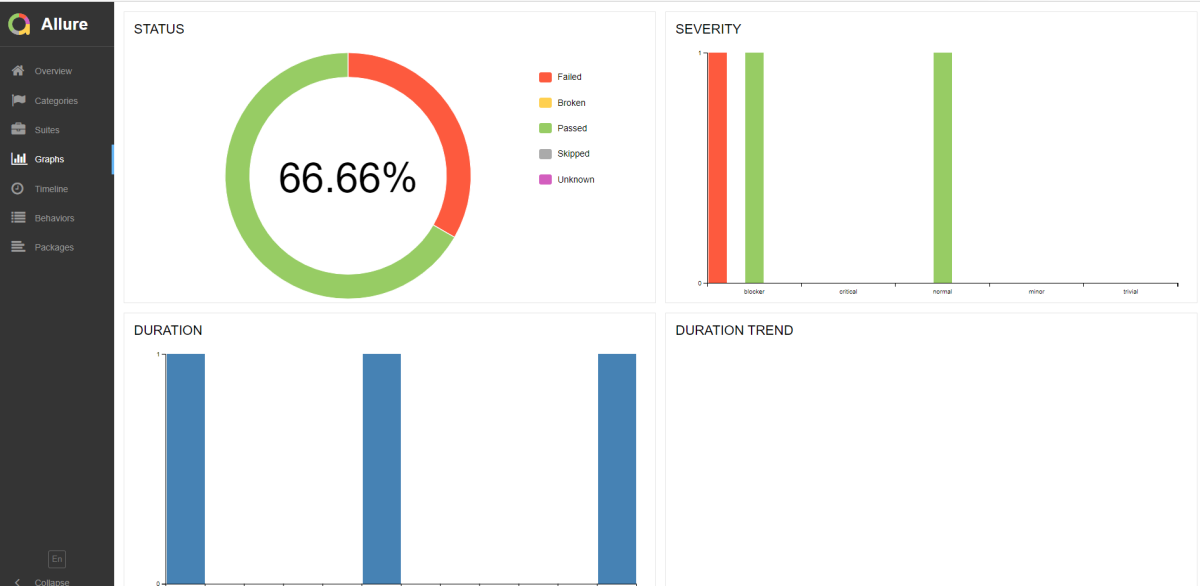
Graphs in Allure Report
Graphs allow you to see different statistics collected from the test data: statuses breakdown or severity and duration diagrams.

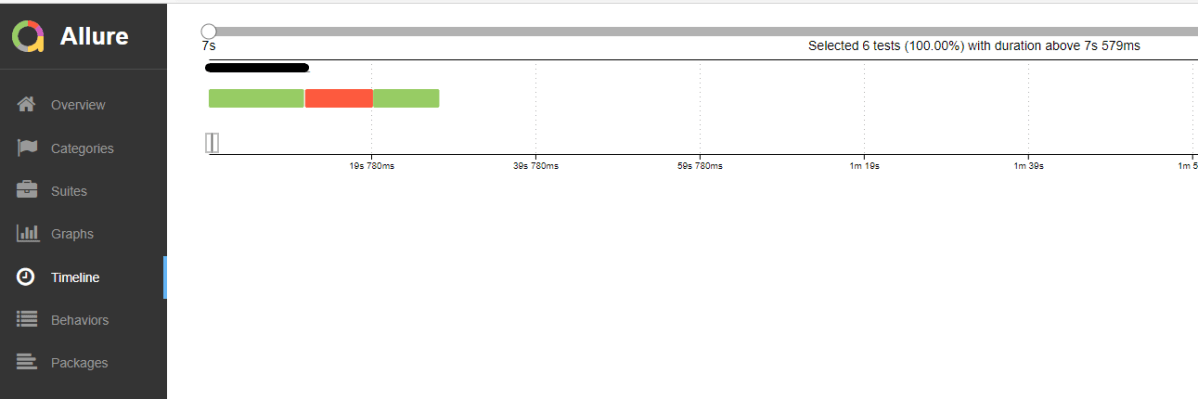
Timeline in Allure Report
Timeline tab visualizes retrospective of tests execution, allure adaptors collect precise timings of tests, and here on this tab they are arranged accordingly to their sequential or parallel timing structure.
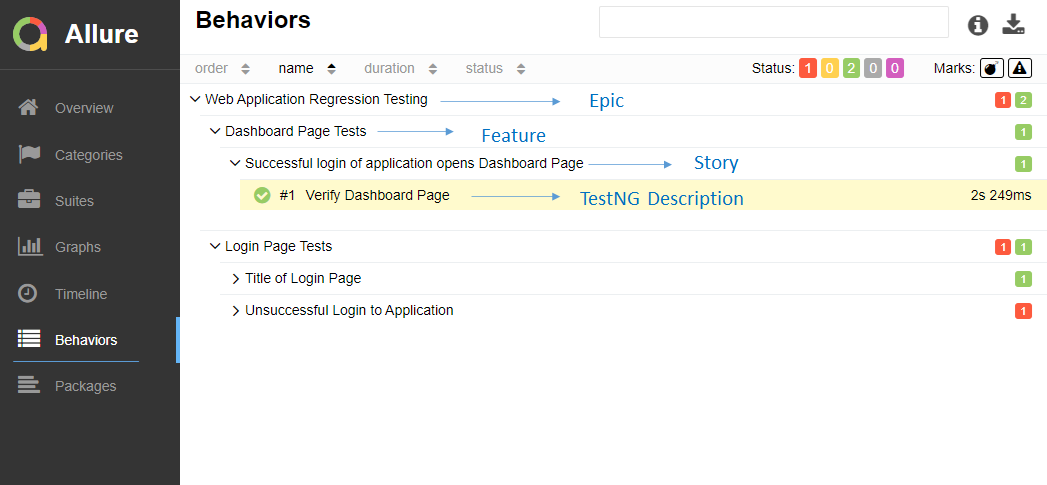
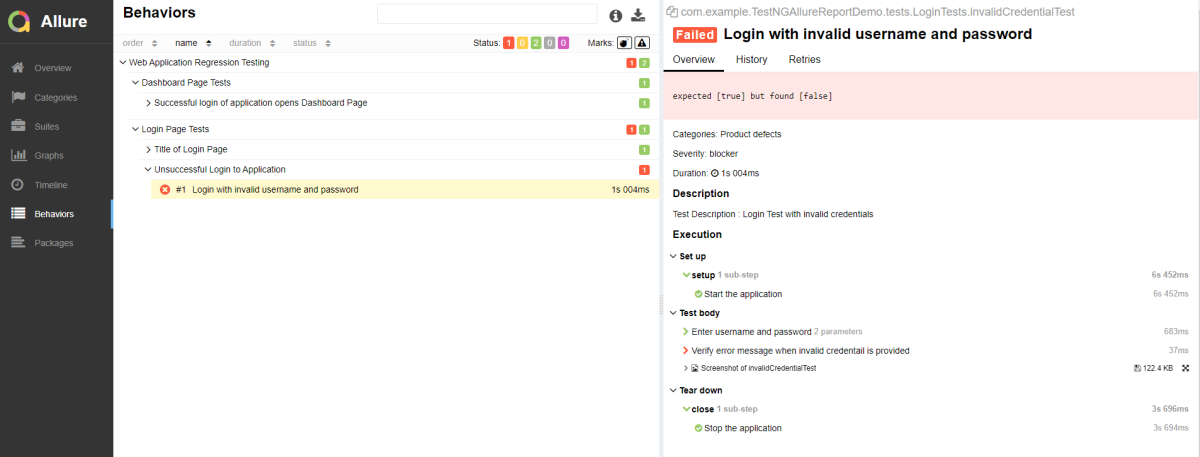
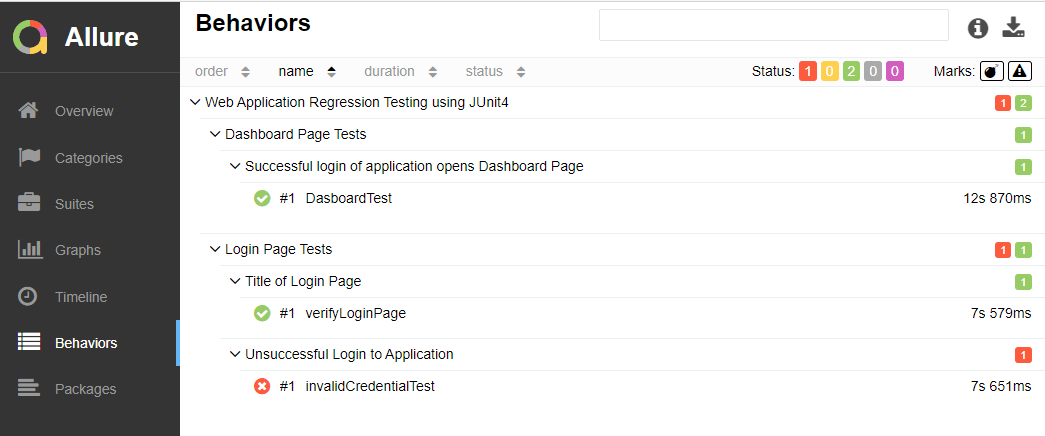
Behaviors of Allure Report
This tab groups test results according to Epic, Feature and Story tags.
Packages in Allure Report
Packages tab represents a tree-like layout of test results, grouped by different packages.