Security tests in ReadyAPI include various types of security scans. Each of them detects a specific vulnerability. With multiple security scans in one test, you guarantee your service is well-protected against possible attacks.
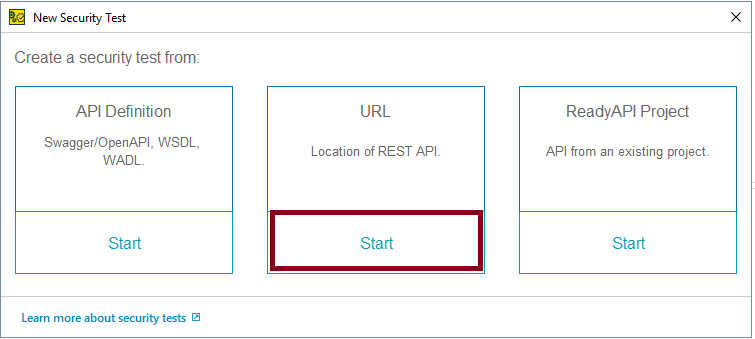
This tutorial explains the steps to create the Security tests in ReadyAPI.
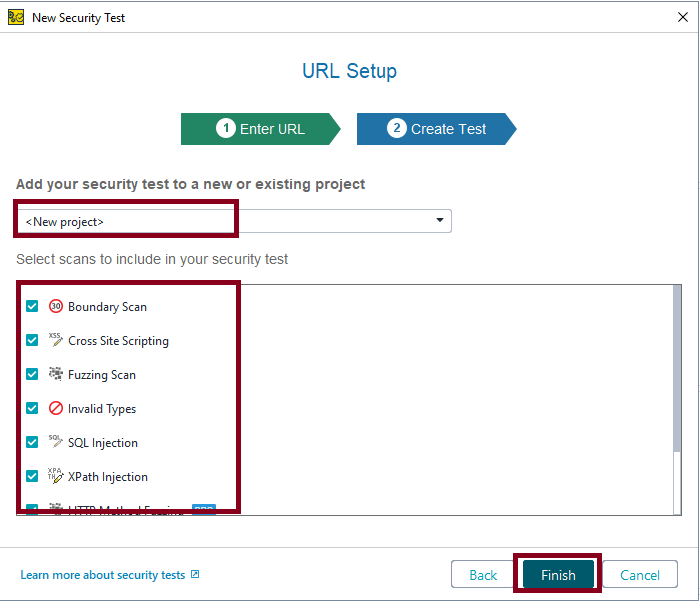
Step 4 – Select the scans you need and click the Finish button.
Another thing to keep in mind is to select whether you want to create a new project or add the test to an existing project. Here, I’m creating a new project.
There is a list of Scans, you can select either one scan or multiple scans. I have selected all the scans.
Boundary Scan
Cross Site Scripting
Fuzzing Scan
Invalid Types
SQL Injection
XPath Injection
HTTP Method Fuzzing
Sensitive Files Exposure
Weak Authentication
Run the Security Tests
Step 5 – We have created a security test. ReadyAPI will offer you to run the security test immediately or edit it before running. We do not need to configure anything, so select the Run Security Test option.
If you want to edit the test before running it, then select the Edit Security Test option.
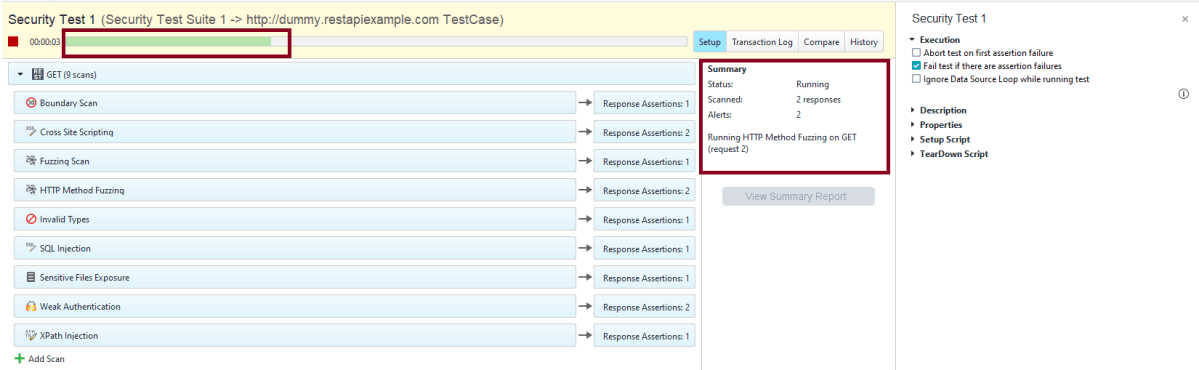
Step 6 – ReadyAPI will start sending modified requests and checking responses.
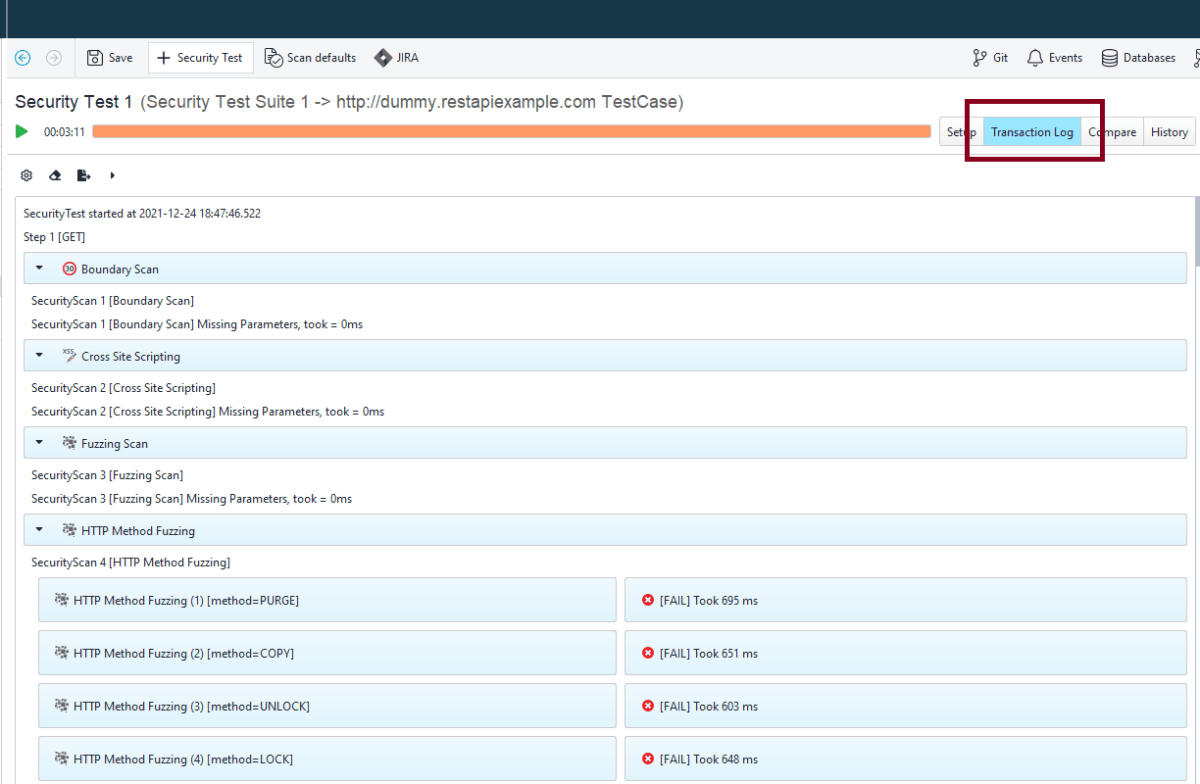
The security test window shows the progress of each test step and matching security scans:
The Summary pane contains a short overview of the currently running security test.
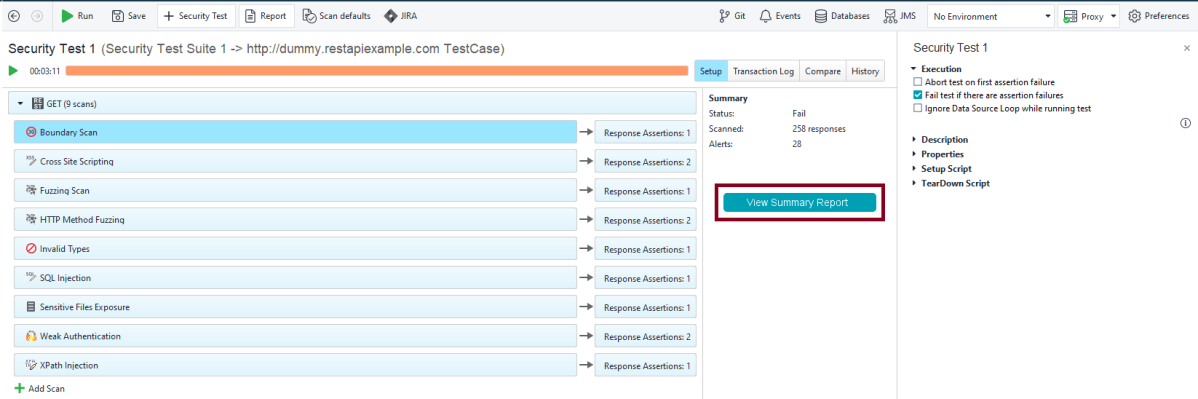
Step 7 – After the security test run finishes, click View Summary Report:
Analyse Security Test Results
Step 8 – The Transaction Log shows additional information about security scans.
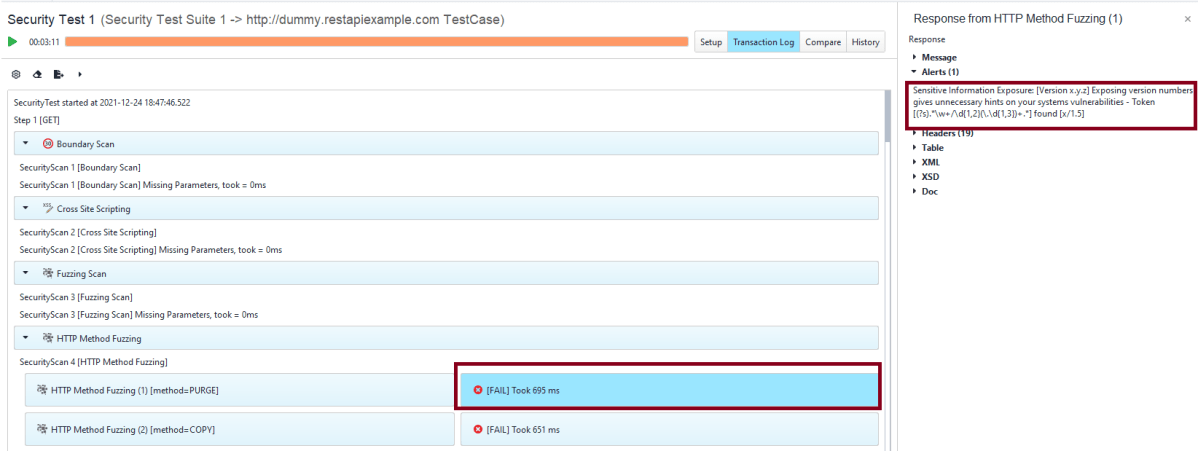
Step 9 – The details of a particular request or response are available in the inspector.
Generation of Security Test Report
Step 10 – In the dialog that appears, click View Full Report:
After that, ReadyAPI will open the report in the default PDF viewer.
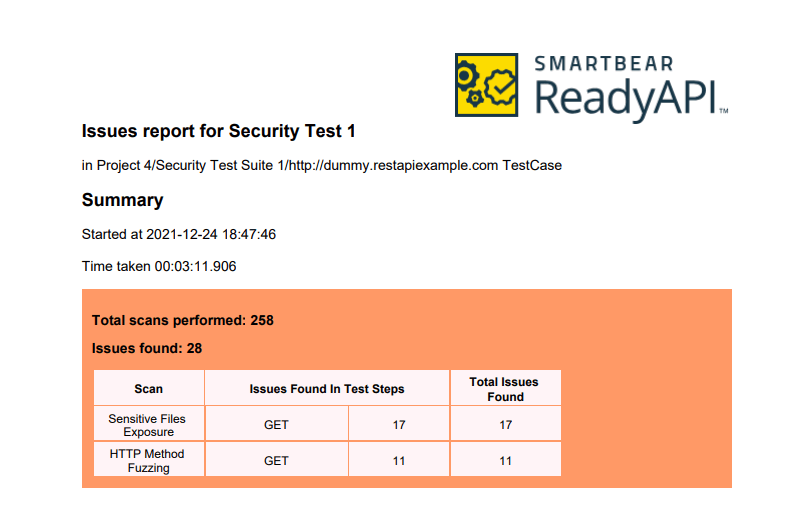
This Summary Report shows there was a total of 258 scans and 28 issues are found. Out of 28 issues, 17 issues were Sensitive Files Exposure, and 11 issues are HTTP Method Fuzzing.
Sample Test Report
Analyse Security Test Report
Step 12 – Sensitive Files Exposure
Example of HTTP Method Fuzzing
Congratulations!! We have successfully created a Security test, run it as well as generating the Test Report, and analyzed the result too. Cheers!!!
ReadyAPI is an easy-to-use no-code API Testing platform designedto streamline your testing workflows. Automate and scale your end-to-end tests across multiple API types. Run compatible load tests against your functional tests. Enable virtualization to ensure fast and reliable integrations for your development teams.
ReadyAPI allows teams to create, manage, and execute automated functional, security, and performance tests in one centralized interface – accelerating API quality for Agile and DevOps software teams. It allows importing API definitions like OpenAPI/Swagger or AsyncAPI, testing and recording live API traffic, or virtualizing web services to remove pipeline dependencies.
ReadyAPI is handled by SmartBear. ReadyAPI is not an open source tool, but a licensed tool.
In ReadyAPI, We can easily manage our APIs and project. We can easily create APIs from an openAPI, Swagger, WSDL, and WADL definition and use Discovery to record API requests and methods.
Step 2 – Before starting the installation, please check the system requirements for ReadyAPI.
Step 3 – As ReadyAPI is a licensed tool, but it also provides a trial version as well as commercial Pro License.
If you want to go for the trial version, fill in the details on this page and get Free Trial.
If you have license, then download the installer for your platform from the ReadyAPI Downloads Center.
I have a license, so will download ReadyAPI Desktop 3.20.0 (Windows Installer 64-bit).
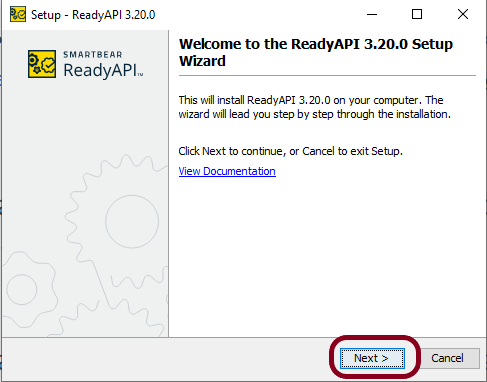
Step 4 – Once the download is completed, run the installer. The installer will unpack the files and prepare them for installation:
Step 5 – Click the Next button to proceed with the installation:
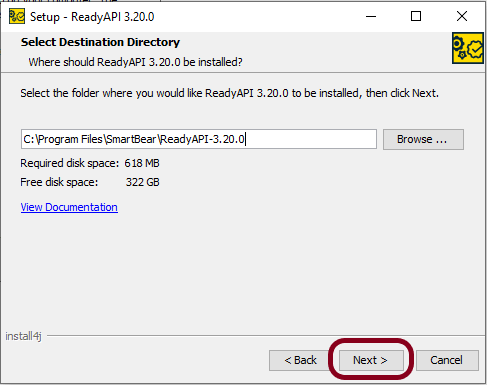
Step 6 – If you install ReadyAPI for the first time or have chosen to install it to a different directory, the wizard will ask you to specify the installation folder:
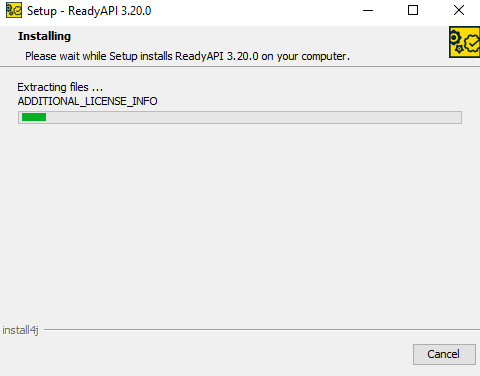
Step 7 – This image shows that installation is in progress.
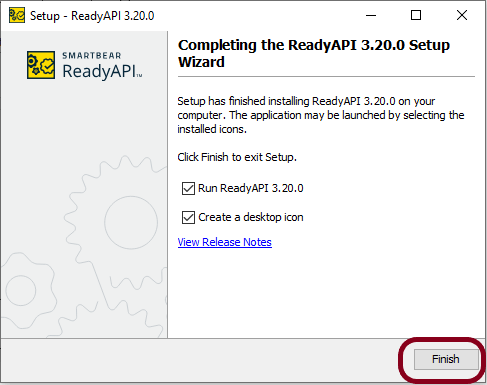
Step 8 – When the installation is complete, you can select the Run ReadyAPI check box to run ReadyAPI upon closing the wizard. You can also select the Create a desktop icon check box to create a desktop icon for ReadyAPI. Click the Finish button.
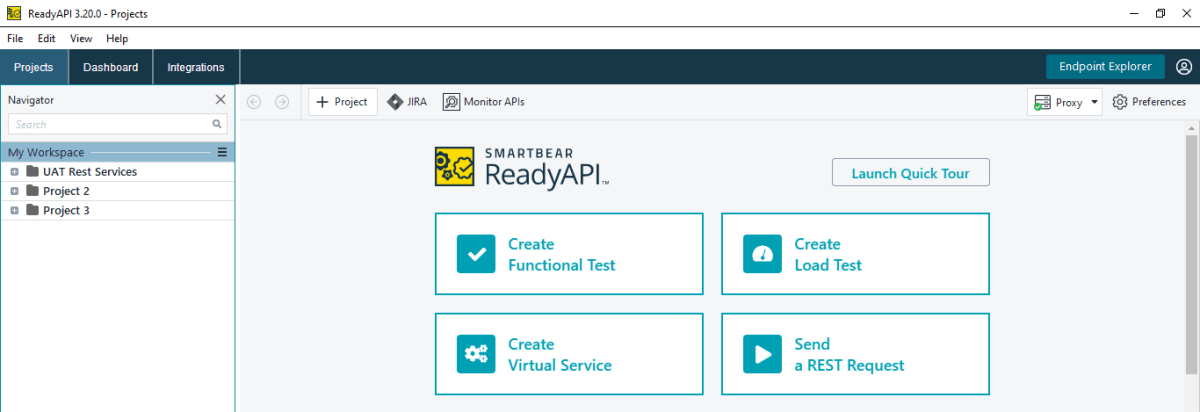
Step 9 – Once the installation is successfully completed, ReadyAPI will open, and it will look like something as in the below image.
We are done! Congratulations on making it through this tutorial and hope you found it useful! Happy Learning!!
The previous tutorials explain how to use JAXB(Java Architecture for XML Binding) to parse XML documents to Java objects and vice versa. This is also calledMarshalling and Unmarshalling.
This tutorial explains @XmlElementWrapperAnnotation.
Configure the Java compiler level to be at least 11 and add the JAXB dependencies to the pom file.
@XmlElementWrapper generates a wrapper element around XML representation. This is primarily intended to be used to produce a wrapper XML element around collections.
This annotation can be used with the following annotations – XmlElement, XmlElements, XmlElementRef, XmlElementRefs, XmlJavaTypeAdapter.
@XmlElementWrapper and @XmlElement (Wrapped collection)
Let us understand this with the help of an example shown below.
@XmlRootElement(name = "CustomerDetails")
@XmlAccessorType(XmlAccessType.FIELD)
public class Customer {

	private int id;

	private String name;
	private int yearOfBirth;
	private String emailId;
	private String streetAddress;

	private String postcode;

	@XmlElementWrapper(name = "emergencyContacts")
	@XmlElement(name = "Contact")
	private List<String> emergencyContacts;

	public Customer() {
		super();
	}

	public Customer(int id, String name, int yearOfBirth, String emailId, String streetAddress, String postcode,
			List<String> emergencyContacts) {
		super();
		this.id = id;
		this.name = name;
		this.yearOfBirth = yearOfBirth;
		this.emailId = emailId;
		this.streetAddress = streetAddress;
		this.postcode = postcode;
		this.emergencyContacts = emergencyContacts;
	}

	public int getId() {
		return id;
	}

	public void setId(int id) {
		this.id = id;
	}

	public String getName() {
		return name;
	}

	public void setName(String name) {
		this.name = name;
	}

	public int getYearOfBirth() {
		return yearOfBirth;
	}

	public void setYearOfBirth(int yearOfBirth) {
		this.yearOfBirth = yearOfBirth;
	}

	public String getEmailId() {
		return emailId;
	}

	public void setEmailId(String emailId) {
		this.emailId = emailId;
	}

	public String getStreetAddress() {
		return streetAddress;
	}

	public void setStreetAddress(String streetAddress) {
		this.streetAddress = streetAddress;
	}

	public String getPostcode() {
		return postcode;
	}

	public void setPostcode(String postcode) {
		this.postcode = postcode;
	}

	public List<String> getEmergencyContacts() {
		return emergencyContacts;
	}

	public void setEmergencyContacts(List<String> emergencyContacts) {
		this.emergencyContacts = emergencyContacts;
	}
}
Now, let us create a Test to convert these Java Objects to XML.
In the previous tutorial, I explained the Implicit Wait in Serenity. This tutorial will explain the Explicit Wait in Serenity.
What is Explicit Wait?
The explicit wait is used to wait for a specific web element on the web page for a specified amount of time. You can configure wait time element by element basis.
By default, the explicit wait is for 5 sec, with an interval of 10 ms.
Below is the example where I have created two classes – ExplicitWaitDemo and SynchronizationTests.
ExplicitWaitDemo
@DefaultUrl("http://the-internet.herokuapp.com/dynamic_loading/1")
public class ExplicitWaitDemo extends PageObject {

    //Incorrect XPath
	@FindBy(xpath = "//*[@id='start']/buttons")
	WebElementFacade startButton;

	@FindBy(xpath = "//*[@id='finish']/h4")
	WebElementFacade pageText;

	public void explicitWaitDemo1() throws InterruptedException {

		open();

		startButton.waitUntilClickable().click();

	}
}
SynchronizationTests
@RunWith(SerenityRunner.class)
public class SynchronizationTests {

	ExplicitWaitDemo ewaitDemo;

	@Managed
	WebDriver driver;

	@Test
	public void waitTest1() throws InterruptedException {

		ewaitDemo.explicitWaitDemo1();

	}

}
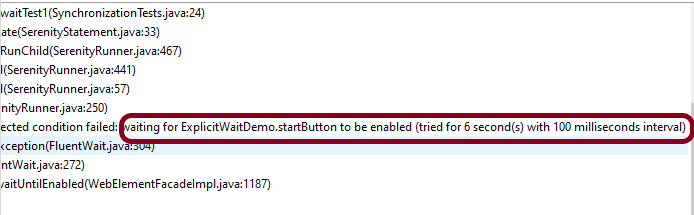
You can see that Serenity waited for 5 sec, with an interval of 100 ms.
When we need to wait for a web element for a specific amount of time, then the below-mentioned command can be added to serenity.conf.
webdriver {
      wait {
         for {
            timeout = 6000

        }
   }
}
The same can be added to serenity.properties as shown below.
webdriver.wait.for.timeout = 6000
Now, let us run the same above test. I have used the incorrect XPath for the button. So the test should fail after trying to locate the button for 6 secs.
You can print the explicit wait time by using the method – getWaitForTimeout().
In the below example, I have used the explicit wait as 6 sec and which is also returned by the method – getWaitForTimeout().
@DefaultUrl("http://the-internet.herokuapp.com/dynamic_loading/2")
public class ExplicitWaitDemo extends PageObject {

	@FindBy(xpath = "//*[@id='start']/button")
	WebElementFacade startButton;

	@FindBy(xpath = "//*[@id='finish']/h4")
	WebElementFacade pageText;

	public void explicitWaitDemo1() throws InterruptedException {

		open();

		startButton.click();

		System.out.println("Explicit Time defined for the test (in seconds):" + getWaitForTimeout().toSeconds());

	}
}
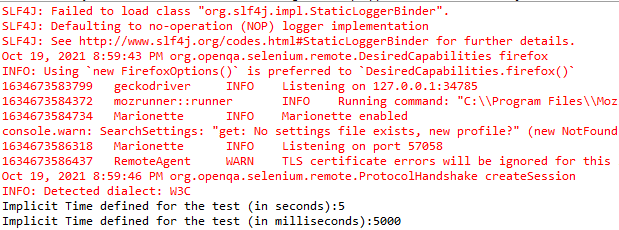
The output of the above program is
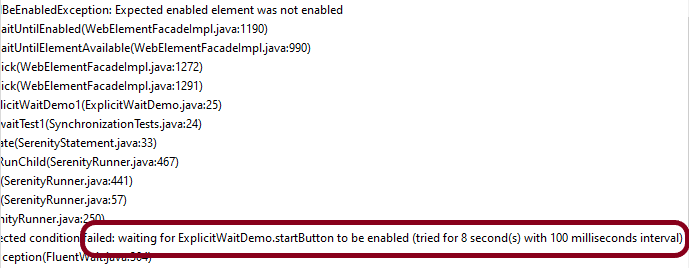
You can override the value of explicit wait mentioned in the serenity.properties or serenity.conf files. This can be done by using the method – withTimeoutOf(Duration duration).
@DefaultUrl("http://the-internet.herokuapp.com/dynamic_loading/1")
public class ExplicitWaitDemo extends PageObject {

    //Incorrect XPath
	@FindBy(xpath = "//*[@id='start']/buttons")
	WebElementFacade startButton;

	@FindBy(xpath = "//*[@id='finish']/h4")
	WebElementFacade pageText;

	public void explicitWaitDemo1() throws InterruptedException {

		open();

       //Override the value mentioned in serenity.conf for timeout from 6 sec to 8 sec
		startButton.withTimeoutOf(Duration.ofSeconds(8)).click();

	}
}
The output of the above program is
You can also wait for more arbitrary conditions, e.g.
@DefaultUrl("http://the-internet.herokuapp.com/dynamic_loading/2")
public class ExplicitWaitDemo extends PageObject {
@FindBy(xpath = "//*[@id='start']/button")
WebElementFacade startButton;
@FindBy(xpath = "//*[@id='finish']/h4")
WebElementFacade pageText;
public void explicitWaitDemo1() throws InterruptedException {
open();
startButton.click();
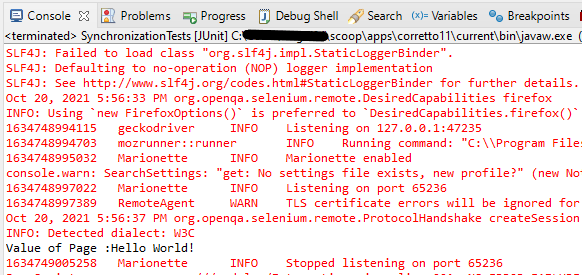
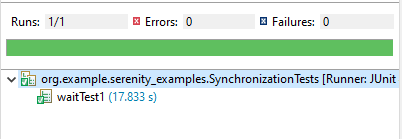
String expected = waitFor(pageText).getText();
System.out.println("Value of Page :" + expected);
Assert.assertEquals("Hello World!", expected);
}
}
The output of the above program is
You can also specify the timeout for a field. For example, if you wanted to wait for up to 8 seconds for a button to become clickable before clicking on it, you could do the following:
Finally, if a specific element of a PageObject needs to have a bit more time to load, you can use the timeoutInSeconds attribute in the Serenity @FindBy annotation, e.g.
import net.serenitybdd.core.annotations.findby.FindBy;
...
@FindBy(xpath = ("//*[@id='start']/button"), timeoutInSeconds="10"))
public WebElementFacade startButton;
To wait for a specific text on the web page, you can use waitForTextToAppear attribute
Most Web applications are asynchronous by nature. So it has become necessary to wait for elements, before trying to interact with them. This can be achieved by the use of wait functionality.
I won’t recommend the use of Thread.sleep() statement to wait for a specific web element in the web page, as it slows down the execution as well as makes the test brittle. If you are using Serenity and Selenium for tests, then there are various default timeouts – Implicit, Explicit, and Fluent Wait.
What is Implicit Wait?
Implicit Waits are used to ensure that Serenity does not fail a test if a web element is not immediately present on the page when you first try to use it. Using Implicit wait, you can search for the web element for the specified amount of time. If still, the web element is not found, then Serenity throws NoSuchElementException exception.
To use ImplicitWait in the Test, mention the below-mentioned statement in serenity.properties.
webdriver.timeouts.implicitlywait
There is another way to add implicitwait. Add it to the serenity.conf file as shown below:-
webdriver {
    timeouts {
        implicitlywait = 5000
     }
}
Note:- Make sure to add webdriver and timeout in the same file, either both to properties file or both to conf files.
Let me explain the use of Implicit Wait. Below I have created two classes – ImplictWaitDemo and SynchronizationTests.
ImplictWaitDemo contains detail like default URL, XPath of web elements, methods containing the code for the test whereas SynchronizationTests class calls the tests defined in ImplictWaitDemo and run them using Serenity Runner (@RunWith(SerenityRunner.class)
Scenario 1 – The default value in Serenity for Implicit Wait is currently 2 seconds. In the below example, I’ll open a web page and will try to assert the text present in the webpage. Serenity will wait for 2 seconds and the web element will not be found in 2 secs, so the test fails.
ImplictWaitDemo
@DefaultUrl("http://the-internet.herokuapp.com/dynamic_loading/1")
public class ImplictWaitDemo extends PageObject {

	@FindBy(xpath = "//*[@id='start']/button")
	WebElementFacade startButton;

	@FindBy(xpath = "//*[@id='finish']/h4")
	WebElementFacade pageText;

	public void implictWaitDemo1() throws InterruptedException {
		open();

		startButton.click();
		Assert.assertEquals("Hello World!", pageText.getText())
	}
}
SynchronizationTests
@RunWith(SerenityRunner.class)
public class SynchronizationTests {

	ImplictWaitDemo demo;

	@Managed
	WebDriver driver;

	@Test
	public void waitTest1() throws InterruptedException {
		demo.implictWaitDemo1();

	}
}
This shows that Serenity waited for 2 sec for the text – Hello World.
Now, let us add Implicit Wait to the Test. I have added the implicitWait for 5 sec to each step.
To know the value of wait in the code, you can use the below code. It will show the value of implicit wait in seconds or milliseconds.
System.out.println("Implicit Time defined for the test (in seconds):" + getImplicitWaitTimeout().toSeconds());
System.out.println("Implicit Time defined for the test (in milliseconds):" + getImplicitWaitTimeout().toMillis());
We are done! Congratulations on making it through this tutorial and hope you found it useful! Happy Learning!!
Deserialization converts a stream of bytes into a Java object that we can use in code.
We use Jackson’s ObjectMapper, as we did for serialization, using readValue() to process the input. Also, note our use of Jackson’s TypeReference, which we’ll use in all of our deserialization examples to describe the type of our destination Map.
The previous tutorial explains the Serializarion process that means converting Java Objects to JSON Payload. This is done using Jackson API. This tutorial explains the Deserialization, means converting JSON Payload to Java Objects.
Deserialization – It is the reverse of serializing. In this process, we will read the Serialized byte stream from the file and convert it back into the Class instance representation. Here, we are converting a JSON Object to an Employee class object.
We are using Jackson API for Serialization and Deserialization. So, add the Jackson dependency to the project.
Below is the sample code of the Employee table, which contains the data members needed for Employee JSON and their corresponding getter and setter methods.
public class Employee {

    // private variables or data members of POJO class
    private String firstName;
    private String lastName;
    private int age;
    private double salary;
    private String designation;
    private String contactNumber;
    private String emailId;

    // Getter and setter methods
    public String getFirstName() {
        return firstName;
    }

    public void setFirstName(String firstName) {
        this.firstName = firstName;
    }

    public String getLastName() {
        return lastName;
    }

    public void setLastName(String lastName) {
        this.lastName = lastName;
    }

    public int getAge() {
        return age;
    }

    public void setAge(int age) {
        this.age = age;
    }

    public double getSalary() {
        return salary;
    }

    public void setSalary(double salary) {
        this.salary = salary;
    }

    public String getDesignation() {
        return designation;
    }

    public void setDesignation(String designation) {
        this.designation = designation;
    }

    public String getContactNumber() {
        return contactNumber;
    }

    public void setContactNumber(String contactNumber) {
        this.contactNumber = contactNumber;
    }

    public String getEmailId() {
        return emailId;
    }

    public void setEmailId(String emailId) {
        this.emailId = emailId;
    }

}
Now, let us create a Test Class to show Deserialization.
@Test
public void deserializationTest() {
Employee employee = new Employee();
employee.setFirstName("Tim");
employee.setLastName("Tran");
employee.setAge(49);
employee.setSalary(89000);
employee.setDesignation("Manager");
employee.setContactNumber("+3538944412341");
employee.setEmailId("ttran@test.com");
// Converting a Java class object to a JSON payload as string
ObjectMapper mapper = new ObjectMapper();
String employeeJson = null;
try {
employeeJson = mapper.writeValueAsString(employee);
} catch (JsonProcessingException e) {
e.printStackTrace();
}
// Converting Employee json string to Employee class object
try {
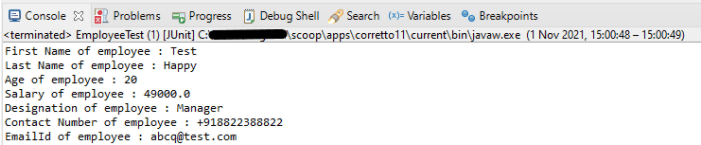
Employee employee2 = mapper.readValue(employeeJson, Employee.class);
System.out.println("First Name of employee : " + employee2.getFirstName());
System.out.println("Last Name of employee : " + employee2.getLastName());
System.out.println("Age of employee : " + employee2.getAge());
System.out.println("Salary of employee : " + employee2.getSalary());
System.out.println("Designation of employee : " + employee2.getDesignation());
System.out.println("Contact Number of employee : " + employee2.getContactNumber());
System.out.println("EmailId of employee : " + employee2.getEmailId());
} catch (JsonMappingException e) {
e.printStackTrace();
} catch (JsonProcessingException e) {
e.printStackTrace();
}
}
We can read JSON String and convert it back to Java Object as shown below. We will use readValue() to deserialize JSON content from the given file into a given Java type.
This is my JSON saved in a file placed at Desktop.
Below is the Test
@Test
public void readJson() {

    ObjectMapper mapper = new ObjectMapper();

    // Converting Employee JSON string to Employee class object
    try {
          Employee employee2 = mapper.readValue(new File(
                "C:\\Users\\Vibha\\Desktop\\Employee.json"),
                Employee.class);
          System.out.println("First Name of employee : " + employee2.getFirstName());
          System.out.println("Last Name of employee : " + employee2.getLastName());
          System.out.println("Age of employee : " + employee2.getAge());
          System.out.println("Salary of employee : " + employee2.getSalary());
          System.out.println("Designation of employee : " + employee2.getDesignation());
          System.out.println("Contact Number of employee : " + employee2.getContactNumber());
          System.out.println("EmailId of employee : " + employee2.getEmailId());
    } catch (StreamReadException e) {
        e.printStackTrace();
    } catch (DatabindException e) {
        e.printStackTrace();
    } catch (IOException e) {
        e.printStackTrace();
    }
}
I hope this has helped to clear your doubts regarding how to create Java Objects from JSON using Jackson API.
We are done! Congratulations on making it through this tutorial and hope you found it useful! Happy Learning!!
This tutorial shows how to convert a Java map to JSON string using Jackson’s data binding. In the previous tutorials, I explained converting Java Objects/Arrays to JSON String using Jackson API. You can refer to the below tutorials.
This tutorial will show how to ignore certain fields when serializing an object to JSON or deserializing the JSON to object using Jackson 2.x.
This is very useful when the Jackson defaults aren’t enough and we need to control exactly what gets serialized to JSON – and there are several ways to ignore properties. One of the most common way is the use of @JsonIgnoreAnnotation, but it has some limitations. One of the major limitation is that if it is applied to getter method only, it will ignore setter method too. So, we cannot control if we want a property to be ignored for either Serialization or Deserialization.
Moreover, when there is a requirement to ignore multiple properties, it is tedious to mention @JsonIgnoreto all the properties which need to be ignored. Imagine there are 100 properties and we need to ignore 30 properties, it is tedious to mention @JsonIgnoreto each properties.
To start of, add Jackson databind dependency to the project. Always add the latest dependency to your project.
We need to create POJO for above JSON. So, let us create a class called Employee. Then create the private data members corresponding to the the nodes of the JSON and the getter and setter methods of these data members.
POJO Class
@JsonIgnoreProperties({"emailId","gender","maritalStatus"})
public class Employee {

	// private variables or data members of pojo class
	private String firstName;
	private String lastName;
	private int age;
	private double salary;
	private String designation;
	private String contactNumber;
	private String emailId;
	private String gender;
	private String maritalStatus;

	// Getter and setter methods
	public String getFirstName() {
		return firstName;
	}

	public void setFirstName(String firstName) {
		this.firstName = firstName;
	}

	public String getLastName() {
		return lastName;
	}

	public void setLastName(String lastName) {
		this.lastName = lastName;
	}

	public int getAge() {
		return age;
	}

	public void setAge(int age) {
		this.age = age;
	}

	public double getSalary() {
		return salary;
	}

	public void setSalary(double salary) {
		this.salary = salary;
	}

	public String getDesignation() {
		return designation;
	}

	public void setDesignation(String designation) {
		this.designation = designation;
	}

	public String getContactNumber() {
		return contactNumber;
	}

	public void setContactNumber(String contactNumber) {
		this.contactNumber = contactNumber;
	}

	public String getEmailId() {
		return emailId;
	}

	public void setEmailId(String emailId) {
		this.emailId = emailId;
	}

	public String getGender() {
		return gender;
	}

	public void setGender(String gender) {
		this.gender = gender;
	}

	public String getMaritalStatus() {
		return maritalStatus;
	}

	public void setMaritalStatus(String maritalStatus) {
		this.maritalStatus = maritalStatus;
	}

}
Here, we have added emailId, gender and maritalStatus to @JsonIgnoreProperties as shown above.
Let us create a test where we pass values to all the nodes present in the JSON and see what happens to properties – emailId, gender and maritalStatus which are tagged as @JsonIgnoreProperties.
SerializationTest
    @Test
	public void serializationTest()  {

		// Create an object of POJO class
		Employee employee = new Employee();
		employee.setFirstName("Vibha");
		employee.setLastName("Singh");
		employee.setAge(30);
		employee.setSalary(75000);
		employee.setDesignation("Manager");
		employee.setContactNumber("+919999988822");
		employee.setEmailId("abc@test.com");
		employee.setMaritalStatus("married");
		employee.setGender("female");

		// Converting a Java class object to a JSON payload as string
		ObjectMapper mapper = new ObjectMapper();
		try {
			String employeeJson = mapper.writeValueAsString(employee);
			System.out.println(employeeJson);
			String employeePrettyJson = mapper.writerWithDefaultPrettyPrinter().writeValueAsString(employee);
			System.out.println(employeePrettyJson);
		} catch (JsonProcessingException e) {
			e.printStackTrace();
		}
}
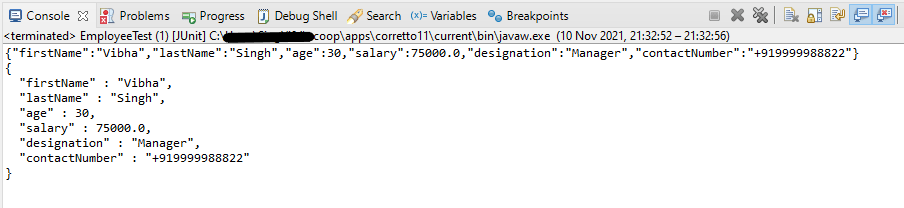
Output
You can see that emailId, gender and maritalStatus are not present in JSON Payload.
Let us see the impact of @JsonIgnoreProperties to the setter or deserialized properties.
Deserialization Test
    @Test
	public void deserializationTest()  {

		String employeeString = "{\r\n"
				+ "  \"firstName\" : \"Deserialization\",\r\n"
				+ "  \"lastName\" : \"Test\",\r\n"
				+ "  \"age\" : 30,\r\n"
				+ "  \"salary\" : 75000.0,\r\n"
				+ "  \"designation\" : \"Manager\",\r\n"
				+ "  \"contactNumber\" : \"+919999988822\",\r\n"
				+ "  \"emailId\" : \"abc@test.com\",\r\n"
				+ "  \"gender\" : \"female\",\r\n"
				+ "  \"maritalStatus\" : \"married\"\r\n"
				+ " }";


		// Converting a JSON Payload to a JAVA Object
		ObjectMapper mapper = new ObjectMapper();
        Employee employee2 = null;

		try {
			employee2 = mapper.readValue(employeeString, Employee.class);
		} catch (JsonMappingException e) {
			e.printStackTrace();
		} catch (JsonProcessingException e) {
			e.printStackTrace();
		}

		System.out.println("First Name of employee : " + employee2.getFirstName());
		System.out.println("Last Name of employee : " + employee2.getLastName());
		System.out.println("Age of employee : " + employee2.getAge());
		System.out.println("Salary of employee : " + employee2.getSalary());
		System.out.println("Designation of employee : " + employee2.getDesignation());
		System.out.println("Contact Number of employee : " + employee2.getContactNumber());
		System.out.println("EmailId of employee : " + employee2.getEmailId());
		System.out.println("Marital Status of employee : " + employee2.getMaritalStatus());
		System.out.println("Gender of employee : " + employee2.getGender());

	}
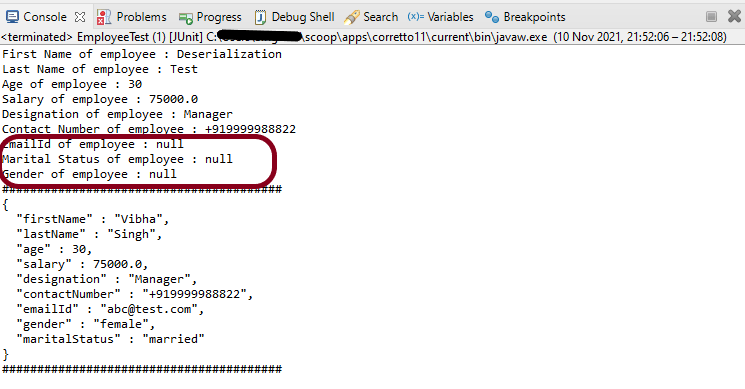
Output
You can see that emailId, gender and maritalStatus – the values present in JSON for all of them are ignored and default values are retrieved.
POJO with allowGetters
allowGetters are enabled to allow “getters” to be used. This is commonly set to support defining “read-only” properties; ones for which there is a getter, but no matching setter: in this case, properties should be ignored for deserialization but NOT serialization. Another way to think about this setting is that setting it to `true` will “disable” ignoring of getters.
Default value is `false`, which means that getters with matching names will be ignored.
In the below example, I have defined emailId, gender and maritalStatus as allowGetters as True.
public class EmployeeTest {

	@Test
	public void serializationTest()  {

		Employee employee = new Employee();
		employee.setFirstName("Vibha");
		employee.setLastName("Singh");
		employee.setAge(30);
		employee.setSalary(75000);
		employee.setDesignation("Manager");
		employee.setContactNumber("+919999988822");
		employee.setEmailId("abc@test.com");
		employee.setMaritalStatus("married");
		employee.setGender("female");

		// Converting a Java class object to a JSON payload as string
		ObjectMapper mapper = new ObjectMapper();

        try {
			String employeePrettyJson = mapper.writerWithDefaultPrettyPrinter().writeValueAsString(employee);
			System.out.println(employeePrettyJson);
		} catch (JsonProcessingException e) {
			e.printStackTrace();
		}

	}

	@Test
	public void deserializationTest() {

		String employeeString = "{\r\n"
				+ "  \"firstName\" : \"Deserialization\",\r\n"
				+ "  \"lastName\" : \"Test\",\r\n"
				+ "  \"age\" : 30,\r\n"
				+ "  \"salary\" : 75000.0,\r\n"
				+ "  \"designation\" : \"Manager\",\r\n"
				+ "  \"contactNumber\" : \"+919999988822\",\r\n"
				+ "  \"emailId\" : \"abc@test.com\",\r\n"
				+ "  \"gender\" : \"female\",\r\n"
				+ "  \"maritalStatus\" : \"married\"\r\n"
				+ " }";


		// Converting a JSON Payload to a JAVA Object
		ObjectMapper mapper = new ObjectMapper();

		 Employee employee2 = null;

		try {
			employee2 = mapper.readValue(employeeString, Employee.class);
		} catch (JsonMappingException e) {
			e.printStackTrace();
		} catch (JsonProcessingException e) {
			e.printStackTrace();
		}

		System.out.println("First Name of employee : " + employee2.getFirstName());
		System.out.println("Last Name of employee : " + employee2.getLastName());
		System.out.println("Age of employee : " + employee2.getAge());
		System.out.println("Salary of employee : " + employee2.getSalary());
		System.out.println("Designation of employee : " + employee2.getDesignation());
		System.out.println("Contact Number of employee : " + employee2.getContactNumber());
		System.out.println("EmailId of employee : " + employee2.getEmailId());
		System.out.println("Marital Status of employee : " + employee2.getMaritalStatus());
		System.out.println("Gender of employee : " + employee2.getGender());

	}

}
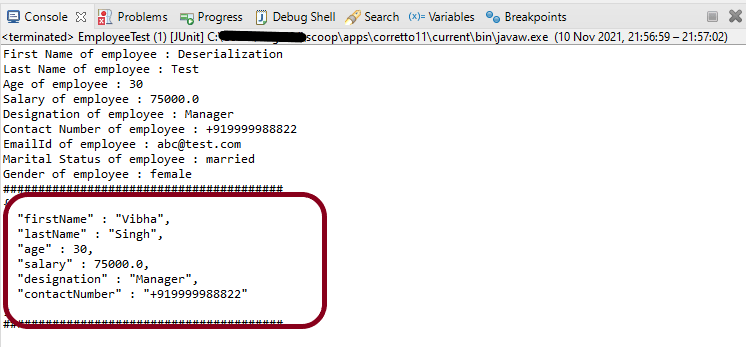
Output
In the below image, it shows that values of emailId, gender and maritalStatus are ignored and default value is passed.
POJO with allowSetters
allowSetters – Property that can be enabled to allow “setters” to be used. This could be used to specify “write-only” properties; ones that should not be serialized out, but that may be provided in for deserialization. Another way to think about this setting is that setting it to `true` will “disable” ignoring of setters.
Default value is `false`, which means that setters with matching names will be ignored.
public class EmployeeTest {

	@Test
	public void serializationTest() {

		Employee employee = new Employee();
		employee.setFirstName("Vibha");
		employee.setLastName("Singh");
		employee.setAge(30);
		employee.setSalary(75000);
		employee.setDesignation("Manager");
		employee.setContactNumber("+919999988822");
		employee.setEmailId("abc@test.com");
		employee.setMaritalStatus("married");
		employee.setGender("female");

		// Converting a Java class object to a JSON payload as string
		ObjectMapper mapper = new ObjectMapper();
		try {
			String employeePrettyJson = mapper.writerWithDefaultPrettyPrinter().writeValueAsString(employee);
			System.out.println(employeePrettyJson);
		} catch (JsonProcessingException e) {
			e.printStackTrace();
		}
		System.out.println("########################################");
	}

	@Test
	public void deserializationTest()  {

		String employeeString = "{\r\n"
				+ "  \"firstName\" : \"Deserialization\",\r\n"
				+ "  \"lastName\" : \"Test\",\r\n"
				+ "  \"age\" : 30,\r\n"
				+ "  \"salary\" : 75000.0,\r\n"
				+ "  \"designation\" : \"Manager\",\r\n"
				+ "  \"contactNumber\" : \"+919999988822\",\r\n"
				+ "  \"emailId\" : \"abc@test.com\",\r\n"
				+ "  \"gender\" : \"female\",\r\n"
				+ "  \"maritalStatus\" : \"married\"\r\n"
				+ " }";


		// Converting a JSON Payload to a JAVA Object
		ObjectMapper mapper = new ObjectMapper();

		 Employee employee2 = null;

		try {
			employee2 = mapper.readValue(employeeString, Employee.class);
		} catch (JsonMappingException e) {
			e.printStackTrace();
		} catch (JsonProcessingException e) {
			e.printStackTrace();
		}

		System.out.println("First Name of employee : " + employee2.getFirstName());
		System.out.println("Last Name of employee : " + employee2.getLastName());
		System.out.println("Age of employee : " + employee2.getAge());
		System.out.println("Salary of employee : " + employee2.getSalary());
		System.out.println("Designation of employee : " + employee2.getDesignation());
		System.out.println("Contact Number of employee : " + employee2.getContactNumber());
		System.out.println("EmailId of employee : " + employee2.getEmailId());
		System.out.println("Marital Status of employee : " + employee2.getMaritalStatus());
		System.out.println("Gender of employee : " + employee2.getGender());

		System.out.println("########################################");

	}

}
Output
We are done! Congratulations on making it through this tutorial and hope you found it useful! Happy Learning!!