The previous tutorials have explained the conversion of Java Object to JSON using Gson API. This tutorial explains the process of reading the JSON Payload from a file using Gson API.
Gson is a Java library that can be used to convert Java Objects into their JSON representation. It can also be used to convert a JSON string to an equivalent Java object. Gson can work with arbitrary Java objects, including pre-existing objects for those you do not have source code.
- Provide simple toJson() and fromJson() methods to convert Java objects to JSON and vice versa.
Add the below dependency to POM.xml to use Gson API.
<dependency>
    <groupId>com.google.code.gson</groupId>
    <artifactId>gson</artifactId>
    <version>2.10.1</version>
</dependency>
Let us take an example of a JSON.
{
  "firstName": "Vibha",
  "lastName": "Singh",
  "age": 30,
  "salary": {
    "2023": 74000,
    "2022": 62000,
    "2021": 50000
  },
  "designation": "Manager",
  "contactNumber": "+919999988822",
  "emailId": "abc@test.com"
}
Let us create a table named Employee which contains the data members same as node names in the above JSON payload and their corresponding getter and setter methods.
import java.math.BigDecimal;
import java.util.Map;

public class Employee {

    // private data members of POJO class
    private String firstName;
    private String lastName;
    private int age;
    private Map<String, BigDecimal> salary;
    private String designation;
    private String contactNumber;
    private String emailId;

    // Getter and setter methods
    public String getFirstName() {
        return firstName;
    }

    public void setFirstName(String firstName) {
        this.firstName = firstName;
    }

    public String getLastName() {
        return lastName;
    }

    public void setLastName(String lastName) {
        this.lastName = lastName;
    }

    public int getAge() {
        return age;
    }

    public void setAge(int age) {
        this.age = age;
    }

    public Map<String, BigDecimal> getSalary() {
        return salary;
    }

    public void setSalary(Map<String, BigDecimal> salary) {
        this.salary = salary;
    }

    public String getDesignation() {
        return designation;
    }

    public void setDesignation(String designation) {
        this.designation = designation;
    }

    public String getContactNumber() {
        return contactNumber;
    }

    public void setContactNumber(String contactNumber) {
        this.contactNumber = contactNumber;
    }

    public String getEmailId() {
        return emailId;
    }

    public void setEmailId(String emailId) {
        this.emailId = emailId;
    }

    @Override
    public String toString() {
        return "(firstName: " + firstName + "," +
                "lastName: " + lastName + "," +
                "age: " + age + ", " +
                "salary: " + salary + "," +
                "designation: " + designation + ", " +
                "contactNumber: " + contactNumber + ", " +
                "emailId: " + emailId + ")";

    }
}
We will convert a JSON Object to a Java Object.
The JSON file – Employee.json is present in src/test/resources.
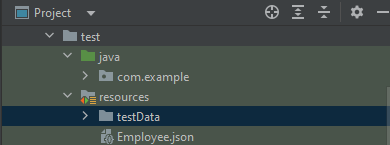
Below is the image of JSON.

You can create a Gson instance by invoking a new Gson() if the default configuration is all you need, as shown in the below example.
import org.junit.Test;
import java.io.File;
import java.io.FileNotFoundException;
import java.io.FileReader;

public class GsonReadFromFile {

    @Test
    public void readJsonFromFile() throws FileNotFoundException {

        String userDir = System.getProperty("user.dir");
        File jsonFilePath = new File(userDir + "\\src\\test\\resources\\Employee.json");
        FileReader fileReader = new FileReader(jsonFilePath);

        Gson gson = new Gson();
        Employee employee = gson.fromJson(fileReader, Employee.class);
        System.out.println(employee.toString());

        System.out.println("FirstName :" + employee.getFirstName());
        System.out.println("LastName :" + employee.getLastName());
        System.out.println("Age :" + employee.getAge());
        System.out.println("Salary :" + employee.getSalary());
        System.out.println("Designation :" + employee.getDesignation());
        System.out.println("ContactNumber :" + employee.getContactNumber());
        System.out.println("EmailId :" + employee.getEmailId());


    }
}
The execution message is shown below.

We are done! Congratulations on making it through this tutorial and hope you found it useful! Happy Learning!!