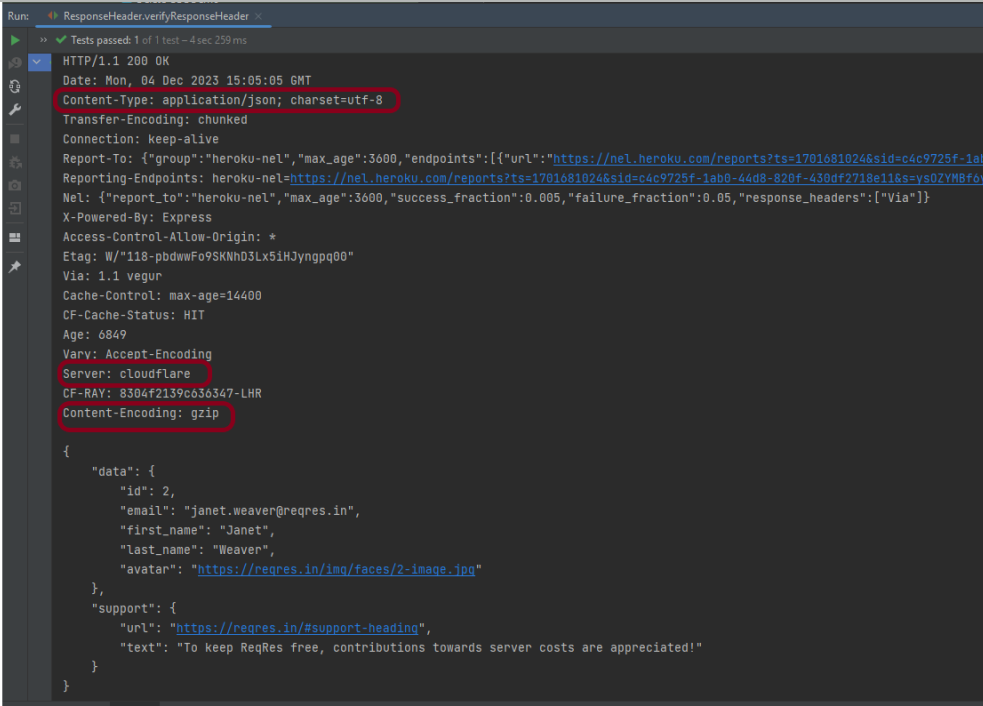
We can verify JSON response headers in Rest Assured. This is achieved with the help of the header method. Every response obtained from the server may contain zero or more headers that provide metadata about the response.
import org.junit.Test;
import static io.restassured.RestAssured.given;
import static org.hamcrest.CoreMatchers.containsString;

public class ResponseHeader {

    @Test
    public void verifyResponseHeader() {

      // Given
      given()

              // When
              .when()
              .get("https://reqres.in/api/users/2")

              // Then
              .then()
              .statusCode(200).statusLine("HTTP/1.1 200 OK")
              .log().all()
              .header("Content-Type" , "application/json; charset=utf-8")
              .header("Content-Encoding" , "gzip")
              .header("Server" , containsString("cloudflare"));

    }
}
The output of the above program is
In the above example, we can verify the Content-Type, Server, and Content-Encoding using the header.
In this blog, we will discuss Classes and Objects. Java is an Object-Oriented Programming language. Class, Objects, Variables, Methods, and Constructors are the building blocks of Object-Oriented language.
What is a Class?
A class is a user-defined template or prototype that is used to create objects and define object data types and methods.
What is an Object?
An object is an instance of a class. An entity that has state and behaviour.
Let us consider the Phone as the object. The state of the Phone is coloured grey, and black, and types like IPhone, Samsung, and behaviour is calling, sending messages, and internet browsing.
How to create a class?
To create a class, a keyword class is used.
Here, I am creating a class with the name Student with the variable Name.
public class Student {
          String Name;
}
How to create an Object?
To create an object, specify a class name like Student, an object name like stud, and use a new keyword.
Student stud = new Student();
Let us create a class and an object of its class and print the value of the variable name.
public class Student {

    String Name = "Tom";
    public static void main(String[] args)

    {
        Student stud = new Student();
        System.out.println("Name of Student :"+stud.Name);
    }
}
The output of the above program is
Multiple Objects of a Class
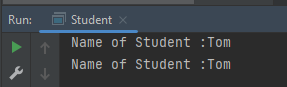
We can create multiple objects of a class. In the below example, we have created 2 objects of class Student.
public class Student {

    String Name = "Tom";
    public static void main(String[] args)
    {
        Student stud1 = new Student();
        Student stud2 = new Student();
        System.out.println("Name of Student :"+stud1.Name);
        System.out.println("Name of Student :"+stud2.Name);
    }
}
The output of the above program is
Multiple Classes
We can create a class and then create an object of that class in another class. Like, here, we have created a class called Student.java and another class is Student_Demo.java where we will create the object of class Student. This is a better approach than the previous one.
public class Student {
          String Name = "Tom";
}


public class Student_Test{
    public static void main(String[] args)
    {
        Student stud = new Student();
        System.out.println("Name of Student :"+stud.Name);
    }
}
There are multiple ways to initialize the classes and objects.
1) Initialize through reference
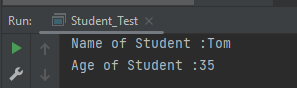
Here, initializing an object means storing data in the object. Let’s see a simple example where we are going to initialize the object through a reference variable.
public class Student {
          String Name ;
          int Age;
}

public class Student_Test {
    public static void main(String[] args)
    {
        Student stud = new Student();
        stud.Name ="Tom";
        stud.Age=35;
        System.out.println("Name of Student :"+stud.Name);
        System.out.println("Age of Student :"+stud.Age);
    }
}
The output of the above program is
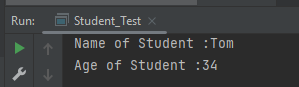
2) Initializing through method
We are creating the two objects of the Student class and initializing the value to these objects by invoking the InsertData() method. Here, we are displaying the state (data) of the objects by invoking the DisplayData() method.
public class Student {
	String Name;
	int Age;

	void InsertData(String n, int a) {
		Name = n;
		Age = a;
	}

	void DisplayData() {
		System.out.println("Name of Student :" + Name);
		System.out.println("Age of Student :" + Age);
	}
}


public class Student_Test {

    public static void main(String[] args) {
        Student stud = new Student();
        stud.InsertData("Tom", 34);
        stud.DisplayData();
    }
}
The output of the above program is
We can create multiple objects
public class Student {
          String Name ;
          int Age;

          void InsertData(String n, int a)
          {
                   Name =n;
                   Age = a;
          }

          void DisplayData()
          {
                   System.out.println("Name of Student :"+Name);
                   System.out.println("Age of Student :"+Age);
          }
    }


public class Student_Test {

    public static void main(String[] args) {

            Student stud1 = new Student();
            Student stud2 = new Student();
            stud1.InsertData("Matt",43);
            stud1.DisplayData();
            stud2.InsertData("Terry",36);
            stud2.DisplayData();
    }
 }
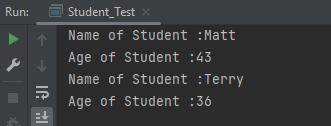
The output of the above program is
We are done! Congratulations on making it through this tutorial and hope you found it useful! Happy Learning!!
It is a feature that allows a class to have more than one method of the same name, but different parameters. The method can be overloaded if:-
No of parameters are different in two methods
Type of parameters are different
Sequence of parameters are different
Note:- If two methods have same name, same no of parameters, same sequence of parameters and same type of parameters but different return type, then the methods are not overloaded. It will show compile time error.
Why do we need Method Overloading?
If we need to perform the same kind of operation with different data inputs, we go for method overloading. Below is an example of an addition operation with different inputs to explain method overloading. It is an example of static polymorphism early binding or compile time binding. Here, the binding of the method call to its definition happens at compile time.
Below is an example of method overloading.
public class MethodOverloading_Demo {

    public void Calculation(int a, float b) {
        System.out.println("Sum of 2 numbers :" + (a + b));
    }

    //Different type of parameters
    public void Calculation(float x, float y) {
        System.out.println("Sum of 2 numbers :" + (x + y));
    }

    //Different number of parameters
    public void Calculation(int i, int j, int k) {
        System.out.println("Sum of 3 numbers :" + (i + j + k));
    }

    //Different sequence of parameters
    public void Calculation(float p, int r) {
        System.out.println("Sum of 3 numbers :" + (p + r));
    }

    public static void main(String[] args) {

        MethodOverloading_Demo add = new MethodOverloading_Demo();

        //Call overloaded methods
        add.Calculation(5, 12f);
        add.Calculation(13f, 12.0f);
        add.Calculation(22, 33, 50);
        add.Calculation(11f, 10);
    }

}
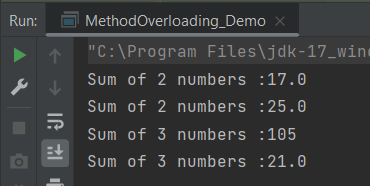
The output of the above program is
What is Type Promotion?
When a data type of smaller type, promote to bigger type, it called type promotion. Suppose a method has double data type and object provides float, then the program works fine. Float will be promote to double.
Let us explain this with an example. In the below example, object has provided float data type, but method has double data type, so there is type promotion.
public class Addition {

    public void Calculation(int a, int b)  {
        System.out.println("Sum of 2 numbers :"+(a+b));
    }

    public void Calculation(int x, double y)   {
        System.out.println("Sum of 2 numbers :"+(x+y));
    }

    public static void main(String[] args) {
        Addition add = new Addition();
        //Type Promotion method
        add.Calculation(5,12);
        add.Calculation(13,12f);
    }
}
The output of the above program is
We are done! Congratulations on making it through this tutorial and hope you found it useful! Happy Learning!!
REST Assured provides a convenient way to retrieve and assert response time. Rest Assured provides a method to get response time in milliseconds by default or the time unit we want. We can also validate if the response time is less than, greater than, or in between the expected values as well.
Interface ResponseOptions
This interface contains four methods:-
getTime() – The response time in milliseconds (or -1 if no response time could be measured)
getTimeIn(TimeUnit timeunit) – The response time in the given time unit (or -1 if no response time could be measured)
time() – The response time in milliseconds (or -1 if no response time could be measured)
timeIn( TimeUnit timeunit ) – The response time in the given time unit (or -1 if no response time could be measured)
Technically, getTime() and time() both are the same, and getTimeIn() and timeIn() both are the same.
Below is an example.
import io.restassured.RestAssured;
import io.restassured.response.Response;
import io.restassured.specification.RequestSpecification;
import org.junit.Test;
import java.util.concurrent.TimeUnit;

public class ResponseTime {


    @Test
    public void getResponseTime() {

        RequestSpecification  requestSpecification = RestAssured.given();

        // Calling GET method
        Response response = requestSpecification.get("https://reqres.in/api/users/2");

        // Let's print response body.
        String resString = response.prettyPrint();
        System.out.println("Response Details : " + resString);

        //Get Response Time
        System.out.println("Response Time in milliseconds: " + response.getTime());

        System.out.println("Response Time in seconds: " + response.getTimeIn(TimeUnit.SECONDS));

        System.out.println("Response Time in milliseconds: " + response.time());

        System.out.println("Response Time in seconds: " + response.timeIn(TimeUnit.SECONDS));

    }

    }
The output of the above program is
Interface ValidatableResponseOptions
This interface has overloaded time() methods that accept Matcher.
time(Matcher matcher) – Validate that the response time (in milliseconds) matches the supplied matcher.
import org.hamcrest.Matchers;
import org.junit.Test;
import static io.restassured.RestAssured.given;

public class ResponseTime {

    @Test
    public void verifyResponseTime() {

        // Given
        given()

                // When
                .when()
                .get("https://reqres.in/api/users/2")

                // Then
                .then()
                .statusCode(200).statusLine("HTTP/1.1 200 OK")

                // Asserting response time is less than 2000 milliseconds
                .time(Matchers.lessThan(3000L));

    }
}
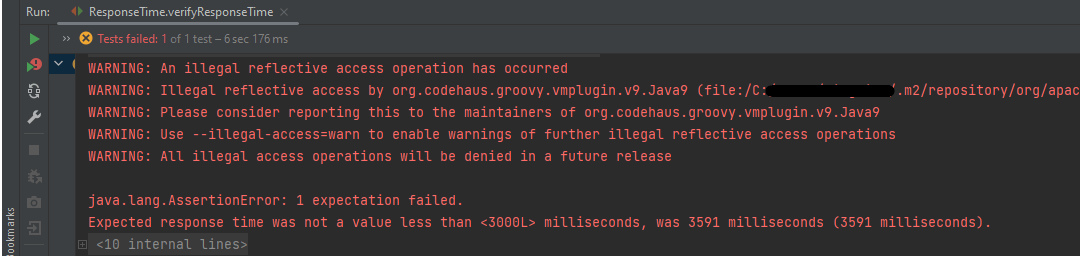
The output of the above program is
In the above example, we can see that the time taken by the request to provide the response is 3591 ms, which is greater than 3000 ms, so the test failed.
Similarly, we can use greaterthan() method too.
    @Test
    public void verifyGreaterResponseTime() {

        // Given
        given()

                // When
                .when()
                .get("https://reqres.in/api/users/2")

                // Then
                .then()
                .statusCode(200).statusLine("HTTP/1.1 200 OK")

                // Asserting response time is greater than 3000 milliseconds
                .time(Matchers.greaterThan(2000L));
    }
The output of the above program is
If you want to verify the time range, it can also be done using the Matchers. Below is an example of the same.
    @Test
    public void verifyResponseTimeRange() {

        // Given
        given()

                // When
                .when()
                .get("https://reqres.in/api/users/2")

                // Then
                .then()
                .statusCode(200).statusLine("HTTP/1.1 200 OK")

                // Asserting response time is greater than 1000 milliseconds and less than 2000 milliseconds
                .time(Matchers.both(Matchers.greaterThanOrEqualTo(1000L)).and(Matchers.lessThanOrEqualTo(2000L)));
    }
The output of the above program is
In the above example, the response time is 2550 ms, which does not fall in the range of 1000-2000 ms. So, the test is failed.
We are done! Congratulations on making it through this tutorial and hope you found it useful! Happy Learning!!
This tutorial explains how to use JAXB (Java Architecture for XML Binding) to convert Java Objects to XML documents.
JAXB provides a fast and convenient way to marshal (write) Java Objects into XML and un-marshal (read) XML into Java Objects. It supports a binding framework that maps XML elements and attributes to Java fields and properties using Java annotations.
With Java releases lower than Java 11, JAXB was part of the JVM and you could use it directly without defining additional libraries.
As of Java 11, JAXB is not part of the JRE anymore, and you need to configure the relevant libraries via your dependency management system, for example, either Maven or Gradle.
Configure the Java compiler level to be at least 11 and add the JAXB dependencies to your pom file.
When we run the code above, we may check the console output to verify that we have successfully converted Java object to XML:
By default, the Marshaller uses UTF-8 encoding when generating XML data.
The javax.xml.bind.JAXBContext class provides a client’s entry point to JAXB API. By default, JAXB does not format the XML document. This saves space and prevents that any white-space may accidentally be interpreted as significant.
To have JAXB format the output, we simply set the Marshaller.JAXB_FORMATTED_OUTPUT property to true on the Marshaller. The marshal method uses an object and an output file where to store the generated XML as parameters.
You can see that we have used JAXB Annotations like @XMLRootElement are changed from Employee to EmployeeDetails.
@XMLElement has set the element name to GrossSalary from Salary.
The below example is the short way of writing the same test and saving XML. We need to add a constructor in the POJO class so that we can set the values to the variables through the Constructor.
import jakarta.xml.bind.annotation.*;

@XmlRootElement(name = "EmployeeDetails")
@XmlAccessorType(XmlAccessType.FIELD)

//Define the order in which the fields are written in XML
@XmlType(propOrder = { "firstName", "lastName", "gender", "age", "maritalStatus", "designation", "contactNumber",
        "emailId", "salary" })

public class Employee {

    private String firstName;
    private String lastName;
    private int age;

    @XmlElement(name = "GrossSalary")
    private double salary;
    private String designation;
    private String contactNumber;
    private String emailId;
    private String gender;
    private String maritalStatus;

    public Employee() {
        super();

    }

    public Employee(String firstName, String lastName, int age, double salary, String designation, String contactNumber,
                    String emailId, String gender, String maritalStatus) {

        this.firstName = firstName;
        this.lastName = lastName;
        this.age = age;


        this.salary = salary;

        this.designation = designation;
        this.contactNumber = contactNumber;
        this.emailId = emailId;
        this.gender = gender;
        this.maritalStatus = maritalStatus;
    }

    // Getter and setter methods
    public String getFirstName() {
        return firstName;
    }

    public void setFirstName(String firstName) {
        this.firstName = firstName;
    }

    public String getLastName() {
        return lastName;
    }

    public void setLastName(String lastName) {
        this.lastName = lastName;
    }

    public int getAge() {
        return age;
    }

    public void setAge(int age) {
        this.age = age;
    }

    public double getSalary() {
        return salary;
    }

    public void setSalary(double salary) {
        this.salary = salary;
    }

    public String getDesignation() {
        return designation;
    }

    public void setDesignation(String designation) {
        this.designation = designation;
    }

    public String getContactNumber() {
        return contactNumber;
    }

    public void setContactNumber(String contactNumber) {
        this.contactNumber = contactNumber;
    }

    public String getEmailId() {
        return emailId;
    }

    public void setEmailId(String emailId) {
        this.emailId = emailId;
    }

    public String getGender() {
        return gender;
    }

    public void setGender(String gender) {
        this.gender = gender;
    }

    public String getMaritalStatus() {
        return maritalStatus;
    }

    public void setMaritalStatus(String maritalStatus) {
        this.maritalStatus = maritalStatus;
    }

    @Override
    public String toString() {
        return "Employee [FirstName=" + firstName + ", LastName=" + lastName + ", Age=" + age + ", Salary=" + salary
                + ", Designation=" + designation + ", ContactNumber=" + contactNumber + ", EmailId=" + emailId
                + ", Gender=" + gender + ", MaritalStatus=" + maritalStatus + "]";
    }
}
The below JAXB example for XML marshalling convert Java objects into an XML.
import jakarta.xml.bind.JAXBContext;
import jakarta.xml.bind.JAXBException;
import jakarta.xml.bind.Marshaller;
import jakarta.xml.bind.PropertyException;
import org.junit.Test;
import java.io.File;
import java.io.StringWriter;
public class SerializationDemo {
@Test
public void serializationTest2() {
try {
Employee employee = new Employee("Thomas", "Pawsey", 35, 100000, "Director", "+919999988822","Test@test.com", "married", "female");
// Create JAXB Context
JAXBContext context = JAXBContext.newInstance(Employee.class);
// Create Marshaller
Marshaller jaxbMarshaller = context.createMarshaller();
// Required formatting
jaxbMarshaller.setProperty(Marshaller.JAXB_FORMATTED_OUTPUT, Boolean.TRUE);
// Write XML to StringWriter
StringWriter writer = new StringWriter();
jaxbMarshaller.marshal(employee, writer);
// Convert XML to String
String xmlContent = writer.toString();
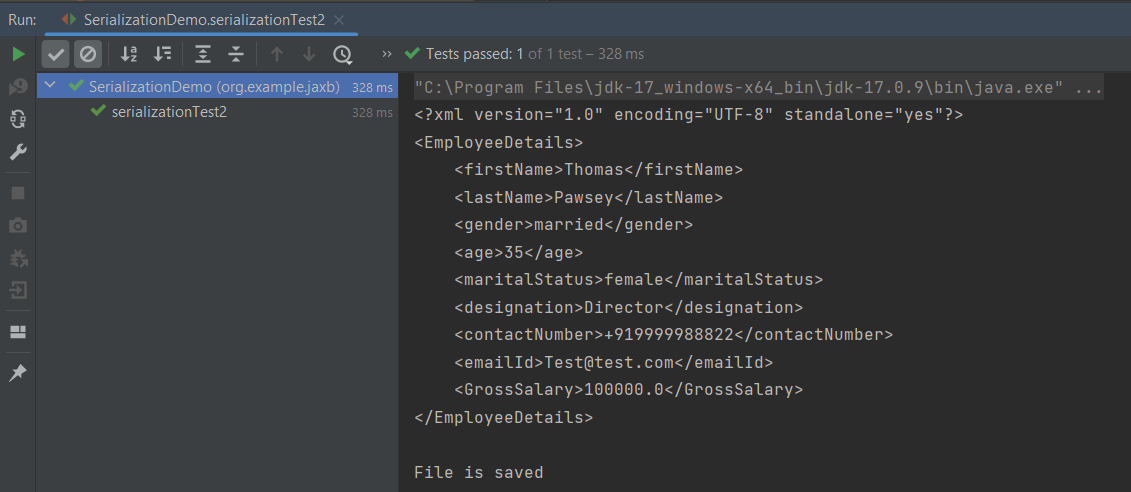
System.out.println(xmlContent);
// Save the file
String userDir = System.getProperty("user.dir");
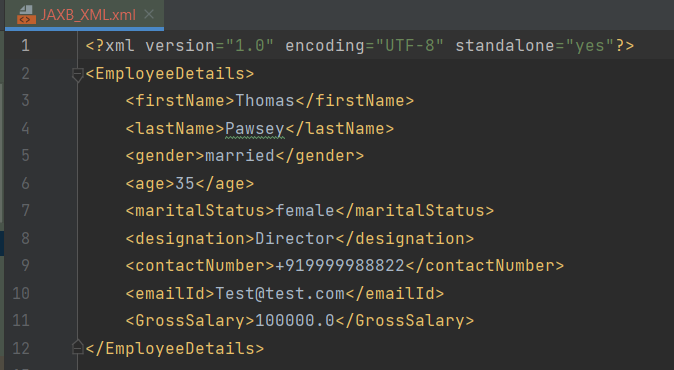
jaxbMarshaller.marshal(employee, new File(userDir + "\\src\\test\\resources\\JAXB_XML.xml"));
System.out.println("File is saved");
} catch (PropertyException e) {
e.printStackTrace();
} catch (JAXBException e) {
e.printStackTrace();
}
}
}
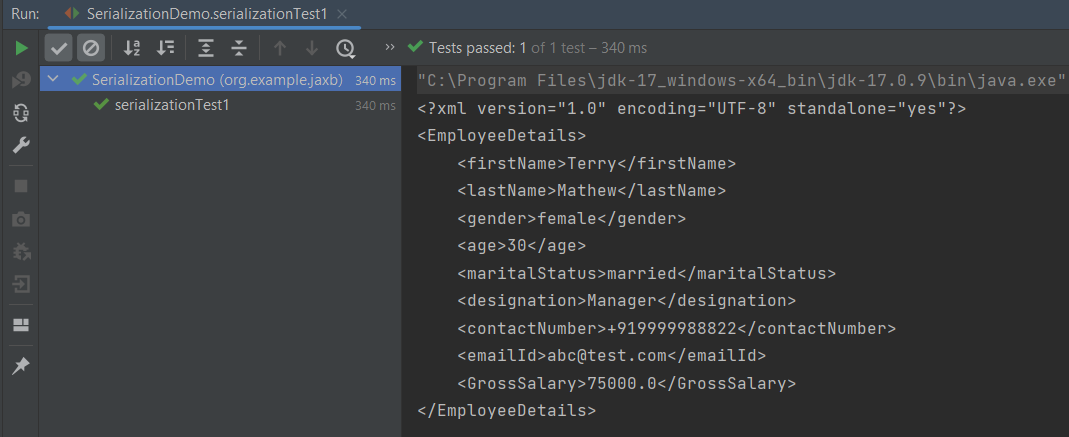
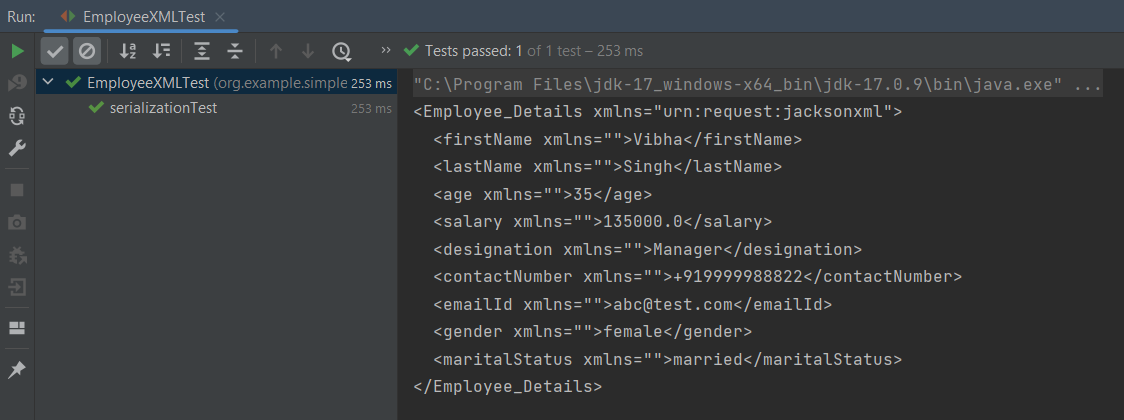
When we run the code above, we may check the console output to verify that we have successfully converted Java object to XML:
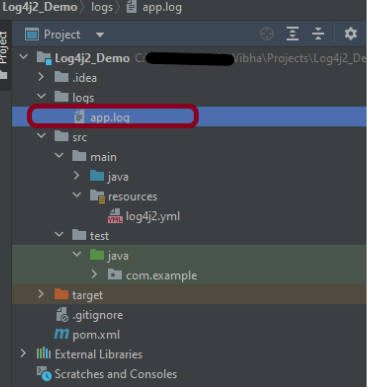
The XML is saved under src/test/resources. To see this file, after the execution of the test, you need to refresh the project.
Similarly, we can unmarshal an XML to Java Objects in the next tutorial.
We are done! Congratulations on making it through this tutorial and hope you found it useful! Happy Learning!!
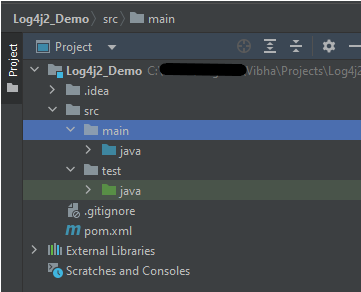
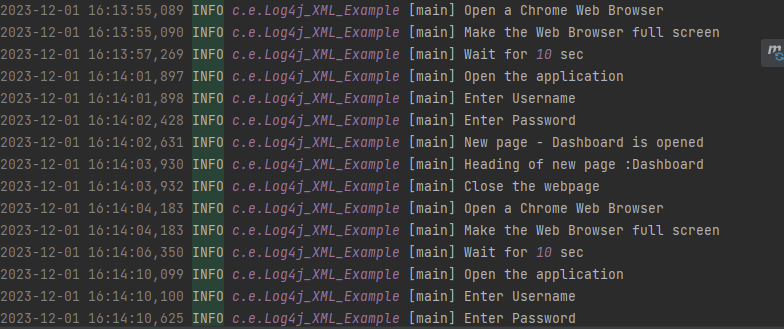
In the previous tutorial, we got an introduction to Log4j 2. In this tutorial, we will create a Selenium project and implement logging using the Log4j2 YML configuration.
We’ve defined the level of the root logger as DEBUG. This means that we’ll get all the log events with level DEBUG and above. We’ve also defined a name for the appender as LogToConsoleand File.
We want to direct the logs to the console as well as File, we assigned the Appender typeas Console and File.
We specify the pattern in which we want to print the log messages.
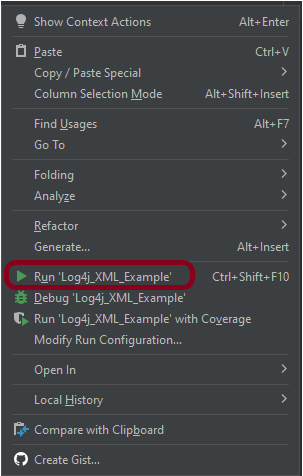
Step 4 – Import log4j in the Selenium script
We need to import the log4j library in the Selenium script, so that we can use it in your code. Here is an example of how to import log4j in the Selenium script:
We need to create a Logger instance in the Selenium script so that we can use it to log information. Here is an example of how to create a Logger instance:
The Jackson XML module adds some additional support for XML-specific features, just like JSON has some additional features. These annotations allow us to control the XML namespace and local name for elements, including the root element, whether a field is rendered in an element or as plain text, whether the content of an element is rendered in a CData wrapper, and whether a collection should use a wrapper element or not.
We need to add Jackson XML dependency to the project.
It is used to define the name of the root element used for the root-level object when serialized, which normally uses the name of the type (class). This can only adjust the Namespace and Local name – since the root element can never be serialized as an attribute.
Jackson allows us to read the contents of an XML file and deserialize the XML back into a Java object. In our example, we will read an XML document containing details about an Employee, and use Jackson to extract this data and use it to create Java objects containing the same information.
First, let us create an XML document matching our class to read from.
Create deserialize.xml with the following contents:
Deserialization – It is the reverse of serializing. In this process, we will read the Serialized byte stream from the file and convert it back into the Class instance representation. Here, we are converting a XML to an Employee class object.
Simple deserialized program
Let us add a deserializeFromXML() function to deserialize the XML file above into a Java object:
import com.fasterxml.jackson.core.exc.StreamReadException;
import com.fasterxml.jackson.databind.DatabindException;
import com.fasterxml.jackson.dataformat.xml.XmlMapper;
import org.example.simple.Employee;
import org.junit.Test;
import java.io.File;
import java.io.IOException;
public class DeserializeXMLTest {
@Test
public void deserializeFromXML() {
XmlMapper xmlMapper = new XmlMapper();
String userDir = System.getProperty("user.dir");
// Converting Employee XML to Employee class object
try {
Employee emp = xmlMapper.readValue(new File(userDir + "\\src\\test\\resources\\XMLExample.xml"),
Employee.class);
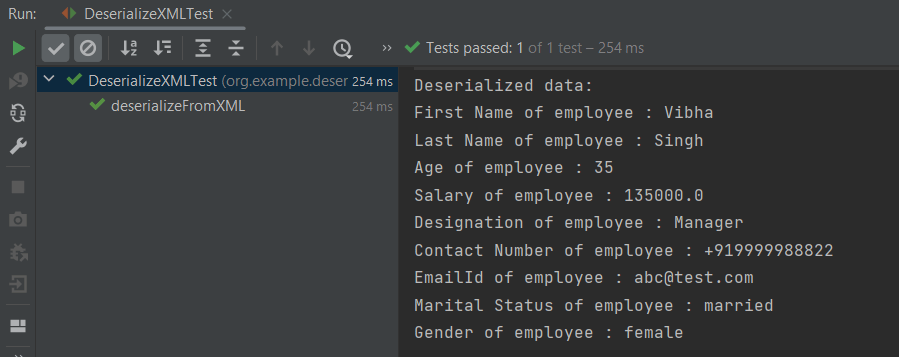
System.out.println("Deserialized data: ");
System.out.println("First Name of employee : " + emp.getFirstName());
System.out.println("Last Name of employee : " + emp.getLastName());
System.out.println("Age of employee : " + emp.getAge());
System.out.println("Salary of employee : " + emp.getSalary());
System.out.println("Designation of employee : " + emp.getDesignation());
System.out.println("Contact Number of employee : " + emp.getContactNumber());
System.out.println("EmailId of employee : " + emp.getEmailId());
System.out.println("Marital Status of employee : " + emp.getMaritalStatus());
System.out.println("Gender of employee : " + emp.getGender());
} catch (StreamReadException e) {
e.printStackTrace();
} catch (DatabindException e) {
e.printStackTrace();
} catch (IOException e) {
e.printStackTrace();
}
}
}
The output of the above program is shown below:
Manipulating Nested Elements in XML
Let us enhance our XML file to add nested elements and loops, and modify our code to deserialize the following updated structure.
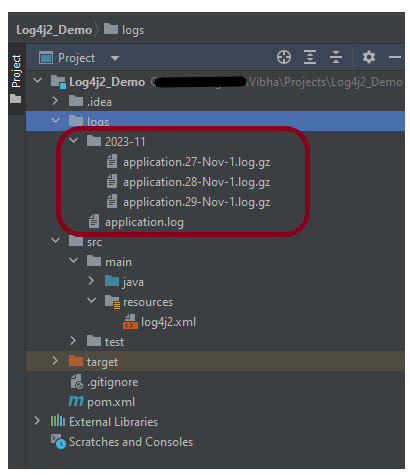
If we want to roll over log files based on file size and date time, we need to use SizeBasedTriggeringPolicy and TimeBasedRollingPolicy.
In the given example, the appender able to refer to the file name pattern and time-based rollover strategy using the filePattern attribute, which includes {dd-MMM}.Time-based rollover will happen every day.
Step 4 – Import log4j in the Selenium script
We need to import the log4j library in the Selenium script so that we can use it in your code. Here is an example of how to import log4j in the Selenium script:
We need to create a Logger instance in the Selenium script so that we can use it to log information. Here is an example of how to create a Logger instance:
This tutorial describes how to download and install Apache POI.
Selenium does not have an inbuilt method to read data from an Excel File. However, there are various libraries in JAVA that help in reading/writing data from Excel files. Apache POI is one of the most used libraries, which provides various classes and methods to read/write data from various formats of Excel files(xls, xlsx etc).
Apache POI, where POI stands for (Poor Obfuscation Implementation) is the Java API for Microsoft Documents that offers a collection of Java libraries that helps us to read, write, and manipulate different Microsoft files such as Excel sheets, PowerPoint, and Word files.
Download Apache POI
POI 5.2.3 was the last version where we produced a set of poi-bin*.zip and poi-bin*.tgz files. We will continue to publish jars to Maven Central. If you are not using a build tool like Apache Maven or Gradle, you can still find these jars by traversing the directories at https://repo1.maven.org/maven2/org/apache/poi/. The jar files are present here. Download them from here.
Go to poi and get the latest jar file from here.
Step 1 – To download Apache POI, go to its official site, here. Click on the Download as shown in the image. This link will navigate to the page showing the latest release of Apache POI. The latest Apache POI version is 5.2.3. You can follow the same steps for any version of POI.
Step 2 – This page shows the latest Apache POI Release Artifacts. Here, you can see POI 5.0.0 is the latest one. Download any one of the Binary Distribution options. One option is .ztar.gz and another option is .zip. I have selected .zip option.
Step 3 – After clicking on the link, it navigates to another page as shown below. I have used the highlighted link to download the POI library files.
Step 4 – Once POI.zip is downloaded and extracted, this is how the folder looks like
How to add POI libraries in Eclipse?
Step 1 – Below is the Java project present in Eclipse.
Step 2 – To add POI libraries to this project, Right-click on the project, hover over the Build path, select Configure Build Path.
Step 3 – It will open the “Properties” of the project. After that, select the Librariestab. Finally, click on the Add External JARs as highlighted below.
Step 4 – Select the JARs in the parent folder of the unzipped POI files. Subsequently, click on the Openbutton to include them in the Eclipse project.
Step 5 – Next, select the JARs under the ooxml-lib folder in the unzipped POI folder as highlighted below:
Step 6 – Select the JARs under the lib folder in the unzipped POI folder as highlighted below.
Step 7 – After that, once all the POI JARs add, click on the Apply and Close button as highlighted below.
Step 8 – Once all the POI libraries successfully install in the Eclipse project, they will reflect under the Referenced Libraries folder in the left pane of the Eclipse project structure, as shown below:
How to add POI libraries to Maven Java Project
You can add the poi and poi-ooxml jar files to the Maven project by mentioning the dependencies in pom.xml.