Internet Explorer is going away in near future. But still it is a browser which holds around 1% of browser market share. When anyone refers to automated browser testing, it somehow means that the testing will be performed on the latest browsers like Chrome, Firefox, etc. But along with these browsers, it is also expected to work on Internet Explorer (IE).
The Internet Explorer driver that is used by Selenium Tests can be downloaded from here.
In order to run the Selenium Tests on IE, it is needed to set the %PATH%.
How to add %PATH%
Go To -> View Advanced System Settings -> Environment Variables ->Clicks on the Path and add the path where IE binary is located on the machine.
How to run tests using Selenium IE driver in Selenium Java?
import org.junit.After;
import org.junit.Assert;
import org.junit.Before;
import org.junit.Test;
import org.openqa.selenium.WebDriver;
import org.openqa.selenium.ie.InternetExplorerDriver;
public class IEDemo {
public WebDriver driver;
@Before
public void setUp() {
System.setProperty("webdriver.ie.driver",
"C:\\Users\\Vibha\\Software\\IEDriverServer_x64_2.39.0\\IEDriverServer.exe");
driver = new InternetExplorerDriver();
}
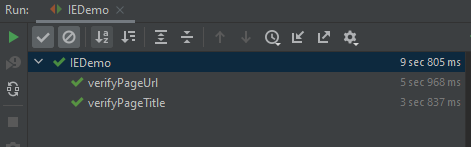
@Test
public void verifyPageTitle() {
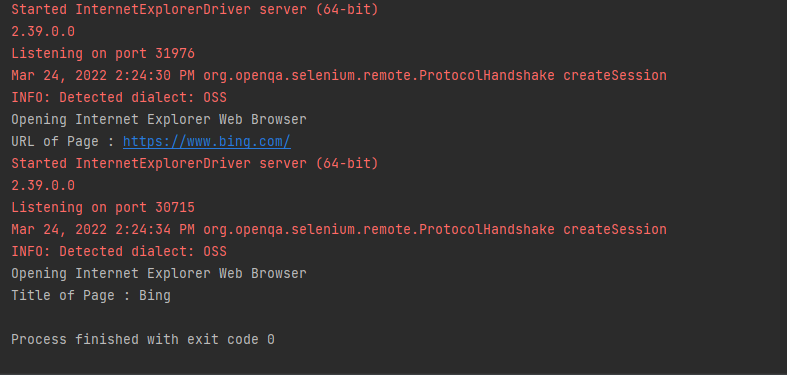
System.out.println("Opening Internet Explorer Web Browser");
driver.get("https://www.bing.com/");
System.out.println("Title of Page : " + driver.getTitle());
Assert.assertEquals(driver.getTitle(), "Bing");
}
@Test
public void verifyPageUrl() {
System.out.println("Opening Internet Explorer Web Browser");
driver.get("https://www.bing.com/");
System.out.println("URL of Page : " + driver.getCurrentUrl());
Assert.assertEquals(driver.getCurrentUrl(), "https://www.bing.com/");
}
@After
public void tearDown() {
// Close the driver
driver.close();
}
}
Execution
The string webdriver.ie.driver is set to the location which contains the Selenium IE driver. The InternetExplorerDriver method is used for instantiating the IE driver class.
The test method is implemented under the @Test annotation.
In the tearDown method, the resources held by IE driver are freed using the close() method in Selenium.
Congratulations!! We are able to open an Internet Explorer browser and perform tests. Happy Learning!!