A Step Definition is a Java method with an expression that links it to one or more Gherkin steps. When Cucumber executes a Gherkin step in a scenario, it will look for a matching step definition to execute.
Cucumber finds the Step Definition file with the help of the Glue code in Cucumber Options.
By storing state in instance variables, a step definition can transfer state to a subsequent step definition.
Step definitions are not associated with a specific feature file or scenario. The name of a step definition’s file, class, or package has no bearing on which Gherkin steps it will match. The formulation of the step definition is the only thing that matters, which means the step definition should only match Gherkin’s steps.
Imagine, we want to test a web application. One of the first steps is Login to the website and then check the various functionalities on the website. We can create a Gherkin step like “I login to the website” and the corresponding step definition of this Gherkin Step. This Gherkin step can be used in multiple feature files, and we don’t need to create the step definition of this Gherkin step for each feature file.
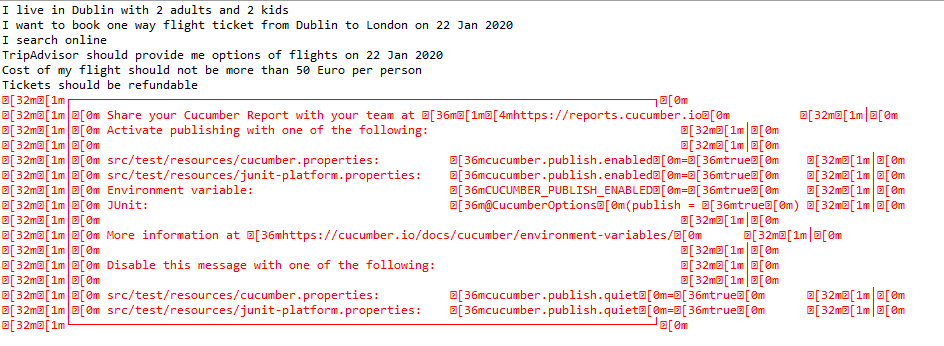
In the previous tutorial, we have seen that when the Feature file is executed without the Step Definition file, the runner shows the missing steps with the snippet in the console.
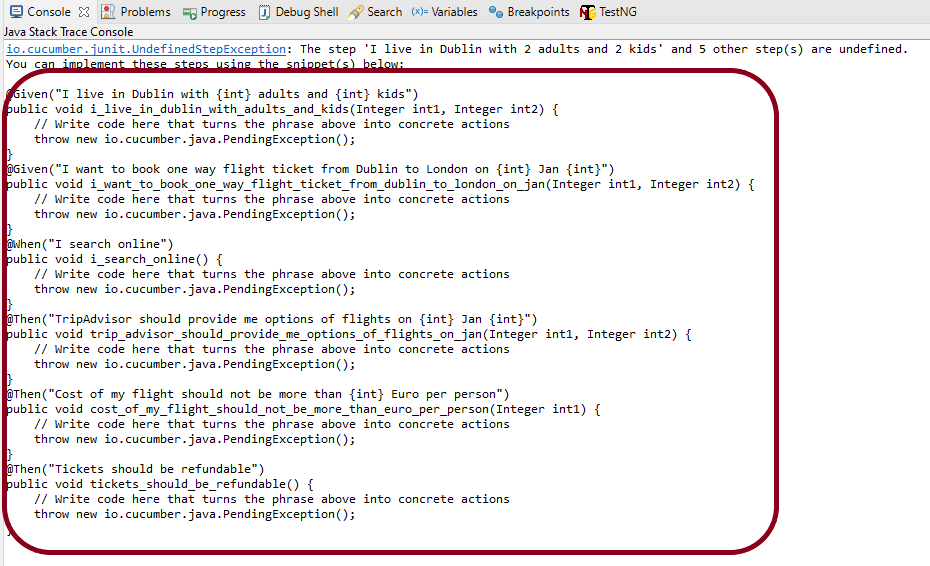
When a Cucumber encounters a Gherkinstep without a matching step definition, it will print a step definition snippet with a matching Cucumber Expression. You can use this as a starting point for new step definitions.
It is very easy to implement all the steps, all you need to do is copy the complete text marked in the above box and paste it into the MyHolidayDefinitions class.
@Given, @When, and @Then are imported from packages:-
Feature: Book flight ticket
@BookOneWayFlight
Scenario: Book Flight for one way trip
Given I live in Dublin with 2 adults and 2 kids
And I want to book one way flight ticket from Dublin to London on 22 Jan 2020
When I search online
Then TripAdvisor should provide me options of flights on 22 Jan 2020
And Cost of my flight should not be more than 50 Euro per person
And Tickets should be refundable
Let me create the step definition for the above Feature file
import io.cucumber.java.en.Given;
import io.cucumber.java.en.Then;
import io.cucumber.java.en.When;
public class MyHolidayDefinitions {
@Given("I live in Dublin with {int} adults and {int} kids")
public void liveInDublin(Integer int1, Integer int2) {
System.out.println("I live in Dublin with 2 adults and 2 kids");
}
@Given("I want to book one way flight ticket from Dublin to London on {int} Jan {int}")
public void bookFlightTicket(Integer int1, Integer int2) {
System.out.println("I want to book one way flight ticket from Dublin to London on 22 Jan 2020");
}
@When("I search online")
public void searchOnline() {
System.out.println("I search online");
}
@Then("TripAdvisor should provide me options of flights on {int} Jan {int}")
public void tripAdvisor(Integer int1, Integer int2) {
System.out.println("TripAdvisor should provide me options of flights on 22 Jan 2020");
}
@Then("Cost of my flight should not be more than {int} Euro per person")
public void costOfFlightLimit(Integer int1) {
System.out.println("Cost of my flight should not be more than 50 Euro per person");
}
@Then("Tickets should be refundable")
public void refundableTickets() {
System.out.println("Tickets should be refundable");
}
}
To run the scenarios present in the Feature File, we need TestRunner class. To learn more about the TestRunner class, please refer to this tutorial – Cucumber Tutorial – JUnit Test Runner Class
The Cucumber plugin is an Eclipse plugin that allows Eclipse to understand the Gherkin syntax. When we are working with cucumber we will write the feature files that contain Feature, Scenario, Given, When, Then, And, But, Tags, Scenario Outline, and Examples. By default, Eclipse doesn’t understand these keywords, so it doesn’t show any syntax highlighter. Cucumber Eclipse Plugin highlights the keywords present in the Feature File.
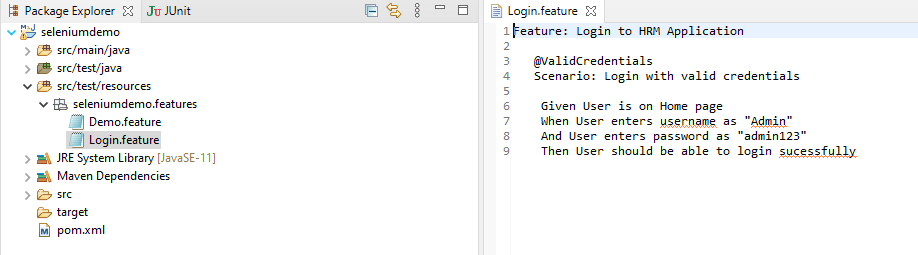
When we create a feature file in Eclipse, it looks something like the below without Cucumber Eclipse Plugin installed.
It is easy to install Cucumber Eclipse Plugin, as it comes as a plugin for Eclipse IDE. A prerequisite for installing this plugin is your Internet connection should be up & running during the installation of this plugin and Eclipse IDE should be installed on your computer.
Steps to follow:
Step 1 – Launch the Eclipse IDE and, from the Help menu, click “Install New Software”.
Step 2 – You will see a dialog window, click the “Add” button.
Step 4 – You come back to the previous window, but this time you must see the Cucumber Eclipse Plugin option in the available software list. Just check the box and press the “Next” button.
Once the installation starts, it can be seen on the screen as shown in the below image.
Step 5 – Click on the “Next“ Button.
Step 6 – Click “I accept the terms of the licence agreement” and then click the “Finish” button.
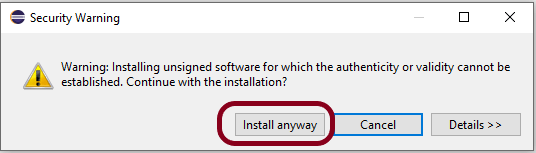
Step 7 – You may or may not encounter a Security warning, if in case you do just click the “OK” button.
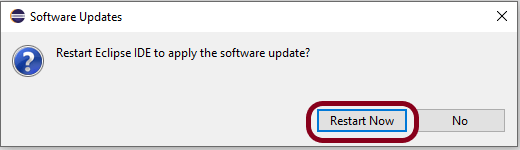
Step 8 -You are all done now, just click the “Restart Now” button.
After restarting Eclipse, you can see the feature file is highlighted based on the keywords.
This means now Eclipse is able to understand the language we have written in the feature file as Gherkin language.
All the steps in the below scenario are highlighted in yellow colour, which indicates we don’t have any corresponding step definition for each step.
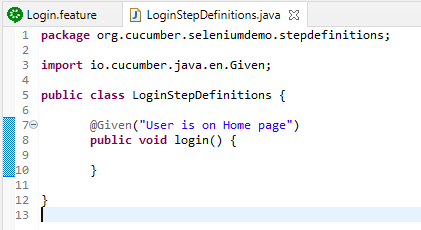
Now, in the below example, I have created the step definition for the Given statement. So, now, it is not highlighted in yellow colour.
Below is the step definition for the Given statement.
If you press the Ctrl button and place the cursor on a Given Statement, it will take you to the corresponding step definition of that step. This is a very helpful feature. When we have multiple feature files with multiple steps, it helps us find the exact location of the step definition.
I hope this tutorial makes your learning a little easy. Thanks. Happy Learning!!
Selenium is moved from version 3 to version 4 which is quite a huge step. What does this change mean? It means that a few of the old features of Selenium 3 are depreciated in Selenium 4 as well some new features are added to it also. I’m trying to explain a few of the latest updates done in Selenium 4.
Managing Selenium Grid is now smooth and easy as there will no longer be any need to set up and start hubs and nodes separately. The grid can be deployed in 3 modes:
Standalone – Standalone is the union of all components, and to the user’s eyes, they are executed as one. A fully functional Grid of one is available after starting it in the Standalone mode. By default, the server will be listening on http://localhost:4444, and that’s the URL you should point your RemoteWebDriver tests. The server will detect the available drivers that it can use from the System PATH.
Hub and Node – It enables the classic Hub & Node(s) setup. These roles are suitable for small and middle-sized Grids
Distributed – On Distributed mode, each component needs to be started on its own. This setup is more suitable for large Grids.
Grid will now support IPv6 addresses and one can communicate with the Grid using the HTTPS protocol. In Grid 4, the configuration files used for spinning up the grid instances can be written in TOML (Tom’s Obvious, Minimal Language) which will make it easier for humans to understand.
The new Selenium Grid comes with Docker support. It also supports advanced tools like AWS, Azure, and much more, useful in the DevOps process. Now Grid has a more user-friendly UI and contains relevant information related to the session, running, capacity, etc.
2. Simplification to open a new Windows browser and Tabs
There are a number of scenarios where you would want to open a new browser (or tab) and perform a certain set of actions in the newly opened window/tab. In Selenium 3, you have to create a new Web Driver object and then switch to the new window (or tab) using its unique WindowHandle to perform subsequent actions in that window (or tab).
Selenium 4 provides a new API new Window that lets you create a new window (or tab) and automatically switch to it. Since the new window or tab is created in the same session, it avoids creating a new WebDriver object. For switching to the new tab, pass WindowType.TAB to newWindow() method and for creating a new window, pass WindowType.WINDOW to newWindow() method.
public class NewWindowDemo {

	public static void main(String[] args) {
		System.setProperty("webdriver.chrome.driver",
				"C:\\Users\\Vibha\\Software\\chromedriver_win32_93.0.4577.15\\chromedriver.exe");
		WebDriver driver = new ChromeDriver();
		driver.manage().window().maximize();

		driver.get("https://www.bing.com/");
		System.out.println("New Page - Bing is opened");

		// Opens a new window and switches to new window
		driver.switchTo().newWindow(WindowType.WINDOW);

		// Opens duckduckgo homepage in the new opened window
		driver.navigate().to("https://www.duckduckgo.com/");

		System.out.println("New Page - DuckDuckGo is opened");

		driver.quit();
	}
}
Open a new Tab in Selenium 4
public class NewTabDemo {

	public static void main(String[] args) {

		System.setProperty("webdriver.chrome.driver",
				"C:\\Users\\Vibha\\Software\\chromedriver_win32_93.0.4577.15\\chromedriver.exe");

		WebDriver driver = new ChromeDriver();
		driver.manage().window().maximize();

		driver.get("https://www.bing.com/");
		System.out.println("New Page - Bing is opened");

		// Opens a new window and switches to new window
		driver.switchTo().newWindow(WindowType.TAB);

		// Opens duckduckgo homepage in the new opened window
		driver.navigate().to("https://www.duckduckgo.com/");

		System.out.println("New Tab is opened with DuckDuckGo");
		driver.quit();
	}
}
3. Relative Locators
Selenium 4 brings Relative Locators which are previously called as Friendly Locators. This functionality was added to help you locate elements that are nearby other elements. The Available Relative Locators are:
above below toLeftOf toRightOf near
findElement method now accepts a new method withTagName() which returns a RelativeLocator.
In Selenium 3, there was a provision to capture a screenshot of the entire web page. Selenium 4 onwards, there is a new option to capture screenshots of a particular WebElement. Hence, there is no need to use third-party tools like Shutterbug, Ashot, etc. (like in Selenium 3) for capturing a screenshot of WebElement.
The newly introduced method in Selenium 4 captures the screenshot of an element for the current browsing context. The screenshot returned by the WebDriver endpoint is encoded in the Base64 format.
This is how you can capture WebElement Screenshot in Selenium 4 (for Java):
import io.github.bonigarcia.wdm.WebDriverManager;
import org.apache.commons.io.FileUtils;
import org.openqa.selenium.By;
import org.openqa.selenium.OutputType;
import org.openqa.selenium.TakesScreenshot;
import org.openqa.selenium.WebDriver;
import org.openqa.selenium.WebElement;
import org.openqa.selenium.chrome.ChromeDriver;
import org.openqa.selenium.firefox.FirefoxDriver;
public class ScreenshotDemo {
public static void main(String[] args) {
WebDriverManager.chromedriver().setup();
WebDriver driver = new ChromeDriver();
driver.manage().window().maximize();
driver.get("https://www.selenium.dev/");
try {
WebElement logo = driver.findElement(By.xpath("//*[@id='td-cover-block-0']/div/div/div/div/h1"));
File source = ((TakesScreenshot) logo).getScreenshotAs(OutputType.FILE);
FileUtils.copyFile(source, new File("./Screenshots/logo" + System.currentTimeMillis() + ".png"));
} catch (Exception e) {
System.out.println(e.getMessage());
}
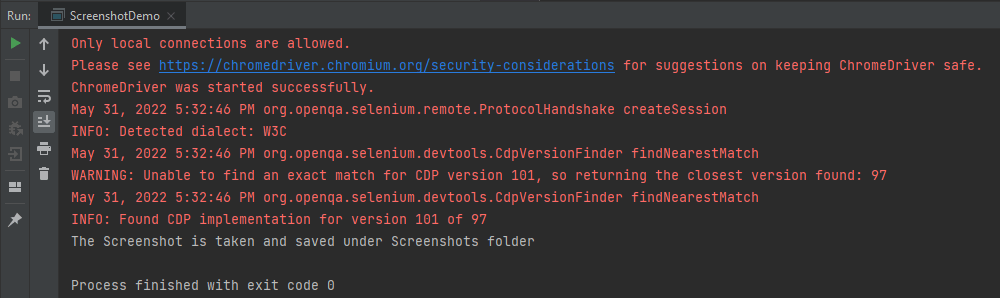
System.out.println("The Screenshot is taken and saved under Screenshots folder");
driver.quit();
}
}
The output of the above program is
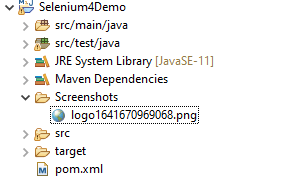
The picture will be saved in the Screenshots folder as shown below:
Below is the image of the screenshots.
5. New additions to the Actions Class
Actions Class in Selenium provides several methods for performing a single action or a series of actions on the WebElements present in the DOM. Mouse actions (e.g., click, double click, etc.) and Keyboard actions (e.g., keyUp, keyDown, sendKeys) are the two broad categories of Actions. For demonstration, we will post the examples demonstrated in the Action class in the Selenium blog from Selenium 3 to Selenium 4.
With Selenium 4, new methods are added to the Actions class, which replaces the classes under the org.openqa.selenium.interactions package.
click(WebElement) is the new method added to the Actions class and it serves as the replacement of moveToElement(onElement).click() method.
Like the method in the versions before Selenium 4, click(WebElement) is used for clicking a web element.
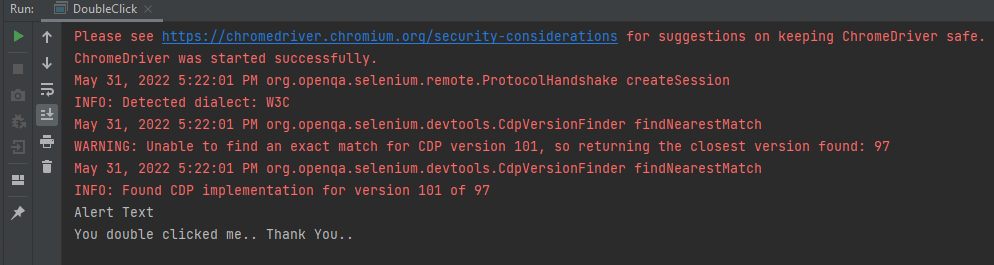
doubleClick(WebElement)
This method is added to replace moveToElement(element).doubleClick(). It will perform a double-click on an element.
import io.github.bonigarcia.wdm.WebDriverManager;
import org.openqa.selenium.Alert;
import org.openqa.selenium.By;
import org.openqa.selenium.WebDriver;
import org.openqa.selenium.WebElement;
import org.openqa.selenium.chrome.ChromeDriver;
import org.openqa.selenium.interactions.Actions;

public class DoubleClick {
    public static void main(String[] args) {

        WebDriverManager.chromedriver().setup();
        WebDriver driver = new ChromeDriver();

        // Navigate to Url
        driver.get("https://demo.guru99.com/test/simple_context_menu.html");

        // Store 'doubleClickButton' button web element
        WebElement doubleClickButton = driver.findElement(By.xpath("//*[@id='authentication']/button"));
        Actions actionProvider = new Actions(driver);

        // Perform double-click action on the element
        actionProvider.doubleClick(doubleClickButton).build().perform();
        Alert alert = driver.switchTo().alert();
        System.out.println("Alert Text\n" +alert.getText());
        alert.accept();

        driver.close();
    }
}
The output of the above program is
clickAndHold(WebElement)
This method will replace the moveToElement(onElement).clickAndHold(). It is used to click on an element without releasing the click.
contextClick(WebElement)
This method will replace moveToElement(onElement).contextClick(). It will perform the right-click operation.
release()
This method (user for releasing the pressed mouse button) was initially a part of org.openqa.selenium.interactions.ButtonReleaseAction class. Now with the updated version of Selenium, it has been moved to the Actions class.
import io.github.bonigarcia.wdm.WebDriverManager;
import org.openqa.selenium.By;
import org.openqa.selenium.WebDriver;
import org.openqa.selenium.WebElement;
import org.openqa.selenium.chrome.ChromeDriver;
import org.openqa.selenium.interactions.Actions;
public class clickAndHold {
public static void main(String[] args) {
WebDriverManager.chromedriver().setup();
WebDriver driver = new ChromeDriver();
// Navigate to Url
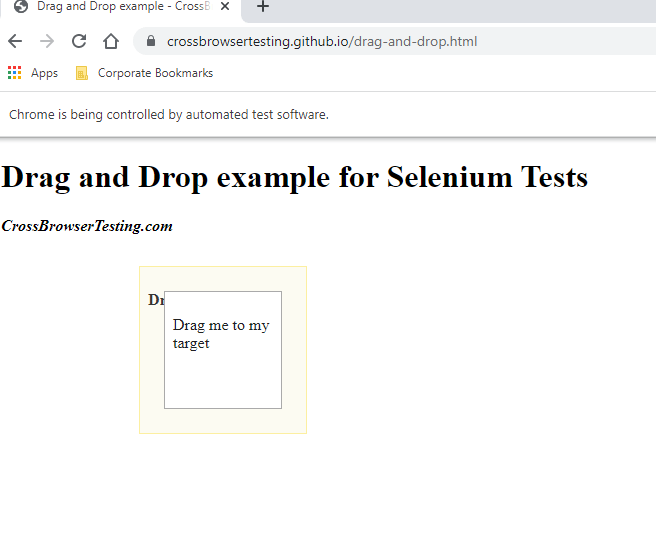
driver.get("https://crossbrowsertesting.github.io/drag-and-drop.html");
driver.manage().window().maximize();
// Find element xpath which we need to drag
WebElement from = driver.findElement(By.id("draggable"));
// Find element xpath where we need to drop
WebElement to = driver.findElement(By.id("droppable"));
Actions actionProvider = new Actions(driver);
// Perform click-and-hold action on the element
actionProvider.clickAndHold(from).build().perform();
// Move to drop Webelement
actionProvider.clickAndHold(to).build().perform();
//Release drop element
actionProvider.release(to).build().perform();
}
}
The output of the above program is
6. Deprecation of Desired Capabilities
In Selenium 3, desired Capabilities were primarily used in the test scripts to define the test environment (browser name, version, operating system) for execution on the Selenium Grid.
In Selenium 4, capabilities objects are replaced with Options. This means testers now need to create an Options object, set test requirements, and pass the object to the Driver constructor.
Listed below are the Options objects to be used going forward for defining browser-specific capabilities:
Firefox – FirefoxOptions Chrome – ChromeOptions Internet Explorer (IE) – InternetExplorerOptions Microsoft Edge – EdgeOptions Safari – SafariOptions
Below is an example of Options
import org.openqa.selenium.WebDriver;
import org.openqa.selenium.chrome.ChromeDriver;
import org.openqa.selenium.chrome.ChromeOptions;
import io.github.bonigarcia.wdm.WebDriverManager;
public class ChromeOptionsHeadless {
public static void main(String[] args) {
WebDriverManager.chromedriver().setup();
ChromeOptions chromeOptions = new ChromeOptions();
chromeOptions.setBrowserVersion("100");
chromeOptions.setPlatformName("Windows 10");
WebDriver driver = new ChromeDriver(chromeOptions);
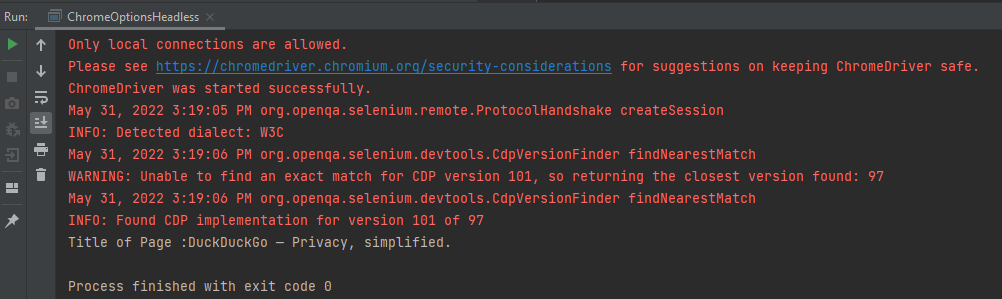
driver.get("https://duckduckgo.com/");
System.out.println("Title of Page :" + driver.getTitle());
// Close the driver
driver.close();
}
}
The output of the above program is
Similarly, we can create the action class for other browsers like Firefox.
FirefoxOptions options = new FirefoxOptions();

// Create an object of WebDriver class and pass the Firefox Options object as an argument
WebDriver driver = new FirefoxDriver(options);
7. Chrome Dev Tools
In the new version of Selenium, they have made some internal changes in the API. Earlier in Selenium 3, the Chrome driver extends directly to the Remote Web Driver class. But now in Selenium 4, the Chrome driver class extends to Chromium Driver. Chromium Driver class has some predefined methods to access the dev tool.
Note: Chromium Driver extends the Remote Web driver class.
By using the API, we can perform the following operations:
JUnit5 enables us to execute a single test method multiple times with a different sets of data. This is called Parameterization. Parameterized Tests are declared just like regular @Test methods but use the @ParameterizedTest annotation.
This article shows you how to run a test multiple times with different arguments, so-called ‘Parameterized Tests’, let’s see the following ways to provide arguments to the test:
@ValueSource
@EnumSource
@MethodSource
@CsvSource
@CsvFileSource
@ArgumentsSource
We need to add junit-jupiter-params to support parameterized tests. In the case of Maven, add the dependency to POM.xml
Let us start with a simple example. The following example demonstrates a parameterized test that uses the @ValueSource annotation to specify an integer array as the source of arguments. The following @ParameterizedTest method will be invoked three times, with the values 5,6, and 0 respectively.
@ParameterizedTest
@ValueSource(ints = {5, 6, 0})
void test_int_arrays(int b) {

    int a= 5;
    int sum = a + b;
    assertTrue(sum>8);
 }
When executing the above-parameterized test method, each invocation will be reported separately.
The output of the above program is:
One of the limitations of value sources is that they only support these types:
short (with the shorts attribute)
byte (bytes attribute)
int (ints attribute)
long (longs attribute)
float (floats attribute)
double (doubles attribute)
char (chars attribute)
java.lang.String (strings attribute)
java.lang.Class (classes attribute)
Also, we can only pass one argument to the test method each time.
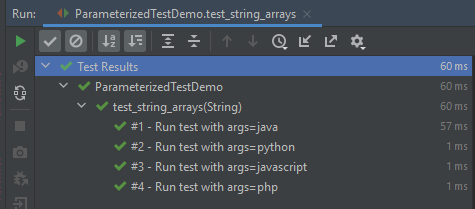
In the below example, an array of strings is passed as the argument to the Parameterized Test.
@ParameterizedTest(name = "#{index} - Run test with args={0}")
@ValueSource(strings = {"java", "python", "javascript","php"})
void test_string_arrays(String arg) {
        assertTrue(arg.length() > 1);
}
The output of the above program is:
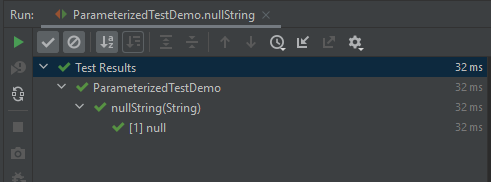
@NullSource
It provides a single null an argument to the annotated @ParameterizedTest method.
The parameterized test method result in seven invocations: 1 for null, 1 for the empty string, 4 for the explicit blank strings supplied via @ValueSource, and 1 non-blank string “a” supplied via @ValueSource.
The output of the above program is:
2. @EnumSource
@EnumSource provides a convenient way to use Enum constants.
The annotation provides an optional names attribute that lets you specify which constants shall be used, like in the following example. If omitted, all constants will be used.
The @EnumSource annotation also provides an optional mode attribute that enables fine-grained control over which constants are passed to the test method. For example, you can exclude names from the enum constant pool or specify regular expressions as in the following examples.
@MethodSource allows you to refer to one or more factory methods of the test class or external classes.
Factory methods within the test class must be static unless the test class is annotated with @TestInstance(Lifecycle.PER_CLASS); whereas, factory methods in external classes must always be static. In addition, such factory methods must not accept any arguments.
If you only need a single parameter, you can return a Stream of instances of the parameter type as demonstrated in the following example.
   @ParameterizedTest(name = "#{index} - Test with String : {0}")
    @MethodSource("stringProvider")
    void test_method_string(String arg) {
        assertNotNull(arg);
    }

    // this need static
    static Stream<String> stringProvider() {
        return Stream.of("java", "junit5", null);
    }
The output of the above program is
If you do not explicitly provide a factory method name via @MethodSource, JUnit Jupiter will search for a factory method that has the same name as the current @ParameterizedTest method by convention. This is demonstrated in the following example.
Streams for primitive types (DoubleStream, IntStream, and LongStream) are also supported as demonstrated by the following example.
 @ParameterizedTest(name = "#{index} - Test with Int : {0}")
    @MethodSource("rangeProvider")
    void test_method_int(int arg) {
        assertTrue(arg < 6);
    }

    static IntStream rangeProvider() {
        return IntStream.range(0, 6);
    }
The output of the above program is
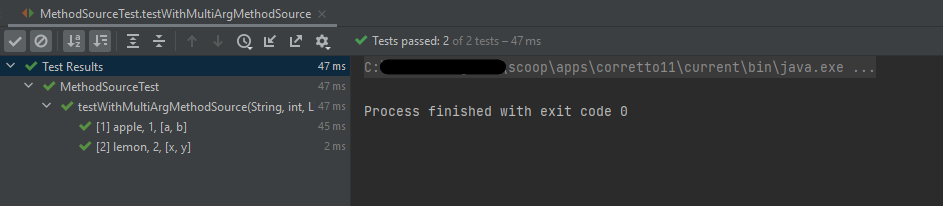
If a parameterized test method declares multiple parameters, you need to return a collection, stream, or array of Arguments instances or object arrays as shown below.
@CsvSource allows you to express argument lists as comma-separated values (i.e., CSV String literals). Each string provided via the value attribute in @CsvSource represents a CSV record and results in one invocation of the parameterized test.
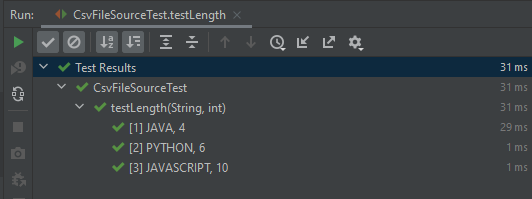
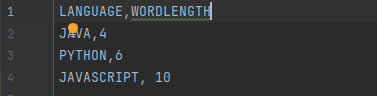
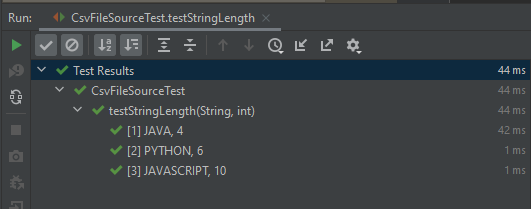
@CsvFileSource lets us use comma-separated value (CSV) files from the classpath or the local file system. Each record from a CSV file results in one invocation of the parameterized test. The first record may optionally be used to supply CSV headers.
If you would like the headers to be used in the display names, you can set the useHeadersInDisplayName attribute to true. The examples below demonstrate the use of useHeadersInDisplayName.
@ArgumentsSource can be used to specify a custom, reusable ArgumentsProvider. Note that an implementation of ArgumentsProvider must be declared as either a top-level class or as a static nested class.
The general practices say that automated tests should be able to run independently and with no specific order, as well as the result of the test should not depend on the results of previous tests. But there are situations where a specific order of test execution can be justified, especially in integration or end-to-end tests. The test methods don’t follow a specific order by default to execute the tests. The test cases need not necessarily execute in the order in which they have been written.
There are different ways or modes to set the order of execution for the test cases. This article shows how to control the JUnit 5 test execution order via the following MethodOrderer classes:
DisplayName – sorts test methods alphanumerically based on their display names
MethodName – sorts test methods alphanumerically based on their names and formal parameter lists
Alphanumeric – sorts test methods alphanumerically based on their names and formal parameter lists. This is deprecated from JUnit Version 5.7 onwards
OrderAnnotation – sorts test methods numerically based on values specified via the @Order annotation
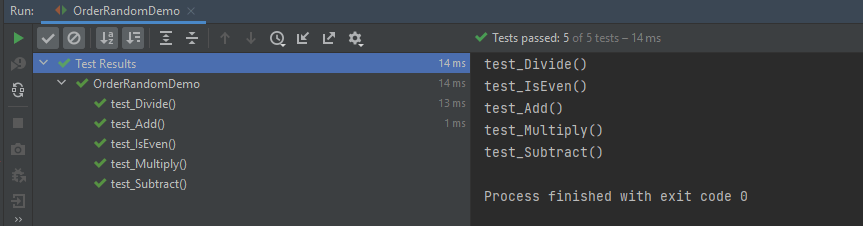
Random – orders test methods pseudo-randomly and support the configuration of a custom seed
Custom Order – A custom ordering sequence can be implemented by the interface MethodOrderer and providing it as the argument to @TestMethodOrder.
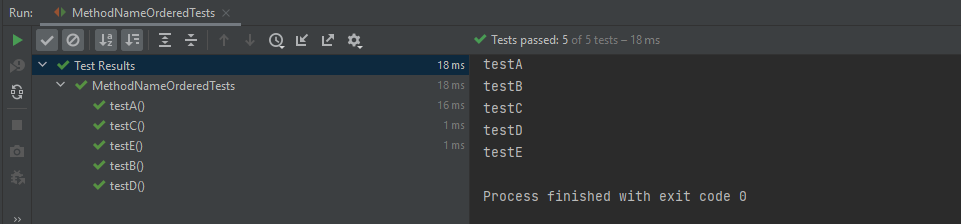
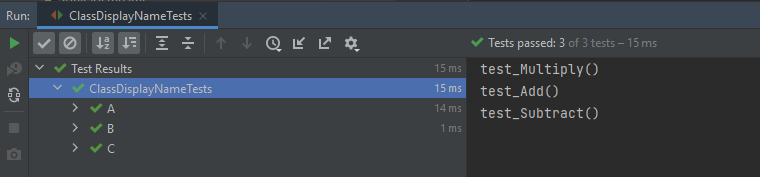
It sorts test methods alphanumerically based on their display names. Test Method can be anything annotated with @Test, @RepeatedTest, @ParameterizedTest, @TestFactory, or @TestTemplate.
@TestMethodOrder(MethodOrderer.DisplayName.class)
@TestMethodOrder is a type-level annotation that is used to configure a MethodOrderer for the test methods of the annotated test class or test interface.
MethodOrderer defines the API for ordering the test methods in a given test class.
Test Method – It is any method annotated with @Test, @RepeatedTest, @ParameterizedTest, @TestFactory, or @TestTemplate.
DisplayName.class – MethodOrderer that sorts methods alphanumerically based on their names using String.compareTo(String). If two methods have the same name, String representations of their formal parameter lists will be used as a fallback for comparing the methods.
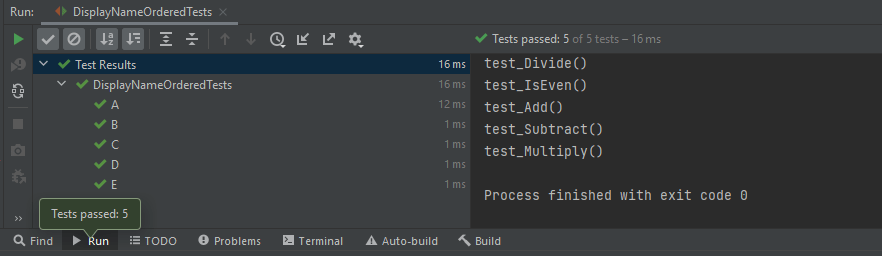
An example of sorting the tests based on their display names.
We can see that the test methods are sorted alphanumerically based on their display name starting from A to E. The output of the above program
2. MethodName
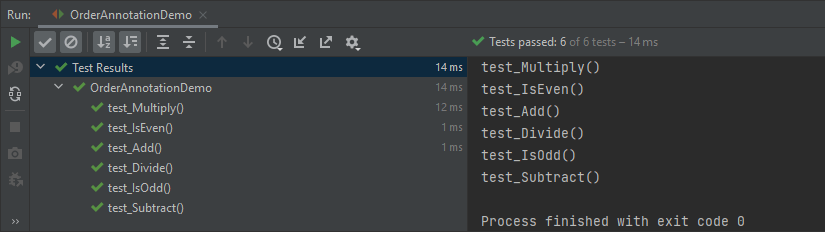
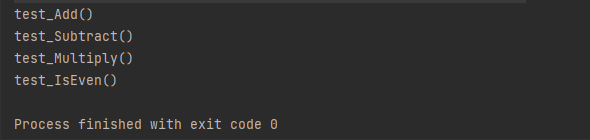
This annotation sorts methods alphanumerically based on their names using String.compareTo(String). If two methods have the same name, String representations of their formal parameter lists will be used as a fallback for comparing the methods.
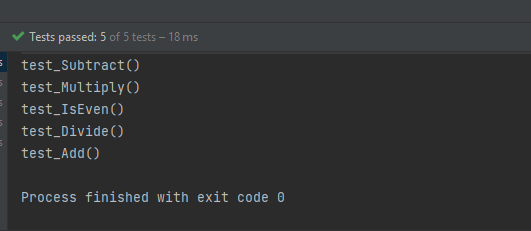
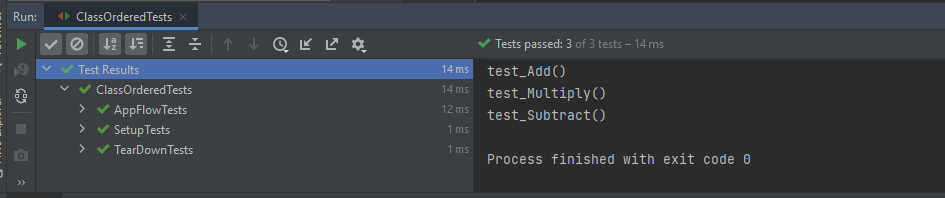
This sorts test method numerically based on values specified via the @Order annotation. Any methods that are assigned the same order value will be sorted arbitrarily adjacent to each other. When any method is not annotated with @Order, it will be assigned the default order value, which will effectively cause them to appear at the end of the sorted list.
The previous tutorial explains to configure Junit in IntelliJ and run the tests as JUnit Tests. This tutorial shows the steps to run the tests through command line. We can ask, why we need to run the tests through command line?? There are many reasons, one of the reason is to achieve CI/CD. To run the tests in pipeline, they need to be run through command line. Another reason is that we don’t need to open the IDE to run the tests. Third reason is that many reports are only generated (Serenity, Cucumber), if the tests run through command line.
Below is a JUnit5 test.
import io.github.bonigarcia.wdm.WebDriverManager;
import org.junit.jupiter.api.*;
import org.openqa.selenium.WebDriver;
import org.openqa.selenium.chrome.ChromeDriver;
import org.openqa.selenium.chrome.ChromeOptions;

public class Demo {

    WebDriver driver;

    @BeforeEach
    public void setUp() {
        WebDriverManager.chromedriver().setup();
        ChromeOptions chromeOptions = new ChromeOptions();
        driver = new ChromeDriver(chromeOptions);
        driver.manage().window().fullscreen();
    }

    @Test
    public void Junit5Test() {
        driver.get("http://automationpractice.com/index.php");
        System.out.println("Title of Page :" + driver.getTitle());
        System.out.println("Page URL : " + driver.getCurrentUrl());
        Assertions.assertEquals("My Store",driver.getTitle());

    }

    @AfterEach
    public void tearDown() {
        driver.close();
    }
}
Let us see what happens when we try to run the JUnit tests through Command Line. This command is used to run the tests present in Demo class.
mvn clean test -Dtest=Demo
The output generated by the test is shown below
This shows that surefire-plugin is need to be add to the project to run t he tests successfully through command line.
JUnit5 contains the assertions available as in JUnit 4 Assertions as well there are a few additional new asserts too. In this post, let’s discuss each new assertion in JUnit5 works in detail with examples.
1. assertIterableEquals
The assertIterableEquals() asserts that the expected and the actual iterables are deeply equal. In order to be equal, both iterable must return equal elements in the same order and it isn’t required that the two iterables are of the same type in order to be equal.
Example 1 – In this example, the number of elements as well as the sequence of elements is in the same order in both Iterables. It is not mandatory to have Iterables of the same type, so we can see as one of the Iterable is ArrayList whereas another Iteratble is of type LinkedList.
As both Iterables do not have same number of elements, so the Assertion has failed.
Note:- There are no assertions like assertNotIterableEquals() or assertIterableNotEquals().
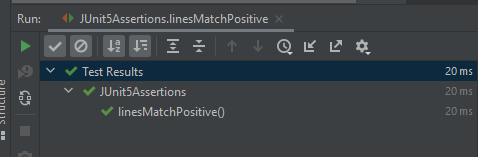
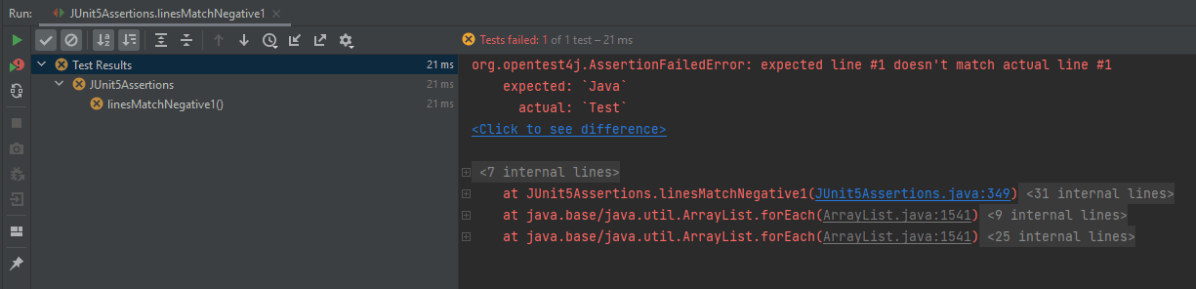
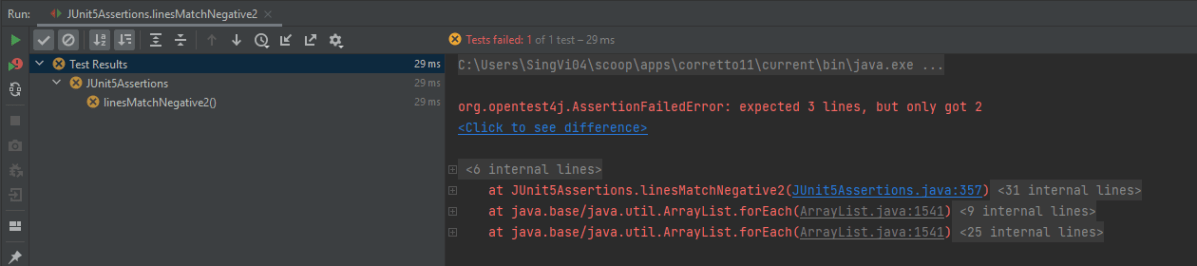
2. assertLinesMatch
This Assertion asserts that the expected list of Strings matches the actual list of String. This method differs from other assertions that effectively only check String.equals(Object), in that it uses the following staged matching algorithm: For each pair of expected and actual lines do a) check if expected.equals(actual) – if yes, continue with next pair b) otherwise treat expected as a regular expression and check via String.matches(String) – if yes, continue with the next pair c) otherwise check if an expected line is a fast-forward marker, if yes apply to fast-forward actual lines accordingly (see below) and goto 1.
Example 1 – In the below example, expected has a regular expression that matches with the elements of actual.
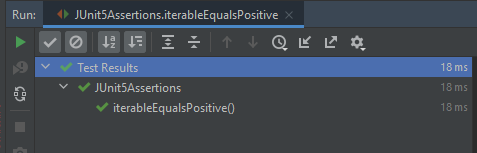
When we want to assert that execution of the supplied executable completes before the given timeout, we can use assertTimeout().
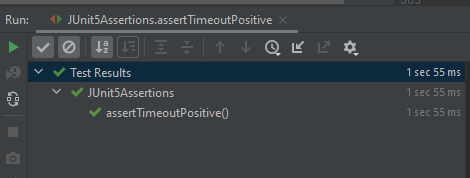
Example 1 – In the below example, assertTimeout() is 2 sec, which means the assertion should be completed within 2 secs. We are waiting for 1 sec and then perform the assertion.
 @Test
     void assertTimeoutPositive() {
       int a = 4;
       int b= 5;
        assertTimeout(
                ofSeconds(2),
                () -> {
                    // code that requires less then 2 seconds to execute
                    Thread.sleep(1000);
                }
        );
        assertEquals(9, (a + b));
    }
As the assertion is within the specified time of assertTimeout(), the timeout assertion passes and the test passes.
Example 2 – In the below example, assertTimeout() is 2 sec whereas are waiting for 5 sec and then performing the assertion.
  @Test
   void assertTimeoutNegative() {
        int a = 4;
        int b= 5;
        assertTimeout(
                ofSeconds(2),
                () -> {
                    // code that requires less then 2 seconds to execute
                    Thread.sleep(5000);
                }
        );
        assertEquals(9, (a + b));
    }
As the assertion is outside the specified time of assertTimeout(), so the test fails. The assertion fails with an error message similar to: “execution exceeded timeout of 2000 ms by 3010 ms”.
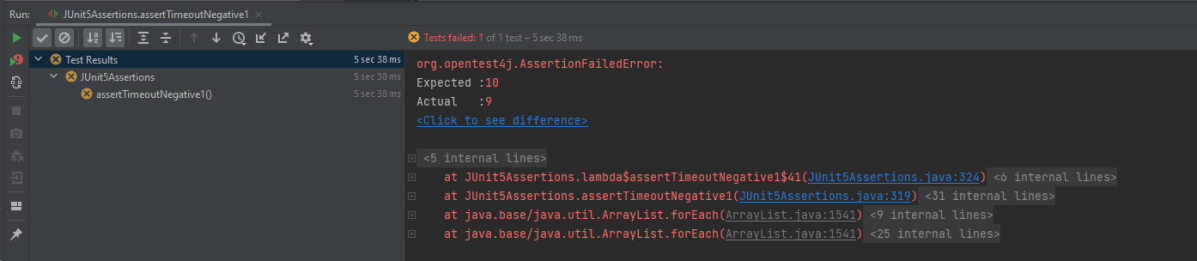
Example 3 – In the below example, the assertion is mentioned just after
The executable will be executed in the same thread as that of the calling code. Consequently, execution of the executable will not be preemptively aborted if the timeout is exceeded.
@Test
 void assertTimeoutNegative1() {
    int a = 4;
    int b= 5;
    assertTimeout(
        ofSeconds(2),
        () -> {
                // code that requires less then 2 seconds to execute
                 Thread.sleep(5000);
                 assertEquals(10, (a + b));
              }
        );
    }
This shows that the assertion assertEquals() is still executed after the timeout also.
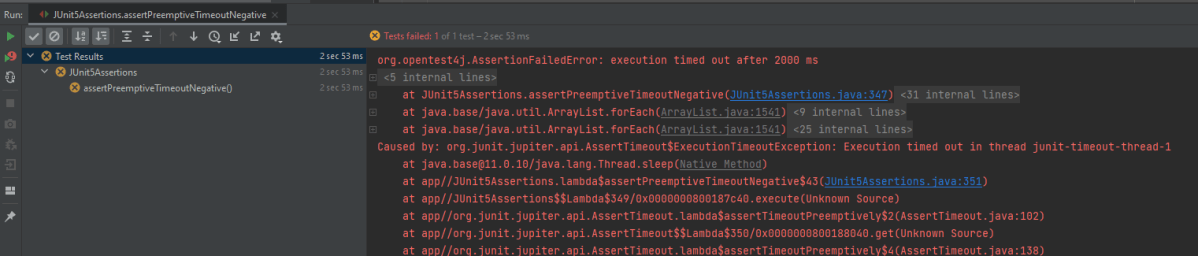
5. assertTimeoutPreemptively()
This assertion works just like assertTimeout(). When we want to assert that the execution of the supplied executable completes before the given timeout, we can use assertTimeoutPreemptively(). The only difference is that here the executable will be executed in a different thread than that of the calling code, whereas in assertTimeout() the executable will be executed in the same thread as that of the calling code. Furthermore, execution of the executable will be preemptively aborted if the timeout is exceeded here as contrary to assertTimeout() where the executable will not be preemptively aborted.
@Test
    void assertPreemptiveTimeoutNegative() {
        int a = 4;
        int b= 5;
        assertTimeoutPreemptively(
                ofSeconds(2),
                () -> {
                    // code that requires less then 2 seconds to execute
                    Thread.sleep(5000);
                    assertEquals(9, (a + b));
                }
        );
    }
In this post, We saw that JUnit Jupiter comes with many of the assertion methods that JUnit 4 has and adds a few that lend themselves well to being used with Java 8 lambdas. All JUnit Jupiter assertions are static methods in the org.junit.jupiter.api.Assertions class.
Grouped assertions in JUnit 5 help make your tests cleaner and more readable by allowing you to group related assertions together with a single failure message if any of them fail. This is particularly useful when you want to ensure that multiple conditions are true in a given test scenario.
JUnit 5 supports an additional Assertion feature called Grouped assertions. In JUnit4, when you have to assert let’s say – 3 different conditions, then you need to write 3 different assertions and they will be executed sequentially. Imagine, 2nd assertion fails, then the program stops there and will not go to the 3rd assertion. To overcome this problem, JUnit5 has a new assertion called Grouped assertion that execute all the conditions present within it using assertAll(), irrespective of the fact if any assertion fails or not and generate a consolidated report with all the failures. To be honest, I love this feature and use very frequently.
All JUnit Jupiter assertions are static methods. They come from class:
org.junit.jupiter.api.Assertions
What is JUnit5?
JUnit 5 is composed of several different modules from three different sub-projects.
The JUnit Platform serves as a foundation for launching testing frameworks on the JVM. It also defines the Test Engine API for developing a testing framework that runs on the platform.
JUnit Jupiter is the combination of the new programming model and extension model for writing tests and extensions in JUnit 5. The Jupiter sub-project provides a Test Engine for running Jupiter-based tests on the platform.
JUnit Vintage provides a Test Engine for running JUnit 3 and JUnit 4 based tests on the platform. It requires JUnit 4.12 or later to be present on the classpath or module path.
To use JUnit5, add the Junit5 maven dependency to the POM.xml
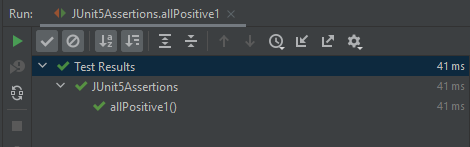
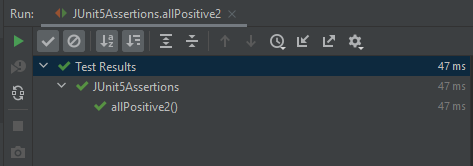
Example 1 – The following example demonstrates positive assertions using `assertAll()` in JUnit 5. All assertions in this example are of the same type, specifically `assertEquals()`, grouped within an `assertAll()` assertion. The heading parameter for this group of assertions is “GroupedAssertionsWithSameAssertionType”.
@Test
void allPositive1() {
   assertAll(
     "GroupedAssertionsWithSameAssertionType",
      () -> assertEquals(8, 5+3, "8 is not sum of 5 and 3"),
      () -> assertEquals("java", "JAVA".toLowerCase()),
      () -> assertEquals(16,4*4,"16 is not product of 4 and 4")
   );
}
Result
As all 3 assertions pass, so the final result passes.
Grouped Assertions with Different Assertion Types
Example 2 – The following example demonstrates using `assertAll()` in JUnit 5 to group assertions of different types – assertEquals(), assertNotNull and assertNotEquals() within a single test. It consists of the heading parameter with the value “GroupedAssertionsWithDifferentAssertionType”.
@Test
void allPositive2() {

    String str ="Spring";
    assertAll(
        "GroupedAssertionsWithDifferentAssertionType",
         () -> assertEquals(8, 5+3, "8 is not sum of 5 and 3"),
         () -> assertNotNull(str, () -> "The string should be null"),
         () -> assertEquals("java", "JAVA".toLowerCase()),
         () -> assertNotEquals(20,5*3,"20 is product of 5 and 3")
    );
 }
Result
As all 3 assertions pass, so the final result passes.
Grouped Assertions with multiple failure
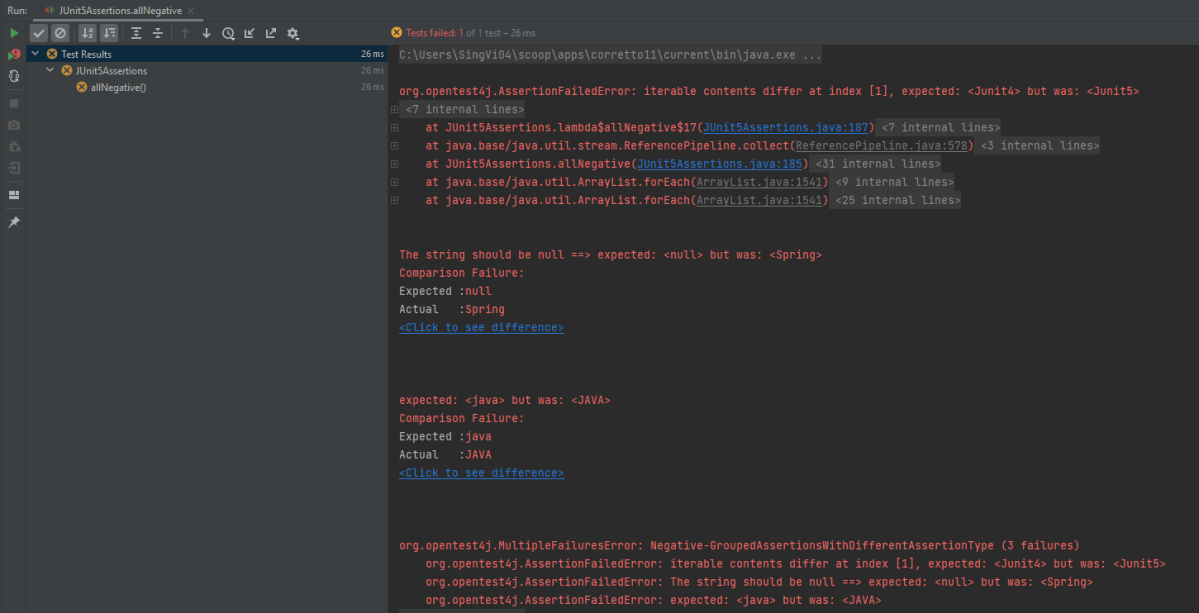
Example 3– In the below example, out of 4 assertions, 3 assertions are failing, so the output will have the detail about all 3 assertion errors.
 @Test
 void allNegative() {

    String str ="Spring";
    Iterable<String> iterat1 = new ArrayList<>(asList("Java", "Junit4", "Test"));
    Iterable<String> iterat2 = new ArrayList<>(asList("Java", "Junit5", "Test"));

    assertAll(
        "Negative-GroupedAssertionsWithDifferentAssertionType",
        () -> assertIterableEquals(iterat1, iterat2),
        () -> assertNull(str, () -> "The string should be null"),
        () -> assertEquals("java", "JAVA"),
        () -> assertNotEquals(20,5*3,"20 is product of 5 and 3")
     );
 }
Result
As one of the asserts in the group fails, instead of AssertionFailureErrorit results in MultipleFailuresError thereby displaying the heading of the grouped assertion passed as the input parameter i.e. Negative-GroupedAssertionsWithDifferentAssertionType in this example. This image shows all the 3 assertion failures.
Assertion 1 fails as we were expecting JUnit4, but response has JUnit5 Assertion 2 fails as the string was not NULL. Assertion 3 fails as Java is not equal to JAVA (case sensitivity).
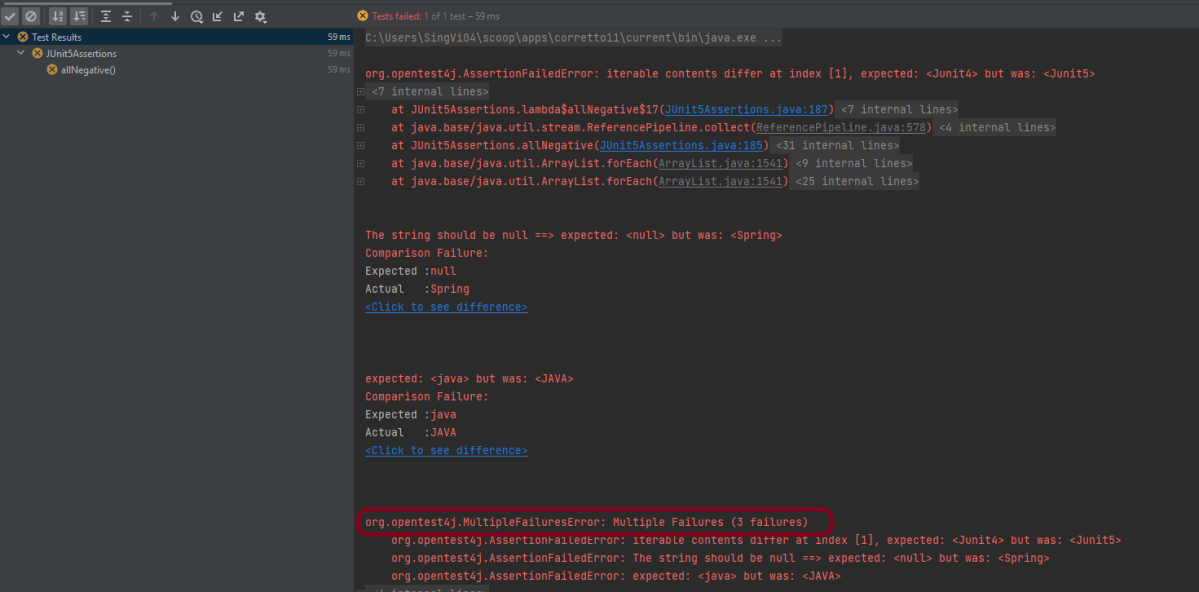
Grouped Assertions Without Heading As Parameter
Grouped Assertions with Same Assertion Type
The assertAll () can be implemented without using the heading parameter. The below example is the same as the above one, we are just skipping the heading part.
@Test
void allNegative() {

      String str ="Spring";
      Iterable<String> iterat1 = new ArrayList<>(asList("Java", "Junit4", "Test"));
      Iterable<String> iterat2 = new ArrayList<>(asList("Java", "Junit5", "Test"));

     // In a grouped assertion all assertions are executed, and all failures will be reported together
      assertAll(
          () -> assertIterableEquals(iterat1, iterat2),
          () -> assertNull(str, () -> "The string should be null"),
          () -> assertEquals("java", "JAVA"),
          () -> assertNotEquals(20,5*3,"20 is product of 5 and 3")
      );
  }
Result
The result displays without a heading.
Nested Or Dependent Grouped Assertions
Example with Outer assertAll() Passing and Nested assertAll() Executing
When one assertAll() includes one or more assertAll() then these are referred to as Nested or Dependent grouped assertions.
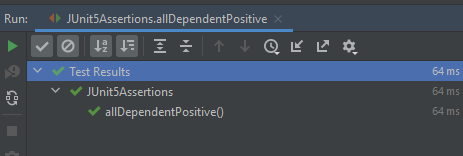
Example 1 – In this case, first, the assertAll() validates if the sum is correct or not. The sum is correct here, so the control moves to the nested assertAll() to verify all the assertions present within it.
@Test
void allDependentPositive() {

   String str ="Spring";

   // Within a code block, if an assertion fails the subsequent code in the same block will be skipped.
    assertAll(
         "DependentPositiveAssertions",
         () -> {
                assertEquals(8, 5 + 3, "8 is not sum of 5 and 3");

                // Executed only if the previous assertion is valid.
                assertAll("sub-heading",
                   () -> assertNotNull(str, () -> "The string should be null"),
                   () -> assertEquals("java", "JAVA".toLowerCase()),
                   () -> assertEquals(20, 5 * 4, "20 is product of 5 and 4")
                ); // end of inner AssertAll()
           }

      );  // end of outer AssertAll()
 }
Result
All the assertions within nested assertAll() are passes. So the final result passes.
Example of Outer AssertAll() Causing Nested AssertAll() Not to Execute
Example 2– In the below example, outer AssertAll() fails, so all the assertions within nested/dependent assertAll() are not executed.
 @Test
 void allDependentNegative() {

    String str ="Spring";

    // Within a code block, if an assertion fails the subsequent code in the same block will be skipped.
    assertAll(
       "DependentPositiveAssertions",
        () -> {
                assertEquals(8, 5 + 4, "8 is not sum of 5 and 3");

                // Executed only if the previous assertion is valid.
                assertAll("sub-heading",
                   () -> assertNull(str, () -> "The string should be null"),
                   () -> assertNotEquals("java", "JAVA".toLowerCase()),
                   () -> assertNotEquals(20, 5 * 4, "20 is product of 5 and 4")
               ); // end of inner AssertAll()
           }

        ); // end of outer AssertAll()
    }
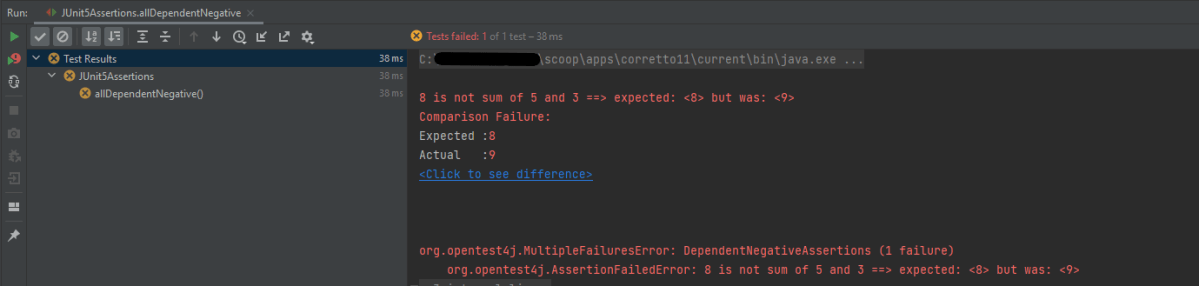
Result
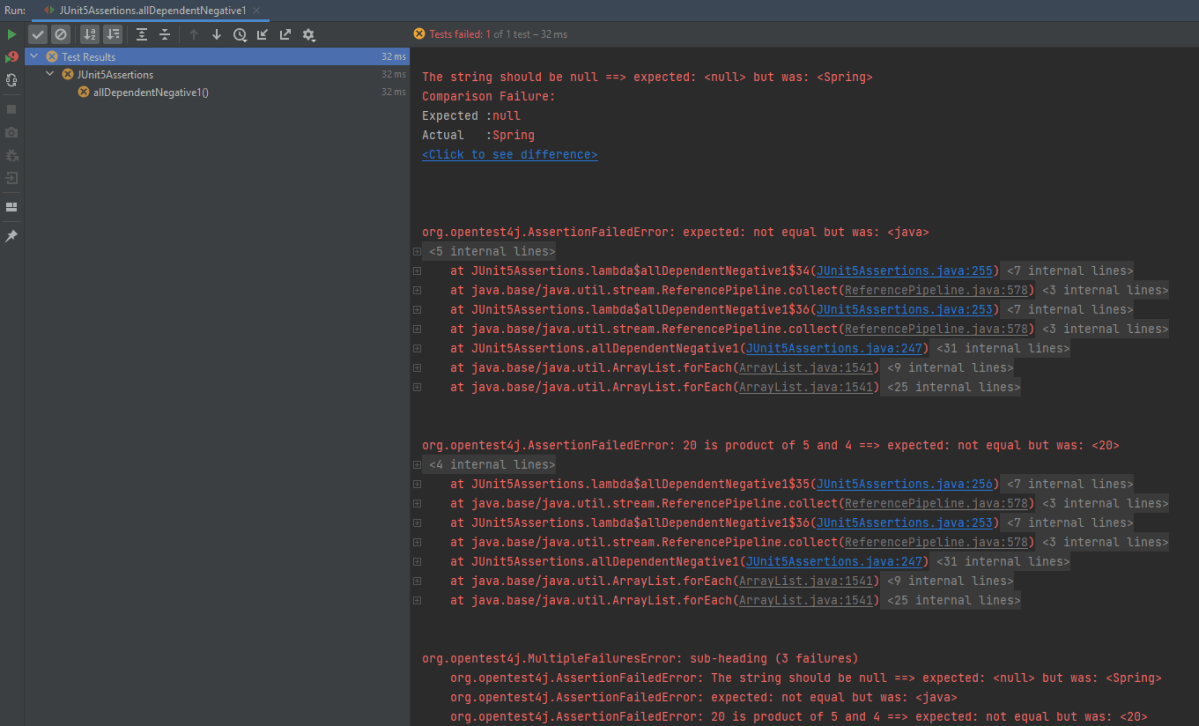
Example of Outer AssertAll() allows Nested AssertAll(), but nested AssertAll fails
Example 3 – In the below example, outer AssertAll() passes, so all the assertions within nested/dependent assertAll() are executed. But due to the failure of assertNull, the nested assertions are not evaluated, and the report will indicate the failure of `assertNull` first
@Test
void allDependentNegative1() {

    String str ="Spring";

   // Within a code block, if an assertion passes the subsequent code in the same block will be executed.
    assertAll(
      "DependentNegativeAssertions",
      () -> {
             assertEquals(8, 5 + 3, "8 is not sum of 5 and 3");

             // Executed only if the previous assertion is valid.
             assertAll("sub-heading",
               () -> assertNull(str, () -> "The string should be null"),
               () -> assertNotEquals("java", "JAVA".toLowerCase()),
               () -> assertNotEquals(20, 5 * 4, "20 is product of 5 and 4")
             ); // end of inner AssertAll()
         }

      ); // end of outer AssertAll()
    }
Result
The nested assertions have failed. So they can be seen in the execution status.
In short,
When first assertAll() method passes, then all the subsequent assertions within that block will be executed and these assertions can further pass or fails.
When the first assertAll() assertion fails, then the execution of subsequent assertions is skipped.
That’s it! Congratulations on making it through this tutorial and hope you found it useful! Happy Learning!!
This tutorial explains the process to run the Rest API Tests in the GitLab pipeline. This is a significant step towards achieving CI/CD. Ideally, the tests need to run after any change (minor/major) before merging the change to the master branch. Suppose there are 100 changes in a day, and any QA won’t want to start the tests manually 100 times in a day. So, now adding tests to the GitLab pipeline comes into the picture. We can add a test stage to the pipeline and the tests will run automatically when the pipeline run, or we can schedule the tests to run automatically every hour or day using GitLab pipeline.
To use GitLab CI/CD, we need to keep 2 things in mind:-
a) Make sure a runner is available in GitLab to run the jobs. If there is no runner, install GitLab Runner and register a runner for your instance, project, or group.
b) Create a .gitlab-ci.yml file at the root of the repository. This file is where you define your CI/CD jobs.
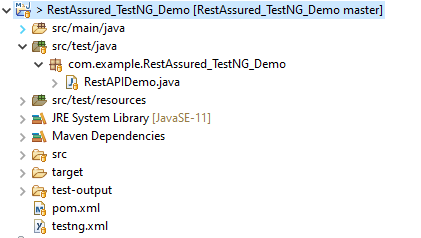
Create a Rest API Project
Step 1 – Create a new Maven Project
Step 2 – Add dependencies to the project
Add the below-mentioned pom.xml which shows all the dependencies that need to add to the project.
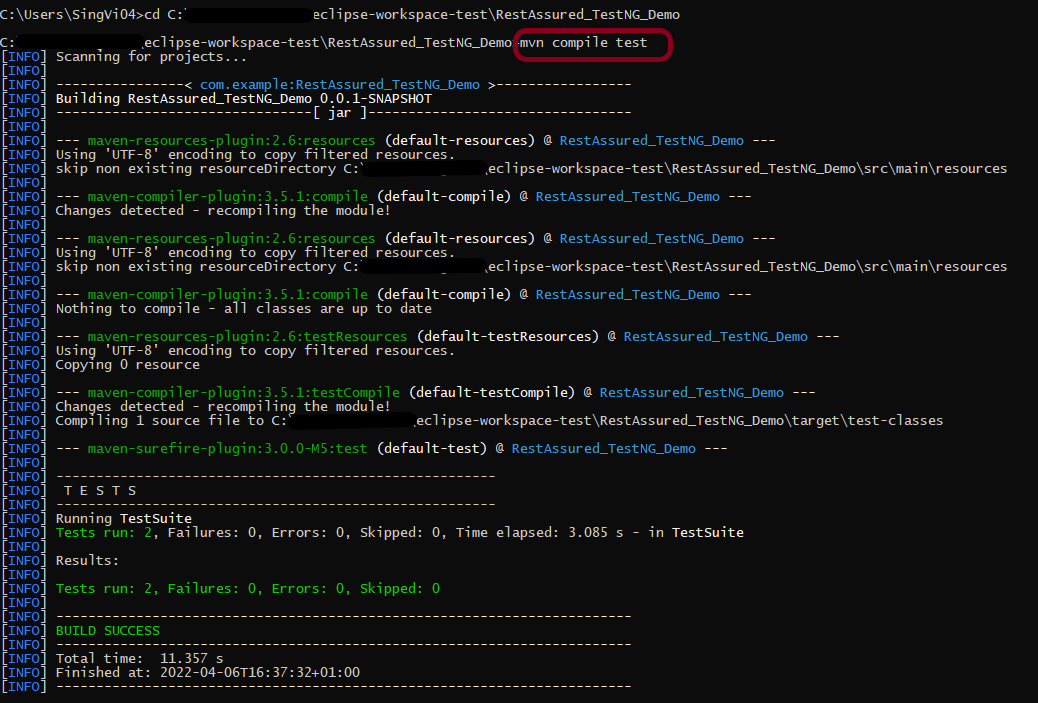
It is needed to add maven-surefire plugin to run the TestNG tests through command line. To know more about this, please refer to this tutorial.
Step 3 – Create the Test Code to test the Rest API
Here, 2 tests are created. One of the tests gets all the employee data (GET) whereas another test creates an employee (POST).
import static io.restassured.RestAssured.given;
import static org.hamcrest.Matchers.equalTo;

import org.json.JSONObject;
import org.testng.annotations.Test;

import io.restassured.http.ContentType;

public class RestAPIDemo {

	@Test(description = "To get the details of employee with id 2", priority = 0)
	public void verifyUser() {

		// Given
		given()
				// When
				.when().get("http://dummy.restapiexample.com/api/v1/employee/2")

               // Then
				.then().statusCode(200).statusLine("HTTP/1.1 200 OK")

                // To verify booking id at index 2
				.body("data.employee_name", equalTo("Garrett Winters"))
				.body("message", equalTo("Successfully! Record has been fetched."));
	}

	@Test(description = "To create a new employee", priority = 1)
	public void createUser() {

		JSONObject data = new JSONObject();

		// Map<String, String> map = new HashMap<String, String>();

		data.put("employee_name", "APITest");
		data.put("employee_salary", "99999");
		data.put("employee_age", "30");

		// GIVEN
		given().baseUri("http://dummy.restapiexample.com/api").contentType(ContentType.JSON).body(data.toString())

				// WHEN
				.when().post("/v1/create")

				// THEN
				.then().statusCode(200).body("data.employee_name", equalTo("APITest"))
				.body("message", equalTo("Successfully! Record has been added."));

	}
}
Step 4 – Create testng.xml to run the tests through TestNG
Now, let’s create a testng.xml to run the TestNG tests. If JUnit is used instead of TestNG, then this step is not needed.
<?xml version="1.0" encoding="UTF-8"?>
<!DOCTYPE suite SYSTEM "https://testng.org/testng-1.0.dtd">
<suite name="Suite">
  <test name="Test">
    <classes>
      <class name="com.example.RestAssured_TestNG_Demo.RestAPIDemo"/>
    </classes>
  </test> <!-- Test -->
</suite> <!-- Suite -->
Step 5 – Run the tests through the command line
Now, let us execute the tests through the command line. Go to the place where pom.xml of the project is placed and use the below command to run the tests. This step makes sure that all the tests are running as expected.
Step 8 – Create .gitlab-ci.yml file in the project in GitLab
It is a YAML file where you configure specific instructions for GitLab CI/CD. In the .gitlab-ci.yml, we can define:
The scripts you want to run.
Other configuration files and templates you want to include.
Dependencies and caches.
The commands you want to run in sequence and those you want to run in parallel.
The location to deploy your application.
Whether you want to run the scripts automatically or trigger any of them manually.
image: adoptopenjdk/maven-openjdk11

stages:
  - test

variables:
  MAVEN_OPTS: "-Dmaven.repo.local=.m2/repository"

test:
  stage: test
  allow_failure: true

# Run the tests
  script:
    - mvn $MAVEN_OPTS clean package
    - mvn compile test

# Store artifacts
  artifacts:
    when: always
    name: "report"
    paths:
    - target/surefire-reports/*
    expire_in: 1 h
Step 9 – Run the tests in the GitLab pipeline
Now, when a new change is committed, a pipeline kicks off and it runs all the tests.
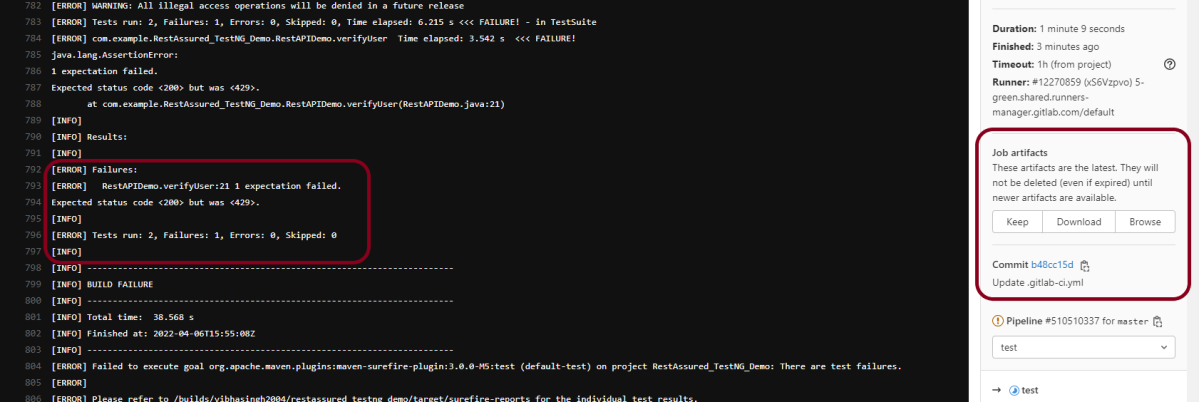
Step 10 – Check the status of the pipeline
Once the Status of the pipeline changes to either failed or passed.. that means the tests are already executed. Here, the pipeline is passed with brown colour means that the execution of the test is completed with some failures.
I have added an artifact in the gitalb-ci.yml with the name “report”. This artifact creates a folder with the name “report” and the reports in this folder come from the path /target/surefire-reports. This artifact gives us an option to download the reports or browse the report. This report will be available for 1 hour only as mentioned in the gitlab-ci.yml.
Step 11 – Download the report
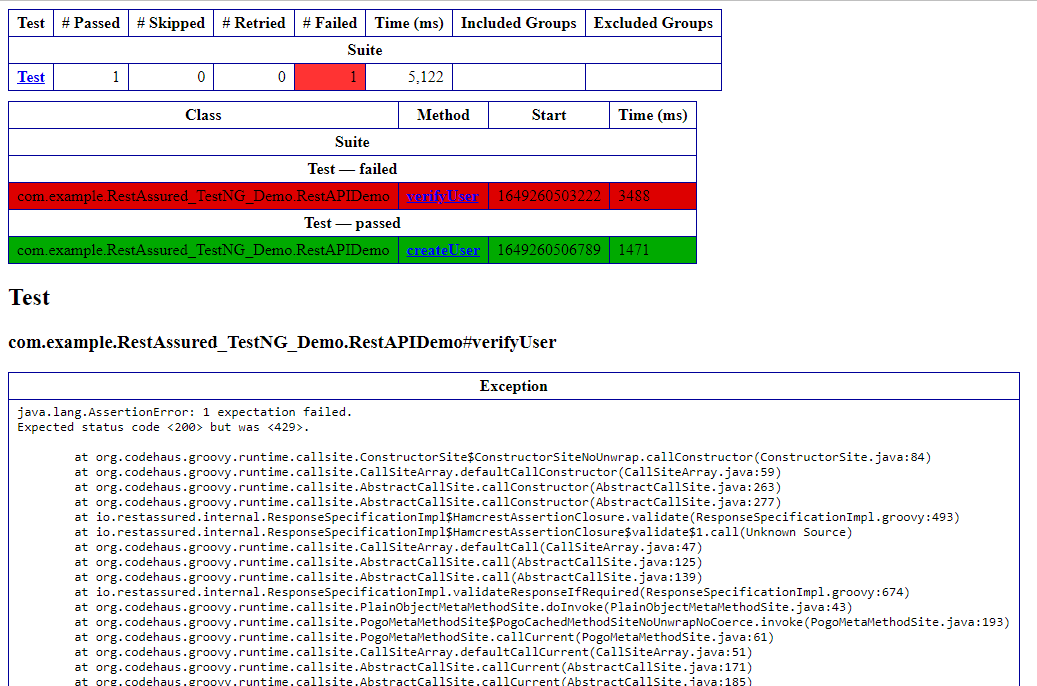
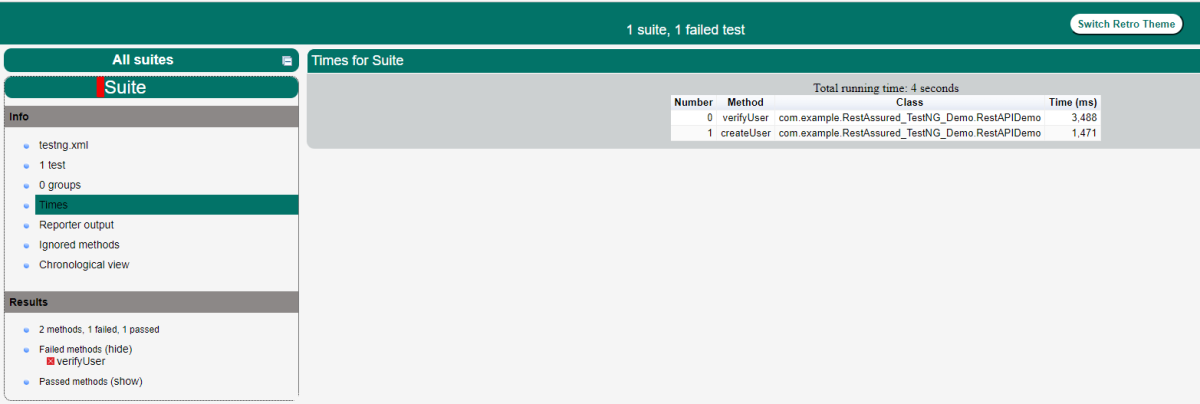
Click on the Download button and the report zip file is downloaded. Unzip the folder, and it contains all different types of surefire-reports.
Example of Emailable-Report.html
Example of Index.html
Congratulations. This tutorial has explained the steps to run Selenium tests in GitLab CI/CD. Happy Learning!!
JUnit provides overloaded assertion methods for all primitive types and objects and arrays (of primitives or Objects). The parameter order is the expected value followed by an actual value. Optionally, the first parameter can be a String message that is output on failure. Only failed assertions are recorded. Assertions is a JUnit API or library of functions through which you can verify if a particular logic or condition returns true or false after execution of the test. If it returns false, then an AssertionError is thrown.
In order to increase the readability of the test and of the assertions itself, it’s always recommended to import statically the respective class.
import static org.junit.Assert.*;
Type of Assertions
1.assertEquals()
The assertEquals() assertion verifies that the expected and the actual values are equal. Below is an example of assertion pass.
@Test
public void equalsPositive() {
    String expected = "JUnit";
    String actual = "JUnit";

    assertEquals("Expected and Actual Strings are not equal",expected,actual);
}
The output of the above program is
If expected and actual values are not equal, an AssertionError without a message is thrown. Below is an example of AssertionError thrown by assertEquals().
@Test
public void equalsNegative() {
    String expected = "JUnit";
    String actual = "JUnit Test";

    assertEquals(expected,actual);
}
The output of the above program is
2. assertEquals with NULL
If expected and actual are NULL, then they are considered equal in assertEqual().
@Test
public void test2() {

    String expected = null;
    String actual = null;

    assertEquals("Expected and Actual Strings are not null",expected,actual);
}
The output of the above program is
3. assertNotEquals()
The assertNotEquals() assertion verifies that the expected and the actual values are not equal. Below is an example where expected and actual values are not equal.
 @Test
  public void notEqualsPositive() {
      String expected = "JUnit";
      String actual = "JUnit5";

      assertNotEquals("Expected and Actual Strings are equal",expected,actual);

 }
The output of the above program is
If expected and actual values are equal, then an AssertionError with a message is thrown. Below is an example of AssertionError thrown by assertNotEquals().
@Test
public void notEqualsNegative() {
   String expected = "JUnit";
    String actual = "JUnit";

    assertNotEquals("Expected and Actual Strings are equal",expected,actual);
}
The output of the above program is
4. assertArrayEquals()
If we want to assert that two arrays are equals, we can use the assertArrayEquals(). In the below example, two arrays are equal, so there is no AssertionError.
    @Test
    public void arrayEqualsPositive() {
        char[] expected = {'j','u','n','i','t'};
        char[] actual = {'j','u','n','i','t'};

        assertArrayEquals("Expected and Actual Arrays are not equal",expected,actual);

    }
The output of the above program is
Below is an example of AssertionError thrown by assertArrayEquals(), when arrays are different.
    @Test
    public void arrayEqualsNegative() {
        char[] expected = {'J','U','n','i','t'};
        char[] actual = "JUnit Test".toCharArray();

        assertArrayEquals("Expected and Actual Arrays are not equal",expected,actual);

    }
The output of the above program is
5. assertNull()
When we want to test if an object is nullwe can use the assertNull() assertion.
    @Test
    public void nullPositive() {

        String str = null;
        assertNull("String is not null",str);

    }
The output of the above program is
If the object is not null, then an AssertionError is thrown with the given message. Below is an example of AssertionError thrown by assertNull().
 @Test
 public void nullNegative() {

    String str = "Happy";
    assertNull("String is not null",str);

 }
The output of the above program is
6. assetNotNull()
If we want to assert that an object should not be null, we can use the assertNotNull assertion. Below is an example of object not null.
 @Test
    public void notNullPositive() {

        String str = "Spring";
        assertNotNull("String is null",str);

    }
The output of the above program is
If the object is null, then an AssertionError is thrown with the given message. Below is an example of AssertionError thrown by assertNotNull().
   @Test
    public void notNullNegative() {

        String str = null;
        assertNotNull("String is null",str);

    }
The output of the above program is
7. assertFalse()
If we want to verify that the condition is false, we can use assertFalse() assertion.
    @Test
    public void falsePositive() {

        String str1 = "Happy Days";
        String str2 = new String("Summer");
        assertFalse("String 2 is not present in String 1", str1.contains(str2));

    }
The output of the above program is
If the condition is true, then an AssertionError is thrown with the given message. Below is an example of AssertionError thrown by assertFalse().
    @Test
    public void falseNegative() {

        String str1 = "Happy Days";
        String str2 = new String("Happy");
        assertFalse("String 2 is not present in String 1", str1.contains(str2));

    }
The output of the above program is
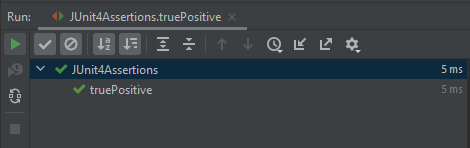
8. assertTrue()
If we want to verify that the condition is true, we can use assertTrue() assertion.
@Test
public void truePositive() {

    String str1 = "Happy Days";
    String str2 = new String("Days");
    assertTrue("String 2 is present in String 1", str1.contains(str2));

}
The output of the above program is
If the condition is false, then an AssertionError is thrown with the given message. Below is an example of AssertionError thrown by assertTrue().
    @Test
    public void trueNegative() {

        String str1 = "Happy Days";
        String str2 = new String("Healthy");
        assertTrue("String 2 is present in String 1", str1.contains(str2));

    }
The output of the above program is
10. assertSame()
The assertSame() internally uses operator == to validate if two objects are equal. Despite the two string values are the same, the below test fails. The reason is that the two object references are different.
In the below example, str1 and str2 have same value as well refer to the same memory addresses, so the assertion pass.
@Test
public void samePositive() {

   String str1 = "Happy";
   String str2 = str1;
   assertSame("String1 and String 2 have different object reference",str1, str2);

 }
The output of the above program is
Both the string objects str1 and str2 have the same value but are referring to the different memory addresses that result in the failure of the assert function.
@Test
public void sameNegative() {

    String str1 = "Happy";
    String str2 = new String("Happy");
    assertSame("String1 and String 2 have different object reference",str1, str2);

    }
The output of the above program is
11. fail()
The fail assertion fails a test throwing an AssertionFailedError. It can be used to verify that an actual exception is thrown or when we want to make a test failing during its development.
@Test
public void test14() {

    String str1 = "Happy Days";
    String str2 = new String("Happy");
    Assert.fail("Fail this test");
}
The output of the above program is
What is the difference between assertEquals() and assertSame() assertions?
assertEquals() uses equals() method to compare objects, while assertSame() uses == operator to asserts that two objects refer to the same object.
In the below example, str1 and str2 both have the same value. So, the assertion passes here when we use assertEquals().
@Test
public void test10() {

   String str1 = "Happy";
   String str2 = new String("Happy");
   Assert.assertEquals("String1 and String 2 are equal",str1, str2);

}
The output of the above program is
In the below example, both str1 and str2 have same value but different object reference, so the assertion fails with assertSame().
@Test
public void test11() {

    String str1 = "Happy";
    String str2 = new String("Happy");
    Assert.assertSame("String1 and String 2 have different object reference",str1, str2);
}
The output of the above program is
In the below example, str1 and str2 have the same object reference. So, now the assertion passes with assertSame().
 @Test
 public void test12() {

    String str1 = "Happy";
    String str2 = str1;
    Assert.assertSame("String1 and String 2 have different object reference",str1, str2);

 }