In the previous tutorials, we discussed BDD (Behaviour Driven Development) and Gherkin. Cucumber is one such open-source tool, which supports Behaviour Driven Development (BDD). In simple words, Cucumber can be defined as a testing framework, driven by plain English. It serves as documentation, automated tests, and development aid – all in one.
In this tutorial, we will set up Cucumber with Eclipse.
Table of Content
- Implementation Steps
Implementation Steps
1. Download and Install Java
Java is a robust programming language. Java is a general-purpose programming language that is concurrent; class-based and object-oriented language. Java follows the concept of “write once and run anywhere (WORA)” which means that compiled Java code can be run on all different platforms that support Java without the need for recompilation. Cucumber supports the Java platform for execution. Click here to know How to install Java.
2. Download and Start Eclipse
Eclipse is an Integrated Development Environment (IDE). It contains a base workspace and an extensible plug-in system for customizing the environment. To download Eclipse, please refer to this tutorial – How to install Eclipse.
3. Maven – How to install Maven on Windows
Apache Maven is a software project management and comprehension tool. It uses the concept of a project object model (POM), Maven can manage a project’s build, reporting, and documentation from a central piece of information. MAVEN helps us in creating the project structure and managing and downloading the dependencies. We need to define the required dependencies in pom.xml. To install Maven on Windows, please refer to this tutorial – How to install Maven.
4. Install Cucumber Eclipse Plugin
The Cucumber plugin is an Eclipse plugin that allows eclipse to understand the Gherkin syntax. Cucumber Eclipse Plugin highlights the keywords present in Feature File. To install Cucumber Eclipse Plugin, please refer to this tutorial – How to install Cucumber Eclipse Plugin
5. Configure Cucumber with Maven
Step 1 – Create a new Maven Project.
Click here to know the steps to create a new Maven project – How to create a Maven project.
Step 2 – Open pom.xml of the project
1. Go to package explorer on the left-hand side of Eclipse.
2. Expand the project CucumberTest.
3. Locate pom.xml file
4. Add dependencies to POM.XML
Step 3 − Add dependency for selenium
This will indicate to Maven that Selenium jar files are to download from the central repository to the local repository.
Open pom.xml in the edit mode, create dependencies tag (), inside the project tag.
 <!-- Selenium -->
 <dependency>
      <groupId>org.seleniumhq.selenium</groupId>
      <artifactId>selenium-java</artifactId>
      <version>4.15.0</version>
 </dependency>
Step 4 – Add dependency for Cucumber-Java
This will indicate Maven, which Cucumber files are to be downloaded from the central repository to the local repository. Create one more dependency tag.
<dependency>
    <groupId>io.cucumber</groupId>
    <artifactId>cucumber-java</artifactId>
    <version>7.14.0</version>
</dependency>
Step 5 – Add dependency for Cucumber-JUnit
This will indicate Maven, which Cucumber JUnit files are to download from the central repository to the local repository. Create one more dependency tag.
<dependency>
    <groupId>io.cucumber</groupId>
    <artifactId>cucumber-junit</artifactId>
    <version>7.14.0</version>
    <scope>test</scope>
</dependency>
Step 6 – Add dependency for JUnit
This will indicate Maven, which JUnit files are to be downloaded from the central repository to the local repository. Create one more dependency tag.
<dependency>
   <groupId>junit</groupId>
   <artifactId>junit</artifactId>
   <version>4.13.2</version>
   <scope>test</scope>
</dependency>
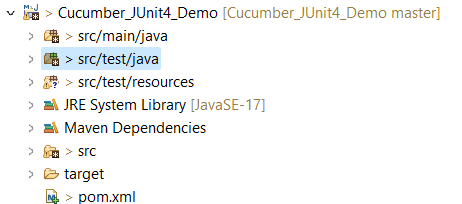
Below is the screenshot which shows that Maven Project called Cucumber_JUnit4_Demo.
After adding the above mention dependencies, pom.xml looks like the image below
<project xmlns="http://maven.apache.org/POM/4.0.0" xmlns:xsi="http://www.w3.org/2001/XMLSchema-instance"
  xsi:schemaLocation="http://maven.apache.org/POM/4.0.0 http://maven.apache.org/xsd/maven-4.0.0.xsd">
  <modelVersion>4.0.0</modelVersion>

  <groupId>org.example</groupId>
  <artifactId>Cucumber_JUnit4_Demo</artifactId>
  <version>1.0-SNAPSHOT</version>
  <packaging>jar</packaging>

  <name>Cucumber_JUnit4_Demo</name>
  <url>http://maven.apache.org</url>

  <properties>
    <project.build.sourceEncoding>UTF-8</project.build.sourceEncoding>
    <cucumber.version>7.14.0</cucumber.version>
    <selenium.version>4.15.0</selenium.version>
    <junit.version>4.13.2</junit.version>
  </properties>

  <dependencies>

    <dependency>
      <groupId>io.cucumber</groupId>
      <artifactId>cucumber-java</artifactId>
      <version>${cucumber.version}</version>
    </dependency>

    <dependency>
      <groupId>io.cucumber</groupId>
      <artifactId>cucumber-junit</artifactId>
      <version>${cucumber.version}</version>
      <scope>test</scope>
    </dependency>

    <!-- Selenium -->
    <dependency>
      <groupId>org.seleniumhq.selenium</groupId>
      <artifactId>selenium-java</artifactId>
      <version>${selenium.version}</version>
    </dependency>

    <!-- JUnit4 -->
    <dependency>
      <groupId>junit</groupId>
      <artifactId>junit</artifactId>
      <version>${junit.version}</version>
      <scope>test</scope>
    </dependency>
  </dependencies>

</project>
After adding the dependencies and then building the project, the below image shows the entire jar files added to the Maven Dependency.

Congratulations!! We are done with the setup of the Cucumber in Eclipse. Happy Learning.

Very informative blog. Helped me in setting up cucumber .
LikeLike
Thank you. Please continue reading the blogs and provide your suggestions
LikeLike