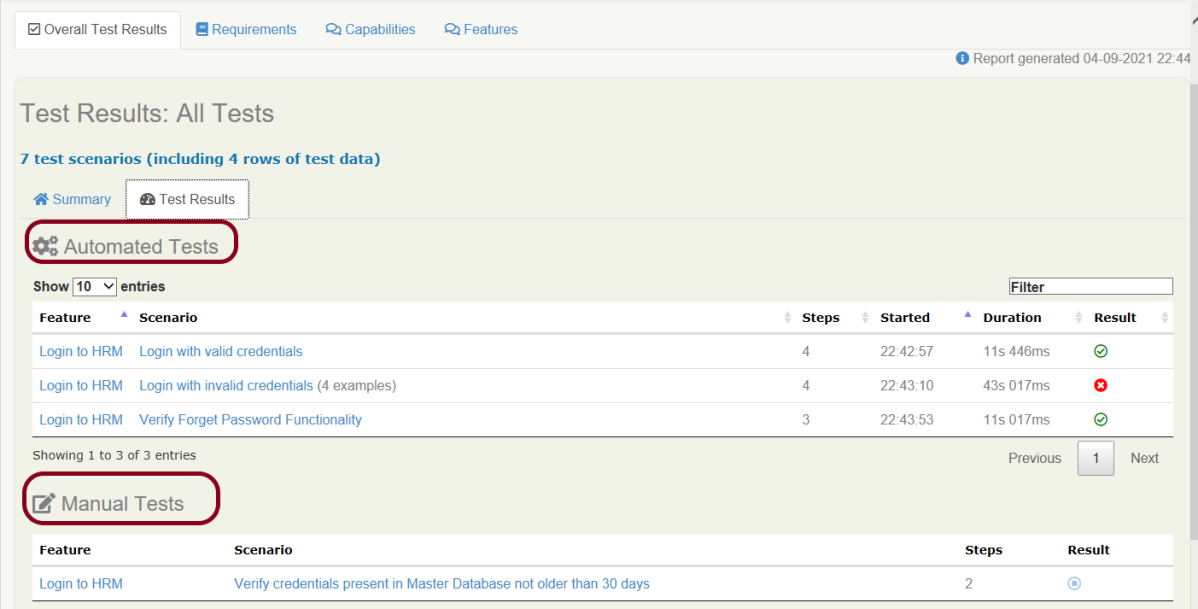
Cucumber is primarily and traditionally used for automating executable specifications. But with Serenity BDD, you can add special tags to indicate that a scenario represents a manual test case.
You can flag any Cucumber scenario as manual simply by using the @manual tag. In the below example, I have tagged a scenario as “@manual”. The last scenario is tagged as “manual”. By default, @manual scenarios are marked as pending in the Serenity reports.
Feature: Login to HRM
@ValidCredentials
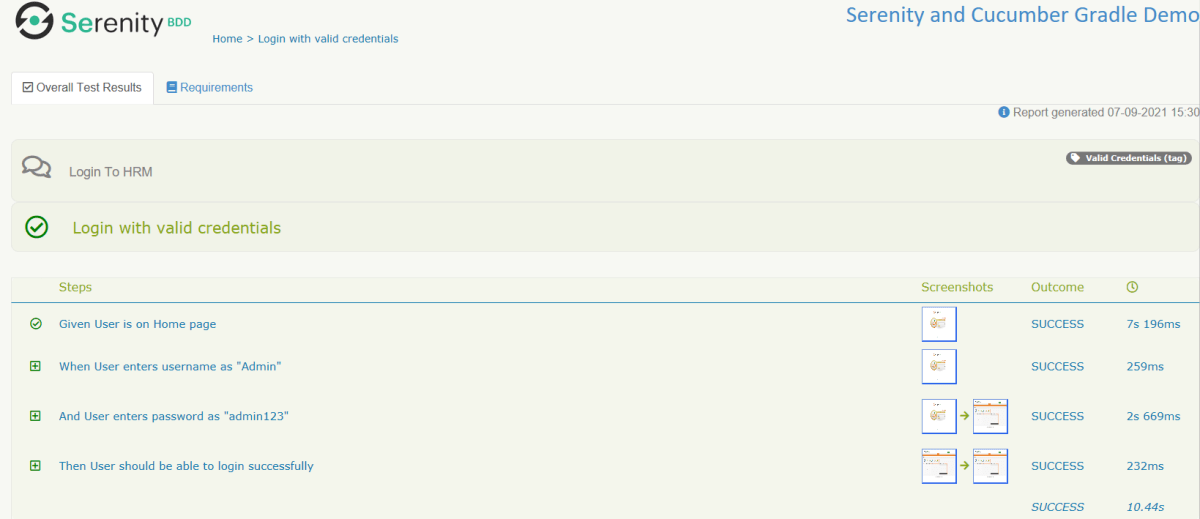
Scenario: Login with valid credentials
Given User is on Home page
When User enters username as "Admin"
And User enters password as "admin123"
Then User should be able to login successfully
@InValidCredentials
Scenario Outline: Login with invalid credentials
Given User is on Home page
When User enters username as '<username>'
And User enters password as '<password>'
Then User should be able to see error message '<errorMessage>'
Examples:
|username |password |errorMessage |
|admin |admin |Invalid credentials |
| |admin123 |Username cannot be empty |
|Admin | |Password cannot be empty |
| | |Username can be empty |
@ForgetPassword
Scenario: Verify Forget Password Functionality
Given User is on Home page
When User clicks on Forgot your password link
Then User should be able to see new page which contains Reset Password button
@manual
Scenario: Verify credentials present in Master Database not older than 30 days
Given User is connected to Master Database
Then Username "Admin" and password "admin123" are present in Master Database not older than 30 days
Execute the test suite using below command
mvn clean verify
The scenario marked with @manual tag will now appear as a Manual test case in the Serenity report (Index.html). To know how to create Serenity Report, click here.
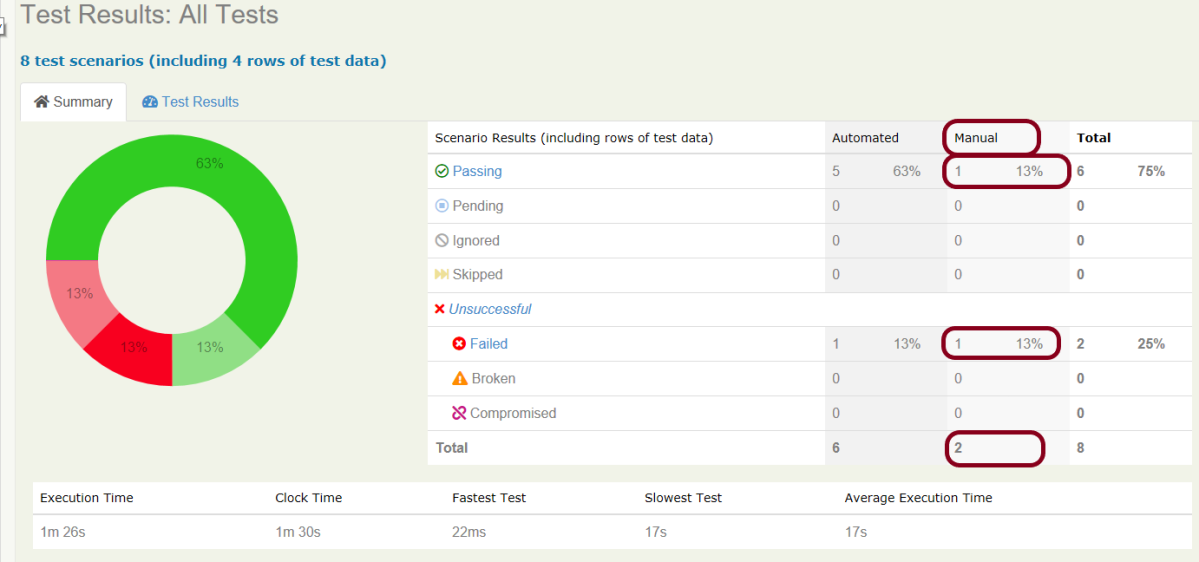
We can indicate a different result by adding the @manual-result tag as shown here:
A passing test: @manual-result:passed
A failing test: @manual-result:failed
A compromised test: @manual-result:compromised
If we want to record the result of a manual test, we should include both the @manual and the @manual-result tags.
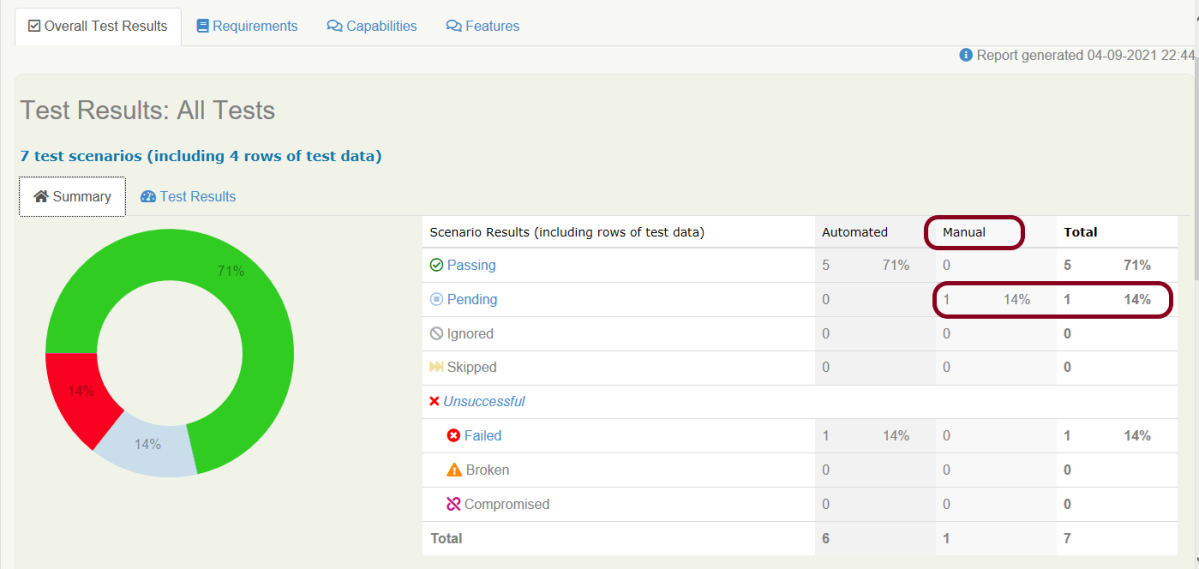
   @manual
   @manual-result:passed
   Scenario: Verify credentials present in Master Database not older than 30 days

   Given User is connected to Master Database
   Then Username "Admin" and password "admin123" are present in Master Database not older than 30 days

   @manual
   @manual-result:failed
   Scenario: Verify different credentials are provided to Admin, Dev and QA to access Master Database

   Given User is connected to Master Database
   Then Different credentials are provided to Admin, Business, Dev and QA to access Master Database

This image shows that there are 2 manual tests. I have marked one manual test as passed and another one as failed which is clearly shown in this image.
How to update Manul Test Results
In the below example, we are considering that the team is working on Sprint-1. We have executed the manual tests and marked the status in the feature file as shown below.
  @manual
  @manual-result:passed
  @manual-last-tested:sprint-1
  Scenario: Verify credentials present in Master Database not older than 30 days

  Given User is connected to Master Database
  Then Username "Admin" and password "admin123" are present in Master Database not older than 30 days

  @manual
  @manual-result:failed
  @manual-last-tested:sprint-1
  Scenario: Verify different credentials are provided to Admin, Dev and QA to access Master Database

  Given User is connected to Master Database
  Then Different credentials are provided to Admin, Business, Dev and QA to access Master Database
In the Serenity properties , the team also records the current version (or sprint number):
serenity.project.name = Serenity and Cucumber Report Demo
current.target.version = sprint-1
Now, execute the feature file. This is how the report look like.
Now, we are in next sprint. Update the value of current.target.version in serenity.properties file.
serenity.project.name = Serenity and Cucumber Report Demo
current.target.version = sprint-2
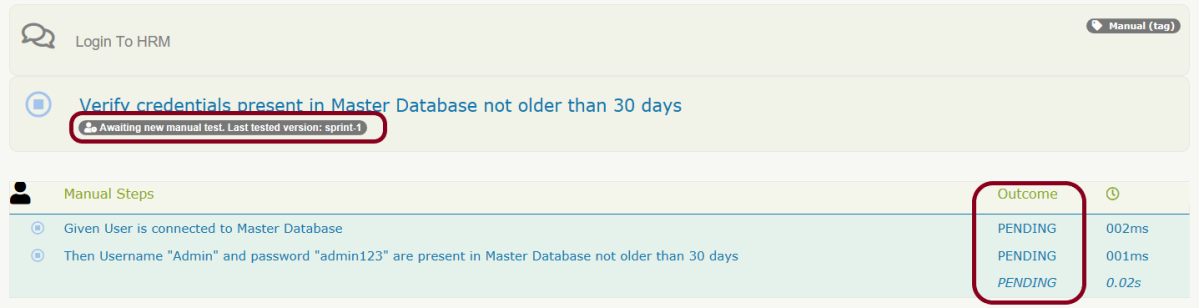
Now, when the manual scenario is processed, it will be marked as pending, with a note indicating that a new manual test is required:
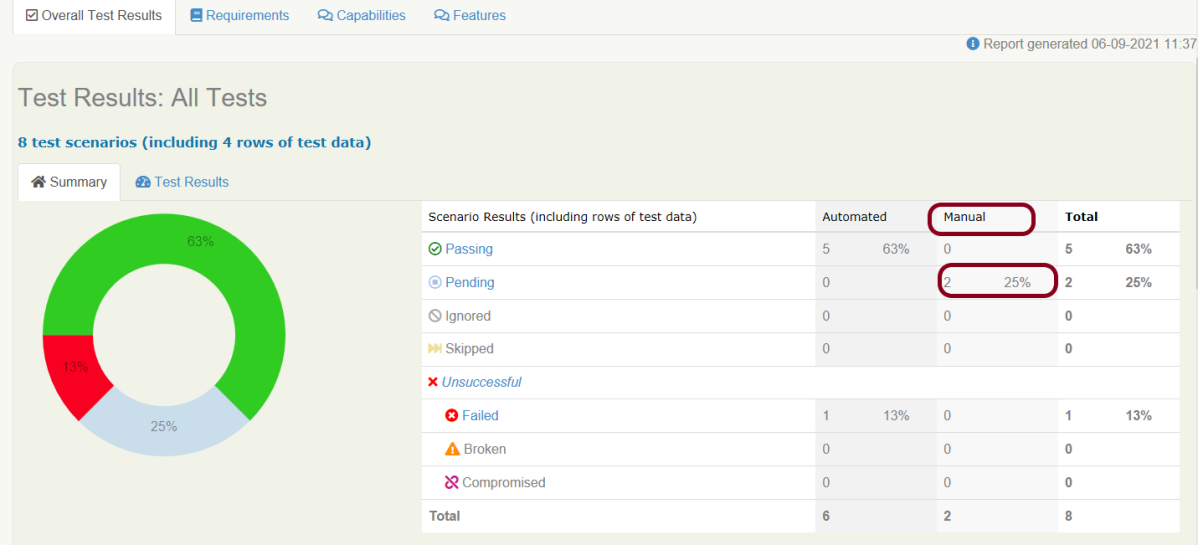
Both the maual tests which were marked as pass and fail are now pending tests as shown in the image.

We are done! Congratulations on making it through this tutorial and hope you found it useful! Happy Learning!!