This tutorial explains the steps to create a GitHub Action for the Selenium tests and execute the tests in that workflow.
Table of Contents
Why GitHub?
The flexible aspects of Selenium WebDrivers and GitHub Actions enable users to create powerful, fast, and efficient automated testing workflows in CI/CD environments.
CI/CD pipelines have contributed to the success of the DevOps cycle in all software development projects. This is a holistic process that bridges development and operations. Continuous integration helps development teams deploy code efficiently, and continuous delivery automates code deployment.
Important points
1. We don’t need to think about the Chromedriver.exe we are using WebDriver Manager to handle that instead of adding it to our project like the example:
WebDriverManager.chromedriver().setup();
From Selenium 4.6.0 onwards, we don’t need to add WebDriverManager dependency explicitly to the project, because Selenium has added an inbuilt tool to handle the drivers.
2. The Selenium tests need to run in the headless mode. As we are using Chrome browser, use the below code:
          ChromeOptions options = new ChromeOptions();
          options.addArguments("--no-sandbox");
          options.addArguments("--disable-dev-shm-usage");
          options.addArguments("--headless");
	      driver = new ChromeDriver(options);
3. Install Chrome browser in ubuntu. Use the below code:
    - uses: browser-actions/setup-chrome@latest
    - run: chrome --version
Implementation Steps
Step 1 – Create GitHub Actions and Workflows
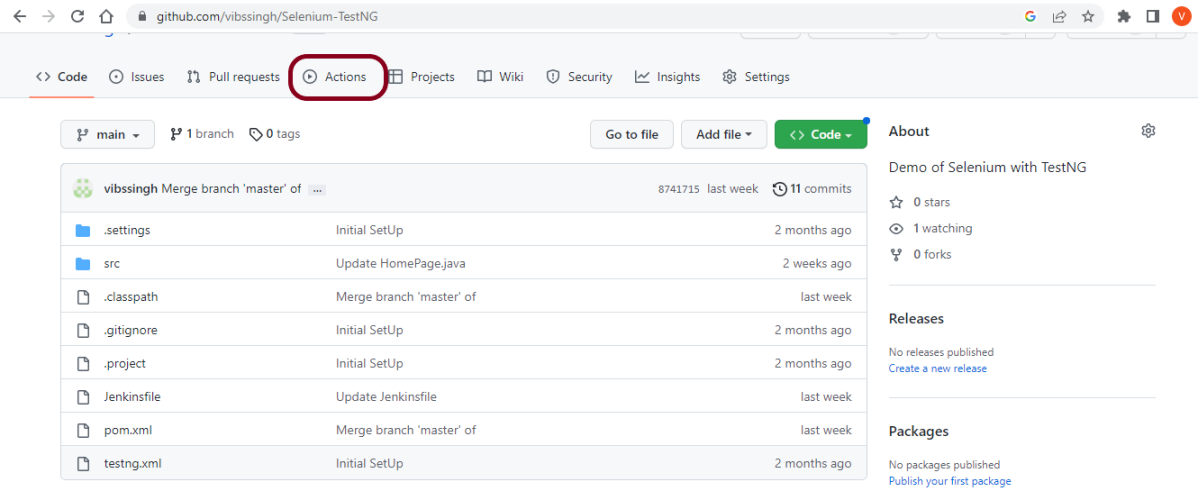
I have a repository available in GitHub – Selenium-TestNG as shown in the below image. Go to the “Actions” tab. Click on the “Actions” tab.
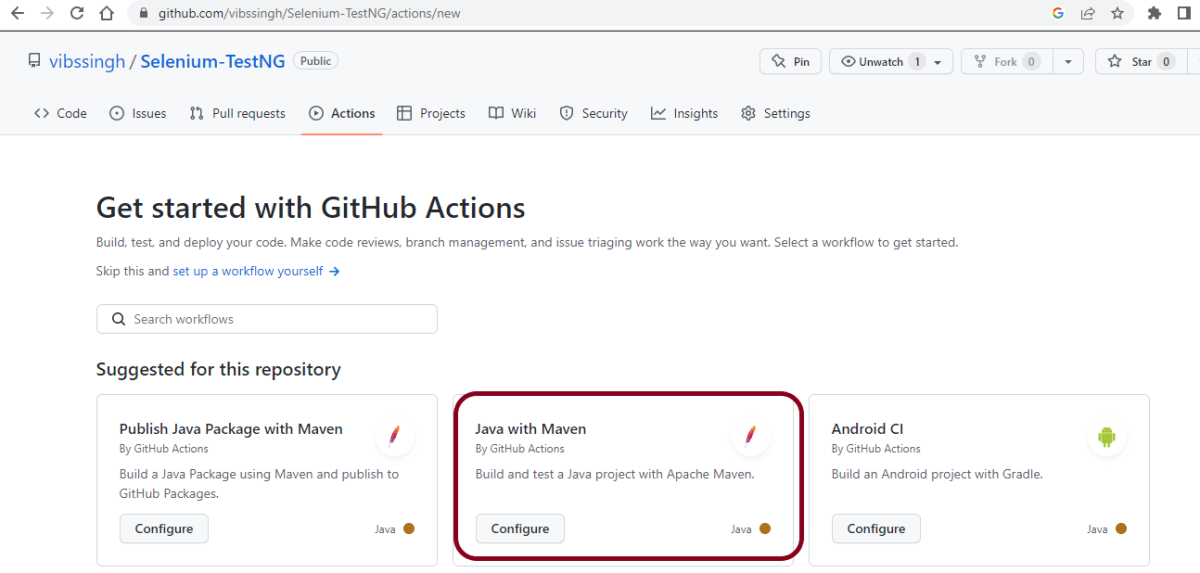
Step 2 – Select the type of Actions
You will see that GitHub recommends Actions depending on the project. In our case, it is recommending actions suitable for a Java project. I have selected the “Java with Maven” option as my project is built in Maven.
Step 3 – Generation of Sample pipeline
If you choose an existing option, it will automatically generate a .yaml for the project as shown below.
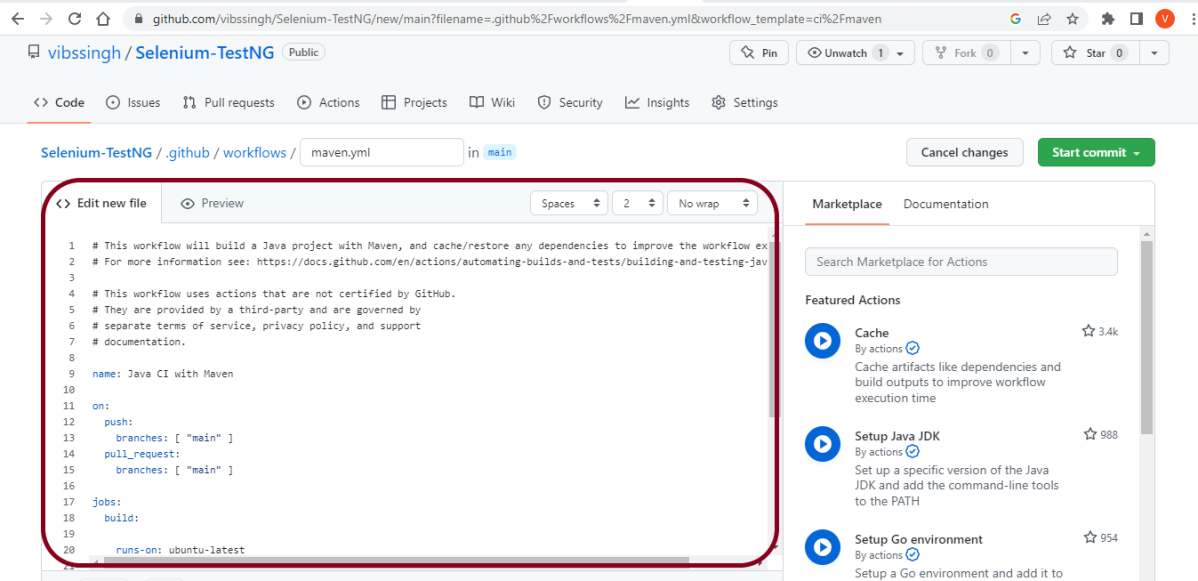
We will replace the current workflow with the next yml file as shown below:
name: Selenium with TestNG - CI

on:
  push:
    branches: [ "main" ]
  pull_request:
    branches: [ "main" ]

jobs:
  build:

    runs-on: ubuntu-latest

    steps:
    - uses: actions/checkout@v3
    - name: Set up JDK 17
      uses: actions/setup-java@v3
      with:
        java-version: '17'
        distribution: 'temurin'
        cache: maven

    - uses: browser-actions/setup-chrome@latest
    - run: chrome --version

    - name: Build with Maven
      run: mvn -B clean test
The workflow file usually consists of the below attributes:
| name: Java CI with Maven | Name of workflow: This is an optional attribute.The name of the workflow is denoted by the keyword “name”. If you wish to include multiple CI jobs in your project, it is recommended to name each one appropriately. |
| on: [push] : | On attribute – This attribute is mandatory and specifies the trigger for this workflow. There are several actions you can include such as push, pull request, release, etc. for more information on the events, check the official guide here. |
| jobs: | Under the jobs attribute, groups together all the jobs that run in the workflow. |
| runs-on: ubuntu-latest | Configures the job to run on the latest version of an Ubuntu Linux runner. This means that the job will execute on a fresh virtual machine hosted by GitHub |
| steps: | Under this option, the actions used by the particular workflow, and the multiple jobs that would run under the workflow are mentioned. These jobs run in parallel. If you want to run the jobs in the order in the CI pipelines, you must add the “needs” attribute. It is crucial to ensure that every workflow has at least one job. In our sample workflow, we only have one job as shown in image above. |
| uses: actions/checkout@v3 | The uses keyword specifies that this step will run v3 of the actions/checkout action. This is an action that checks out your repository onto the runner, allowing you to run scripts or other actions against your code (such as build and test tools). You should use the checkout action any time your workflow will run against the repository’s code. |
| uses: actions/setup-java@v3 with: java-version: ’17’ | This step uses the actions/setup-java@v3 action to install the specified version of the Java (this example uses v17). |
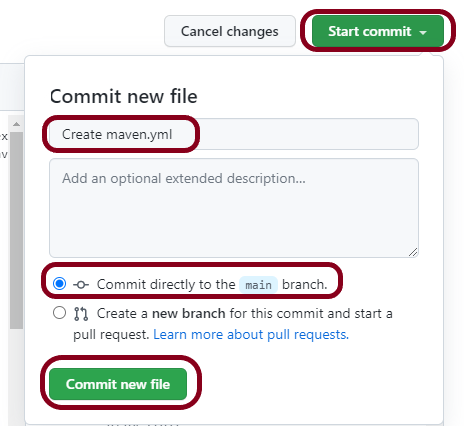
Step 4 – Commit the changes
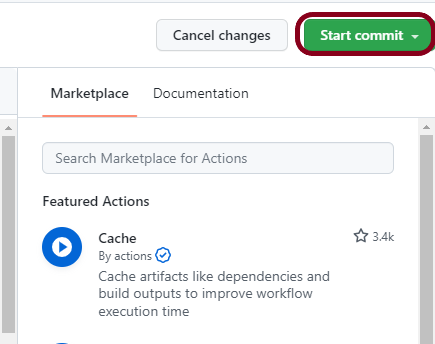
After the changes, hit the “Start Commit” button.
This will give the choice to add a description for the commit. It will also allow the user to commit either to the main branch or commit to any other branch that exists in the project. Click on the “Commit new file” button to set up the workflow file.
Step 5 – Verify that the workflow is running
Next, head over to the “Actions” tab, and you will see your YAML workflow file available under the tab. The yellow sign represents that the job is in the queue.

In Progress – When the job starts building and running, you will see the status change from “Queued” to “in progress”.

Passed – If the build is successful, you will see a green tick mark.

Click on the workflow and the below screen is displayed. It shows the status of the run of the workflow, the total time taken to run the workflow, and the name of the .yml file.

Below are all the steps of the workflow.
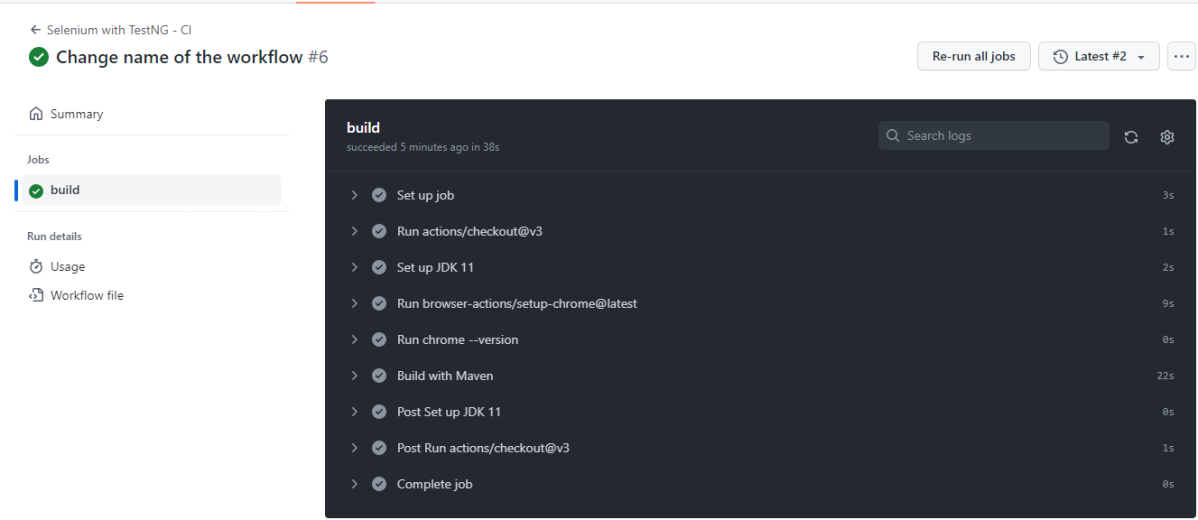
Failed – In case the build has failed, then there will be a red cross mark.

To learn more about Chrome installation, please refer to this tutorial – browser-actions/setup-chrome.
The complete code can be found here on GitHub – vibssingh/Selenium-TestNG.
Congratulations! We just created our CI workflow for running our Selenium test cases.