Rest Assured Tutorials

HOME

RestAssured is a Java-based library that is used to test RESTful Web Services. REST-assured was designed to simplify the testing and validation of REST APIs and is highly influenced by testing techniques used in dynamic languages such as Ruby and Groovy.

Chapter 1 Introduction to Rest Assured
Chapter 2 Setup Basic REST Assured Maven Project In Eclipse IDE
Chapter 3 How to test GET Request using Rest Assured
Chapter 4 How to test POST Request using Rest Assured
Chapter 5 How to test PUT Request using Rest Assured
Chapter 6 How to test DELETE Request using Rest Assured
Chapter 7 How to test PATCH Request using Rest Assured
Chapter 8 How to test POST request from JSON Object in Rest Assured
Chapter 9 How to test POST JSON Object request using Java Map in Rest Assured
Chapter 10 How to create JSON Array Request Body – org.json
Chapter 11 How to print pretty JSON using org.json library in Java?
Chapter 12 Assertion of JSON in Rest Assured using Hamcrest
Chapter 13 Extraction from JSON in Rest Assured
Chapter 14 How To Send A JSON/XML File As Payload To Request using Rest Assured
Chapter 15 Logging in Rest Assured
Chapter 16 How to test SOAP Services using Rest Assured
Chapter 17 How to send basic authentication credentials in Rest Assured
Chapter 18 How to add Content Type to request in Rest Assured
Chapter 19 How to verify the response time of a request in Rest Assured?
Chapter 20 How to verify JSON response headers in Rest Assured? 
Chapter 21 How to perform multiple assertions in Rest Assured? 
Chapter 22 How to handle HTTP Query Parameters using REST Assured
Chapter 23 How to validate JSON body in Rest Assured?
Chapter 24 Compare JSON Objects using JSONAssert Library
Chapter 25 Compare JSON Arrays using JSONAssert Library
Chapter 26 How to blacklist headers in Rest Assured
Chapter 27 How to pass authorization token in header in Rest assured? – NEW
Chapter 28 Generating and Using Access Tokens in a Rest API: A Complete Guide – NEW

JSON Manipulation

Chapter 1 Serialization – How to create JSON Payload from Java Object – Jackson API
Chapter 2 Deserialization – How to convert JSON to Java Object using Jackson API
Chapter 3 How to create JSON Array Payload using POJO – Jackson API
Chapter 4 How to create Nested JSON Object using POJO – Jackson API
Chapter 5 Rest Assured – How to test JSON Request using Jackson API
Chapter 6 Rest Assured – @JsonIgnore Annotation in Jackson API
Chapter 7 Rest Assured – @JsonIgnoreProperties in Jackson
Chapter 8 Serialization – How to convert Map to JSON string using Jackson API
Chapter 9 Deserialization – How to convert JSON to Map using Jackson API

XML Manipulations

Chapter 1 How to parse XML in Java
Chapter 2 How to retrieve XML Child Nodes in Java
Chapter 3 Serialization – How to convert Java Objects to XML using Jackson API
Chapter 4 Deserialization – How to convert XML to Java Objects using Jackson API
Chapter 5 Jackson Annotations for XML – JacksonXmlRootElement
Chapter 6 Marsalling – How to convert Java Objects to XML using JAXB
Chapter 7 UnMarshalling- How to convert XML to Java Objects using JAXB
Chapter 8 @XmlElementWrapper Annotation for XML – JAXB
Chapter 9 XML Marshalling – Convert Java objects to XML using JAXB Version 3
Chapter 10 XML Unmarshalling – Convert XML to Java objects using JAXB Version 3

Gradle

Chapter 1 Setup Basic REST Assured Gradle Project In Eclipse IDE

Frameworks

Chapter 1 Integration of REST Assured with TestNG
Chapter 2 Integration of REST Assured with JUnit4
Chapter 3 Integration of REST Assured with JUnit5
Chapter 4 Serenity BDD with Cucumber and Rest Assured
Chapter 5 Serenity BDD with Cucumber and Rest Assured in Gradle
Chapter 6 How To Create Gradle Project with Cucumber to test Rest API
Chapter 7 Rest API Test in Cucumber and JUnit4
Chapter 8 API Automation with REST Assured, Cucumber and TestNG – NEW

How to run Rest API Tests in GitLab CI/CD

HOME

This tutorial explains the process to run the Rest API Tests in the GitLab pipeline. This is a significant step towards achieving CI/CD. Ideally, the tests need to run after any change (minor/major) before merging the change to the master branch. Suppose there are 100 changes in a day, and any QA won’t want to start the tests manually 100 times in a day. So, now adding tests to the GitLab pipeline comes into the picture. We can add a test stage to the pipeline and the tests will run automatically when the pipeline run, or we can schedule the tests to run automatically every hour or day using GitLab pipeline.

Prerequisite:

  1. Rest Assured – 4.3.3
  2. Java 11
  3. Maven / Gradle
  4. TestNG /JUnit
  5. GitLab account

To use GitLab CI/CD, we need to keep 2 things in mind:-

a) Make sure a runner is available in GitLab to run the jobs. If there is no runner, install GitLab Runner and register a runner for your instance, project, or group.

b) Create a .gitlab-ci.yml file at the root of the repository. This file is where you define your CI/CD jobs.

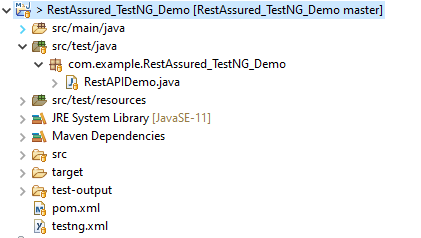
Step 1 – Create a new Maven Project

Step 2 – Add dependencies to the project

<dependencies>
      
      <dependency>
         <groupId>org.testng</groupId>
         <artifactId>testng</artifactId>
         <version>7.4.0</version>
         <scope>test</scope>
      </dependency>
      
      <dependency>
         <groupId>io.rest-assured</groupId>
         <artifactId>rest-assured</artifactId>
         <version>4.3.3</version>
         <scope>test</scope>
      </dependency>
      
      <dependency>
         <groupId>org.json</groupId>
         <artifactId>json</artifactId>
         <version>20210307</version>
      </dependency>
   </dependencies>
   
<build>
    <plugins>
        
        <!-- Compiler plug-in -->
         <plugin>
            <groupId>org.apache.maven.plugins</groupId>
            <artifactId>maven-compiler-plugin</artifactId>
            <version>3.5.1</version>
            <configuration>
               <source>11</source>
               <target>11</target>
            </configuration>
         </plugin>

         <!-- Added Surefire Plugin configuration to execute tests -->
         <plugin>
            <groupId>org.apache.maven.plugins</groupId>
            <artifactId>maven-surefire-plugin</artifactId>
            <version>3.0.0-M5</version>
            <configuration>
               <suiteXmlFiles>
                  <suiteXmlFile>testng.xml</suiteXmlFile>
               </suiteXmlFiles>
            </configuration>
         </plugin>
      </plugins>
   </build>
</project>

It is needed to add maven-surefire plugin to run the TestNG tests through command line. To know more about this, please refer to this tutorial.

Step 3 – Create the Test Code to test the Rest API

Here, 2 tests are created. One of the tests gets all the employee data (GET) whereas another test creates an employee (POST).

import static io.restassured.RestAssured.given;
import static org.hamcrest.Matchers.equalTo;

import org.json.JSONObject;
import org.testng.annotations.Test;

import io.restassured.http.ContentType;

public class RestAPIDemo {

	@Test(description = "To get the details of employee with id 2", priority = 0)
	public void verifyUser() {

		// Given
		given()
				// When
				.when().get("http://dummy.restapiexample.com/api/v1/employee/2")
				
               // Then
				.then().statusCode(200).statusLine("HTTP/1.1 200 OK")
				
                // To verify booking id at index 2
				.body("data.employee_name", equalTo("Garrett Winters"))
				.body("message", equalTo("Successfully! Record has been fetched."));
	}

	@Test(description = "To create a new employee", priority = 1)
	public void createUser() {

		JSONObject data = new JSONObject();

		// Map<String, String> map = new HashMap<String, String>();

		data.put("employee_name", "APITest");
		data.put("employee_salary", "99999");
		data.put("employee_age", "30");

		// GIVEN
		given().baseUri("http://dummy.restapiexample.com/api").contentType(ContentType.JSON).body(data.toString())

				// WHEN
				.when().post("/v1/create")

				// THEN
				.then().statusCode(200).body("data.employee_name", equalTo("APITest"))
				.body("message", equalTo("Successfully! Record has been added."));

	}
}

Step 4 – Create testng.xml to run the tests through TestNG

Now, let’s create a testng.xml to run the TestNG tests. If JUnit is used instead of TestNG, then this step is not needed.

<?xml version="1.0" encoding="UTF-8"?>
<!DOCTYPE suite SYSTEM "https://testng.org/testng-1.0.dtd">
<suite name="Suite">
  <test name="Test">
    <classes>
      <class name="com.example.RestAssured_TestNG_Demo.RestAPIDemo"/>
    </classes>
  </test> <!-- Test -->
</suite> <!-- Suite -->

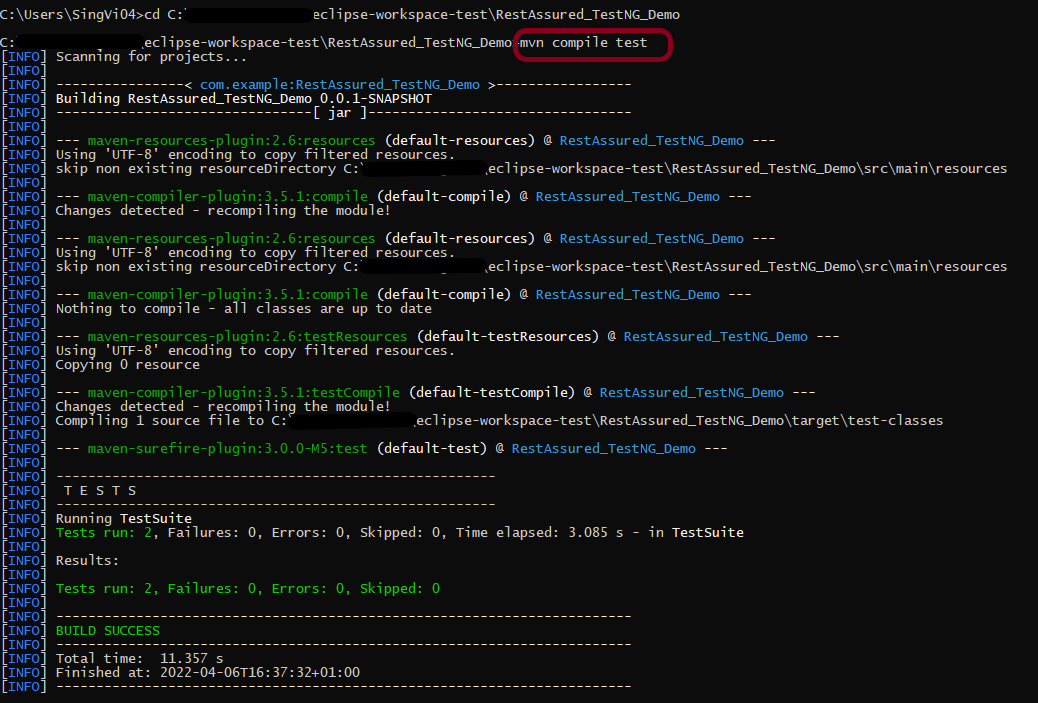
Step 5 – Run the tests through the command line

Now, let us execute the tests through the command line. Go to the place where pom.xml of the project is placed and use the below command to run the tests. This step makes sure that all the tests are running as expected.

GitLab Section

Step 6 – Create a blank project in GitLab

Refer to this tutorial to create a new blank project – How to create a new project in GitLab.

Step 7 – Push the project from the local repository to GitLab Repository

Refer to this tutorial to push the changes – How to push new local GIT Repository to GitLab.

Step 8 – Create .gitlab-ci.yml file in the project in GitLab

It is a YAML file where you configure specific instructions for GitLab CI/CD. In the .gitlab-ci.yml, we can define:

  • The scripts you want to run.
  • Other configuration files and templates you want to include.
  • Dependencies and caches.
  • The commands you want to run in sequence and those you want to run in parallel.
  • The location to deploy your application.
  • Whether you want to run the scripts automatically or trigger any of them manually.

image: adoptopenjdk/maven-openjdk11

stages:
  - test

variables:
  MAVEN_OPTS: "-Dmaven.repo.local=.m2/repository"

test:
  stage: test
  allow_failure: true

# Run the tests
  script:
    - mvn $MAVEN_OPTS clean package
    - mvn compile test

# Store artifacts
  artifacts:
    when: always
    name: "report"
    paths:
    - target/surefire-reports/*
    expire_in: 1 h

Step 9 – Run the tests in the GitLab pipeline

Now, when a new change is committed, a pipeline kicks off and it runs all the tests.

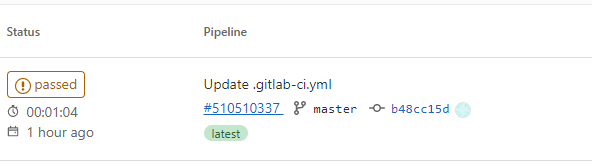
Step 10 – Check the status of the pipeline

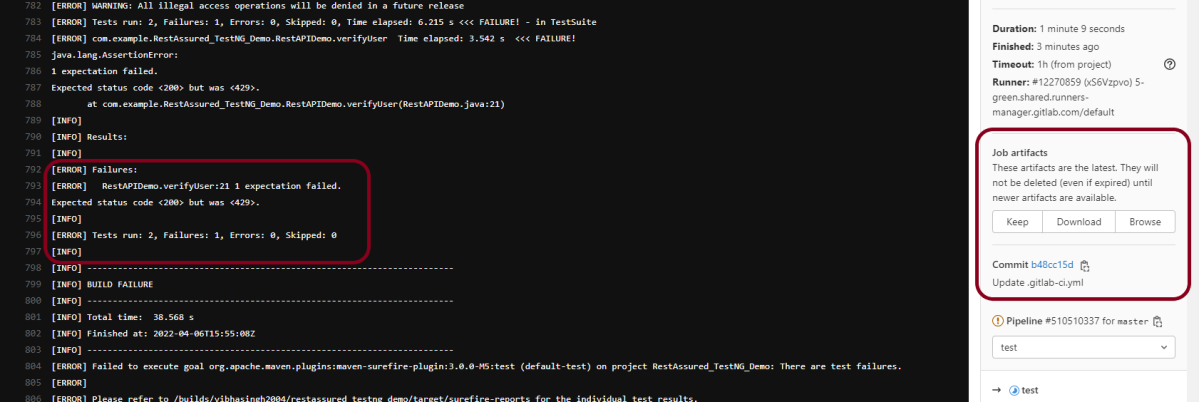
Once the Status of the pipeline changes to either failed or passed.. that means the tests are already executed. Here, the pipeline is passed with brown colour means that the execution of the test is completed with some failures.

I have added an artifact in the gitalb-ci.yml with the name “report”. This artifact creates a folder with the name “report” and the reports in this folder come from the path /target/surefire-reports. This artifact gives us an option to download the reports or browse the report. This report will be available for 1 hour only as mentioned in the gitlab-ci.yml.

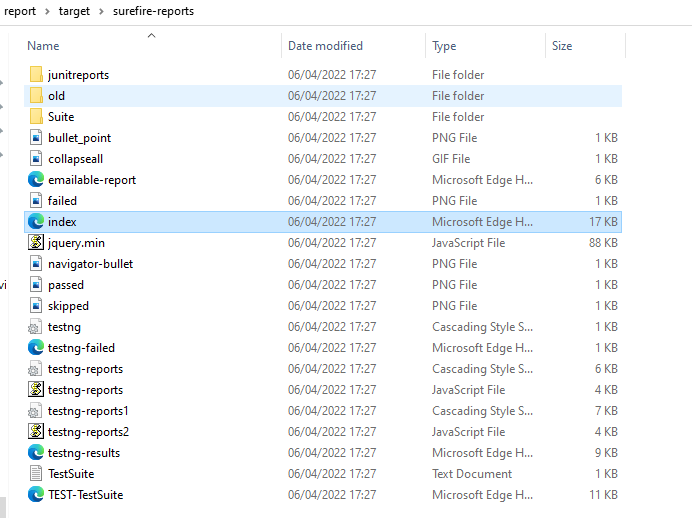
Step 11 – Download the report

Click on the Download button and the report zip file is downloaded. Unzip the folder, and it contains all different types of surefire-reports.

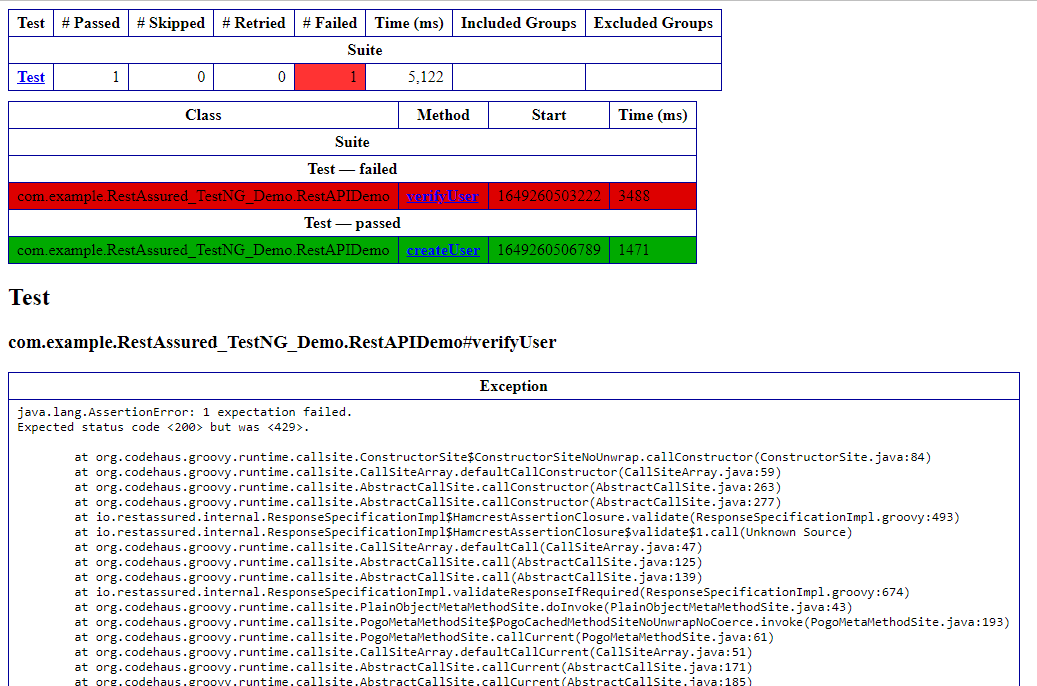
Example of Emailable-Report.html

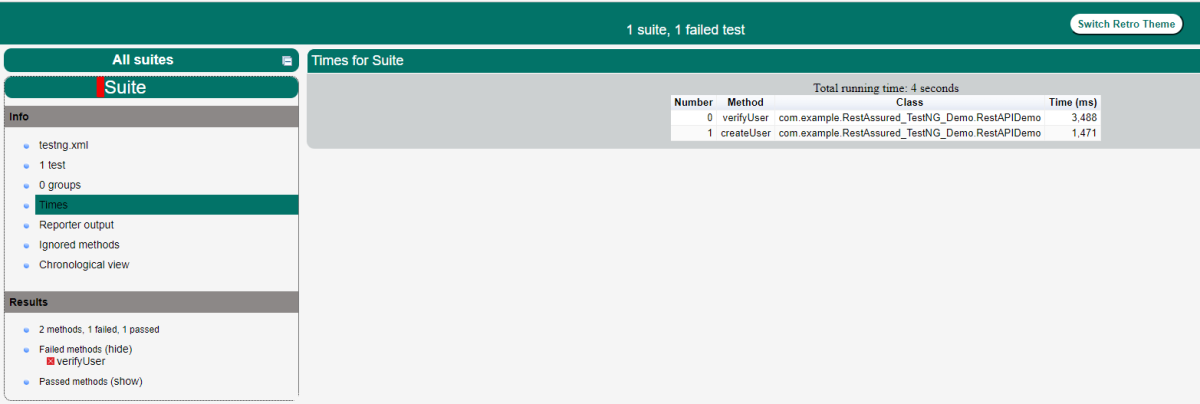
Example of Index.html

Congratulations. This tutorial has explained the steps to run Selenium tests in GitLab CI/CD. Happy Learning!!