Git is a Distributed Version Control System (VCS)which is originally developed in 2005 by Linus Torvalds (Creator of Linux) and is open source, i.e. freely available to use. It is the most popular and most used version control tool right now. A staggering number of software projects rely on Git for version control, including commercial projects as well as open source.
The git pull command fetches and downloads content from the remote repository and integrates changes into the local repository. The git pull command is called as the combination of git fetch followed by git merge.
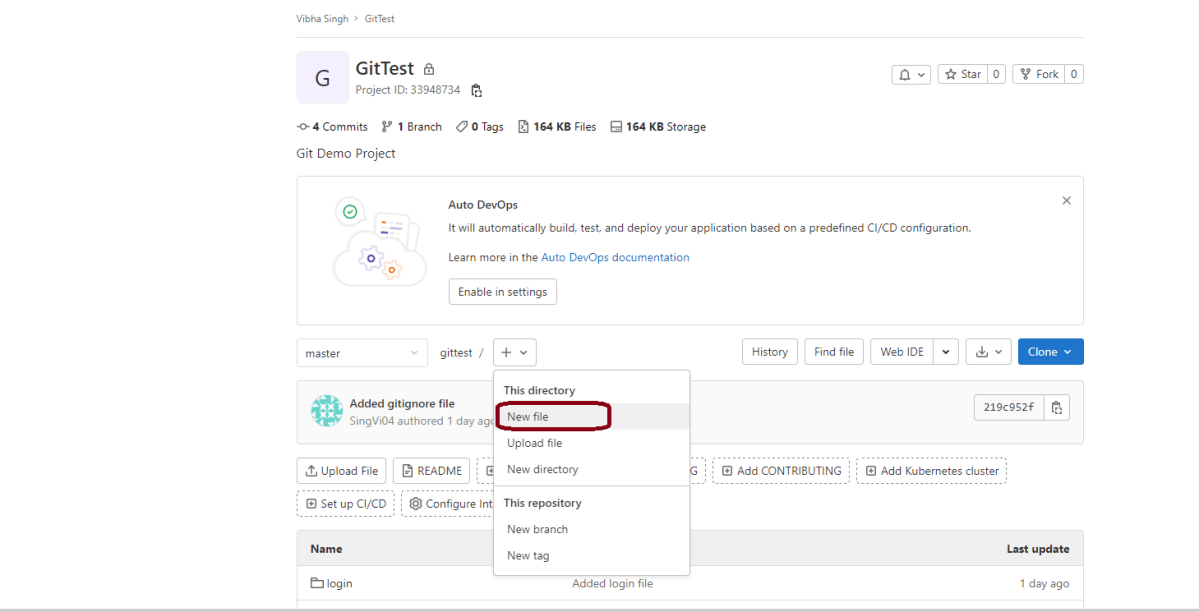
This is my project in GitLab. If, you don’t have any project in GitLab, follow the below steps to create a GIT local Repository and push it to GitLab.
Step 4 – Let’s add a new file in the Remote Repository directly using GitLab. Follow the steps shown below to add and commit a new .
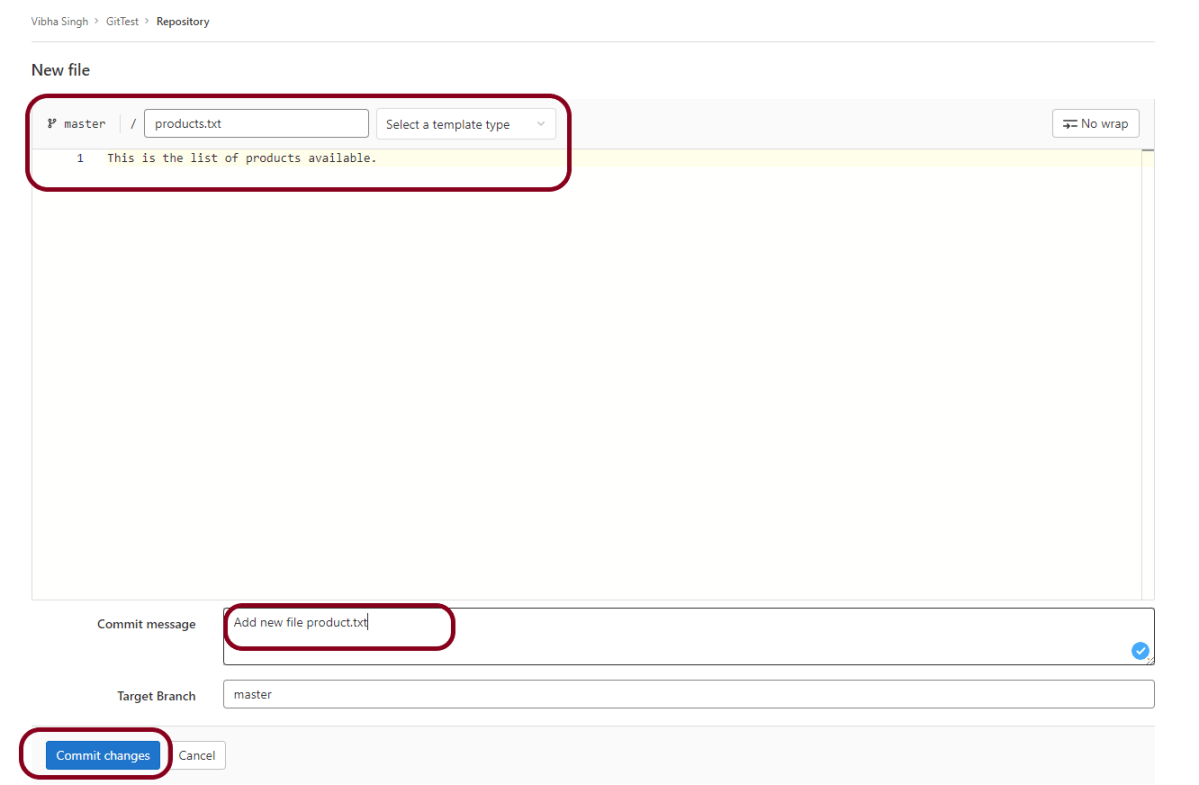
Step 5 – This is a new file. I have provided name to this file as products.txt. Add the comment as commit message. Click the Commit changes button to commit this change.
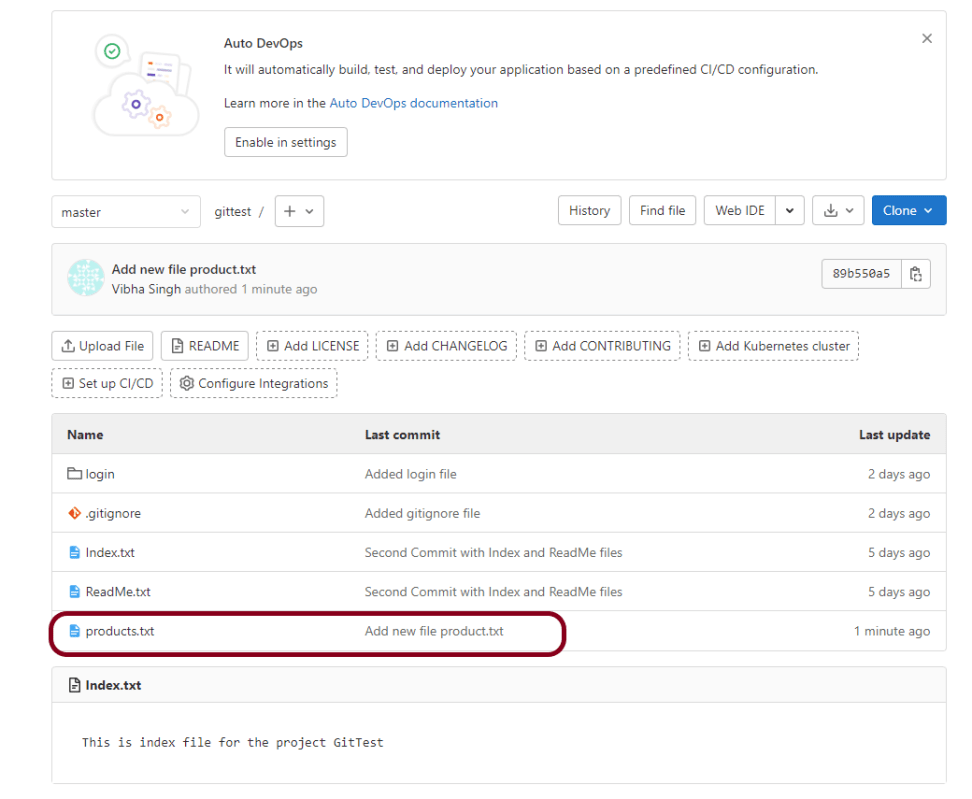
Below image shows that new file – products.txt is committed to this project.
Step 6 – Go to the directory where local GIT Repository is saved. Right-click and click on Git Bash Here to open GitBash at that place.
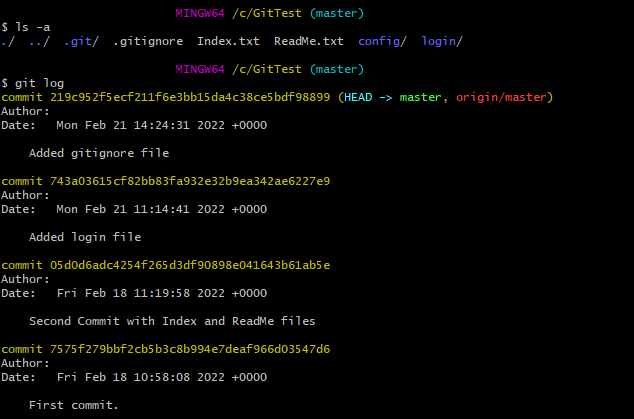
Use the below command to see the list of files present in GIT Local Repository.
ls -a
git log
Type git log to see the list of commits present.
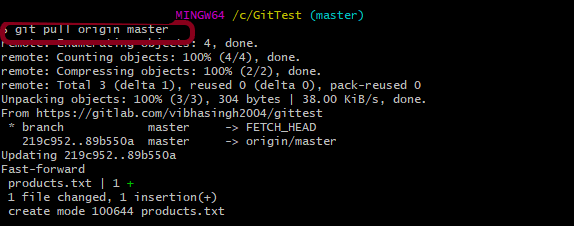
Step 7 – Type git pull command is used to pull the latest changes from Remote GIT Repository to local GIT Repository.
git pull origin master
This command says that pull the content from the “master” branch in the “origin” repo.
As the “git pull” command fetches and merges, we can see the newly added file named “products.txt” in my local repo.
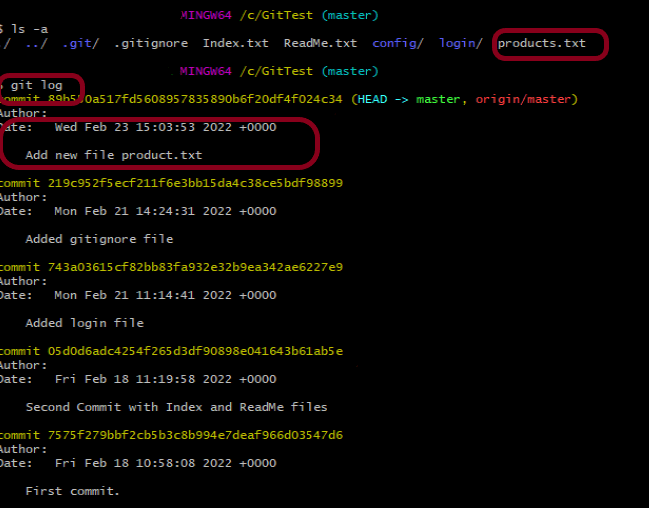
Again use the below commands:
ls -a
git log
This shows that the new file – products.txt which was present in GitLab is now present in Git local Repository means latest change is pulled from GitLab to local Repository.
Congratulation!! We are able to pull the changes from Remote Repository to Local Repository. Happy Learning!!