What is Version Control?
Version control systems are tools that manage changes made to files and directories in a project. They enable you to monitor your actions over time. You can revert any changes that you wish to discard. You can also work collaboratively with others on a larger scale. This cheat sheet highlights one of the most widely used systems, Git.
Git configuration
1. Specify the username and email address that will be used with the commits.
1.1. Sets up Git with your name
git config --global user.name "<Your-Full-Name>"
1.2 Sets up Git with your email
git config --global user.email "<your-email-address>"
Starting a project
1. Initializes a new Git repository in the current directory.
git init
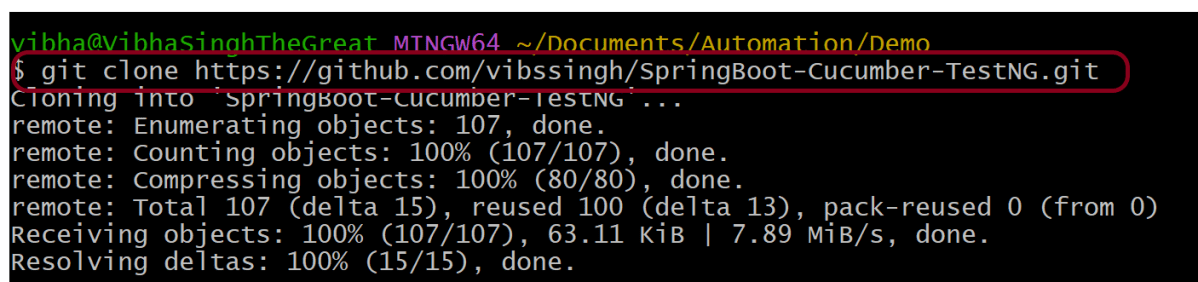
2. Creates a local copy of a remote repository.
git clone <repository_url>
3. Clones a specific branch from a remote repository instead of the default branch (main or master)
git clone --branch <branch_name> <repo_url>
Basic Commands
1. Displays the status of your working directory. Options include new, staged, and modified files. It will retrieve branch name, current commit identifier, and changes pending commit.
git status
2. To move files from the Working Directory to the Staging Index
2.1. To add specific files,
git add <file1> <file2> … <fileN>
2.2. To add all the files:
git add .
3. Remove a file from a working directory or staging area
git rm <filename_or_dir>
4. Show changes between working directory and staging area.
git diff [file]
5. Create a new commit from changes added to the staging area with custom message.
git commit -m “[Commit message]”
6. Editing the message of the latest commit
git commit --amend -m "New commit message"
Branch & Merge
1. List all local branches in repository.
git branch
Lists all branches, including: Local branches, Remote-tracking branches (from remote like origin)
git branch -a
2. Create a new branch referencing the current HEAD
git branch [branch-name]
3. Apply commits of the current working branch and apply them to the HEAD of [branch]
git rebase [branch_name]
4.1. Switch working directory to another existing branch
git checkout [branch_name]
4.2. Create and switch to a new branch (older method):
git checkout -b [branch_name]
4.3. Create and switch to a new branch (new method):
git switch -c [branch_name]
5. Remove selected branch, if it is already merged into any other.
git branch -d [branch_name]
6. Force delete a local branch (whether merged or unmerged)
git branch -D [branch_name]
7. Rename the current branch to new branch name
git branch -m [branch_name]
8. Join specified [branch_name] branch into your current branch
git merge [branch_name]
Synchronizing repositories
1.Fetch changes from the remote, but not update tracking branches.
git fetch [remote]
2. Push a local branch named branch to a remote repository (usually named origin)
git push origin branch
3. Fetches changes from the remote repository and merges them into the current branch.
git pull
4. Fetches changes from the remote repository and rebases the current branch onto the updated branch.
git pull --rebase
5. Pushes all branches to the remote repository.
git push --all
6. Lists all remote repositories.
git remote
7. Adds a new remote repository with the specified name and URL.
git remote add [name] [url]
8. Remove a connection to a remote repository.
git remote rm [remote]
9. Rename an existing remote connection.
git remote rename [old_name] [new_name]
Temporary Commits
1. Stashes the changes in the working directory, allowing you to switch to a different branch or commit without committing the changes.
git stash
2. Lists all stashes in the repository.
git stash list
3. Applies and removes the most recent stash from the stash list.
git stash pop
4. Removes the most recent stash from the stash list.
git stash drop
Git Logging
1. Show the commit history for the currently active branch.
git log
2. Shows commit logs for all branches.
git log --all
3. Compares working directory and staging area (unstaged changes).
git diff
4. Shows commits made by a specific author.
git log --author="Name"
5. Shows commits made before a specific date.
git log --until="2024-12-31"
6. Shows the commit history of a specific file.
git log [file]
7. Displays the full details of a specific commit (diff + metadata).
git show