Testing of Web Application using Serenity with JUnit4

HOME

In the previous tutorial, I explained Serenity BDD with Cucumber for Web Application. In this tutorial, I will explain the Integration of Serenity with JUnit4. This tutorial gives an idea of how to set up a new project where we like to use Serenity as BDD Framework and JUnit as a Testing framework.

Prerequisite

  1. Java 17 installed
  2. Maven installed
  3. Eclipse or IntelliJ installed

Dependency List:

  1. Java 17
  2. Maven – 3.9.9
  3. Serenity – 4.0.30
  4. JUnit – 4.13.2
  5. Maven Surefire Plugin – 3.2.3
  6. Maven Failsafe Plugin – 3.2.3
  7. Maven Compiler Plugin – 3.12.1
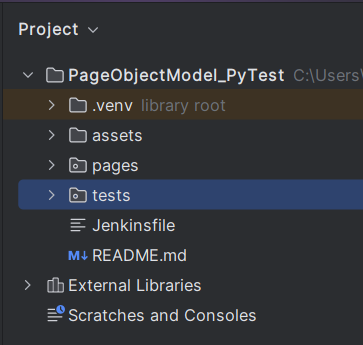
Project Structure

This project consists of various classes – ApplicationLoginTests (This is the Test Class which is going to contain all the tests). NavigationActions is the Action class that is used to open the webpage or application. StepLoginPage, StepDashboardPage, and StepForgotPasswordPage are the Page Object classes that contain multiple functionalities of that page and that help to keep the code clean.

Step 1 – Update the Properties section

 <properties>
    <project.build.sourceEncoding>UTF-8</project.build.sourceEncoding>
    <serenity.version>4.0.30</serenity.version>
    <junit.version>4.13.2</junit.version>
    <maven.compiler.plugin.version>3.12.1</maven.compiler.plugin.version>
    <maven.surefire.plugin.version>3.2.3</maven.surefire.plugin.version>
    <maven.failsafe.plugin.version>3.2.3</maven.failsafe.plugin.version>
    <maven.compiler.source.version>17</maven.compiler.source.version>
    <maven.compiler.target.version>17</maven.compiler.target.version>
    <tags></tags>
    <parallel.tests></parallel.tests>
    <webdriver.base.url></webdriver.base.url>
  </properties>

Step 2 – Add dependencies to POM.xml

<dependencies>
   <dependency>
            <groupId>net.serenity-bdd</groupId>
            <artifactId>serenity-core</artifactId>
            <version>${serenity.version}</version>
            <scope>test</scope>
        </dependency>
        <dependency>
            <groupId>net.serenity-bdd</groupId>
            <artifactId>serenity-junit</artifactId>
            <version>${serenity.version}</version>
            <scope>test</scope>
        </dependency>
      
        <dependency>
            <groupId>net.serenity-bdd</groupId>
            <artifactId>serenity-screenplay</artifactId>
            <version>${serenity.version}</version>
            <scope>test</scope>
        </dependency>
      
        <dependency>
            <groupId>net.serenity-bdd</groupId>
            <artifactId>serenity-screenplay-webdriver</artifactId>
            <version>${serenity.version}</version>
            <scope>test</scope>
        </dependency>

        <dependency>
            <groupId>junit</groupId>
            <artifactId>junit</artifactId>
            <version>${junit.version}</version>
            <scope>test</scope>
        </dependency>      
</dependencies>

Step 3 – Update the Build Section of pom.xml

<build>
        <plugins>
            <plugin>
                <groupId>org.apache.maven.plugins</groupId>
                <artifactId>maven-surefire-plugin</artifactId>
                <version>${maven.surefire.plugin.version}</version>
                <configuration>
                    <skip>true</skip>
                </configuration>
            </plugin>
            <plugin>
                <artifactId>maven-failsafe-plugin</artifactId>
                <version>${maven.failsafe.plugin.version}</version>
                <configuration>
                    <includes>
                        <include>**/*.java</include>
                    </includes>
                    <parallel>methods</parallel>
                    <useUnlimitedThreads>true</useUnlimitedThreads>
                </configuration>
                <executions>
                    <execution>
                        <goals>
                            <goal>integration-test</goal>
                            <goal>verify</goal>
                        </goals>
                    </execution>
                </executions>
            </plugin>
            <plugin>
                <groupId>org.apache.maven.plugins</groupId>
                <artifactId>maven-compiler-plugin</artifactId>
                <version>${maven.compiler.plugin.version}</version>
                <configuration>
                    <source>${maven.compiler.source}</source>
                    <target>${maven.compiler.target}</target>
                </configuration>
            </plugin>
           <plugin>
               <groupId>net.serenity-bdd.maven.plugins</groupId>
               <artifactId>serenity-maven-plugin</artifactId>
               <version>${serenity.version}</version>
               <dependencies> 
                  <dependency>
                       <groupId>net.serenity-bdd</groupId>
                       <artifactId>serenity-single-page-report</artifactId>
                       <version>${serenity.version}</version>
                  </dependency>                
               </dependencies>
               <configuration>
                   <tags>${tags}</tags>
                   <reports>single-page-html</reports> 
               </configuration>
               <executions>
                  <execution>
                      <id>serenity-reports</id>
                      <phase>post-integration-test</phase>
                      <goals>
                          <goal>aggregate</goal>
                      </goals>
                   </execution>
               </executions>
           </plugin>
        </plugins>
    </build>
</project>

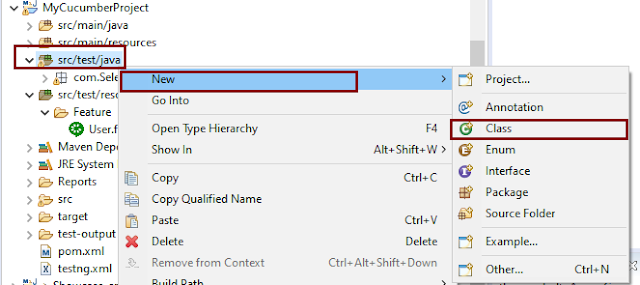
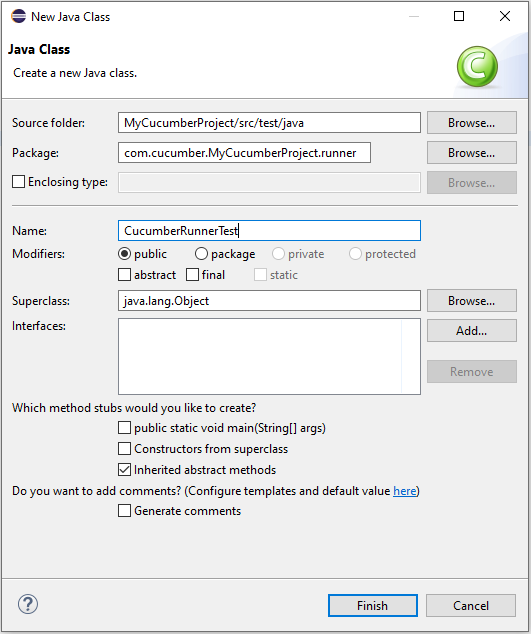
Step 4 – Create the Test Class

package org.example.tests;

import net.serenitybdd.annotations.Pending;
import net.serenitybdd.annotations.Steps;
import net.serenitybdd.annotations.Title;
import net.serenitybdd.core.Serenity;
import net.serenitybdd.junit.runners.SerenityRunner;
import org.example.steps.StepDashBoardPage;
import org.example.steps.StepForgotPasswordPage;
import org.example.steps.StepLoginPage;
import org.junit.Test;
import org.junit.runner.RunWith;

import static org.junit.Assert.assertTrue;

@RunWith(SerenityRunner.class)
public class ApplicationLoginTests {

    @Steps
    NavigateActions navigate;

    @Steps
    StepLoginPage loginPage;

    @Steps
    StepDashBoardPage dashboardPage;

    @Steps
    StepForgotPasswordPage forgetPasswordPage;


    @Test
    @Title("Login to application with invalid credential generates error message")
    public void invalidCredentials() {

        // Given
        navigate.toTheHomePage();

        // When
        loginPage.inputUserName("Admin");
        loginPage.inputPassword("admin");
        loginPage.clickLogin();

        // Then
        Serenity.reportThat("Passing invalid credentials generates error message",
                () -> assertTrue(loginPage.errorMessage().equalsIgnoreCase("Invalid Credentials")));

    }

    @Test
    @Title("Login to application with valid credentials navigates to DashBoard page")
    public void successfulLogin() {

        navigate.toTheHomePage();
        // loginPage.open();

        // When
        loginPage.inputUserName("Admin");
        loginPage.inputPassword("admin123");
        loginPage.clickLogin();

        // Then
        Serenity.reportThat("Passing valid credentials navigates to DashBoard page",
                () -> assertTrue(dashboardPage.getHeading().equalsIgnoreCase("DashBoard")));
    }


    @Test
    @Pending
    @Title("Verify Forgot your password link")
    public void clickForgetPasswordLink() {

        // Given
        navigate.toTheHomePage();

        // When
        loginPage.clickForgetPasswordLink();

        // Then
        Serenity.reportThat("Open Forget Password Page after clicking forget password link",
                () -> assertTrue(forgetPasswordPage.getHeadingForgetPasswordPage().equalsIgnoreCase("Reset Password")));

    }

}
  1. The tests run using the Serenity test runner – @RunWith(SerenityRunner.class).
  2. The @Steps annotation marks a Serenity step library.
  3. Create the test following the Given/When/Then pattern and using step methods from the step library.
  4. The @Title annotation lets you provide your own title for this test in the test reports.

Step 5 – Create the Action class

Create NavigateActions class under src/test/java. This class is used to open a web browser with the URL specified. This class is extended from UIInteractionSteps.

openPageNamed() method opens an environment-specific page defined in the serenity.conf file under the pages section. The value of loginForm is derived from serenity.config:

package org.example.tests;

import net.serenitybdd.annotations.Step;
import net.serenitybdd.core.steps.UIInteractionSteps;

public class NavigateActions extends UIInteractionSteps {

    @Step
    public void toTheHomePage() {
        // openUrl("https://opensource-demo.orangehrmlive.com/");

        openPageNamed("loginForm");
    }
}

serenity.conf (partial config file)

pages{
  loginForm = "https://opensource-demo.orangehrmlive.com/"
  }

Step 6 – Create the Page Object Classes

StepLoginPage

package org.example.steps;

import net.serenitybdd.annotations.Step;
import net.serenitybdd.core.pages.PageObject;
import net.serenitybdd.core.pages.WebElementFacade;
import org.openqa.selenium.support.FindBy;

public class StepLoginPage extends PageObject {

    @FindBy(name = "username")
    WebElementFacade username;

    @FindBy(name = "password")
    WebElementFacade password;

    @FindBy(xpath = "//*[@class='oxd-form']/div[3]/button")
    WebElementFacade submitButton;

    @FindBy(xpath = "//*[@class='orangehrm-login-error']/div/div/p")
    WebElementFacade errorMessage;

    @FindBy(xpath = "//*[@class='orangehrm-login-forgot']/p")
    WebElementFacade linkText;

    @Step("Enter Username")
    public void inputUserName(String userName) {
        username.sendKeys(userName);
    }

    @Step("Enter Password")
    public void inputPassword(String passWord) {
        password.sendKeys(passWord);
    }

    @Step("Click Submit Button")
    public void clickLogin() {
        submitButton.click();
    }

    @Step("Error Message on unsuccessful login")
    public String errorMessage() {
        String actualErrorMessage = errorMessage.getText();
        return actualErrorMessage;
    }

    @Step("Click Forget Password Link")
    public void clickForgetPasswordLink() {
        linkText.click();

        System.out.println("Clicked on Forgot Password Link");
    }

}

StepDashBoardPage

package org.example.steps;

import net.serenitybdd.annotations.Step;
import net.serenitybdd.core.pages.PageObject;
import net.serenitybdd.core.pages.WebElementFacade;
import org.openqa.selenium.support.FindBy;

public class StepDashBoardPage extends PageObject {

    @FindBy(xpath = "//*[@class='oxd-topbar-header-breadcrumb']/h6")
    WebElementFacade dashboardPageTitle;

    @Step("Heading of DashBoard Page")
    public String getHeading() {
        return dashboardPageTitle.getText();


    }
}

StepForgetPasswordPage

package org.example.steps;

import net.serenitybdd.annotations.Step;
import net.serenitybdd.core.pages.PageObject;
import net.serenitybdd.core.pages.WebElementFacade;
import org.openqa.selenium.support.FindBy;

public class StepForgotPasswordPage extends PageObject {

    @FindBy(xpath = "//*[@class='oxd-form']/h6")
    WebElementFacade forgetLink;


    @Step("Verify Forget Password Page ")
    public String getHeadingForgetPasswordPage() {

        return forgetLink.getText();
    }
}

Keep in mind to use @FindBy annotation from:

import org.openqa.selenium.support.FindBy;

PageObject class is imported from:

import net.thucydides.core.pages.PageObject;

The JUnit Serenity integration provides some special support for Serenity Page Objects. In particular, Serenity will automatically instantiate any PageObject fields in the JUnit test. When a field of type StepLoginPage is declared in the test, Serenity instantiates it for you. The page is automatically instantiated and ready to be used.

@Managed                                                                
WebDriver driver;

@Managed declares a WebDriver instance that will be managed by Serenity. The WebDriver instance will be initialized automatically.

The driver parameter lets you define what WebDriver driver you want to run these tests in. Possible values include Firefox, chrome, iexplorer, phantomjs, appium, safari, edge, and htmlunit.  The default browser in Serenity is Firefox. There are multiple ways to configure webDriver. One of the ways is to mention with @Managed as shown below:

@Managed(driver="chrome")

Step 7 – Create the serenity.conf file

Serenity.conf file is used to specify various features like the type of webdriver used, various test environments, run test in headless mode, and many more options. Serenity.conf can also contain settings like start size, disable sandbox, disable gpu, and others that need to be added to chrome.switches setting. Create serenity.conf file under src/test/resources.

headless.mode = false
pages{
   loginForm ="https://opensource-demo.orangehrmlive.com/"
   }

webdriver {
  driver = chrome
  capabilities {
    browserName = "chrome"
    acceptInsecureCerts = true
    "goog:chromeOptions" {
      args = ["remote-allow-origins=*","test-type", "no-sandbox", "ignore-certificate-errors", "--window-size=1920,1080",
        "incognito", "disable-infobars", "disable-gpu", "disable-default-apps", "disable-popup-blocking",
        "disable-dev-shm-usage", "disable-extensions", "disable-web-security", "disable-translate", "disable-logging"]
    }
  }
}

Step 8 – Create a serenity.properties file

serenity.project.name = Serenity and Junit4 Demo

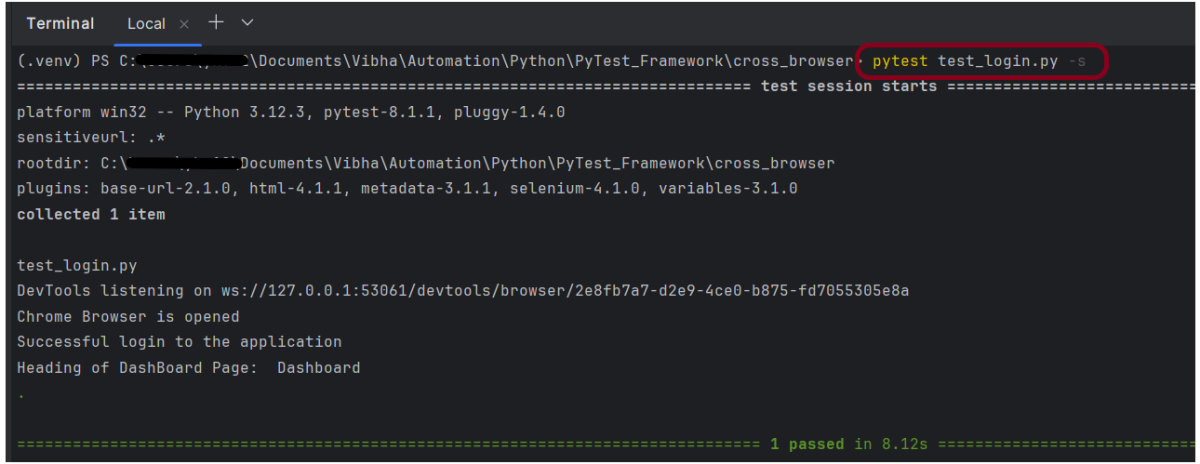
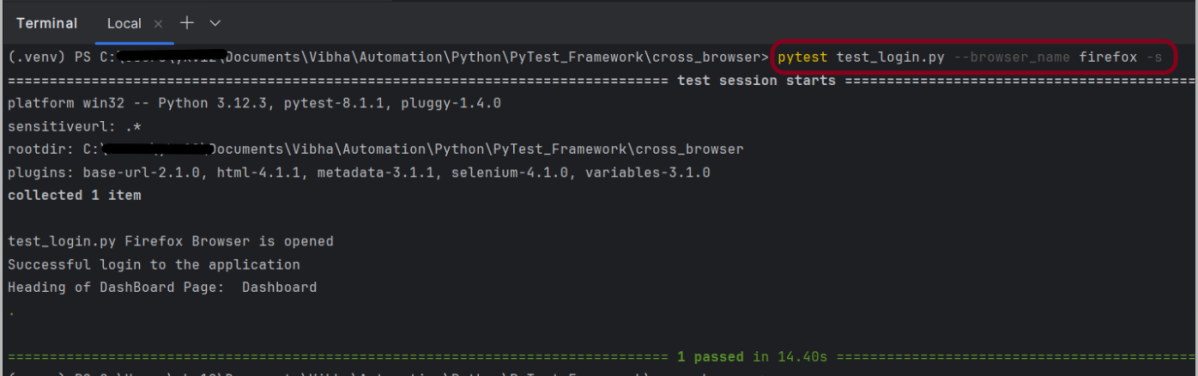
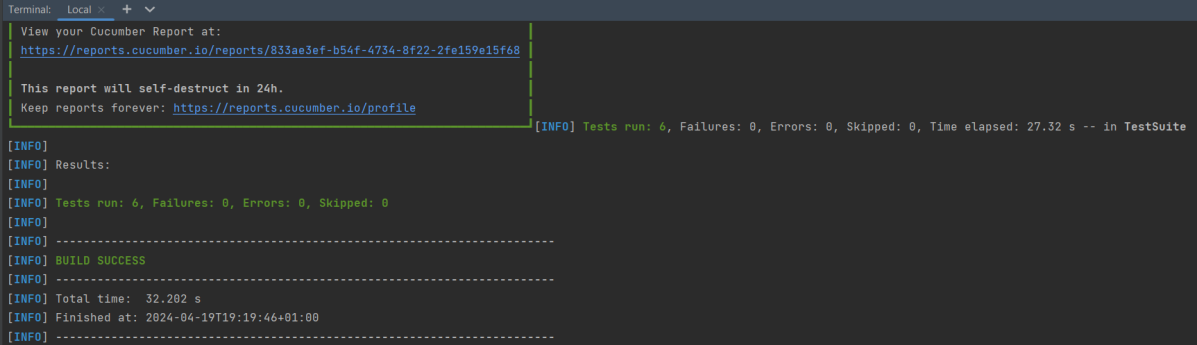
Step 9 – Run the tests through the command

Open the command line and go to the location where the pom.xml of the project is present and type the below command.

mvn clean verify

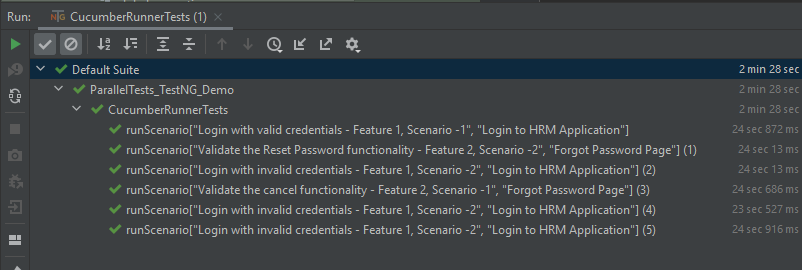
Below is the execution status.
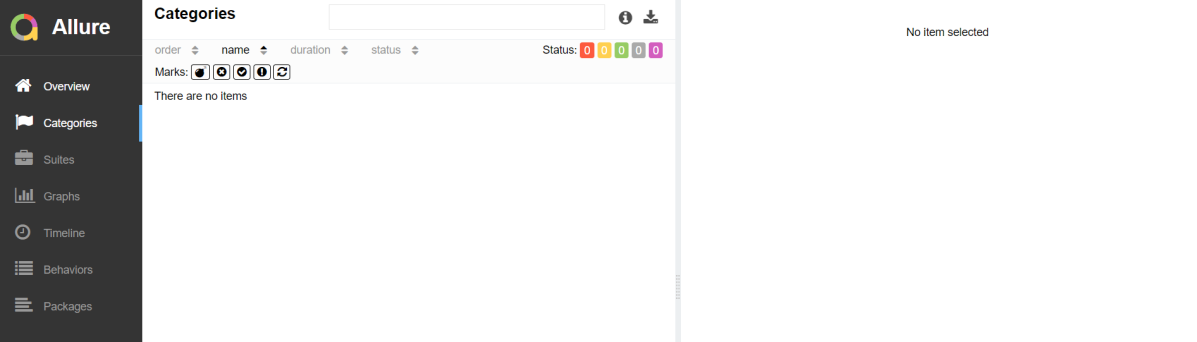
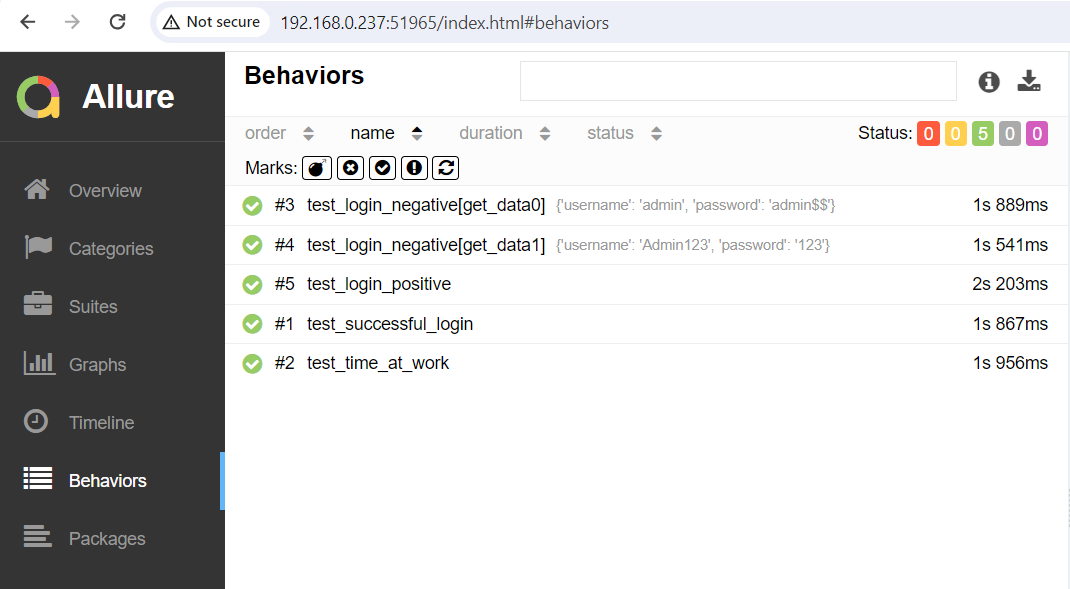
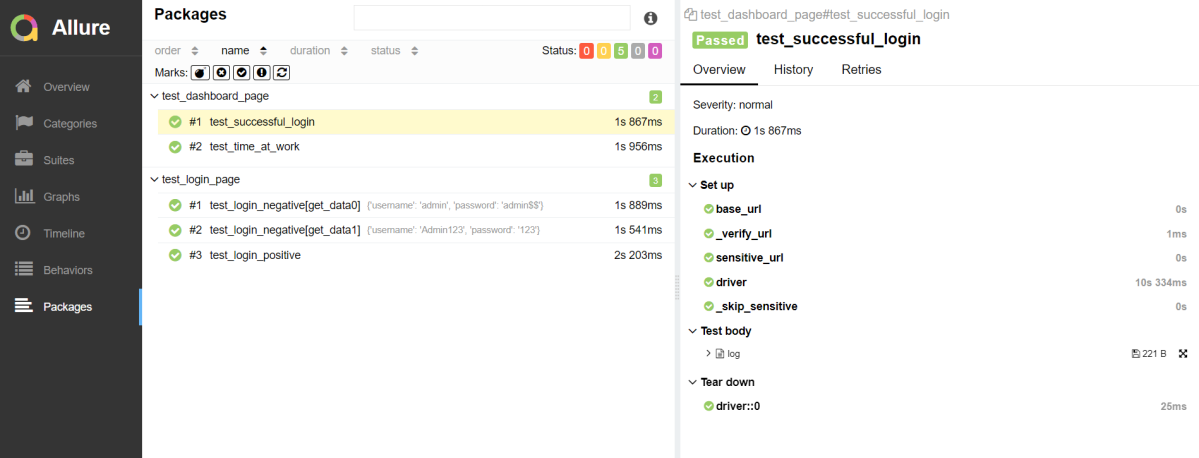
There are 2 types of reports are generated – Index.html and Serenity-Summary.html.
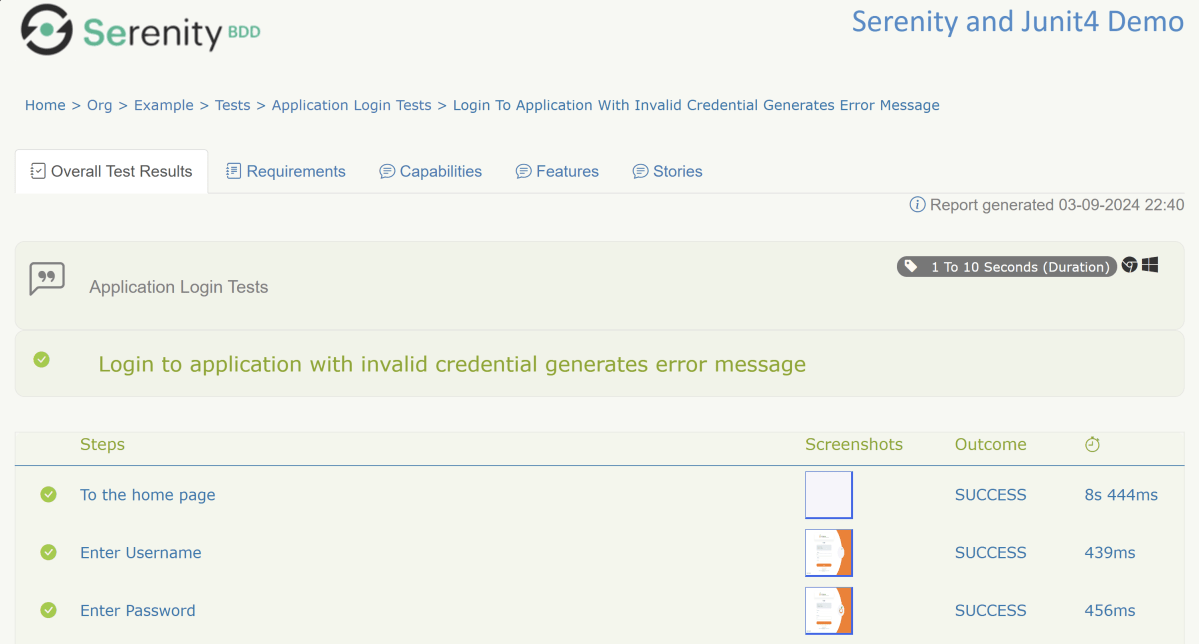
Index.html

 We can see the value of the @Title annotation, ‘Login to the application with valid credentials navigates to DashBoard page’, added as the heading. The value of @Step annotation, ‘Enter Username’, and ‘Enter Password’ is added to the Report as various steps.

This report contains a screenshot of each step also.

Emailable Report (Serenity-Summary.html)

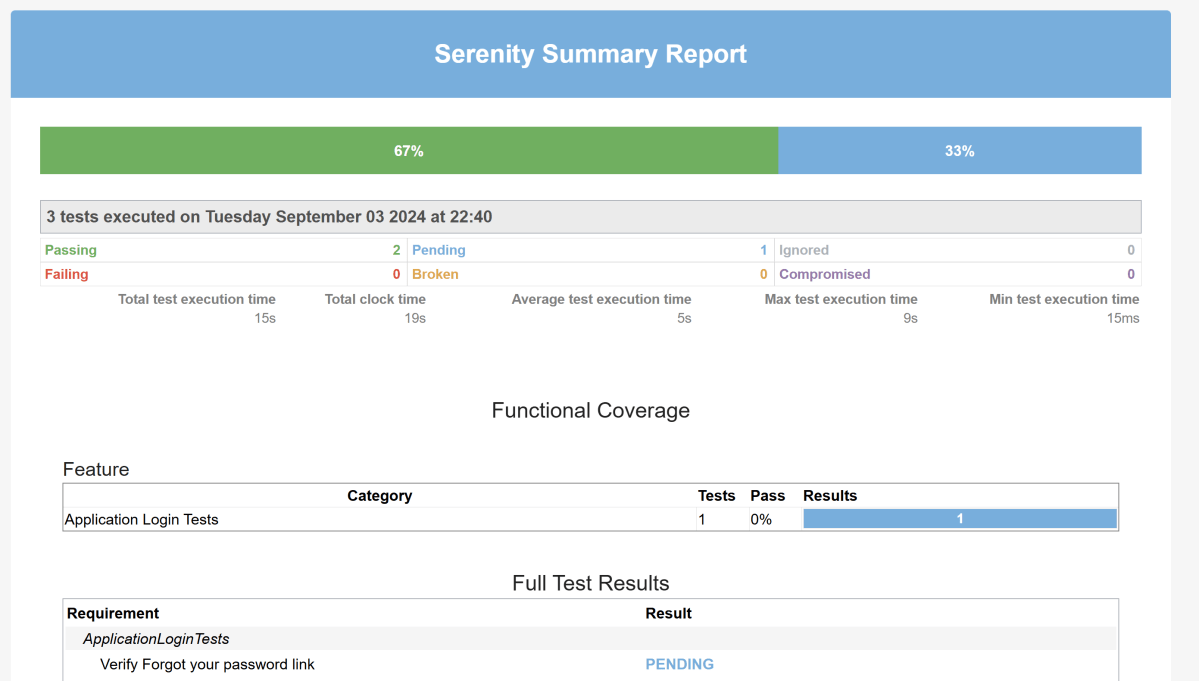
These reports are present under /target/site/serenity.
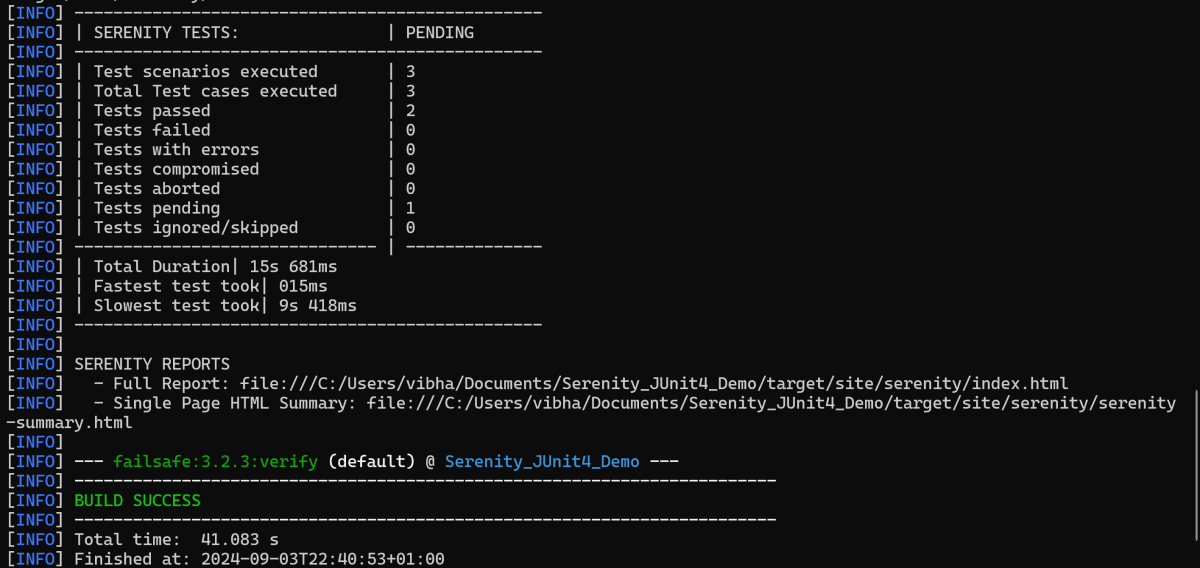
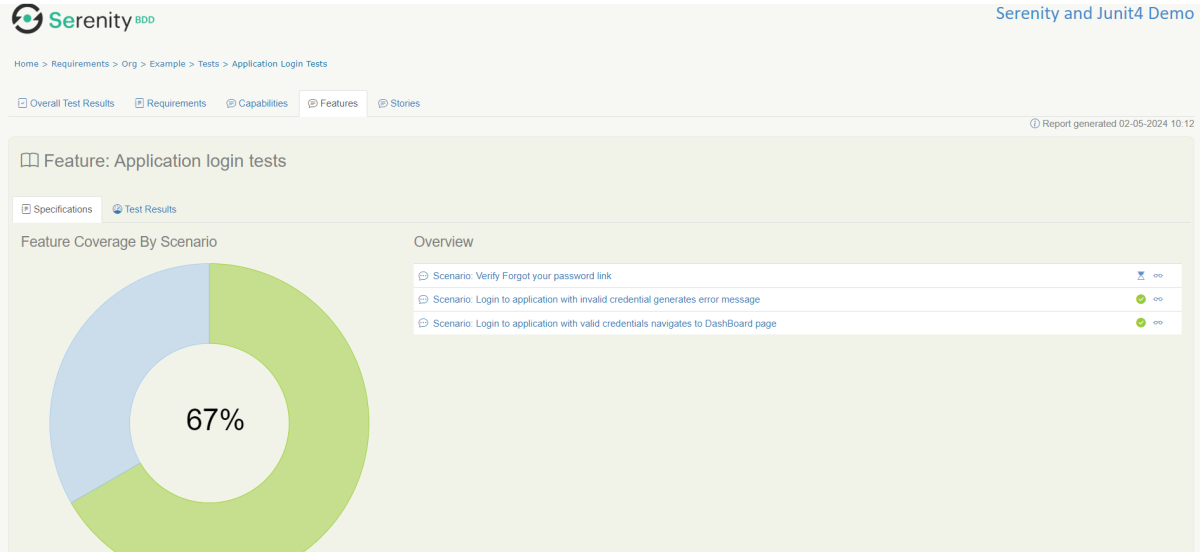
Skipping the tests

In Serenity, you use the @Pending annotation, either for a test or for a @Step-annotated method, to indicate that the scenario is still being implemented and that the results are not available yet. These tests appear as ‘Pending’ (shown in blue) in the test reports.

    @Test
	@Pending
	@Title("Verify Forgot your password link")
	public void clickForgetPasswordLink() {

		// Given
		loginPage.open();

		// When
		loginPage.clickForgetPasswordLink();

		// Then
		Assert.assertTrue(forgetpasswordPage.ForgetPasswordPage());
	}

Tests marked with @Ignore will appear as ‘Ignored’ (from JUnit) and appears as grey in the test reports.

We are done! Congratulations on making it through this tutorial and hope you found it useful! Happy Learning!!

How to run PyTest Framework in GitHub Actions

Last Updated On

HOME

This tutorial explains the steps to create a GitHub Action for the PyTest Framework. It also guides you on how to execute the tests in that workflow.

Table of Contents

Why GitHub?

GitHub is a collaborative platform. It supports version control and code collaboration. Automated testing and issue tracking are also supported. These are crucial elements in the software testing process. It promotes transparency, collaboration, and efficiency in the development and testing workflows.

CI/CD pipelines have contributed to the success of the DevOps cycle in all software development projects. This is a holistic process that bridges development and operations. Continuous integration helps development teams deploy code efficiently, and continuous delivery automates code deployment.

Implementation Steps

Step 1 – Create GitHub Actions and Workflows

I have a repository available in GitHub – “PyTest_Framework” as shown in the below image. Go to the “Actions” tab.  Click on the “Actions” tab.

Step 2 – Select the type of Actions

You will see that GitHub recommends Actions depending on the project. In our case, it is recommending actions suitable for a Java project. I have selected the “Python application” option as my project is built in Maven.

Step 3 – Generation of Sample pipeline

If you choose an existing option, it will automatically generate a .yaml for the project as shown below.

We will replace the current workflow with the following yml file as shown below:

name: PyTest Framework - Python
on:
  push:
    branches: [ "main" ]
  pull_request:
    branches: [ "main" ]

permissions:
  contents: read

jobs:
  test:
    runs-on: ubuntu-latest

    steps:
      - uses: actions/checkout@v4
      - name: Set up Python 3.12.1
        uses: actions/setup-python@v4
        with:
          python-version: 3.12.1

      - name: Install dependencies
        run: |
          python -m pip install --upgrade pip
          pip install pytest
          pip install pytest-selenium
   
      - name: Test with PyTest
        run: pytest --html=tests/Reports/Report.html  

      - name: Test Report Generation
        uses: actions/upload-artifact@v4
        if: success() || failure()
        with:
          name: Pytest Report           # Name of the folder
          path: tests/Reports           # Path to test results

python -m pip install --upgrade pip

pip install pytest
pip install pytest-selenium

  - name: Test with PyTest
    run: pytest --html=tests/Reports/Report.html  

Step 4 – Commit the changes

After the changes, hit the “Start Commit” button.

This will give the option to add a description for the commit. It will also enable the user to commit either to the main branch or commit to any other branch that exists in the project. My personal prefernece is to create a new branch like shown below and then commit the changes in that new branch.

Step 5 – Verify that the workflow is running

Next, head over to the “Actions” tab, and you will see your YAML workflow file present under the tab. The yellow sign represents that the job is in the queue.

In Progress – When the job starts building and running, you will see the status change from “Queued” to “In progress”.

Passed – If the build is successful, you will see a green tick mark. 

Click on the workflow and the below screen is displayed. It shows the status of the run of the workflow, the total time taken to run the workflow, and the name of the .yml file.

Below shows all the steps of the workflow.

The complete code can be found here on GitHub – vibssingh/PyTest_Framework.

Congratulations! We just created our CI workflow for running our Python Robot Framework.

How to retrieve XML Child Nodes in Java

HOME

<?xml version = "1.0"?>
<department>
    <employee>
        <firstname>Tom</firstname>
        <lastname>Mathew</lastname>
        <salary>25000</salary>
        <age>21</age>
    </employee>
</department>
DocumentBuilderFactory dbFactory = DocumentBuilderFactory.newInstance();
DocumentBuilder dBuilder = dbFactory.newDocumentBuilder();
Document doc = dBuilder.parse(inputFile);
doc.getDocumentElement().normalize();
NodeList nodeList = doc.getElementsByTagName("employee");
System.out.println("Node Length :" + nodeList.getLength());
for (int temp = 0; temp < nodeList.getLength(); temp++) {
                Node node = nodeList.item(temp);
                System.out.println("\nCurrent Element :" + node.getNodeName());
  NodeList childNodes = node.getChildNodes();
                for (int i = 0; i < childNodes.getLength(); i++) {
                    Node childNode = childNodes.item(i);
                    if (childNode.getNodeType() == Node.ELEMENT_NODE) {
                        System.out.println("Child node name " + i + ":" + childNode.getNodeName());
                        System.out.println("Child node value: " + i + ":" + childNode.getTextContent());

                    }
                }

package com.example.XML;

import org.w3c.dom.Document;
import org.w3c.dom.Element;
import org.w3c.dom.Node;
import org.w3c.dom.NodeList;
import org.xml.sax.SAXException;

import javax.xml.parsers.DocumentBuilder;
import javax.xml.parsers.DocumentBuilderFactory;
import javax.xml.parsers.ParserConfigurationException;
import java.io.File;
import java.io.IOException;

public class ChildNodes {

    public static void main(String[] args) {

        try {
            //Create a DocumentBuilder
            File inputFile = new File("src/test/resources/testData/test1.xml");
            DocumentBuilderFactory dbFactory = DocumentBuilderFactory.newInstance();
            DocumentBuilder dBuilder = dbFactory.newDocumentBuilder();
            Document doc = dBuilder.parse(inputFile);
            doc.getDocumentElement().normalize();

            //Extract the root element
            System.out.println("Root element :" + doc.getDocumentElement().getNodeName());

            NodeList nodeList = doc.getElementsByTagName("employee");
            System.out.println("Node Length :" + nodeList.getLength());

            for (int temp = 0; temp < nodeList.getLength(); temp++) {
                Node node = nodeList.item(temp);
                System.out.println("\nCurrent Element :" + node.getNodeName());

                NodeList childNodes = node.getChildNodes();
                for (int i = 0; i < childNodes.getLength(); i++) {
                    Node childNode = childNodes.item(i);
                    if (childNode.getNodeType() == Node.ELEMENT_NODE) {
                        System.out.println("Child node name " + i + ":" + childNode.getNodeName());
                        System.out.println("Child node value: " + i + ":" + childNode.getTextContent());

                    }
                }
            }
        } catch (ParserConfigurationException | SAXException | IOException e) {
            e.printStackTrace();
        }

    }
}

<?xml version = "1.0"?>
<department>
    <employee>
        <firstname>Tom</firstname>
        <lastname>Mathew</lastname>
        <salary>25000</salary>
        <age>21</age>
    </employee>

    <employee id = "429">
        <firstname>Erika</firstname>
        <lastname>David</lastname>
        <salary>
                <fixed>
                    <fixed1>350000</fixed1>
                    <fixed2>200000</fixed2>
                </fixed>
                <bonus>5000</bonus>
        </salary>
        <age>29</age>
        <type>Permanent</type>
    </employee>
</department>

package com.example.XML;

import org.w3c.dom.Document;
import org.w3c.dom.Node;
import org.w3c.dom.NodeList;
import org.xml.sax.SAXException;

import javax.xml.parsers.DocumentBuilder;
import javax.xml.parsers.DocumentBuilderFactory;
import javax.xml.parsers.ParserConfigurationException;
import java.io.File;
import java.io.IOException;

public class ComplexChildNodes {

    public static void main(String[] args) {

        try {
            //Create a DocumentBuilder
            File inputFile = new File("src/test/resources/testData/test2.xml");
            DocumentBuilderFactory dbFactory = DocumentBuilderFactory.newInstance();
            DocumentBuilder dBuilder = dbFactory.newDocumentBuilder();
            Document doc = dBuilder.parse(inputFile);
            doc.getDocumentElement().normalize();

            //Extract the root element
            System.out.println("Root element :" + doc.getDocumentElement().getNodeName());

            NodeList nodeList = doc.getElementsByTagName("employee");
            System.out.println("Node Length :" + nodeList.getLength());

            for (int temp = 0; temp < nodeList.getLength(); temp++) {
                Node node = nodeList.item(temp);
                System.out.println("\nCurrent Element :" + node.getNodeName());

                NodeList childNodes = node.getChildNodes();
                for (int i = 0; i < childNodes.getLength(); i++) {
                    Node childNode = childNodes.item(i);

                    if (childNode.getNodeType() == Node.ELEMENT_NODE) {
                        System.out.println("Child node name " + i + ":" + childNode.getNodeName());
                        System.out.println("Child node value: " + i + ":" + childNode.getTextContent());

                        for (int j = 0; j < childNode.getChildNodes().getLength(); j++) {
                            Node subChildNode = childNode.getChildNodes().item(j);
                            if (subChildNode.getNodeType() == Node.ELEMENT_NODE) {
                                {
                                    System.out.println("Sub Child node name " + j + ":" + subChildNode.getNodeName());
                                    System.out.println("Sub Child node value: " + j + ":" + subChildNode.getTextContent());
                                }
                            }
                        }
                    }

                }
            }

        } catch (ParserConfigurationException | SAXException | IOException e) {
            e.printStackTrace();
        }

    }
}

Integration of Allure Report with PyTest

Last Updated on

HOME

In this tutorial, we will discuss the Integration of Allure Report with the PyTest.

Table of Contents:

  1. What is an Allure Report?
  2. Prerequisite
  3. Implementation Steps
    1. Install allure-pytest plugin
    2. Create a new project folder and open it in PyCharm
    3. Add the allure-pytest package to the PyCharms
    4. Create the test code
    5. Execute the tests
    6. Generation of allure-results folder
    7. Generate the Allure Report
    8. Allure Report Dashboard
      1. Categories in Allure Report
      2. Suites in Allure Report
      3. Graphs in Allure Report
      4. Timeline in Allure Report
      5. Behaviours of Allure Report
      6. Packages in Allure Report

What is an Allure Report?

Allure Framework is a flexible lightweight multi-language test report tool that not only shows a very concise representation of what has been tested in a neat web report form but allows everyone participating in the development process to extract maximum useful information from everyday execution of tests.

From the dev/qa perspective, Allure reports shorten common defect lifecycle: test failures can be divided into bugs and broken tests, also logs, steps, fixtures, attachments, timings, history, and integrations with TMS and bug-tracking systems can be configured, so the responsible developers and testers will have all information at hand.

Prerequisite:

    Implementation Steps:

    Step 1 – Install allure-pytest plugin

    Go to the command prompt and run the below-mentioned command to download the plugin:

    pip install allure-pytest
    

    The below image shows that the plugin is installed successfully.

    Step 3 – Add the allure-pytest package to the PyCharms

    Go to File->Settings ->Project:PageObjectModel_Pytest->Python Interpreter.

    Click on the “+” sign and enter allure-pytest in the search bar. It will show a list of packages. Select the “allure-pytest” package and click on the “Install Package”.

    Once the package is installed, we will see the message that the package is installed successfully, and it can be seen under the package list as shown below:

    Step 4 – Create the test code

    The complete PyTest framework can be found here – Page Object Model Implementation of Python with Selenium – PyTest.

    Step 5 – Execute the tests

    We need the below command to run the PyTest Framework script using the Allure listener.

    pytest --alluredir allure-results
    

    The output of the above program is

    Step 6 – Generation of allure-results folder

    We have the test case passed. It will generate an allure-results folder in the tests directory. This folder contains all the files needed to generate the Allure Report.

    Step 7 – Generate the Allure Report

    To create Allure Report, use the below command

    allure serve allure-results
    

    This will generate the beautiful Allure Test Report as shown below.

    Step 8 – Allure Report Dashboard

    The overview page hosts several default widgets representing the basic characteristics of your project and test environment.

    1. Statistics – overall report statistics.
    2. Launches – if this report represents several test launches, statistics per launch will be shown here.
    3. Behaviours – information on results aggregated according to stories and features.
    4. Executors – information on test executors that were used to run the tests.
    5. History Trend – if tests accumulated some historical data, it’s trend will be calculated and shown on the graph.
    6. Environment – information on the test environment.

    Categories in Allure Report

    The categories tab gives you a way to create custom defect classifications to apply for test results. There are two categories of defects – Product Defects (failed tests) and Test Defects (broken tests).

    Suites in Allure Report

    On the Suites tab a standard structural representation of executed tests, grouped by suites and classes can be found.

    Graphs in Allure Report

    Graphs allow you to see different statistics collected from the test data: statuses breakdown or severity and duration diagrams.

    Timeline in Allure Report

    The timeline tab visualizes retrospective of tests execution, allure adaptors collect precise timings of tests, and here on this tab, they are arranged accordingly to their sequential or parallel timing structure.

    Behaviours of Allure Report

    This tab groups test results according to Epic, Feature, and Story tags.

    Packages in Allure Report

    The packages tab represents a tree-like layout of test results, grouped by different packages.

    That’s it! Congratulations on making it through this tutorial and hope you found it useful! Happy Learning!!

    Cross Browser Testing in PyTest

    HOME

    import pytest
    from selenium import webdriver
    
    
    def pytest_addoption(parser):
        """Custom Pytest command line options"""
        parser.addoption(
            "--browser_name", action="store", default="chrome"
        )
    
    
    @pytest.fixture(scope="class")
    def driver(request):
    
        browser_name = request.config.getoption("browser_name")
    
        if browser_name == "chrome":
            options = webdriver.ChromeOptions()
            driver = webdriver.Chrome(options)
            print("Chrome Browser is opened")
        elif browser_name == "firefox":
            options = webdriver.FirefoxOptions()
            driver = webdriver.Firefox(options)
            print("Firefox Browser is opened")
        elif browser_name == "edge":
            options = webdriver.EdgeOptions()
            driver = webdriver.Edge(options)
            print("Edge Browser is opened")
        else:
            print("No browser is selected")
        driver.get("https://opensource-demo.orangehrmlive.com/")
        driver.maximize_window()
        driver.implicitly_wait(5)
        yield driver
        driver.close()
    
    
    from selenium.webdriver.common.by import By
    
    
    class Test_Login:
    
        def test_login(self,driver):
            driver.find_element(By.NAME, "username").send_keys("Admin")
            driver.find_element(By.NAME, "password").send_keys("admin123")
            driver.find_element(By.XPATH, "//*[@class='oxd-form']/div[3]/button").click()
            print("Successful login to the application")
            homePageTitle = driver.find_element(By.XPATH, "//*[@class='oxd-topbar-header-breadcrumb']/h6").text
            print("Heading of DashBoard Page: ", homePageTitle)
            assert homePageTitle == "Dashboard", "Heading is different"
    
    
    pytest test_login.py -s
    

     pytest test_login.py --browser_name firefox -s
    

    Cucumber Tutorial – JUnit Test Runner Class

    HOME

    In the previous tutorial, we showed you What is Feature File in Cucumber is. This tutorial will show you how to run this feature file. 

    Once the Feature file is created, we need to create a class called Runner class to run the tests. This class will use the JUnit annotation @RunWith(), which tells JUnit what is the test runner class.

    We cannot run a Feature file on its own in a cucumber-based framework. We need to create a Java class, which will run the Feature File. It is the starting point for JUnit to start executing the tests. TestRunner class is created under src/test/java. In this tutorial, Cucumber uses the JUnit framework to run the tests. Apart from JUnit, we can also use the TestNG Test Runner class to run the cucumber tests. 

    JUnit Test Runner Class

    First, we need to add the below dependencies to the POM.xml (in the case of the Maven project).

    <dependencies>
      
      <dependency>
        <groupId>io.cucumber</groupId>
        <artifactId>cucumber-java</artifactId>
        <version>7.16.1</version>
      </dependency>
    
      <dependency>
        <groupId>io.cucumber</groupId>
        <artifactId>cucumber-junit</artifactId>
        <version>7.16.1</version>
        <scope>test</scope>
      </dependency>
        
      <dependency>
          <groupId>junit</groupId>
          <artifactId>junit</artifactId>
          <version>4.13.2</version>
          <scope>test</scope>
      </dependency>
        
    </dependencies>
    

    Create a new runner class file called CucumberRunnerTest

    Select and Right-Click on the package outline. Click on the New→Class.

    Provide the Java class a name, such as CucumberRunnerTest, and click the Finish button.

    Import Statements

    1) @RunWith annotation tells JUnit that tests should run using the Cucumber class.

    import org.junit.runner.RunWith;
    

    2) Cucumber.class is imported from:

    import io.cucumber.junit.Cucumber;
    

    3) @CucumberOptions annotation tells Cucumber where to look for feature files, what reporting system to use, and some other things also. But as of now, in the above test, we have just told it for the Feature file folder. It is imported from:

    import io.cucumber.junit.CucumberOptions;
    

    The CucumberRunnerTest class looks like shown below:

    import org.junit.runner.RunWith;
    import io.cucumber.junit.Cucumber;
    import io.cucumber.junit.CucumberOptions;
    
    @RunWith(Cucumber.class)
    @CucumberOptions(plugin = "pretty", features = "src/test/resources/Features/MyHoliday.feature", tags = "@BookOneWayFlight")
    
    public class CucumberRunnerTest {
    
    }


    The first parameter, called features, provides the location of the feature file. Similarly, the second parameter, called tags, provides the tag name (scenario) which needs to run. Apart from these, we can use plugins, and glue, in the CucumberOptions.

    The feature file is placed under src/test/resources, so it is added as the path for the Feature file.

    Run the Cucumber Test

    As we know, the Feature file is already created in the previous tutorial. TestRunner class is created to run the Cucumber Tests.

    Right Click on CucumberRunnerTest class and Click Run As  > JUnit Test Application

    The output of the Test Execution looks as shown below image.

    This output shows that the Feature file is created, and Test Runner is able to run the Feature File. But this error shows that we should implement these methods so that the Steps mentioned in the Feature file can be traced to Java methods, which can be executed while executing the feature file. Don’t worry about this error. We will see how to create step definitions in the next tutorial.

    Congratulations on making it through this tutorial and hope you found it useful! Happy Learning!! Cheers!!

    isDisplayed, isSelected, isEnabled in Selenium

    HOME

    This tutorial describes how to check the state of a WebElement in Selenium.

    In this tutorial, we will learn the isDisplayed, isEnabled, isSelected method in Selenium, and how to check the state of a WebElement. There are many methods that are used to determine the visibility scope for the web elements – isSelected(), isEnabled(), and isDispalyed().

    Many a time, a test fails when we click on an element or enter text in a field. This is because the element is displayed or exists in DOM, but it does not exist on the web page.

    WebDriver facilitates the user with the following methods to check the visibility of the web elements. These web elements can be buttons, drop boxes, checkboxes, radio buttons, labels, etc.

    • isDisplayed()
    • isSelected()
    • isEnabled()

    1) Boolean isSelected(): This method determines if an element is selected or not. It returns true if the element is selected and false if it is not. It is widely used on checkboxes, radio buttons, and options in a select.

    2) Boolean isDisplayed(): This method determines if an element is displayed or not. It returns true if the element is displayed and false if it is not. The advantage of this method is that it avoids parsing an element’s style attribute.

    3) Boolean isEnabled(): This method determines if an element is enabled or not. It returns true if the element is enabled (All elements apart from disabled input elements) and false if otherwise.

    Steps to follow to understand when an element isEnabled and isDisplayed.

    1. Launch the web browser and open the application under test – https://duckduckgo.com/
    2. Verify the web page title
    3. Verify if the “Search Box” is displayed
    4. Verify that the “Search Box” is enabled
    5. If Search Box is enabled, then search for text – Selenium
    6. Close the browser

    The complete program is shown below:

    package org.example;
    
    import org.openqa.selenium.By;
    import org.openqa.selenium.WebDriver;
    import org.openqa.selenium.WebElement;
    import org.openqa.selenium.firefox.FirefoxDriver;
    import org.openqa.selenium.firefox.FirefoxOptions;
    
    import java.util.concurrent.TimeUnit;
    
    public class VerifyConditionsDemo {
    
        public static void main(String[] args) {
    
            // Initiate Firefox browser
            FirefoxOptions options = new FirefoxOptions();
            WebDriver driver = new FirefoxDriver(options);
    
            // Maximize the browser
            driver.manage().window().maximize();
            driver.manage().timeouts().implicitlyWait(5, TimeUnit.SECONDS);
    
            // launch the firefox browser and open the application url
            driver.get("https://duckduckgo.com/");
    
            // compare the expected title of the page with the actual title of the page and
            String expectedTitle = "DuckDuckGo — Privacy, simplified.";
            String actualTitle = driver.getTitle();
            if (expectedTitle.equals(actualTitle)) {
                System.out.println("Verification Pass- The correct title is displayed on the web page.");
            } else {
                System.out.println("Verification Failed - An incorrect title is displayed on the web page.");
            }
    
            // Verify that the “Search" Box is displayed
            WebElement searchBox = driver.findElement(By.className("searchbox_input__bEGm3"));
            if (searchBox.isDisplayed()) {
                System.out.println("Search Box is visible. Return: " + searchBox.isDisplayed());
            } else {
                System.out.println("Search Box is not visible. Return: " + searchBox.isDisplayed());
            }
    
            // Verify that the “Search” Box is enabled
            if (searchBox.isEnabled()) {
                System.out.println("Search Box is enabled. Return: " + searchBox.isEnabled());
                searchBox.sendKeys("Selenium");
            } else {
                System.out.println("Search Box is not enabled. Return: " + searchBox.isEnabled());
            }
    
            System.out.println("Successful Execution of Test.");
    
            // close the web browser
            driver.close();
    
        }
    }
    

    The output of the above program is

    isSelected

    Steps to follow to understand when an element is Selected or not

    1. Launch the web browser and open the application under test – https://demoqa.com/radio-button
    2. Print all the options for the Radio Button
    3. Verify if the first Radio Button (Yes) is selected or not
    4. If the first radio button is not selected, then select Radio Button 1, else select button 2.
    5. Print the value of the selected Radio Button
    6. Close the browser

    Below is the image of the options for the Radio Button.

    The complete program is shown below:

    package org.example;
    
    import org.openqa.selenium.By;
    import org.openqa.selenium.WebDriver;
    import org.openqa.selenium.WebElement;
    import org.openqa.selenium.firefox.FirefoxDriver;
    import org.openqa.selenium.firefox.FirefoxOptions;
    
    import java.util.List;
    import java.util.concurrent.TimeUnit;
    
    public class isSelectedDemo {
    
            public static void main(String[] args) {
    
    
                // Initiate Firefox browser
                FirefoxOptions firefoxOptions = new FirefoxOptions();
                WebDriver driver = new FirefoxDriver(firefoxOptions);
    
                // Maximize the browser
                driver.manage().window().maximize();
                driver.manage().timeouts().implicitlyWait(10, TimeUnit.SECONDS);
    
                driver.get("https://demoqa.com/radio-button");
    
                List<WebElement> Radio_Options = driver.findElements(By.cssSelector(".custom-radio"));
                for(WebElement options: Radio_Options)
                    System.out.println("Options :"+ options.getText());
    
                // Create a boolean variable which will hold the value (True/False)
                boolean radio_value = false;
    
                // This statement will return True, in case of first Radio button is already selected
                radio_value = Radio_Options.get(0).isSelected();
                System.out.println("First Option is already selected :"+radio_value);
    
                // If button 1 is not selected, then select otherwise select button 2
                if (radio_value == false) {
                    Radio_Options.get(0).click();
                    System.out.println("Button Selected is :" + Radio_Options.get(0).getText());
                } else {
                    Radio_Options.get(1).click();
                    System.out.println("Button Selected is :" + Radio_Options.get(1).getText());
                }
    
                // close the web browser
                driver.close();
            }
        }
    

    The output of the above program is

    That’s it! Congratulations on making it through this tutorial and hope you found it useful! Happy Learning!! Cheers!!

    Parallel Testing in Cucumber with TestNG

    Last Updated On

    HOME

    In this tutorial, I will explain Parallel Testing using Cucumber with TestNG.

    Cucumber-JVM allows parallel execution across multiple threads since version 4.0.0. There are several options to incorporate this built-in feature in a Cucumber project. You can do so by using JUnit, TestNG, or CLI.

    Cucumber can be executed in parallel using TestNG and Maven test execution plugins by setting the data provider parallel option to true.

    In TestNG, the scenarios and rows in a scenario outline are executed in multiple threads. One can use either Maven Surefire or Failsafe plugin for executing the runners. In this tutorial, I’m using the Maven Surefire plugin.

    Table of Contents:

    1. Prerequisite
    2. Dependency List
    3. Detailed Step Description
      1. Create a Maven project
      2. Update Properties section in Maven pom.xml
      3. Add Cucumber, Selenium, and TestNG dependencies to the project
      4. Add Surefire plugin configuration to the build section of the POM
      5. Create 2 feature files in src/test/resources – LoginPage.feature and ForgotPasswordPage.feature
      6. Create Page Object Model classes of both feature files
      7. Create the Step Definition classes for both feature files or Glue Code
      8. Create the Hook Class and Dependency Injection class (TestSetUp) and BaseTest class
      9. Create a Cucumber TestNG Runner class
      10. Report Generation
      11. Execute the test from Command Line
      12. Execute the tests from TestNG Runner
      13. Test Execution Result

    Prerequisite

    1. Java is installed
    2. Maven is installed
    3. TestNG is installed
    4. Eclipse or IntelliJ Java IDE installed

    Dependency List

    1. Selenium – 4.19.1
    2. Java 17
    3. Cucumber Java – 7.16.1
    4. Cucumber TestNG – 7.16.1
    5. Maven – 3.9.5
    6. TestNG – 7.10.1
    7. Maven Surefire Plugin – 3.2.5
    8. Maven Compiler Plugin – 3.13.1

    Detailed Step Description

    Step 1 – Create a Maven project

    Create a Maven project in your favorite IDE using the cucumber archetype. To know more about this, click here.

    Step 2 – Update Properties section in Maven pom.xml

    <properties>
            <project.build.sourceEncoding>UTF-8</project.build.sourceEncoding>
            <selenium.version>4.19.1</selenium.version>
            <cucumber.version>7.16.1</cucumber.version>
            <testng.version>7.10.1</testng.version>
            <maven.compiler.plugin.version>3.13.0</maven.compiler.plugin.version>
            <maven.surefire.plugin.version>3.2.5</maven.surefire.plugin.version>
            <maven.compiler.source>17</maven.compiler.source>
            <maven.compiler.target>17</maven.compiler.target>
        </properties>
    

    Step 3 – Add Cucumber, Selenium, and TestNG dependencies to the project

    Add below mentioned Cucumber-Java and Cucumber-TestNG and Selenium-java dependencies to the project.

    <dependencies>
    
            <!--Cucumber Dependencies -->
            <dependency>
                <groupId>io.cucumber</groupId>
                <artifactId>cucumber-java</artifactId>
                <version>${cucumber.version}</version>
            </dependency>
    
            <dependency>
                <groupId>io.cucumber</groupId>
                <artifactId>cucumber-testng</artifactId>
                <version>${cucumber.version}</version>
                <scope>test</scope>
            </dependency>
    
            <!-- Selenium Dependency -->
            <dependency>
                <groupId>org.seleniumhq.selenium</groupId>
                <artifactId>selenium-java</artifactId>
                <version>${selenium.version}</version>
            </dependency>
    
            <!-- TestNG Dependency -->
            <dependency>
                <groupId>org.testng</groupId>
                <artifactId>testng</artifactId>
                <version>${testng.version}</version>
                <scope>test</scope>
            </dependency>
    
            <!-- Dependency Injection-->
            <dependency>
                <groupId>io.cucumber</groupId>
                <artifactId>cucumber-picocontainer</artifactId>
                <version>${cucumber.version}</version>
                <scope>test</scope>
            </dependency>
    
        </dependencies>


    Step 4 – Add Surefire plugin configuration to the build section of the POM

     <plugin>
                <groupId>org.apache.maven.plugins</groupId>
                <artifactId>maven-surefire-plugin</artifactId>
                <version>${maven.surefire.plugin.version}</version>
                <configuration>
                    <parallel>methods</parallel>
                    <useUnlimitedThreads>true</useUnlimitedThreads>
                </configuration>
      </plugin>


    The complete POM.xml is shown below:

    <?xml version="1.0" encoding="UTF-8"?>
    <project xmlns="http://maven.apache.org/POM/4.0.0"
             xmlns:xsi="http://www.w3.org/2001/XMLSchema-instance"
             xsi:schemaLocation="http://maven.apache.org/POM/4.0.0 http://maven.apache.org/xsd/maven-4.0.0.xsd">
        <modelVersion>4.0.0</modelVersion>
    
        <groupId>org.example</groupId>
        <artifactId>ParallelTests_TestNG_Demo</artifactId>
        <version>1.0-SNAPSHOT</version>
    
        <properties>
            <project.build.sourceEncoding>UTF-8</project.build.sourceEncoding>
            <selenium.version>4.8.0</selenium.version>
            <cucumber.version>7.11.1</cucumber.version>
            <testng.version>7.7.1</testng.version>
            <webdrivermanager.version>5.3.2</webdrivermanager.version>
            <maven.compiler.plugin.version>3.10.1</maven.compiler.plugin.version>
            <maven.surefire.plugin.version>3.0.0-M7</maven.surefire.plugin.version>
            <maven.compiler.source>11</maven.compiler.source>
            <maven.compiler.target>11</maven.compiler.target>
        </properties>
    
        <dependencies>
    
            <!--Cucumber Dependencies -->
            <dependency>
                <groupId>io.cucumber</groupId>
                <artifactId>cucumber-java</artifactId>
                <version>${cucumber.version}</version>
            </dependency>
    
            <dependency>
                <groupId>io.cucumber</groupId>
                <artifactId>cucumber-testng</artifactId>
                <version>${cucumber.version}</version>
                <scope>test</scope>
            </dependency>
    
            <!-- Selenium Dependency -->
            <dependency>
                <groupId>org.seleniumhq.selenium</groupId>
                <artifactId>selenium-java</artifactId>
                <version>${selenium.version}</version>
            </dependency>
    
            <!-- TestNG Dependency -->
            <dependency>
                <groupId>org.testng</groupId>
                <artifactId>testng</artifactId>
                <version>${testng.version}</version>
                <scope>test</scope>
            </dependency>
    
            <!-- Dependency Injection-->
            <dependency>
                <groupId>io.cucumber</groupId>
                <artifactId>cucumber-picocontainer</artifactId>
                <version>${cucumber.version}</version>
                <scope>test</scope>
            </dependency>
    
            <!-- WebDriver Manager Dependency -->
            <dependency>
                <groupId>io.github.bonigarcia</groupId>
                <artifactId>webdrivermanager</artifactId>
                <version>${webdrivermanager.version}</version>
            </dependency>
    
        </dependencies>
        <build>
            <plugins>
    
                <plugin>
                    <groupId>org.apache.maven.plugins</groupId>
                    <artifactId>maven-compiler-plugin</artifactId>
                    <version>${maven.compiler.plugin.version}</version>
                    <configuration>
                        <source>${maven.compiler.source}</source>
                        <target>${maven.compiler.target}</target>
                    </configuration>
                </plugin>
    
                <plugin>
                    <groupId>org.apache.maven.plugins</groupId>
                    <artifactId>maven-surefire-plugin</artifactId>
                    <version>${maven.surefire.plugin.version}</version>
                    <configuration>
                        <parallel>methods</parallel>
                        <useUnlimitedThreads>true</useUnlimitedThreads>
                    </configuration>
                </plugin>
            </plugins>
        </build>
    
    </project>
    

    Step 5 – Create 2 feature files in src/test/resources – LoginPage.feature and ForgotPasswordPage.feature

    Feature File is an entry point to the Cucumber tests.

    The first keyword in the Feature file is the Feature keyword, followed by: and short text that describes the feature.

    To know more about the Feature file, please refer to this tutorial.

    Below are the sample feature files.

    LoginPage.feature

    Feature: Login to HRM Application
    
      Background:
        Given User is on Home page
    
      @ValidCredentials
      Scenario: Login with valid credentials - Feature 1, Scenario -1
    
        When User enters username as "Admin" and password as "admin123"
        Then User should be able to login successfully
    
      @InvalidCredentials
      Scenario Outline: Login with invalid credentials - Feature 1, Scenario -2
    
        When User enters username as "<username>" and password as "<password>"
        Then User should be able to see error message "<errorMessage>"
    
        Examples:
          | username    | password   | errorMessage                      |
          | Admin        | admin12$$  | Invalid credentials               |
          | admin$$     | admin123   | Invalid credentials               |
          | abc123       | xyz$$      | Invalid credentials               |
    

    ForgotPasswordPage.feature

    Feature: Forgot Password Page
    
      Background:
        Given User is on Home page
    
      @BackFunctionality
      Scenario: Validate the cancel functionality - Feature 2, Scenario - 1
    
        When User clicks on Forgot your password? link
        Then User should be able to navigate to Reset Password page
        And User clicks on Cancel button to go back to Login Page
    
      @ResetFunctionality
      Scenario: Validate the Reset Password functionality - Feature 2, Scenario - 2
    
        When User clicks on Forgot your password? link
        Then User should be able to navigate to Reset Password page
        And User clicks on Reset Password button and provide username as "abc1234"
        And Verify the message "Reset Password link sent successfully"


    Step 6 – Create Page Object Model classes of both feature files

    Page Object Model class contains all the locators and the actions performed on these locators for the particular class to improve the readability and maintainability of the code.

    Below are the Page Object Model classes for these feature files.

    LoginPage

    import org.openqa.selenium.By;
    import org.openqa.selenium.WebDriver;
    
    public class LoginPage {
    
        public WebDriver driver;
    
        By userName = By.name("username");
        By passWord = By.name("password");
        By login = By.xpath("//*[@id='app']/div[1]/div/div[1]/div/div[2]/div[2]/form/div[3]/button");
        By errorMessage = By.xpath("//*[@class='orangehrm-login-error']/div[1]/div[1]/p");
        By forgotPasswordLink = By.xpath("//*[@id='app']/div[1]/div/div[1]/div/div[2]/div[2]/form/div[4]/p");
        By loginPageTitle = By.xpath("//*[@id='app']/div[1]/div/div[1]/div/div[2]/h5");
    
        public LoginPage(WebDriver driver) {
            this.driver = driver;
        }
    
        public String getErrorMessage() {
            return driver.findElement(errorMessage).getText();
        }
    
        public void login(String strUserName, String strPassword) {
    
            // Fill user name
            driver.findElement(userName).sendKeys(strUserName);
    
            // Fill password
            driver.findElement(passWord).sendKeys(strPassword);
    
            // Click Login button
            driver.findElement(login).click();
    
        }
    
        // Click on Forgot Password link
        public void clickOnForgotPasswordLink() {
            driver.findElement(forgotPasswordLink).click();
        }
    
        //Get Login Page Title
        public String getLoginPageTitle() {
            return driver.findElement(loginPageTitle).getText();
        }
    }
    

    HomePage

    import org.openqa.selenium.By;
    import org.openqa.selenium.WebDriver;
    
    public class HomePage {
    
        public WebDriver driver;
    
        public HomePage(WebDriver driver) {
            this.driver = driver;
        }
    
        By homePageUserName = By.xpath("//*[@class='oxd-topbar-header-breadcrumb']/h6");
    
        public String getHomePageText() {
            return driver.findElement(homePageUserName).getText();
        }
    }
    

    ForgotPasswordPage

    import org.openqa.selenium.By;
    import org.openqa.selenium.WebDriver;
    
    public class ForgotPasswordPage {
    
        WebDriver driver;
    
         By forgotPasswordPageTitle = By.xpath("//*[@id='app']/div[1]/div[1]/div/form/h6");
         By cancelBtn = By.xpath("//*[@id='app']/div[1]/div[1]/div/form/div[2]/button[1]");
         By resetPasswordBtn = By.xpath("//*[@id='app']/div[1]/div[1]/div/form/div[2]/button[2]");
         By userName = By.name("username");
         By resetMessage = By.xpath("//*[@id='app']/div[1]/div[1]/div/h6");
    
        public ForgotPasswordPage(WebDriver driver) {
            this.driver = driver;
        }
    
        // Get the Title of ForgotPage
        public String getForgotPageText() {
            return driver.findElement(forgotPasswordPageTitle).getText();
        }
    
        // Click Cancel Button
        public void clickOnCancelBtn() {
             driver.findElement(cancelBtn).click();
        }
    
        // Click ResetPassword Button
        public void clickOnRestPasswordBtn() {
            driver.findElement(resetPasswordBtn).click();
        }
    
        // Type username in TextBox
        public void TypeOnUsernameTextBox(String username) {
            driver.findElement(userName).sendKeys(username);
        }
    
        // Get Message
        public String getRestMessage() {
            return driver.findElement(resetMessage).getText();
        }
    }


    PageObjectManager – This class creates the object of all the above-mentioned Page Object Model classes. This an optional class. If you want you can create the objects in StepDefinition class also.

    public class PageObjectManager {
    
        public LoginPage loginPage;
        public HomePage homePage;
        public ForgotPasswordPage forgotPasswordPage;
        public WebDriver driver;
    
    
        public PageObjectManager(WebDriver driver)
        {
            this.driver = driver;
        }
    
        public LoginPage getLoginPage()
        {
    
            loginPage= new LoginPage(driver);
            return loginPage;
        }
    
        public HomePage getHomePage()
        {
            homePage = new HomePage(driver);
            return homePage;
        }
    
        public ForgotPasswordPage getForgotPasswordPage()
        {
            forgotPasswordPage = new ForgotPasswordPage(driver);
            return forgotPasswordPage;
        }
    }


    Step 7 – Create the Step Definition classes for both feature files or Glue Code

    Below is the Step Definition for LoginPage.feature.

    import io.cucumber.java.en.Given;
    import io.cucumber.java.en.Then;
    import io.cucumber.java.en.When;
    import pageObjects.HomePage;
    import pageObjects.LoginPage;
    import pageObjects.PageObjectManager;
    import utils.TestSetUp;
    import org.testng.Assert;
    
    public class LoginPageDefinitions {
    
        TestSetUp setUp;
        public PageObjectManager pageObjectManager;
        public LoginPage loginPage;
        public HomePage homePage;
    
    
        public LoginPageDefinitions(TestSetUp setUp) {
            this.setUp = setUp;
            this.loginPage = setUp.pageObjectManager.getLoginPage();
            this.homePage= setUp.pageObjectManager.getHomePage();
        }
    
        @Given("User is on Home page")
        public void loginTest() throws IOException {
            setUp.baseTest.WebDriverManager().get("https://opensource-demo.orangehrmlive.com/");
    
        }
    
        @When("User enters username as {string} and password as {string}")
        public void goToHomePage(String userName, String passWord) {
    
            // login to application
            loginPage.login(userName, passWord);
    
            // go the next page
    
        }
    
        @Then("User should be able to login successfully")
        public void verifyLogin() {
    
            // Verify home page
            Assert.assertTrue(homePage.getHomePageText().contains("Dashboard"));
    
        }
    
        @Then("User should be able to see error message {string}")
        public void verifyErrorMessage(String expectedErrorMessage) {
    
            // Verify home page
            Assert.assertEquals(loginPage.getErrorMessage(),expectedErrorMessage);
    
        }
    
    }


    Below is the Step Definition for ForgotPasswordPage.feature.

    import io.cucumber.java.en.Then;
    import io.cucumber.java.en.When;
    import pageObjects.ForgotPasswordPage;
    import pageObjects.LoginPage;
    import pageObjects.PageObjectManager;
    import utils.TestSetUp;
    import org.testng.Assert;
    
    public class ForgotPasswordPageDefinitions{
    
        TestSetUp setUp;
        PageObjectManager pageObjectManager;
        public LoginPage loginPage;
        public  ForgotPasswordPage forgotPasswordPage;
    
        public ForgotPageDefinitions(TestSetUp setUp) {
            this.setUp = setUp;
            this.loginPage = setUp.pageObjectManager.getLoginPage();
            this.forgotPasswordPage = setUp.pageObjectManager.getForgotPasswordPage();
        }
    
        @When("User clicks on Forgot your password? link")
        public void forgotPasswordLink() {
    
            loginPage.clickOnForgotPasswordLink();
    
        }
    
        @Then("User should be able to navigate to Reset Password page")
        public void verifyForgotPasswordPage() {
    
            Assert.assertEquals(forgotPasswordPage.getForgotPageText(),"Reset Password");
    
        }
    
        @Then("User clicks on Cancel button to go back to Login Page")
        public void verifyCancelBtn() {
    
            forgotPasswordPage.clickOnCancelBtn();
            Assert.assertEquals(loginPage.getLoginPageTitle(),"Login");
    
        }
    
        @Then("User clicks on Reset Password button and provide username as {string}")
        public void verifyResetPasswordBtn(String username) {
    
            forgotPasswordPage.TypeOnUsernameTextBox(username);
            forgotPasswordPage.clickOnRestPasswordBtn();
    
        }
    
        @Then("Verify the message {string}")
        public void verifyMessage(String message) {
    
            Assert.assertEquals(forgotPasswordPage.getRestMessage(),message);
    
        }
    }


    Step 8 – Create the Hook Class and Dependency Injection class (TestSetUp) and BaseTest class

    Below is the code for the ApplicationHook Class.

    import io.cucumber.java.After;
    import utils.TestSetUp;
    
    public class ApplicationHooks {
    
     public TestSetUp setUp;
    
        public ApplicationHooks(TestSetUp setUp) {
            this.setUp = setUp;
        }
    
        @After
        public void tearDown( ) throws IOException {
            setUp.baseTest.WebDriverManager().quit();
        }
    }
    

    Below is the code for the Dependency Injection class. In Cucumber, if we want to share the state between multiple-step definition files, we will need to use dependency injection (DI). 

    import org.openqa.selenium.WebDriver;
    import org.openqa.selenium.WebElement;
    import pageObjects.PageObjectManager;
    
    public class TestSetUp {
    
        public WebElement errorMessage;
        public WebElement homePageUserName;
        public PageObjectManager pageObjectManager;
        public BaseTest baseTest;
    
        public TestSetUp()  {
    
            baseTest = new BaseTest();
            pageObjectManager = new PageObjectManager(baseTest.WebDriverManager());
    
        }
    }


    BaseTest class is used to initialize the WebDriver.

    import io.github.bonigarcia.wdm.WebDriverManager;
    import org.openqa.selenium.WebDriver;
    import org.openqa.selenium.chrome.ChromeDriver;
    import java.time.Duration;
    
    public class BaseTest {
    
        public WebDriver driver;
        public final static int TIMEOUT = 10;
    
        public WebDriver WebDriverManager ()  {
    
       
            if (driver == null) {
            
                ChromeOptions options = new ChromeOptions();
                driver = new ChromeDriver(options);
                driver.manage().timeouts().implicitlyWait(Duration.ofSeconds(TIMEOUT));
                driver.manage().window().maximize();
                driver.get(url);
    
            }
            return driver;
        }
    }


    Step 9 – Create a Cucumber TestNG Runner class

    Add a cucumber runner by extending the AbstractTestNGCucumberTests class and overriding the scenarios method. Set the parallel option value to true for the DataProvider annotation.

    import io.cucumber.testng.AbstractTestNGCucumberTests;
    import io.cucumber.testng.CucumberOptions;
    import org.testng.annotations.DataProvider;
    
    @CucumberOptions(tags = "", features = "src/test/resources/features", glue = "org.example.definitions")
    public class CucumberRunnerTests  extends AbstractTestNGCucumberTests {
    
       @Override
        @DataProvider(parallel = true)
        public Object[][] scenarios() {
            return super.scenarios();
        }
    
    }


    Step 10 – Report Generation

    Add cucumber.properties under src/test/resources and add the below instruction in the file.

    cucumber.publish.enabled=true
    

    Step 11 – Execute the test from Command Line

    Use the below-mentioned command in the command prompt to run the tests.

    mvn clean test
    

    The output of the above program is

    Step 12 – Execute the tests from TestNG Runner

    Go to the Runner class and right-click Run As TestNG Test. The tests will run as TestNG tests. (Eclipse)

    In the case of IntelliJ, right-click and select Run “CucumberRunnerTests”.

    Step 13 – Test Execution Result

    All the tests are started at the same time, so they share different threads. The way tests are executed is different in them. With non-parallel tests, all the scenarios of the same feature are executed together, and then the scenarios of another feature file. Whereas in parallel tests, all the tests are started at the same time, so there won’t be any specific order.

    All the scenarios have started simultaneously.

    The Cucumber Report is shown below:

    There are chances that we don’t want to run all the scenarios simultaneously, in this case, we need to add the below-mentioned configuration in the pom.xml. The value =2 means that 2 scenarios will be executed simultaneously.

      <configuration>
                        <properties>
                            <property>
                                <name>dataproviderthreadcount</name>
                                <value>2</value>
                            </property>
                        </properties>
     </configuration>
    

    The default thread count of the dataprovider in parallel mode is 10.

    Congratulations on making it through this tutorial and hope you found it useful! Happy Learning!! Cheers!!

    There is another tutorial that shows Parallel Testing in Cucumber with JUnit.

    The complete source code can be found here – GitHub

    How to skip tests in PyTest – skip, skipIf, xfail

    HOME

    import pytest
    
    
    @pytest.mark.skip(reason="In Progress")
    def test_addition():
        a = 6
        b = 5
        c = 11
    
        assert a + b == 11, "Sum is not 11"
        assert a + b == c, "Sum of a and b is not equal to c"
    
    
    @pytest.mark.skipif(15-4>10, reason="Conditional")
    def test_subtraction():
        x = 15
        y = 4
        z = 10
    
        assert x - y == z, "Subtract y from x is equal to z"
    
    
    @pytest.mark.xfail
    def test_multiplication():
        a = 6
        b = 5
        c = 30
    
        assert a * b == c, "Product of 5 and 6 is not 30"
    
    
    def test_division():
        a = 16
        b = 2
        c = 8
    
        assert a / b == c, "Division of 2 by 6 is not 3"


    pytest test_skip_demo.py
    

    import pytest
    
    
    @pytest.mark.skip("Development in progress")
    class test_skip_class:
    
        def test_addition(self):
            a = 10.44
            b = 5.56
            c = 16.00
    
            assert a + b == 16.00, "Sum is not 16"
    
        def test_subtraction(self):
            x = 15
            y = 4
            z = 10
    
            assert x - y == z, "Subtract y from x is equal to z"


    How to Select value from Drop down list or perform Multiple Selection Operations in Selenium WebDriver

    HOME


    In the previous tutorial, it is explained how to automate Checkbox in Selenium. In this tutorial, we will learn how to handle Drop Down & Multiple Select Operations. DropDownMultiple Select Operations work together and almost the same way. The only difference between these two deselecting statements & multiple selections is not allowed on DropDown.

    To identify DropDown or multi-select list on a web page, we can use any one of the options like idnamexpathcss, etc. 

    To perform any operation on DropDown, we need to do 2 things:-

    1) Selenium WebDrivers provides a class called “Select “class that is used to automate dropdown, and it is imported from the package:

    org.openqa.selenium.support.ui.Select
    

    2) Create a new Select object of class Select.

    Select oSelect = new Select());
    

    We can access all the methods residing inside the SELECT class by typing oSelect + dot.

    Different Select Commands

    Before we discuss various select commands, we should know how the HTML code of DropDown actually looks

    1) selectByVisibleText 

    selectByVisibleText(String arg0): void – Choose the option given under any dropdowns and multiple selection boxes with selectByVisibleText method. It takes a parameter of String that is one of the Value of Select element and it returns nothing.

    To select the text One

    select.selectByVisibleText("One");
    

    2)  selectByIndex 

    selectByIndex(int arg0): void – It is almost the same as selectByVisibleText but the only difference here is that we provide the index number of the option here rather than the option text. It takes a parameter of int which is the index value of the Select element and it returns nothing.

    To select the value 3 using index

     select.selectByIndex(3);
    

    3) selectByValue

    selectByValue(String arg0): void –  It selects the option of the value. It takes a parameter of String that is of the value of the Select element and it returns nothing.

    To select the value of two

     Select mselect = new Select(driver.findElement(By.id("redirect")));
     mselect.selectByValue("two");
    

    Let us explain this with the help of an example.

    1) Launch a new Browser and open https://www.selenium.dev/selenium/web/formPage.html
    2) Print the list of options in the dropdown.
    3) Select option ‘One’ (Use selectByVisibleText)
    4) Select option ‘3’ (Use selectByIndex)
    5) Select option ‘two’ (Use selectByValue)
    6) Close the browser

    The complete program looks like as shown below:

    package org.example;
    
    import org.openqa.selenium.By;
    import org.openqa.selenium.WebDriver;
    import org.openqa.selenium.WebElement;
    import org.openqa.selenium.firefox.FirefoxDriver;
    import org.openqa.selenium.firefox.FirefoxOptions;
    import org.openqa.selenium.support.ui.Select;
    
    import java.time.Duration;
    import java.util.List;
    
    public class DropDown_Demo {
    
        public static void main(String[] args)  {
    
            // Initiate Firefox browser
            FirefoxOptions firefoxOptions = new FirefoxOptions();
            WebDriver driver = new FirefoxDriver(firefoxOptions);
    
            // Implicit Wait
            driver.manage().window().maximize();
            driver.manage().timeouts().implicitlyWait(Duration.ofSeconds(5));
    
            // Pass application url
            driver.get("https://www.selenium.dev/selenium/web/formPage.html");
    
            //Get the list of options from dropdown
            Select select = new Select(driver.findElement(By.name("select-default")));
            List<WebElement> listElements = select.getOptions();
            System.out.println("List of options in dropdown:" );
            for(WebElement options: listElements)
                System.out.println(options.getText());
    
            // Select option 'Two' (Use selectByVisibleText)
            System.out.println("Select the Option by Text - One");
            select.selectByVisibleText("One");
    
            // Select option '3' (Use selectByIndex)
            System.out.println("Select the Option by Index 3 - Still learning how to count, apparently");
            select.selectByIndex(3);
    
            // Select option 'two' (Use selectByValue)
            System.out.println("Select the Option by selectByValue - two");
            Select mselect = new Select(driver.findElement(By.id("redirect")));
            mselect.selectByValue("two");
    
            // close the browser
            driver.close();
        }
    
    }
    

    The output of the above program is

    Different DeSelect Methods

    The way we select different values of DropDown and Multi Select, we can deselect the options similarly.

    1) deselectAll

    deselectAll( ): void – Clear all selected entries. This is only valid when the SELECT supports multiple selections.

    Syntax:

    oSelect.deselectAll;
    

    2) deselectByIndex

    deselectByIndex(int arg0): void –Deselect the option at the given index.

    Syntax:

    oSelect.deselectByIndex;
    

    3) deselectByValue

    deselectByValue(String arg0): void –Deselect all options that have a value matching the argument.

    Syntax:

     oSelect.deselectByValue;
    

    4) deselectByVisibleText

    deselectByVisibleText(String arg0): void – Deselect all options that display text matching the argument.

    Syntax:

    oSelect.deselectByVisibleText
    

    Below is an example of how to operate on multi-selection options.

    1) Launch a new Browser and open https://www.selenium.dev/selenium/web/formPage.html
    2) Print the list of options in the dropdown.
    3) Select options ‘eggs’ and ‘sausages’.
    4) Print and select all the options for the selected Multiple selection list.
    5) Deselect option eggs.
    6) Deselect all options
    7) Close the browser

    package org.example;
    
    import org.openqa.selenium.By;
    import org.openqa.selenium.WebDriver;
    import org.openqa.selenium.WebElement;
    import org.openqa.selenium.firefox.FirefoxDriver;
    import org.openqa.selenium.firefox.FirefoxOptions;
    import org.openqa.selenium.support.ui.Select;
    
    import java.time.Duration;
    import java.util.List;
    
    public class MultiSelect_Demo {
        
        public static void main(String[] args) {
    
            // Initiate Firefox browser
            FirefoxOptions firefoxOptions = new FirefoxOptions();
            WebDriver driver = new FirefoxDriver(firefoxOptions);
    
            // Implicit Wait
            driver.manage().window().maximize();
            driver.manage().timeouts().implicitlyWait(Duration.ofSeconds(5));
    
            // Pass application url
            driver.get("https://www.selenium.dev/selenium/web/formPage.html");
    
            //Get the list of options from dropdown
            Select select = new Select(driver.findElement(By.name("multi")));
            List<WebElement> listElements = select.getOptions();
            System.out.println("List of options in dropdown:");
            for (WebElement options : listElements)
                System.out.println(options.getText());
    
            // Select option 'Ham' (Use selectByVisibleText)
            System.out.println("Select the Option by Text - Eggs");
            select.selectByVisibleText("Eggs");
    
            // Select option '2' (Use selectByIndex)
            System.out.println("Select the Option by Index 2 - Sausages");
            select.selectByIndex(2);
    
            System.out.println("*************************************");
            //Get the list of selected options
            System.out.println("The selected values in the dropdown options are -");
            List<WebElement> selectedOptions = select.getAllSelectedOptions();
    
            for(WebElement selectedOption: selectedOptions)
                System.out.println(selectedOption.getText());
    
            // Deselect the value "eggs" by Value
            System.out.println("*************************************");
            System.out.println("DeSelect option eggs by Value");
            select.deselectByValue("eggs");
    
            System.out.println("*************************************");
            System.out.println("The latest selected values in the dropdown options are -");
            List<WebElement> reselectedOptions = select.getAllSelectedOptions();
    
            for(WebElement selectedOption: reselectedOptions)
                System.out.println(selectedOption.getText());
    
            select.deselectAll();
    
            driver.quit();
        }
    }
    

    The output of the above program is

    That’s it! Congratulations on making it through this tutorial and hope you found it useful! Happy Learning!!