In the previous tutorial, I explained the Serenity BDD with Cucumber for Web Application using Junit4. In this tutorial, I will explain the parallel execution of Cucumber Scenarios with Serenity and JUnit5. This tutorial gives a clear picture of the initial setup of a BDD Framework.
Starting with version 3.6.0 is possible to run the Cucumber scenarios in parallel.
We need to mention these in the junit-platform.properties to run the Cucumber scenarios parallelly.
cucumber.execution.parallel.enabled=true
cucumber.execution.parallel.config.strategy=fixed
cucumber.execution.parallel.config.fixed.parallelism=2
cucumber.plugin=io.cucumber.core.plugin.SerenityReporterParallel
Table of Contents
- Dependency List
- Project Structure
- Implementation Steps
- Download and Install Java
- Download and setup Eclipse IDE on the system
- Setup Maven and create a new Maven Project
- Update Properties section in Maven pom.xml
- Add dependencies to POM.xml
- Update the Build Section of pom.xml
- Create a feature file in src/test/resources
- Create the Step pages for StepDefinition class
- Create the Step Definition class or Glue Code
- Create a Serenity-Cucumber Runner class
- Create cucumber.properties file under src/test/resources (optional)
- Create junit-platform.properties in src/test/resources
- Create serenity.conf file under src/test/resources
- Create serenity.properties file at the root of the project
- Run the tests from Command Line
- Run the tests from CucumberRunner
- Serenity Report Generation
Dependency List:
- Serenity – 4.0.18
- Serenity Cucumber – 4.0.18
- JUnit Jupiter – 5.9.2
- Java 17
- Maven – 3.8.1
- Maven Compiler Plugin – 3.11.0
- Maven Surefire Plugin – 3.2.1
- Maven FailSafe Plugin – 3.2.1
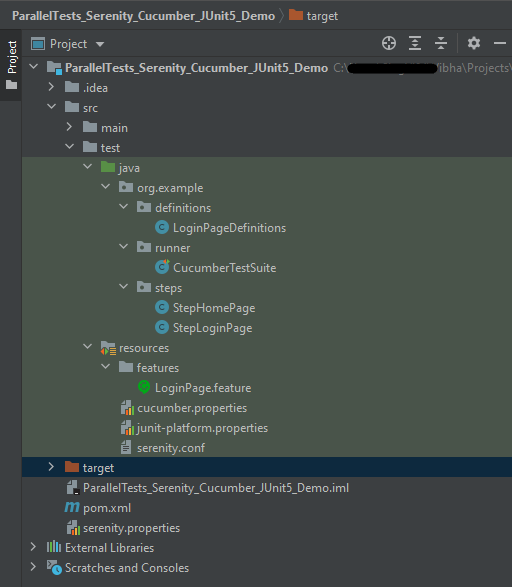
Project Structure
Implementation Steps
Step 1- Download and Install Java
Click here to know How to install Java.
Step 2 – Download and setup Eclipse IDE on the system
The Eclipse IDE (integrated development environment) provides strong support for Java developers which is needed to write Java code. Click here to know How to install Eclipse.
Step 3 – Setup Maven and create a new Maven Project
Click here to know How to install Maven.
Click here to know How to create a Maven project
Below is the Maven project structure. Here,
Group Id – org.example
Artifact Id – ParallelTests_Serenity_Cucumber_Junit5_Demo
Version – 0.0.1-SNAPSHOT
Package – org.example. ParallelTests_Serenity_Cucumber_Junit5_Demo
Step 4 – Update Properties section in Maven pom.xml
 <properties>
        <project.build.sourceEncoding>UTF-8</project.build.sourceEncoding>
        <serenity.version>4.0.18</serenity.version>
        <serenity.cucumber.version>4.0.18</serenity.cucumber.version>
        <junit.platform.version>1.10.0</junit.platform.version>
        <cucumber.version>7.14.0</cucumber.version>
        <maven.compiler.plugin.version>3.11.0</maven.compiler.plugin.version>
        <maven.compiler.source>17</maven.compiler.source>
        <maven.compiler.target>17</maven.compiler.target>
        <maven.surefire.plugin.version>3.2.1</maven.surefire.plugin.version>
        <maven.failsafe.plugin.version>3.2.1</maven.failsafe.plugin.version>
    </properties>
Step 5 – Add dependencies to POM.xml
Add Serenity, Serenity-Cucumber, and JUnit5 dependencies to POM.xml
<dependencies>

        <dependency>
            <groupId>net.serenity-bdd</groupId>
            <artifactId>serenity-core</artifactId>
            <version>${serenity.version}</version>
            <scope>test</scope>
        </dependency>

        <dependency>
            <groupId>net.serenity-bdd</groupId>
            <artifactId>serenity-junit5</artifactId>
            <version>${serenity.version}</version>
        </dependency>

        <dependency>
            <groupId>net.serenity-bdd</groupId>
            <artifactId>serenity-screenplay</artifactId>
            <version>${serenity.version}</version>
            <scope>test</scope>
        </dependency>

        <dependency>
            <groupId>net.serenity-bdd</groupId>
            <artifactId>serenity-cucumber</artifactId>
            <version>${serenity.version}</version>
            <scope>test</scope>
        </dependency>

        <dependency>
            <groupId>io.cucumber</groupId>
            <artifactId>cucumber-junit-platform-engine</artifactId>
            <version>${cucumber.version}</version>
            <scope>test</scope>
        </dependency>

        <dependency>
            <groupId>org.junit.platform</groupId>
            <artifactId>junit-platform-suite</artifactId>
            <version>${junit.platform.version}</version>
            <scope>test</scope>
        </dependency>

    </dependencies>
Step 6 – Update the Build Section of pom.xml
 <build>
        <plugins>
            <plugin>
                <groupId>org.apache.maven.plugins</groupId>
                <artifactId>maven-surefire-plugin</artifactId>
                <version>${maven.surefire.plugin.version}</version>
                <configuration>
                    <skip>true</skip>
                </configuration>
            </plugin>
            <plugin>
                <groupId>org.apache.maven.plugins</groupId>
                <artifactId>maven-failsafe-plugin</artifactId>
                <version>${maven.failsafe.plugin.version}</version>
                <configuration>
                    <includes>
                        <include>**/*.java</include>
                    </includes>
                    <parallel>methods</parallel>
                    <useUnlimitedThreads>true</useUnlimitedThreads>
                </configuration>
                <executions>
                    <execution>
                        <goals>
                            <goal>integration-test</goal>
                            <goal>verify</goal>
                        </goals>
                    </execution>
                </executions>
            </plugin>
            <plugin>
                <groupId>org.apache.maven.plugins</groupId>
                <artifactId>maven-compiler-plugin</artifactId>
                <version>${maven.compiler.plugin.version}</version>
                <configuration>
                    <source>${maven.compiler.source}</source>
                    <target>${maven.compiler.target}</target>
                </configuration>
            </plugin>
            <plugin>
                <groupId>net.serenity-bdd.maven.plugins</groupId>
                <artifactId>serenity-maven-plugin</artifactId>
                <version>${serenity.version}</version>
                <dependencies>
                    <dependency>
                        <groupId>net.serenity-bdd</groupId>
                        <artifactId>serenity-single-page-report</artifactId>
                        <version>${serenity.version}</version>
                    </dependency>
                </dependencies>
                <configuration>
                    <reports>single-page-html</reports>
                </configuration>
                <executions>
                    <execution>
                        <id>serenity-reports</id>
                        <phase>post-integration-test</phase>
                        <goals>
                            <goal>aggregate</goal>
                        </goals>
                    </execution>
                </executions>
            </plugin>
        </plugins>
    </build>
The complete POM.xml looks like as shown below:
<?xml version="1.0" encoding="UTF-8"?>
<project xmlns="http://maven.apache.org/POM/4.0.0"
         xmlns:xsi="http://www.w3.org/2001/XMLSchema-instance"
         xsi:schemaLocation="http://maven.apache.org/POM/4.0.0 http://maven.apache.org/xsd/maven-4.0.0.xsd">
    <modelVersion>4.0.0</modelVersion>

    <groupId>org.example</groupId>
    <artifactId>ParallelTests_Serenity_Cucumber_JUnit5_Demo</artifactId>
    <version>1.0-SNAPSHOT</version>

    <properties>
        <project.build.sourceEncoding>UTF-8</project.build.sourceEncoding>
        <serenity.version>4.0.18</serenity.version>
        <serenity.cucumber.version>4.0.18</serenity.cucumber.version>
        <junit.platform.version>1.10.0</junit.platform.version>
        <cucumber.version>7.14.0</cucumber.version>
        <maven.compiler.plugin.version>3.11.0</maven.compiler.plugin.version>
        <maven.compiler.source>17</maven.compiler.source>
        <maven.compiler.target>17</maven.compiler.target>
        <maven.surefire.plugin.version>3.2.1</maven.surefire.plugin.version>
        <maven.failsafe.plugin.version>3.2.1</maven.failsafe.plugin.version>
    </properties>

    <dependencies>

        <dependency>
            <groupId>net.serenity-bdd</groupId>
            <artifactId>serenity-core</artifactId>
            <version>${serenity.version}</version>
            <scope>test</scope>
        </dependency>

        <dependency>
            <groupId>net.serenity-bdd</groupId>
            <artifactId>serenity-junit5</artifactId>
            <version>${serenity.version}</version>
        </dependency>

        <dependency>
            <groupId>net.serenity-bdd</groupId>
            <artifactId>serenity-screenplay</artifactId>
            <version>${serenity.version}</version>
            <scope>test</scope>
        </dependency>

        <dependency>
            <groupId>net.serenity-bdd</groupId>
            <artifactId>serenity-cucumber</artifactId>
            <version>${serenity.version}</version>
            <scope>test</scope>
        </dependency>

        <dependency>
            <groupId>io.cucumber</groupId>
            <artifactId>cucumber-junit-platform-engine</artifactId>
            <version>${cucumber.version}</version>
            <scope>test</scope>
        </dependency>

        <dependency>
            <groupId>org.junit.platform</groupId>
            <artifactId>junit-platform-suite</artifactId>
            <version>${junit.platform.version}</version>
            <scope>test</scope>
        </dependency>

    </dependencies>

    <build>
        <plugins>
            <plugin>
                <groupId>org.apache.maven.plugins</groupId>
                <artifactId>maven-surefire-plugin</artifactId>
                <version>${maven.surefire.plugin.version}</version>
                <configuration>
                    <skip>true</skip>
                </configuration>
            </plugin>
            <plugin>
                <groupId>org.apache.maven.plugins</groupId>
                <artifactId>maven-failsafe-plugin</artifactId>
                <version>${maven.failsafe.plugin.version}</version>
                <configuration>
                    <includes>
                        <include>**/*.java</include>
                    </includes>
                    <parallel>methods</parallel>
                    <useUnlimitedThreads>true</useUnlimitedThreads>
                </configuration>
                <executions>
                    <execution>
                        <goals>
                            <goal>integration-test</goal>
                            <goal>verify</goal>
                        </goals>
                    </execution>
                </executions>
            </plugin>
            <plugin>
                <groupId>org.apache.maven.plugins</groupId>
                <artifactId>maven-compiler-plugin</artifactId>
                <version>${maven.compiler.plugin.version}</version>
                <configuration>
                    <source>${maven.compiler.source}</source>
                    <target>${maven.compiler.target}</target>
                </configuration>
            </plugin>
            <plugin>
                <groupId>net.serenity-bdd.maven.plugins</groupId>
                <artifactId>serenity-maven-plugin</artifactId>
                <version>${serenity.version}</version>
                <dependencies>
                    <dependency>
                        <groupId>net.serenity-bdd</groupId>
                        <artifactId>serenity-single-page-report</artifactId>
                        <version>${serenity.version}</version>
                    </dependency>
                </dependencies>
                <configuration>
                    <reports>single-page-html</reports>
                </configuration>
                <executions>
                    <execution>
                        <id>serenity-reports</id>
                        <phase>post-integration-test</phase>
                        <goals>
                            <goal>aggregate</goal>
                        </goals>
                    </execution>
                </executions>
            </plugin>
        </plugins>
    </build>
</project>
Step 7 – Create a feature file in src/test/resources
The purpose of the Feature keyword is to provide a high-level description of a software feature and to group related scenarios. To know more about the Feature files, please refer this tutorial.
Feature: Login to HRM

  @ValidCredentials
  Scenario: Login with valid credentials

    Given User is on Home page
    When User enters username as "Admin"
    And User enters password as "admin123"
    Then User should be able to login successfully

  @InValidCredentials
  Scenario: Login with invalid credentials

    Given User is on Home page
    When User enters username as "Admin1"
    And User enters password as "Admin123"
    Then User should be able to see error message "Invalid credentials"

  @BlankUsername
  Scenario: Login with blank username

    Given User is on Home page
    When User enters username as ""
    And User enters password as "Admin123"
    Then User should be able to see error message "Required" below username
Step 8 – Create the Step pages for StepDefinition class
In Serenity, tests are broken down into reusable steps. An important principle behind Serenity is the idea that it is easier to maintain a test that uses several layers of abstraction to hide the complexity behind different parts of a test. So, in Step class, we will declare the locators of the web elements and the actions performed on these web elements.
There are multiple ways to identify a web element on the web page – one of the ways is to use @FindBy or $(By.).
I prefer to use @FindBy as I do need not to find the same element multiple times. Using @FindBy, I have identified a web element and defined a WebElementFacacde for the same which is reusable.
StepLoginPage
import net.serenitybdd.core.pages.PageObject;
import net.serenitybdd.core.pages.WebElementFacade;
import net.thucydides.core.annotations.Step;
import org.openqa.selenium.support.FindBy;

public class StepLoginPage extends PageObject {

    @FindBy(name = "username")
    WebElementFacade username;

    @FindBy(name = "password")
    WebElementFacade password;

    @FindBy(xpath = "//*[@id='app']/div[1]/div/div[1]/div/div[2]/div[2]/form/div[3]/button")
    WebElementFacade submitButton;

    @FindBy(xpath = "//*[@id='app']/div[1]/div/div[1]/div/div[2]/div[2]/div/div[1]/div[1]/p")
    WebElementFacade errorMessage;

    @FindBy(xpath = "//*[@id='app']/div[1]/div/div[1]/div/div[2]/div[2]/form/div[1]/div/span")
    WebElementFacade missingUsername;

    @Step("Enter Username")
    public void inputUserName(String userName) {
        username.sendKeys((userName));
    }

    @Step("Enter Password")
    public void inputPassword(String passWord) {
        password.sendKeys((passWord));
    }

    @Step("Click Submit Button")
    public void clickLogin() {
        submitButton.click();
    }

    @Step("Error Message on unsuccessful login")
    public String errorMessage() {
        String actualErrorMessage = errorMessage.getText();
        return actualErrorMessage;
    }

    @Step("Error Message for missing username")
    public String missingUsernameErrorMessage() {
        String actualErrorMessage = missingUsername.getText();
        return actualErrorMessage;
    }

}
StepHomePage
import net.serenitybdd.core.pages.PageObject;
import net.serenitybdd.core.pages.WebElementFacade;
import net.thucydides.core.annotations.Step;
import org.openqa.selenium.support.FindBy;

public class StepHomePage extends PageObject {

    @FindBy(xpath = "//*[@id='app']/div[1]/div[1]/header/div[1]/div[1]/span/h6")
    WebElementFacade dashboardText;

    @Step("Successful login")
    public String getHomPageTitle() {
        String dashboardTitle = dashboardText.getText();
       return dashboardTitle;


    }
}
Step 9 – Create the Step Definition class or Glue Code
A Step Definition is a Java method with an expression that links it to one or more Gherkin steps. When Cucumber executes a Gherkin step in a scenario, it will look for a matching step definition to execute. You can have all of your step definitions in one file, or in multiple files.
LoginPageDefinitions
package org.example.definitions;

import io.cucumber.java.en.Given;
import io.cucumber.java.en.Then;
import io.cucumber.java.en.When;
import net.serenitybdd.annotations.Steps;
import org.example.steps.StepHomePage;
import org.example.steps.StepLoginPage;
import static org.junit.jupiter.api.Assertions.*;

public class LoginPageDefinitions {

    @Steps
    StepLoginPage loginPage;

    @Steps
    StepHomePage homePage;

    @Given("User is on Home page")
    public void openApplication() {
        loginPage.open();

    }

    @When("User enters username as {string}")
    public void enterUsername(String userName) {
        loginPage.inputUserName(userName);
    }

    @When("User enters password as {string}")
    public void enterPassword(String passWord) {
        loginPage.inputPassword(passWord);

        loginPage.clickLogin();
    }

    @Then("User should be able to login successfully")
    public void clickOnLoginButton() {

        assertTrue(homePage.getHomPageTitle().contains("Dashboard"));
    }

    @Then("User should be able to see error message {string}")
    public void unsuccessfulLogin(String expectedErrorMessage) {

        String actualErrorMessage = loginPage.errorMessage();
        assertEquals(expectedErrorMessage, actualErrorMessage);
    }

    @Then("User should be able to see error message {string} below username")
    public void missingUsername (String expectedErrorMessage) {

        String actualErrorMessage = loginPage.missingUsernameErrorMessage();
        assertEquals(expectedErrorMessage, actualErrorMessage);
    }

}
Assertions in JUnit-Jupiter are imported from the below package:-
import static org.junit.jupiter.api.Assertions.*;
Step 10 – Create a Serenity-Cucumber Runner class
Cucumber runs the feature files via JUnit and needs a dedicated test runner class to actually run the feature files.
import static io.cucumber.junit.platform.engine.Constants.GLUE_PROPERTY_NAME;
import org.junit.platform.suite.api.ConfigurationParameter;
import org.junit.platform.suite.api.IncludeEngines;
import org.junit.platform.suite.api.SelectClasspathResource;
import org.junit.platform.suite.api.Suite;

@Suite
@IncludeEngines("cucumber")
@SelectClasspathResource("org.example")
@SelectClasspathResource("/features")
@ConfigurationParameter(key = GLUE_PROPERTY_NAME, value = "org.example")
public class CucumberTestSuite {

}
Step 11 – Create cucumber.properties file under src/test/resources (optional)
This is an optional step. Cucumber of version 6.7 and above provides the functionality to generate a beautiful cucumber report. For this, it is needed to add a file cucumber.properties under src/test/resources.
cucumber.publish.enabled = true
Step 12 – Create junit-platform.properties in src/test/resources
cucumber.execution.parallel.enabled=true
cucumber.execution.parallel.config.strategy=fixed
cucumber.execution.parallel.config.fixed.parallelism=3
cucumber.plugin=io.cucumber.core.plugin.SerenityReporterParallel
Step 13 – Create serenity.conf file under src/test/resources
The serenity configuration file is used to configure the drivers so the test cases can run successfully. This file contains an operating system-specific binary. The binary file sits between your test and the browser. It acts as an intermediary, an interface between your tests and the browser you are using.
You can also configure the webdriver.base.url property for different environments in the serenity.conf configuration file.
webdriver {
    driver = chrome
}

serenity.browser.maximized = true

#
# Define drivers for different platforms. Serenity will automatically pick the correct driver for the current platform
#

environments {
  default {
    webdriver.base.url = "https://opensource-demo.orangehrmlive.com/"
  }
  dev {
    webdriver.base.url = "https://opensource-demo.orangehrmlive.com/dev"
  }
  staging {
    webdriver.base.url = "https://opensource-demo.orangehrmlive.com/staging"
  }
  prod {
    webdriver.base.url = "https://opensource-demo.orangehrmlive.com/prod"
  }
}
Step 14 – Create serenity.properties file at the root of the project
serenity.project.name = Parallel Execution of Cucumber Scenarios with Serenity
Step 15 – Run the tests from Command Line
Open the command line and go to the location where the pom.xml of the project is present and type the below command.
mvn clean verify
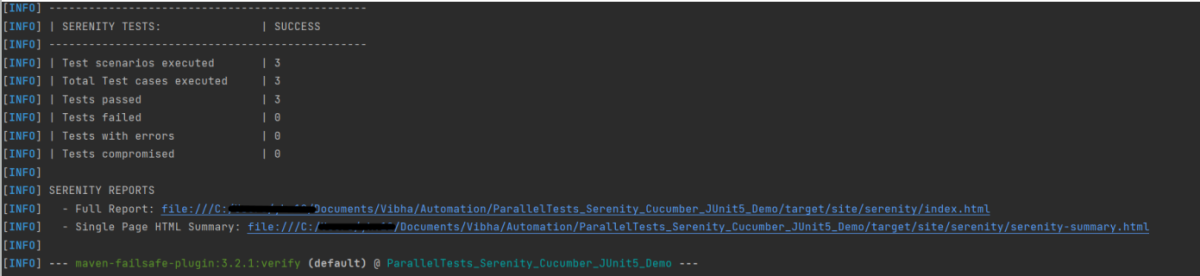
Below is the test result of the test execution.
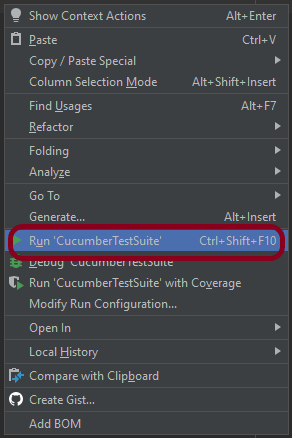
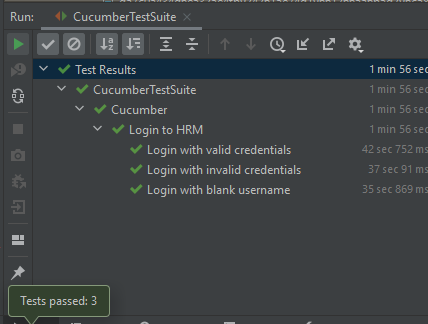
Step 16 – Run the tests from CucumberRunner
Right-click on the Ruuner class (CucumberTestSuite) and select Run ‘CucumberTestSuite’. (This is an image of IntelliJ Runner class).
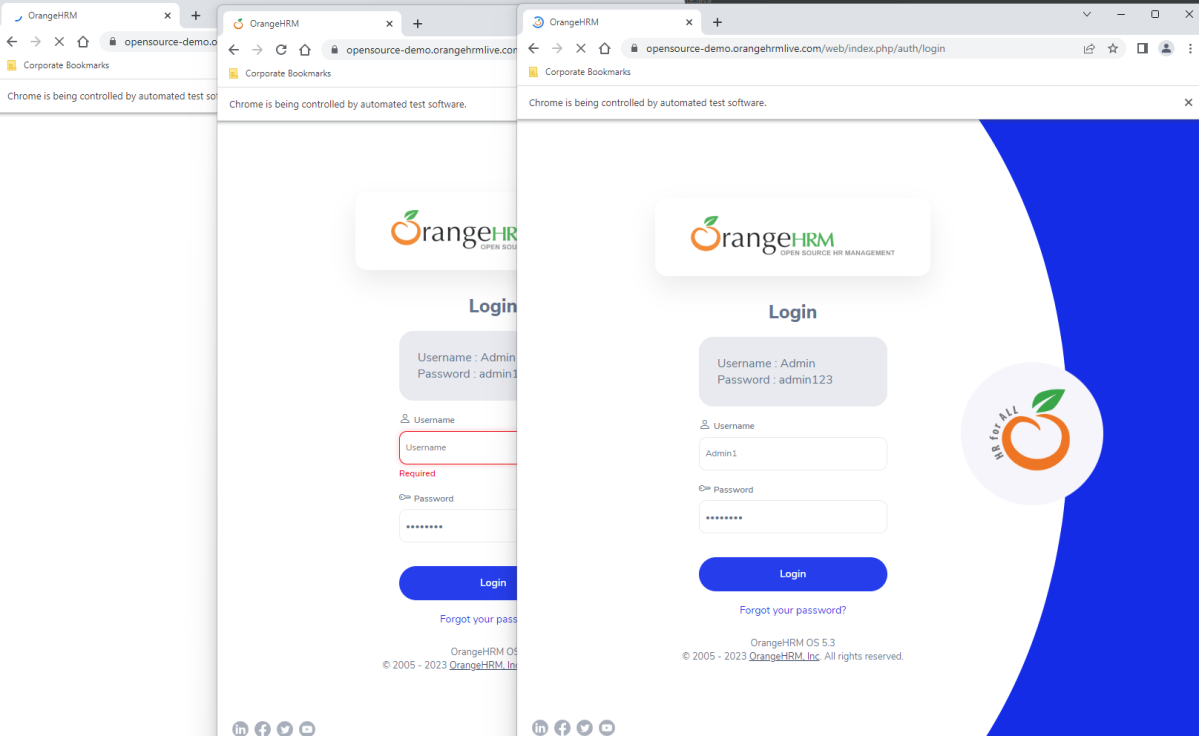
The below image shows that 3 browsers open simultaneously.
Below is the test result of the test execution.
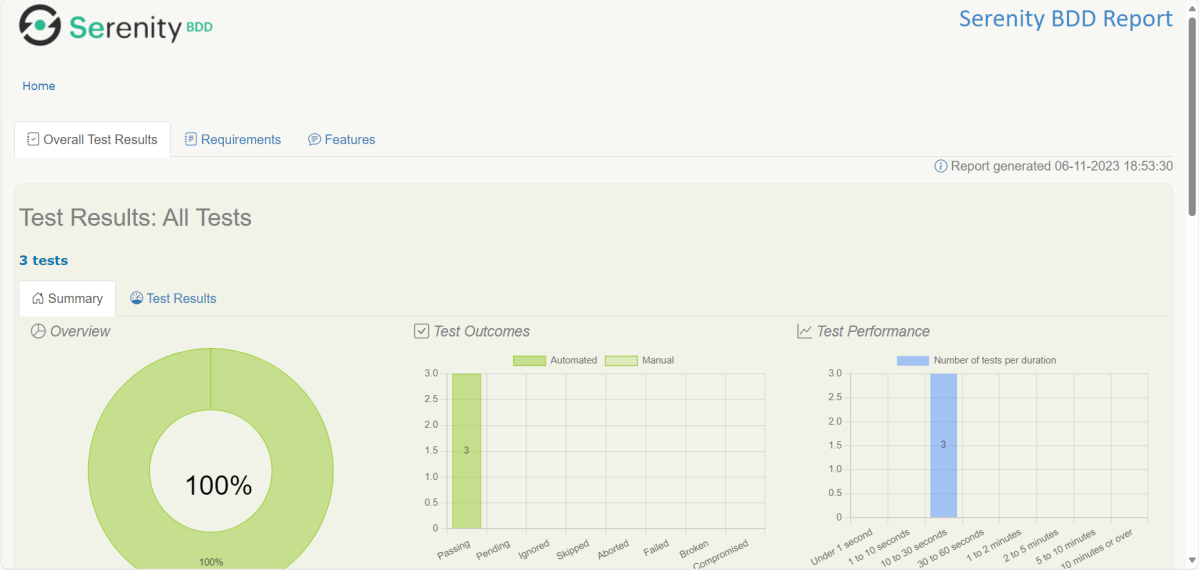
Step 17 – Serenity Report Generation
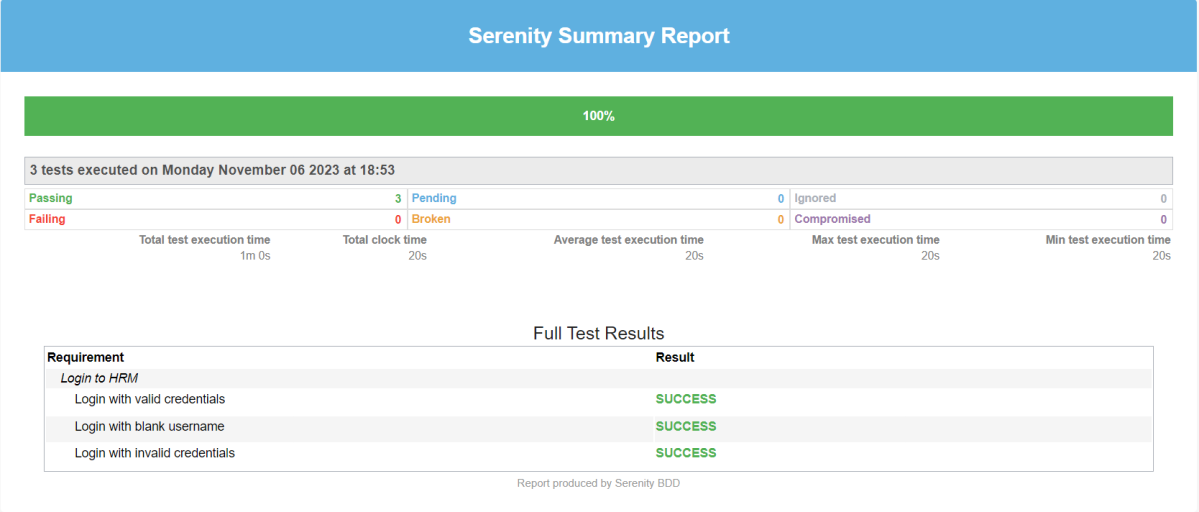
The best part about Serenity is the report generation by it. The Reports contain all possible types of information, you can think of with minimal extra effort. There is multiple types of reports are generated. We are interested in index.html and serenity-summary.html. To know more about Serenity Reports, please refer to tutorials for Index.html and Serenity-Summary.html. Below is the new Serenity Report.
Index.html

serenity-summary.html
If you want to control the number of browsers open in the test, then add the below-mentioned parameters in the junit-platform.properties:
cucumber.execution.parallel.config.fixed.parallelism=2
cucumber.execution.parallel.config.fixed.max-pool-size=2
Here, count=3 is the number of browsers that will open.
Please also remove <useUnlimitedThreads>true</useUnlimitedThreads> from pom.xml.
Note: While .fixed.max-pool-size effectively limits the maximum number of concurrent threads, Cucumber does not guarantee that the number of concurrently executing scenarios will not exceed this. This is from JUnit-Platform documentation.
We are done! Congratulations on making it through this tutorial and hope you found it useful! Happy Learning!!
You can see this framework in GitHub.

I have tried this same POM, And i figured unlimited Chrome Browser is opening while executing in parallel. However, execution could not be completed as Chrome Browser was keep invoking. How to limit the Chrome Browser invoke?
LikeLike
We need to add the below in the junit-platform.properties file.
cucumber.execution.parallel.config.fixed.parallelism=2
cucumber.execution.parallel.config.fixed.max-pool-size=2
This is also updated in the tutorial.
Along with this, please also delete useUnlimitedThreads>true</useUnlimitedThreads from pom.xml
LikeLike
I am having this Err, Not sure how to resolve this?
The plugin org.apache.maven.plugins:maven-compiler-plugin:3.11.0 requires Maven version 3.2.5
LikeLike
Updated Maven then i dont see this issue anymore, However my mvn command runs but no tests actually executes. Instead “Build Success” message generates. I can upload my POM here.
LikeLike
This is my POM.XML I am having issues where tests never get invoked But Build is Successful all the time. As well this is my mvn command:
mvn clean verify -Dcucumber.filter.tags=”@smoke” -Dwebdriver.driver=chrome serenity:aggregate
Need help.
4.0.0
net.serenitybdd
test-automation
6
pom
Serenity BDD
1.8
UTF-8
UTF-8
3.6.12
5.2.0
3.6.12
1.9.2
7.11.0
3.10.1
${java.version}
${java.version}
3.0.0-M7
3.0.0-M7
net.serenity-bdd
serenity-core
${serenity.version}
test
net.serenity-bdd
serenity-junit5
${serenity.version}
net.serenity-bdd
serenity-cucumber
${serenity.version}
test
io.cucumber
cucumber-junit-platform-engine
${cucumber.version}
test
net.serenity-bdd
serenity-rest-assured
${serenity.version}
org.junit.platform
junit-platform-suite
${junit.platform.version}
test
jline
jline
2.11
org.slf4j
slf4j-simple
1.7.21
test
org.seleniumhq.selenium
selenium-http-jdk-client
4.8.0
org.seleniumhq.selenium
selenium-java
4.8.0
io.cucumber
cucumber-java
7.11.0
io.cucumber
cucumber-junit
7.11.0
test
org.junit.jupiter
junit-jupiter-engine
5.9.2
test
org.apache.maven.plugins
maven-surefire-plugin
${maven.surefire.plugin.version}
true
org.apache.maven.plugins
maven-failsafe-plugin
${maven.failsafe.plugin.version}
**/*.java
${webdriver.base.url}
methods
true –>
integration-test
verify
org.apache.maven.plugins
maven-compiler-plugin
${maven.compiler.plugin.version}
${maven.compiler.source}
${maven.compiler.target}
net.serenity-bdd.maven.plugins
serenity-maven-plugin
${serenity.version}
net.serenity-bdd
serenity-single-page-report
${serenity.version}
single-page-html
serenity-reports
post-integration-test
aggregate
LikeLike
I have updated the max-pool-size=2, but still multiple chrome browsers are invoking.
And also how to add the tags in starter file?
LikeLike
Hi, you need to remove this from pom.xml to run the tests as specified by max-pool-size true. But, while .fixed.max-pool-size effectively limits the maximum number of concurrent threads, Cucumber does not guarantee that the number of concurrently executing scenarios will not exceed this. This is from JUnit-Platform documentation.
LikeLike
I have parallel execution set up with serenity and junit5.
I can see tests are being executed in parallel in the console.
However the serenity-reports aggregate of the results output shows only 1 test executed.. i.e ‘test scenarios executed: 1’.
The serenity Full Report only shows 1 test executed as well.
Has anyone come across this and is there are any suggestions on how to fix this show the report shows the correct number of tests executed?
thanks
Martin
LikeLike
Hi, I have never faced this issue. I have updated the code with latest dependencies and pushed the changes to GitHub. You can try to clone the latest changes
LikeLike
How to give browser version in conf file
LikeLike
You can add browser version as like this in conf file
webdriver {
driver = chrome
version = “91.0”
}
LikeLike