In Automation, it is advisable to take screenshots of failed test cases for further analysis and proof of failure. Selenium provides the capability to take screenshot. But, before we see how to capture Screenshot in Selenium, we need to add below mentioned dependencies in the Maven project. In this tutorial, we will take screenshot of a specific element in the webpage.
Initialize the WebDriver. Here, it is FireFoxOptions. Open the desired web page.
FirefoxOptions options = new FirefoxOptions();
WebDriver driver = new FirefoxDriver(options);
driver.manage().window().maximize();
driver.get("https://www.selenium.dev/");
2. Locate the Element
Use Selenium methods to locate the element.
WebElement logo = driver.findElement(By.xpath("//div[@class='row']/div"));
3. Take the screenshot of the element
To capture a screenshot in Selenium, we can make use of an interface, called TakesScreenshot. This method indicates the driver, that it can capture a screenshot and store it in different ways
In order to capture screenshot and store it in a particular location, there is a method called “getScreenshotAs“, where OutputType defines the output type for a screenshot.
4. Specify the location to save the screenshot
File screenshotLocation = new File("src//test/resources//screenshot/specific_element_screenshot.png");
5. Save the screenshot to the specified location
We want to save the element in the screenshot folder present in src/test/resources directory. So, copy the screenshot in that folder.
FileUtils.copyFile(source, screenshotLocation);
5. Quit the browser
Make sure to quit the browser to free up all the resources.
driver.quit();
Let’s see the complete program
package com.example;

import org.openqa.selenium.*;
import org.openqa.selenium.firefox.FirefoxDriver;
import org.openqa.selenium.firefox.FirefoxOptions;
import org.apache.commons.io.FileUtils;
import java.io.File;

public class ScreenShot_Demo {

    public static void main(String[] args) {

        FirefoxOptions options = new FirefoxOptions();
        WebDriver driver = new FirefoxDriver(options);
        driver.manage().window().maximize();
        driver.get("https://www.selenium.dev/");

        // Locate the specific element
        WebElement logo = driver.findElement(By.xpath("//div[@class='row']/div"));

        // Take the screenshot of the element
        File source = logo.getScreenshotAs(OutputType.FILE);

        // Specify the location to save the screenshot
        File screenshotLocation = new File("src//test/resources//screenshot/element_screenshot.png");

        try {
            // Save the screenshot to the specified location
            FileUtils.copyFile(source, screenshotLocation);
            System.out.println("Screenshot saved to: " + screenshotLocation.getAbsolutePath());
        } catch (Exception e) {
            System.out.println(e.getMessage());
        }

        System.out.println("The Screenshot is taken and saved under Screenshots folder");
        driver.quit();
    }

}
The output of the above program is
A folder with name screenshot is created inside src/test/resources directory and the screenshot is placed in that folder as you can see the image below
The Screenshot looks like something below
That’s it! Congratulations on making it through this tutorial and hope you found it useful! Happy Learning!!
Switching between frames in Selenium can be necessary when dealing with web pages that use iframes. The methods to switch between frames allow you to interact with elements within those frames
In this tutorial, we will learn handling iFrames using Selenium Webdriver. iFrame is a HTML document embedded inside an HTML document. iFrame is defined by an <iframe></iframe> tag in HTML. With this tag, you can identify an iFrame while inspecting the HTML tree as shown below:
Below is the page that contains Frames.
1) Switching by Name or ID
If the frame or iframe has an id or name attribute, we can switch the frames using name or ID. If the name or ID is not unique on the page, then the first one found will be switched to.
//switch To IFrame using name or id
driver.findElement(By.name("iframe1-name"));

//Switch to the frame
driver.switchTo().frame(iframe);
2) Switching by WebElement
We can find the frame using any selector and switch to it.
Switching between the frames can be done by Index also.
//switch To IFrame using index
driver.switchTo().frame(0);
4) Switching back to the default content:
To leave an iframe or frameset, switch back to the default content like:
//leave frame
driver.switchTo().defaultContent();
Let us explain frame switchching with an example:-
1) Launch new Browser and open https://demoqa.com/frames 2) Switch iFrame using any of locator strategy 3) Switch back to main content 4) Switch iFrame using index 5) Close the window
The program for the above scenario is shown below:
package com.example;

import org.openqa.selenium.By;
import org.openqa.selenium.WebDriver;
import org.openqa.selenium.WebElement;
import org.openqa.selenium.chrome.ChromeDriver;
import org.openqa.selenium.chrome.ChromeOptions;


public class iFrame_Demo {

    public static void main(String[] args) {

        ChromeOptions options = new ChromeOptions();
        WebDriver driver = new ChromeDriver(options);
        driver.manage().window().maximize();
        driver.get("https://demoqa.com/frames");

        //Switch iFrame using any of locator strategy
        WebElement iframeElement = driver.findElement(By.id("frame1"));
        driver.switchTo().frame(iframeElement);
        String Frame_1 = driver.findElement(By.id("sampleHeading")).getText();
        System.out.println("Switch by locator:" + Frame_1);

        //Switch back to the main window
        driver.switchTo().defaultContent();
        String mainPage = driver.findElement(By.xpath("//*[@id='framesWrapper']/h1")).getText();
        System.out.println("Back to Main page :" + mainPage);

        //Switch iFrame using index
         driver.switchTo().frame(1);
        String Frame_2 = driver.findElement(By.id("sampleHeading")).getText();
        System.out.println("Switch by Index :" + Frame_2);

        //quit the browser
        driver.quit();
    }
}
The output of the above program is
Note:-
1. Make sure to always switch back to the default content after performing actions within a frame. This is particularly important before interacting with elements that are outside of the frame.
2. If you want to switch between multiple frames, then switch to a frame and them switch back to main window and then switch to another frame.
Congratulations. We have learnt about window switching in Selenium. I hope you find this tutorial helpful. Happy Learning!!
In the previous tutorial, I have explained How to update data in existing excel in Java. In this Java Excel tutorial, I will explain how to create an Excel with formula in a Java program. Excel is very excellent in calculating formulas. The Apache POI library provides excellent support for working with formulas in Excel.
I’m using Apache POI to write data to the excel file. To download and install Apache POI, refer here.
If you are using maven, then you need to add below dependency in pom.xml.
Step 9 – Write the workbook to a File and close the workbook
try {

			// Write the workbook in file system
			FileOutputStream out = new FileOutputStream(new File("Salary_Slip.xlsx"));
			workbook.write(out);
			out.close();
			System.out.println("Excel written successfully.");

		} catch (IOException e) {
			e.printStackTrace();

		}
In the above line, note that you should make sure that the cell at position (1, 5) does exist, otherwise you get a NullPointerException.
Let us see a program where I have created a cell which contains the formula.
import org.apache.poi.xssf.usermodel.XSSFRow;
import org.apache.poi.xssf.usermodel.XSSFSheet;
import org.apache.poi.xssf.usermodel.XSSFWorkbook;

import java.io.File;
import java.io.FileOutputStream;
import java.io.IOException;

public class FormulaExcelDemo {

    public static void main(String[] args) {

        // Create object of XSSFWorkbook class
        XSSFWorkbook workbook = new XSSFWorkbook();

        // Create object of XSSFSheet class
        XSSFSheet sheet = workbook.createSheet("Calculate Salary");

        // Create Header row using XSSFRow class
        XSSFRow header = sheet.createRow(0);
        header.createCell(0).setCellValue("Employee_Name");
        header.createCell(1).setCellValue("Base_Salary");
        header.createCell(2).setCellValue("Variable_Pay");
        header.createCell(3).setCellValue("Other_Benefits");
        header.createCell(4).setCellValue("Total Salary");
        header.createCell(5).setCellValue("Base_Variable Salary");

        XSSFRow dataRow = sheet.createRow(1);
        dataRow.createCell(0).setCellValue("George");
        dataRow.createCell(1).setCellValue(5000);
        dataRow.createCell(2).setCellValue(650);
        dataRow.createCell(3).setCellValue(1200);

        // Set formula
        dataRow.createCell(4).setCellFormula("B2+C2+D2");
        dataRow.createCell(5).setCellFormula("SUM(B2:C2)");

        try {

            // Write the workbook in file system
            FileOutputStream out = new FileOutputStream(new File("Salary_Slip.xlsx"));
            workbook.write(out);
            out.close();
            System.out.println("Excel written successfully.");

        } catch (IOException e) {
            e.printStackTrace();

        }
    }
}
The output of the above program is
Updated Excel
That’s it! Well Done! Cheers!!
Congratulations on making it through this tutorial and hope you found it useful! Happy Learning!!
In the previous tutorial, we discussed How to disable Test Cases using TestNG. In this tutorial, we will see how we can create a dependency between Selenium Test Cases using TestNG.
Imagine there is a situation in which a test case can only be executed if a particular test case executes successfully. This can be achieved in TestNG by dependsOnMethod().
Below is an example.
To Run the TestNG program, right-click on the Java Program – here it is TestNGMethodDependencyDemo, select Run As TestNG Test(Eclipse).
Below is an example of dependsOnMethod() method.
import org.testng.annotations.Test;

public class TestNGMethodDependencyDemo {

    @Test
    public static void FirstTest() {
        System.out.println("This is Test Case 1");
    }

    @Test(dependsOnMethods = "FirstTest")
    public static void SecondTest() {
        System.out.println("This is Test Case 2 and will be executed after Test Case 1 successfully executed");
    }

    @Test
    public static void ThirdTest() {
        System.out.println("This is Test Case 3");
    }

    @Test
    public static void FourthTest() {
        System.out.println("This is Test Case 4");
    }
}
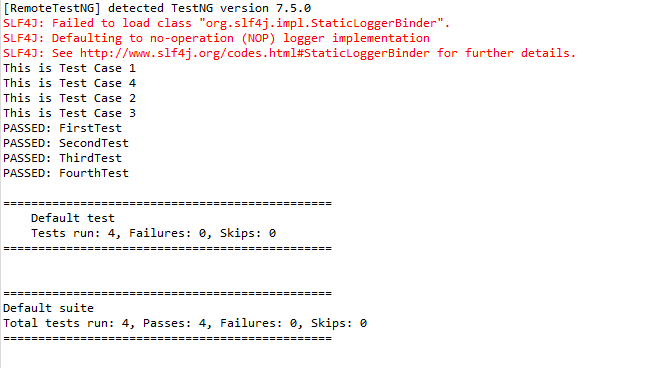
The output of the above program is
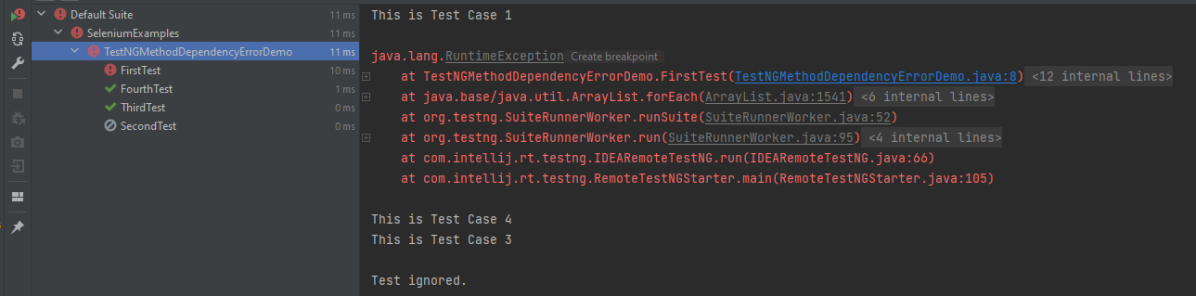
In the below scenario, Test Case 2 is dependent on Test CASE 1. If Test Case 1 fails, then Test Case 2 will skip.
package TestNGDemo;

import org.testng.annotations.Test;
public class TestNGMethodDependencyErrorDemo {

      @Test
      public static void FirstTest() {
            System.out.println("This is Test Case 1");
            throw new RuntimeException();
      }

      @Test(dependsOnMethods = "FirstTest")
      public static void SecondTest() {
          System.out.println("This is Test Case 2 and will be executed after Test Case 1 sucessfully executed");
     }

     @Test
     public static void ThirdTest() {
          System.out.println("This is Test Case 3");
     }

      @Test
      public static void FourthTest() {
            System.out.println("This is Test Case 4");
    }
}
The output of the above program is
We are done. Congratulations on making it through this tutorial and hope you found it useful!
TestNG provides several features like prioritizing the test cases, grouping the test cases, skipping the test cases, defining dependencies between test cases, and so on. The previous tutorial has explained the parameters in TestNG.
In this tutorial, we will see how the test cases can be prioritized using TestNG. If no priority is assigned to a Test Case, then the annotated test methods are executed as per the alphabetical order of the tests.
Below is an example
import org.testng.annotations.Test;

public class TestNGPriorityDemo {


     @Test
     public static void FirstTest() {
           System.out.println("This is Test Case 1");
     }

     @Test
     public static void SecondTest() {
           System.out.println("This is Test Case 2");
     }

     @Test
     public static void ThirdTest() {
           System.out.println("This is Test Case 3");
     }

     @Test
     public static void FourthTest() {
           System.out.println("This is Test Case 4");
     }
}
The output of the above program is
In the above example, FirstTest and FourthTest have the highest preference as per the alphabetical order. F comes before S and T. FirstTest is executed before Fourth because preference of I is higher than O.
The methods can be prioritized by assigning a number to the annotated test cases. The smaller the number, the higher the priority. Priority can be assigned as parameters while defining the test cases. In the below example, we have assigned priority to test cases, and now they are executed as per the priority. The Test Case with priority = 1 has the highest precedence. It overrides the rule of executing test cases by alphabetical order.
To Run the TestNG program, right-click on the program, select Run As TestNG Test.
import org.testng.annotations.Test;

public class TestNGPriorityDemo {


     @Test(priority = 3)
     public static void FirstTest() {
           System.out.println("This is Test Case 1, but after priority Test Case 3");
     }


     @Test(priority = 4)
     public static void SecondTest() {
           System.out.println("This is Test Case 2, but after priority Test Case 4");
     }


     @Test(priority = 2)
     public static void ThirdTest() {
           System.out.println("This is Test Case 3, but after priority Test Case 2");
     }


     @Test(priority = 1)
     public static void FourthTest() {
          System.out.println("This is Test Case 4, but after priority Test Case 1");
     }
}
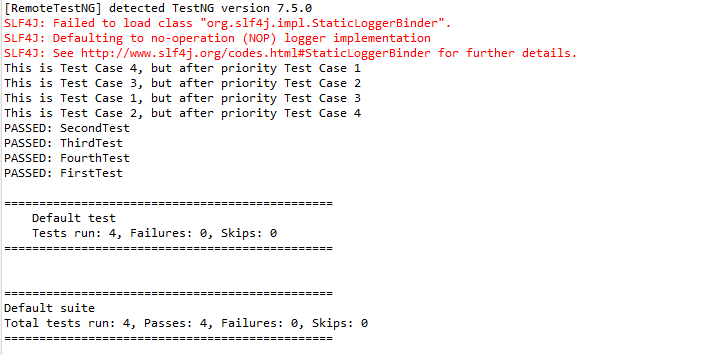
The output of the above program is
We are done. Congratulations on making it through this tutorial and hope you found it useful!
The previous tutorial has shown the various parameterized tests in JUnit5. This tutorial shows how to run a Selenium test multiple times with a different set of data. This helps to reduce the duplication of code. This is a very common scenario in any testing. Imagine, we want to test the requirement for a login page that uses a username and password to log in to the application. Username and password must satisfy some conditions like username can be only alphabets and no numeric and special characters. There could be multiple sets of data that can be used to test this requirement.
Prerequisite:
Selenium – 4.21.0
Maven – 3.9.6
Java 17
JUnit Jupiter Engine – 5.11.0-M2
JUnit Jupiter API – 5.11.0-M2
JUnit5 provides a lot of ways to parameterize a test –@ValueSource, @EnumSource, @MethodSource, @CsvSource, @CsvFileSource, and @ArgumentsSource.
Let us see an example where the test is not parameterized. In the below example, we want to verify the different error messages generated by passing incorrect values to username and password.
This is the base class – Login, which contains the test method that uses a different set of test data.
package com.example.parameterized;

import org.openqa.selenium.WebDriver;
import org.openqa.selenium.WebElement;
import org.openqa.selenium.support.FindBy;
import org.openqa.selenium.support.PageFactory;

public class LoginPage {

    WebDriver driver ;

    @FindBy(name="username")
    WebElement username;

    @FindBy(name="password")
    WebElement password;

    @FindBy(xpath="//*[@class='oxd-form']/div[3]/button")
    WebElement loginButton;

    @FindBy(xpath="//*[@class='orangehrm-login-error']/div[1]/div[1]/p")
    WebElement actualErrorMessage;


    public LoginPage(WebDriver driver) {

        this.driver = driver;

        // This initElements method will create all WebElements
        PageFactory.initElements(driver, this);
    }

    public void setUserName(String strUserName) {
        username.sendKeys(strUserName);
    }

    // Set password in password textbox
    public void setPassword(String strPassword) {
        password.sendKeys(strPassword);
    }

    // Click on login button
    public void clickLogin() {
        loginButton.click();
    }

    // Get the error message
    public String getErrorMessage() {
        return actualErrorMessage.getText();
    }

    public void login(String strUserName, String strPasword) {

        // Fill user name
        this.setUserName(strUserName);

        // Fill password
        this.setPassword(strPasword);

        // Click Login button
        this.clickLogin();
    }

}
The example below shows 4 tests using a common test with 4 different sets of data.
There are multiple ways to parameterize the test. To start with:
Replace the @Test annotation with the @ParameterizedTest annotation provided by the JUnit5 framework.
Add parameters to the loginTest() method. In this example, we will add a username and a password parameter.
Add the parameters source. In this example, we will use the @CsvFileSource annotation.
To know all the different types of parameterization methods, please refer to this tutorial. This tutorial will show the 2 most common ways to parameterize tests in JUnit5.
1.@CsvSource
@CsvSource allows us to express argument lists as comma-separated values (i.e., CSV String literals). Each string provided via the value attribute in @CsvSource represents a CSV record and results in one invocation of the parameterized test. An empty, quoted value (”) results in an empty String. This can be seen in the example below.
@CsvFileSource lets us use comma-separated value (CSV) files from the classpath or the local file system.
We can see in the example below that we have skipped the first line from the credentials.csv file as it is the heading of the file. invalidCredentials() method got 4 different set of the test data from CSV file using parameterization. JUnit5 ignores the headers via the numLinesToSkip attribute.
In this example, will retrieve the data from CSV. This CSV file is placed under src/test/resources. Below is an example of the credentials.csv file.
In @CsvFileSource, an empty, quoted value (“”) results in an empty String in JUnit5.
Parallelism or multi-threading in software terms is defined as the ability of the software, operating system, or program to execute multiple parts or sub-components of another program simultaneously.
Parallel testing helps to reduce execution time and efforts and results in faster time to delivery. In a scenario where we have two versions of software available, and we need to check its stability and compatibility, we can run the two versions simultaneously and find issues at a much faster rate.
How to run Parallel Tests with Selenium?
TestNG provides multiple ways to execute tests in separate threads. In testng.xml, if we set ‘parallel’ attribute on the tag to ‘methods’, testNG will run all the ‘@Test’ methods in tag in a separate thread.
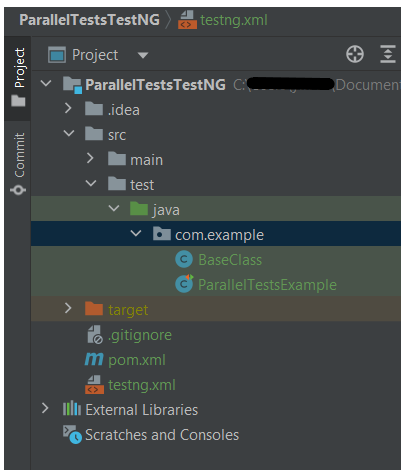
The project Structure looks like shown below:-
To start with, add the below mentioned dependencies to POM.xml (Maven project)
Let us create a class with multiple tests. In the below Example, we have created three test cases or methods . We want to run these methods parallelly. To achieve this, we need to add the below command in testng.xml
parallel="methods"
Below is an example of parallel tests.
import org.openqa.selenium.By;
import org.openqa.selenium.WebDriver;
import org.openqa.selenium.chrome.ChromeDriver;
import org.openqa.selenium.chrome.ChromeOptions;
import org.testng.Assert;
import org.testng.annotations.*;
import java.time.Duration;
public class ParallelTestsExample1 {
@Test
public void invalidLoginTest() {
System.out.println("Test Case 1 with Thread Id - "+Thread.currentThread().getId());
ChromeOptions options = new ChromeOptions();
options.addArguments("--start-maximized");
WebDriver driver = new ChromeDriver(options);
driver.manage().timeouts().implicitlyWait(Duration.ofSeconds(5));
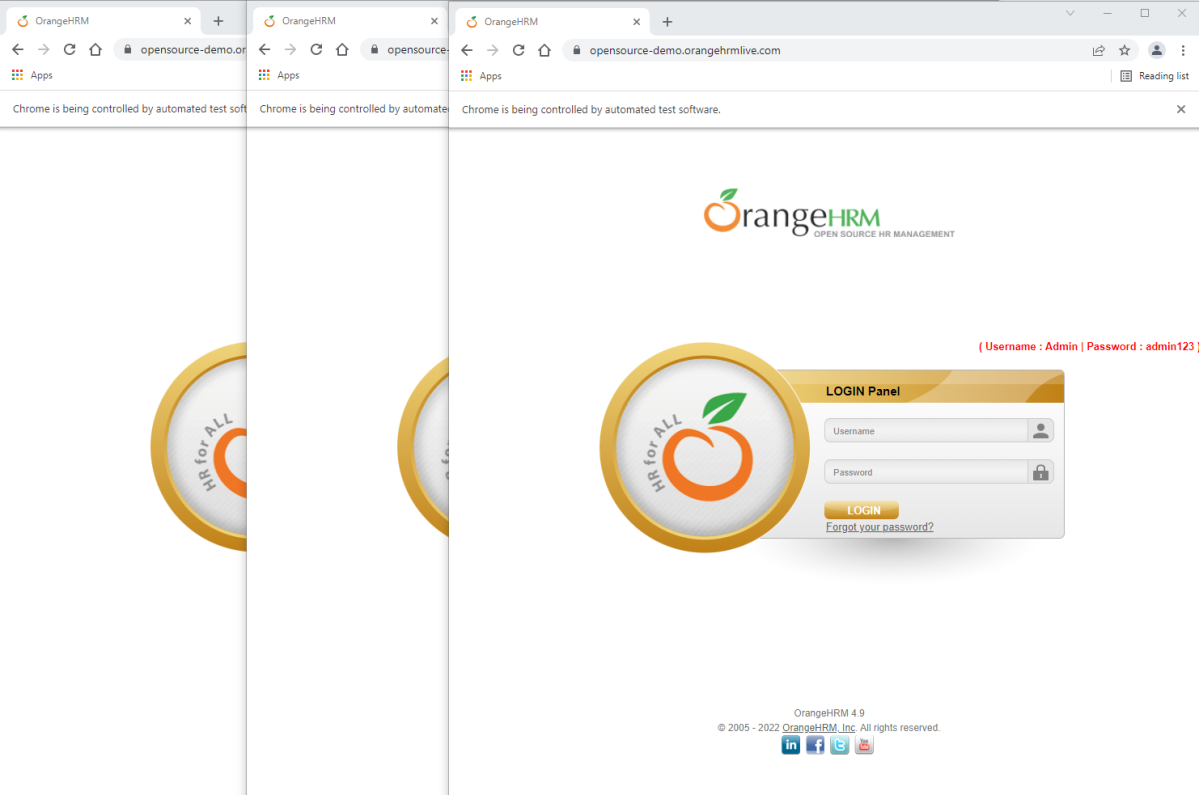
driver.get("https://opensource-demo.orangehrmlive.com/web/index.php/auth/login");
driver.findElement(By.name("username")).sendKeys("admin123123");
driver.findElement(By.name("password")).sendKeys("adm");
driver.findElement(By.xpath("//*[@class='oxd-form']/div[3]/button")).click();
String expectedError = driver.findElement(By.xpath("//*[@class='orangehrm-login-error']/div[1]/div[1]/p")).getText();
Assert.assertTrue(expectedError.contains("Invalid credentials"));
}
@Test
public void validLoginTest() throws InterruptedException {
System.out.println("Test Case 2 with Thread Id - "+Thread.currentThread().getId());
ChromeOptions options = new ChromeOptions();
options.addArguments("--start-maximized");
WebDriver driver = new ChromeDriver(options);
driver.manage().timeouts().implicitlyWait(Duration.ofSeconds(5));
driver.get("https://opensource-demo.orangehrmlive.com/web/index.php/auth/login");
driver.findElement(By.name("username")).sendKeys("Admin");
driver.findElement(By.name("password")).sendKeys("admin123");
driver.findElement(By.xpath("//*[@class='oxd-form']/div[3]/button")).click();
String expectedTitle = driver.findElement(By.xpath("//*[@class='oxd-topbar-header-breadcrumb']/h6")).getText();
Assert.assertTrue(expectedTitle.contains("Dashboard"));
}
@Test
public void forgotLinkTest() {
System.out.println("Test Case 3 with Thread Id - "+Thread.currentThread().getId());
ChromeOptions options = new ChromeOptions();
options.addArguments("--start-maximized");
WebDriver driver = new ChromeDriver(options);
driver.manage().timeouts().implicitlyWait(Duration.ofSeconds(5));
driver.get("https://opensource-demo.orangehrmlive.com/web/index.php/auth/login");
String expectedLink = driver.findElement(By.className("orangehrm-login-forgot-header")).getText();
Assert.assertTrue(expectedLink.contains("Forgot your password?"));
}
}
Now, let us create a testng.xml. Right click on the project and select TestNG -> Convert to TestNG.
The attribute thread-count allows you to specify how many threads should be allocated for this execution.
parallel = “methods” means that the methods will run parallel
The parallel attribute can be extended for multiple values, as below:
· Methods: Helps run methods in separate threads
· Tests: Help to run all methods belonging to the same tag in the same thread, means tests will run sequentially
· Classes: Helps to run all methods belonging to a class in a single thread
· Instances: Helps run all methods in the same instance in the same thread
testng.xml
<?xml version="1.0" encoding="UTF-8"?>
<!DOCTYPE suite SYSTEM "https://testng.org/testng-1.0.dtd">
<suite name="Suite">
  <test name="Parallel Tests" parallel = "methods" thread-count="3">
    <classes>
      <class name="com.example.parallel.ParallelTestsExample"/>
    </classes>
  </test> <!-- Test -->
</suite> <!-- Suite -->
How to run the tests?
Right-click on testng.xml and select Run AS -> TestNG Suite. If you will run the Test Class – ParallelTestDemo.java as Right click and then Run As TestNG Tests, then the methods will run sequentially.
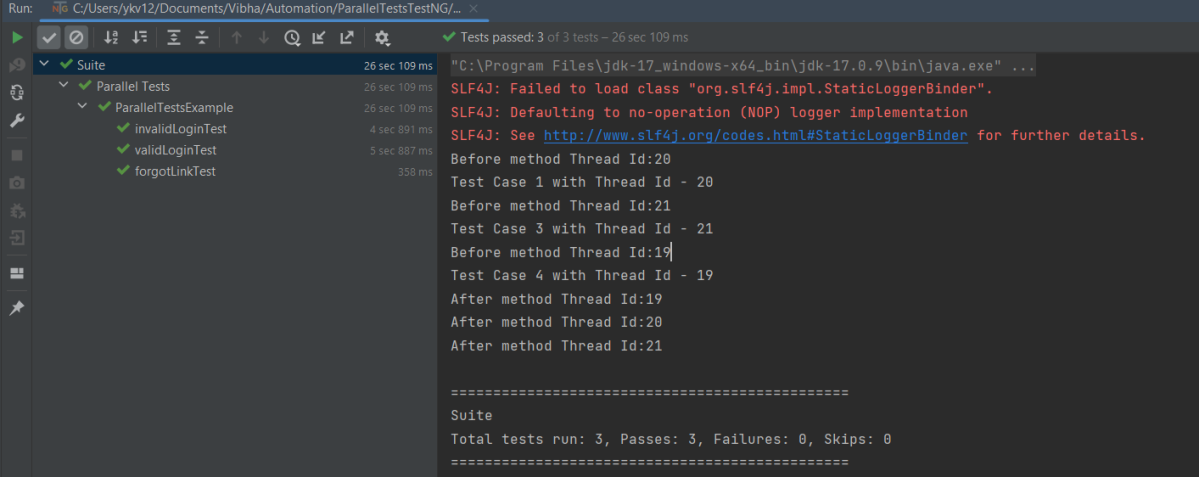
Execution
Here it can be seen that 3 tests were running on thread no – 19, 20 and 21. Out of all 3 tests, browser for only 1 test is closed and rest 2 browsers are left open.
First thread initialized a browser and set a value to static WebDriver reference. Second thread initialized another browser and set a new value to the same static WebDriver reference and this will impact value set by first thread as it is a static.All threads wanted to close same browser that is the reason there is one configuration method failure as one browser is closed another threads will not find sessions to close the browsers. Browser was closed already so last 2 tests did not able to close the browser.
To overcome this issue, will use ThreadLocal<WebDriver>. The complete program looks like as below:
First, I will create a HelperClass which contains the initialization of driver and closing the driver. I like to keep the tests only in Test Class. This is not mandatory. You can combine the code of both classes in one also.
HelperClass
import org.openqa.selenium.WebDriver;
import org.openqa.selenium.chrome.ChromeDriver;
import org.openqa.selenium.chrome.ChromeOptions;
import org.testng.annotations.AfterMethod;
import org.testng.annotations.BeforeMethod;

import java.time.Duration;

public class BaseClass {

    private static final ThreadLocal<WebDriver> driver = new ThreadLocal<WebDriver>();

    @BeforeMethod
    public void setDriver()  {

        ChromeOptions options = new ChromeOptions();
        options.addArguments("--start-maximized");
        driver.set(new ChromeDriver(options));
        driver.get().manage().timeouts().implicitlyWait(Duration.ofSeconds(5));
        driver.get().get("https://opensource-demo.orangehrmlive.com/web/index.php/auth/login");
        System.out.println("Before method Thread Id:" + Thread.currentThread().getId());

    }

    public WebDriver getDriver() {
        return driver.get();
    }

    @AfterMethod
    public  void closeBrowser() {
        System.out.println("After method Thread Id:" + Thread.currentThread().getId());
        driver.get().quit();
        driver.remove();
    }
}
ParallelTestsExample
import org.openqa.selenium.By;
import org.testng.Assert;
import org.testng.annotations.Test;

public class ParallelTestsExample extends BaseClass{

    @Test
    public void invalidLoginTest() {

        System.out.println("Test Case 1 with Thread Id - "+Thread.currentThread().getId());

        getDriver().findElement(By.name("username")).sendKeys("admin123123");
        getDriver().findElement(By.name("password")).sendKeys("adm");
        getDriver().findElement(By.xpath("//*[@class='oxd-form']/div[3]/button")).click();
        String expectedError = getDriver().findElement(By.xpath("//*[@class='orangehrm-login-error']/div[1]/div[1]/p")).getText();
        Assert.assertTrue(expectedError.contains("Invalid credentials"));

    }

    @Test
    public void validLoginTest() throws InterruptedException {

        System.out.println("Test Case 2 with Thread Id - "+Thread.currentThread().getId());

        getDriver().findElement(By.name("username")).sendKeys("Admin");
        getDriver().findElement(By.name("password")).sendKeys("admin123");
        getDriver().findElement(By.xpath("//*[@class='oxd-form']/div[3]/button")).click();
        Thread.sleep(5000);
        String expectedTitle = getDriver().findElement(By.xpath("//*[@class='oxd-topbar-header-breadcrumb']/h6")).getText();
        Assert.assertTrue(expectedTitle.contains("Dashboard"));
    }

    @Test
    public void forgotLinkTest() {

        System.out.println("Test Case 3 with Thread Id - "+Thread.currentThread().getId());

        String expectedLink = getDriver().findElement(By.className("orangehrm-login-forgot-header")).getText();
        Assert.assertTrue(expectedLink.contains("Forgot your password?"));
    }

}
The output of the above program is
Report Generation
TestNG generates 2 reports – emailable-report.html and index.html
Emailable-Report.html
Go to test-output folder and open emailable-report.html
This report gives a summary of all the tests executed, passed, failed, skipped and retried with their respective execution time.
Index.html
This report provides the detailed description of the tests like no of tests present, no of methods, time taken by each step, total time taken by each steps, testng.xml data and soon.
Run Tests Sequentially
If you will run the Test Class – ParallelTestDemo.java as Right click and then Run As TestNG Tests, then the methods will run sequentially. Here all tests are run with Thread 1 whereas with parallel execution tests were run with different threads.
We can make parallel = none, if don’t want to run them parallel. It is shown below that all the tests are running on Thread 1 that means once a test ends then another test starts on that thread.
CSS Selectors are string patterns used to identify an element based on a combination of HTML tag, id, class, and attributes. Locating by CSS Selector is more complicated than the previous methods like by Id, class, XPath, but it is the most common locating strategy of advanced Selenium users because it can access even those elements that have no ID or name.
CSS is preferred way of locating element as it is faster than Xpath.
Here, id =”content” is the parent locator. It will go to first div as child or sub child, then again div as child or sub child, and third div as child or sub child. Then it will go to div class _4bl7 _m-_ which further go to div class _ihd _3ma mbs _6n _6s _6v.
Now, let’s write a small program to show the use of CSS Selectors. This program is it we have done for XPath , the only difference is the use of CSS Selectors to identify the web elements.
import org.openqa.selenium.By;
import org.openqa.selenium.WebDriver;
import org.openqa.selenium.chrome.ChromeDriver;
import org.openqa.selenium.chrome.ChromeOptions;
import java.time.Duration;

public class Selenium_Demo {

    protected static WebDriver driver;

    public static void main(String[] args) {

        ChromeOptions options = new ChromeOptions();
        options.addArguments("--start-maximized");
        driver = new ChromeDriver(options);
        driver.manage().timeouts().implicitlyWait(Duration.ofSeconds(2));
        driver.get("https://opensource-demo.orangehrmlive.com/");
        driver.manage().window().maximize();

        //CSS Selectors for TextBox
        driver.findElement(By.cssSelector("input.oxd-input[name='username'")).sendKeys("Admin");

        driver.findElement(By.cssSelector("input.oxd-input[name='password'")).sendKeys("admin123");

        driver.findElement(By.cssSelector("button[type='submit'")).click();

        driver.close();
    }
}
That’s it! Congratulations on making it through this tutorial and hope you found it useful! Happy Learning!!
This tutorial describes how to check the state of a WebElement in Selenium.
In this tutorial, we will learn the isDisplayed, isEnabled, isSelected method in Selenium, and how to check the state of a WebElement. There are many methods that are used to determine the visibility scope for the web elements – isSelected(), isEnabled(), and isDispalyed().
Many a time, a test fails when we click on an element or enter text in a field. This is because the element is displayed or exists in DOM, but it does not exist on the web page.
WebDriver facilitates the user with the following methods to check the visibility of the web elements. These web elements can be buttons, drop boxes, checkboxes, radio buttons, labels, etc.
isDisplayed()
isSelected()
isEnabled()
1) Boolean isSelected():This method determines if an element is selected or not. It returns true if the element is selected and false if it is not. It is widely used on checkboxes, radio buttons, and options in a select.
2) Boolean isDisplayed(): This method determines if an element is displayed or not. It returns true if the element is displayed and false if it is not. The advantage of this method is that it avoids parsing an element’s style attribute.
3) Boolean isEnabled(): This method determines if an element is enabled or not. It returns true if the element is enabled (All elements apart from disabled input elements) and false if otherwise.
Steps to follow to understand when an element isEnabled and isDisplayed.
If Search Box is enabled, then search for text – Selenium
Close the browser
The complete program is shown below:
package org.example;

import org.openqa.selenium.By;
import org.openqa.selenium.WebDriver;
import org.openqa.selenium.WebElement;
import org.openqa.selenium.firefox.FirefoxDriver;
import org.openqa.selenium.firefox.FirefoxOptions;

import java.util.concurrent.TimeUnit;

public class VerifyConditionsDemo {

    public static void main(String[] args) {

        // Initiate Firefox browser
        FirefoxOptions options = new FirefoxOptions();
        WebDriver driver = new FirefoxDriver(options);

        // Maximize the browser
        driver.manage().window().maximize();
        driver.manage().timeouts().implicitlyWait(5, TimeUnit.SECONDS);

        // launch the firefox browser and open the application url
        driver.get("https://duckduckgo.com/");

        // compare the expected title of the page with the actual title of the page and
        String expectedTitle = "DuckDuckGo — Privacy, simplified.";
        String actualTitle = driver.getTitle();
        if (expectedTitle.equals(actualTitle)) {
            System.out.println("Verification Pass- The correct title is displayed on the web page.");
        } else {
            System.out.println("Verification Failed - An incorrect title is displayed on the web page.");
        }

        // Verify that the “Search" Box is displayed
        WebElement searchBox = driver.findElement(By.className("searchbox_input__bEGm3"));
        if (searchBox.isDisplayed()) {
            System.out.println("Search Box is visible. Return: " + searchBox.isDisplayed());
        } else {
            System.out.println("Search Box is not visible. Return: " + searchBox.isDisplayed());
        }

        // Verify that the “Search” Box is enabled
        if (searchBox.isEnabled()) {
            System.out.println("Search Box is enabled. Return: " + searchBox.isEnabled());
            searchBox.sendKeys("Selenium");
        } else {
            System.out.println("Search Box is not enabled. Return: " + searchBox.isEnabled());
        }

        System.out.println("Successful Execution of Test.");

        // close the web browser
        driver.close();

    }
}
The output of the above program is
isSelected
Steps to follow to understand when an element is Selected or not
Verify if the first Radio Button (Yes) is selected or not
If the first radio button is not selected, then select Radio Button 1, else select button 2.
Print the value of the selected Radio Button
Close the browser
Below is the image of the options for the Radio Button.
The complete program is shown below:
package org.example;

import org.openqa.selenium.By;
import org.openqa.selenium.WebDriver;
import org.openqa.selenium.WebElement;
import org.openqa.selenium.firefox.FirefoxDriver;
import org.openqa.selenium.firefox.FirefoxOptions;

import java.util.List;
import java.util.concurrent.TimeUnit;

public class isSelectedDemo {

        public static void main(String[] args) {


            // Initiate Firefox browser
            FirefoxOptions firefoxOptions = new FirefoxOptions();
            WebDriver driver = new FirefoxDriver(firefoxOptions);

            // Maximize the browser
            driver.manage().window().maximize();
            driver.manage().timeouts().implicitlyWait(10, TimeUnit.SECONDS);

            driver.get("https://demoqa.com/radio-button");

            List<WebElement> Radio_Options = driver.findElements(By.cssSelector(".custom-radio"));
            for(WebElement options: Radio_Options)
                System.out.println("Options :"+ options.getText());

            // Create a boolean variable which will hold the value (True/False)
            boolean radio_value = false;

            // This statement will return True, in case of first Radio button is already selected
            radio_value = Radio_Options.get(0).isSelected();
            System.out.println("First Option is already selected :"+radio_value);

            // If button 1 is not selected, then select otherwise select button 2
            if (radio_value == false) {
                Radio_Options.get(0).click();
                System.out.println("Button Selected is :" + Radio_Options.get(0).getText());
            } else {
                Radio_Options.get(1).click();
                System.out.println("Button Selected is :" + Radio_Options.get(1).getText());
            }

            // close the web browser
            driver.close();
        }
    }
The output of the above program is
That’s it! Congratulations on making it through this tutorial and hope you found it useful! Happy Learning!! Cheers!!
In the previous tutorial, we have discussed about Implict and Explicit Wait. In this blob, we will discuss about Fluent Wait. Fluent Wait instance defines the maximum amount of time to wait for a condition, as well as the frequency with which to check the condition.
Users may configure the wait to ignore specific types of exceptions whilst waiting, such as NoSuchElementExceptionwhen searching for an element on the page. Fluent Wait commands mainly used when the web elements, which sometimes visible in few seconds and sometimes take more, time than usual. Mainly in Ajax applications. We could set the default-pooling period based on the requirement.
Selenium 4
Wait<WebDriver> wait =
        new FluentWait<>(driver)
            .withTimeout(Duration.ofSeconds(2))
            .pollingEvery(Duration.ofMillis(300))
            .ignoring(ElementNotInteractableException.class);

    wait.until(
        d -> {
          revealed.sendKeys("Displayed");
          return true;
        });
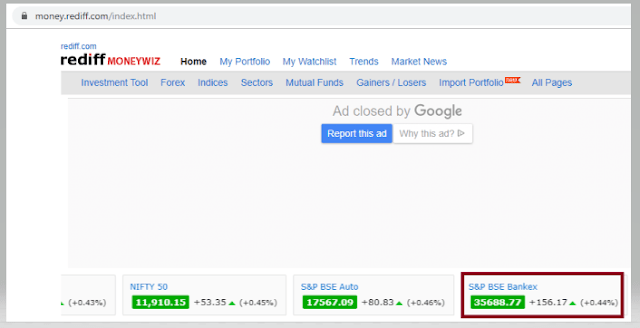
Below is an example which shows the use of Fluent Wait in real world 1) Launch new Browser and open https://www.rediff.com/ 2) Click on Money Link present at the top center of the page 3) Sensex of different companies like S&P BSE Sensex, Nift 50, etc. appears at the center of the page 4) Don’t use Fluent Wait to find value of element S& BSE Sensex 5) Close the browser
package SeleniumTutorial;
import org.openqa.selenium.By;
import org.openqa.selenium.WebDriver;
import org.openqa.selenium.chrome.ChromeDriver;

public class FluentWaitDemo {
      public static void main(String[] args) {

System.setProperty("webdriver.chrome.driver","C:\\Users\\SingVi04\\Desktop\\Drivers\\chromedriver_win32\\chromedriver.exe");
           WebDriver driver= new ChromeDriver();
           driver.manage().window().maximize();
           driver.get("https://www.rediff.com/");
           driver.findElement(By.xpath("//a[@href ='https://money.rediff.com']")).click();

           String Message= driver.findElement(By.xpath("//*[@id='indmarquee']/div[1]/span[2]")).getText();
           System.out.println("Value of S&P BSE Bankex :"+Message);
      driver.quit();
     }
}

Output
Exception in thread "main" org.openqa.selenium.NoSuchElementException: no such element: Unable to locate element
{"method":"xpath","selector":"//*[@id='indmarquee']/div[1]/span[2]"}
(Session info: chrome=78.0.3904.108)
Here, we can see that NoSuchElementException found, as the Web Element is dynamic. We need to wait for some time to find the Web Element. In the below example, will use Fluent Wait to overcome the above stated issue.
Here, Fluent Wait uses two parameters mainly – timeout value and polling frequency. In the above syntax we took time out value as 15 seconds and polling frequency as 2 seconds. The maximum amount of time (15 seconds) to wait for a condition and the frequency (2 seconds) to check the success or failure of a specified condition.
If the element is located with in this time frame it will perform the operations else it will throw an “ElementNotVisibleException”
Few important points:-
1) NoSuchElementException. class – This class should be imported from org.openqa.selenium. By default Selenium shows 2 packages as shown in the image below.
If NoSuchElementException.class imported from java.util package, then we will see NoSuchElementException as shown below.


