Testing of Gradle SpringBoot Application with Serenity, Cucumber and JUnit4

HOME

In the previous tutorial, I explained about Integration Testing of Springboot with Cucumber and TestNG. In this tutorial, I will explain the Testing of the Gradle SpringBoot Application with Serenity, Cucumber, and JUnit4.

Prerequisite:

Spring Boot 3.0.4 requires Java 17 and is compatible with and including Java 19. Spring Framework 6.0.6 or above is also required.

Explicit build support is provided for the following build tools:

  1. Maven – 3.5+
  2. Gradle – 7.x (7.5 or later) and 8.x

This framework consists of

  1. SpringBoot Starter Parent – 3.1.0
  2. Serenity –  3.6.12
  3. Serenity Cucumber – 3.6.12
  4. Serenity JUnit4 – 3.6.12
  5. Serenity Rest Assured – 3.6.12
  6. Spring
  7. Java 17
  8. Gradle – 7.6.1

What is SpringBoot Application?

 Spring Boot is an open-source micro-framework that provides Java developers with a platform to get started with an auto-configurable production-grade Spring application. 

  • Comes with embedded HTTP servers like Tomcat or Jetty to test web applications.
  • Adds many plugins that developers can use to work with embedded and in-memory databases easily. Spring allows you to easily connect with database and queue services like Oracle, PostgreSQL, MySQL, MongoDB, Redis, Solr, ElasticSearch, Rabbit MQ, and others.

What is RestController?

HTTP requests are handled by a controller in Spring’s approach to building RESTful web services. The @RestController annotation identifies these components, and the HelloController shown below (from src/main/java/com/example/springboot_demo/HelloController.java) handles GET requests for / and /qaautomation by returning a new instance of the Greeting class. Spring RestController takes care of mapping request data to the request-defined handles method.

import org.springframework.web.bind.annotation.GetMapping;
import org.springframework.web.bind.annotation.RestController;
 
@RestController
public class HelloController {
     
    @GetMapping(path="/")
    String hello() {
        return "Hello World, Spring Boot!";
    }
     
     
    @GetMapping(path="/qaautomation")
    String qaautomation() {
        return "Hello QA Automation!";
    }
 
}

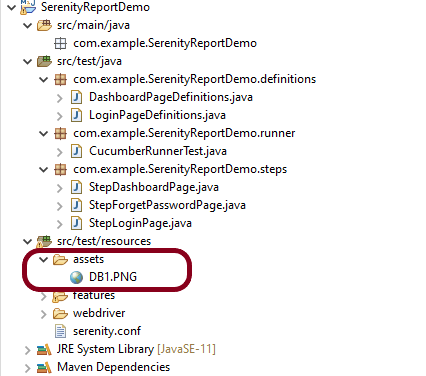
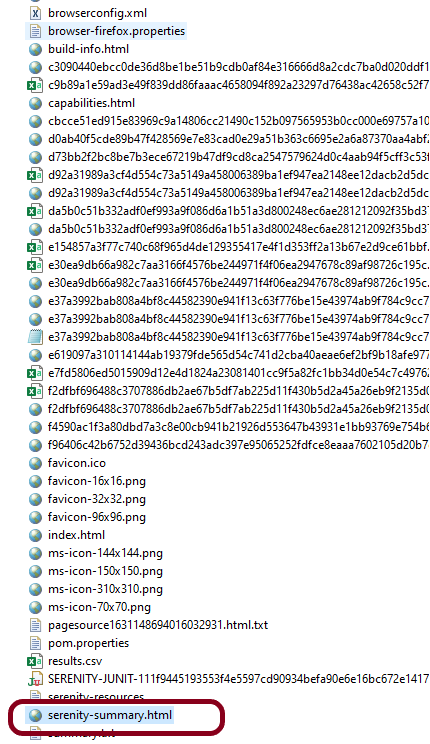
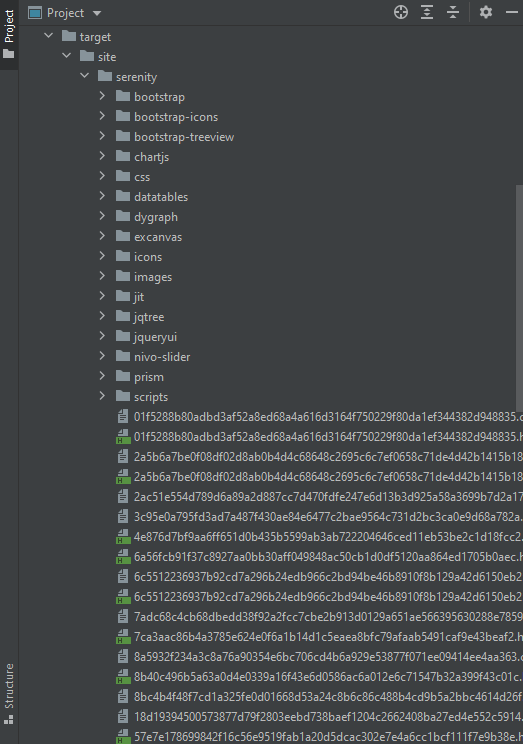
Project Directory Structure

Implementation Steps

  1. Create a source folder – src/test/resources to create properties file
  2. Add SpringBootTest, Rest Assured, and JUnit4 dependencies to the project
  3. Create a feature file in src/test/resources
  4. Create the StepDefinition and Helper classes.
  5. Create a Serenity Runner class in the src/test/java directory
  6. Create an application.properties file in src/test/resources
  7. Create a serenity.properties at the root level of the project
  8. Run the tests from Command Line
  9. Serenity Report Generation
  10. Cucumber Report Generation

Step 1 – Create a source folder – src/test/resources to create test scenarios in the Feature file

Right-click on the test directory and select New->Directory and select resources (Maven Source Directories).

Step 2 – Add SpringBootTest, Rest Assured, and other dependencies to the project

We have added SpringBootTest, SpringBoot Web, Tomcat, Spring Web, Rest Assured, and JUnit4 dependencies to the build.gradle.

plugins {
	id 'java'
	id 'org.springframework.boot' version '3.1.0-SNAPSHOT'
	id 'io.spring.dependency-management' version '1.1.0'
	id "net.serenity-bdd.serenity-gradle-plugin" version "3.6.7"
}

group = 'com.example'
version = '0.0.1-SNAPSHOT'
sourceCompatibility = '17'

repositories {
	mavenCentral()
	maven { url 'https://repo.spring.io/milestone' }
	maven { url 'https://repo.spring.io/snapshot' }
}


dependencies {

	implementation 'org.springframework.boot:spring-boot-starter'
	implementation 'org.springframework.boot:spring-boot-starter-web'
	implementation 'org.springframework.boot:spring-boot-starter-tomcat'
	implementation 'org.springframework:spring-web'

	testImplementation 'org.springframework.boot:spring-boot-starter-test'
	testImplementation 'net.serenity-bdd:serenity-core:3.6.12'
	testImplementation 'net.serenity-bdd:serenity-cucumber:3.6.12'
	testImplementation 'net.serenity-bdd:serenity-rest-assured:3.6.12'
	testImplementation 'net.serenity-bdd:serenity-spring:3.6.12'
	testImplementation 'net.serenity-bdd:serenity-junit:3.6.12'
	testImplementation 'org.junit.vintage:junit-vintage-engine'

}

tasks.named('test') {
	useJUnit() {}
	testLogging {
		showStandardStreams = true
	}
	systemProperties System.getProperties()
}

gradle.startParameter.continueOnFailure = true

test.finalizedBy(aggregate)

Step 3 – Create a feature file in src/test/resources

Below is an example of a feature file that shows a sample test scenario. Feature file should end with .feature. It contains the test scenarios in the form of simple English using the terms Given, When, Then, And.

Feature: SpringBoot Request
   
@ReceiveCorrectResponse

   Scenario Outline: Send a valid Request to get correct response
    Given I send a request to the URL "<url>"
    Then the response will return "<response>"

   Examples:
   | url             | response                   |
   | /               | Hello World, Spring Boot!  |
   | /qaautomation   | Hello QA Automation!       |

Step 4 – Create the StepDefinition and Helper classes.

Below is the code of the StepDefinition and Helper class. These classes are created in the src/test/java directory.

  • uses @SpringBootTest annotation which loads the actual application context.
  • uses WebEnvironment.RANDOM_PORT to create and run the application at some random server port.
  • @LocalServerPort gets the reference of the port where the server has started. It helps in building the actual request URIs to mimic real client interactions.

AbstractRestAssuredHelper

import io.restassured.RestAssured;
import io.restassured.specification.RequestSpecification;
import net.serenitybdd.rest.SerenityRest;
import org.springframework.beans.factory.annotation.Value;
import org.springframework.boot.test.context.SpringBootTest;
import org.springframework.boot.test.context.SpringBootTest.WebEnvironment;
import org.springframework.boot.test.web.server.LocalServerPort;


@SpringBootTest(webEnvironment = WebEnvironment.RANDOM_PORT)
public abstract class AbstractRestAssuredHelper {
     private final static String BASE_URI = "http://localhost";
 
     @LocalServerPort
     private int port;

     @Value("${server.servlet.context-path}")
     private String basePath;
 
     protected void configureRestAssured() {
           RestAssured.baseURI = BASE_URI;
           RestAssured.port = port;
           RestAssured.basePath = basePath;
           
 
     }

     protected RequestSpecification getAnonymousRequest() {
           configureRestAssured();
           return SerenityRest.given();
     }
}

This class sends the request and receives a response after performing the GET operation. Here, the validation of the response also takes place by asserting the expected and actual response

import io.cucumber.java.en.Given;
import io.cucumber.java.en.Then;
import io.restassured.response.Response;
import net.serenitybdd.rest.SerenityRest;
import net.thucydides.core.annotations.Steps;
import org.junit.Assert;

public class SpringBootDemoDefinitions {

	@Steps
    AbstractRestAssuredHelper helper;
    private Response response;

    @Given("I send a request to the URL {string}")
    public void iSendARequest(String endpoint) throws Exception  {
         response = helper.getAnonymousRequest()
                    .header("Content-Type", "application/json").when().get(endpoint);
    }

    @Then("the response will return {string}")
    public void extractResponse(String Expected ) {
          SerenityRest.restAssuredThat(response -> response.statusCode(200));
          String Actual = response.asString();    
          System.out.println("Result :"+Actual);
          Assert.assertEquals(Expected, Actual);
    }
}

Step 5 – Create a Serenity Runner class in the src/test/java directory

We cannot run a Feature file on its own in cucumber-based framework. We need to create a Java class that will run the Feature File. It is the starting point for JUnit to start executing the tests. TestRunner class is created under src/test/javaWhen you run the tests with serenity, you use the CucumberWithSerenity test runner.

import org.junit.runner.RunWith;
import io.cucumber.junit.CucumberOptions;
import net.serenitybdd.cucumber.CucumberWithSerenity;

@RunWith(CucumberWithSerenity.class)
@CucumberOptions(features = "src/test/resources/features", tags = "", glue = "com.example.Gradle_SpringBoot_Demo", publish = true)

public class SpringRunnerTests {

}

Step 6 – Create an application.properties file in src/test/resources

Application.properties is created under src/test/java

spring.profiles.active=dev
server.port=9091
server.servlet.context-path=/demo

spring.profiles.active – property to specify which profiles are active. The default profile is always active.
server.port – By default, the embedded server starts on port 8080. Now the server will start on port 8090
server.servlet.context-path – the context path in Spring Boot can be changed by setting a property, server.servlet.context-path.

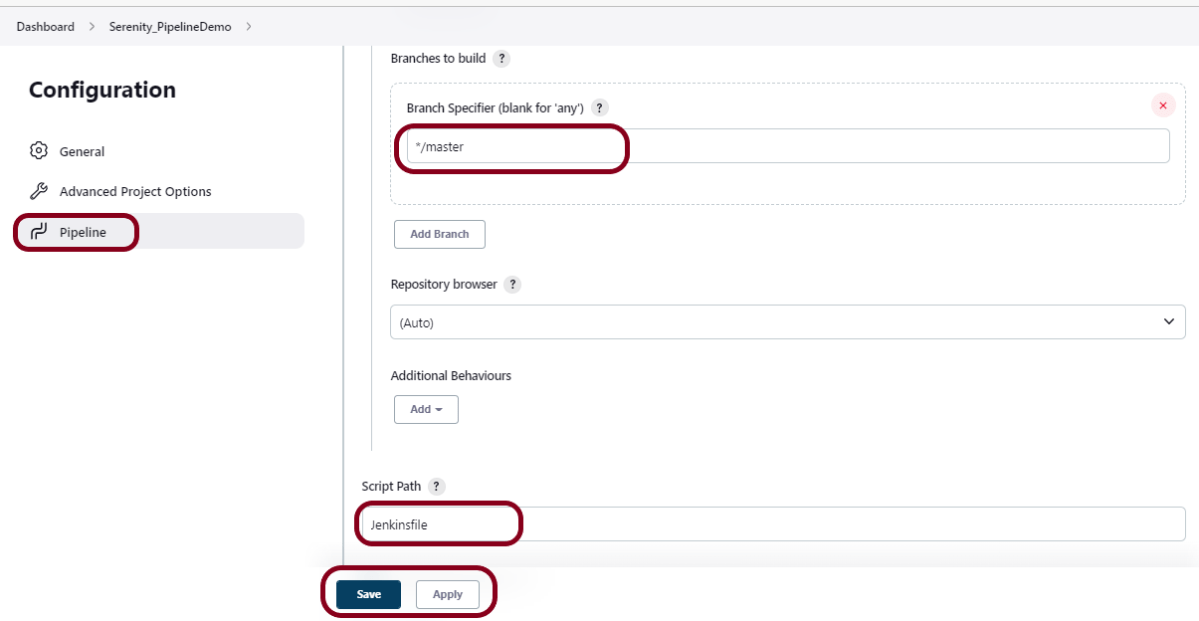
Step 7 – Create a serenity.properties at the root level of the project

serenity.project.name = Testing of Gradle SpringBoot Application with Serenity and JUnit4 Demo

Step 8 – Run the tests from Command Line

Run the tests from the command line by using the below command

gradle clean test

The output of the above program is

This image shows that the profile name is “dev”. Application is started on port – “54462” and the context path is “/demo”.

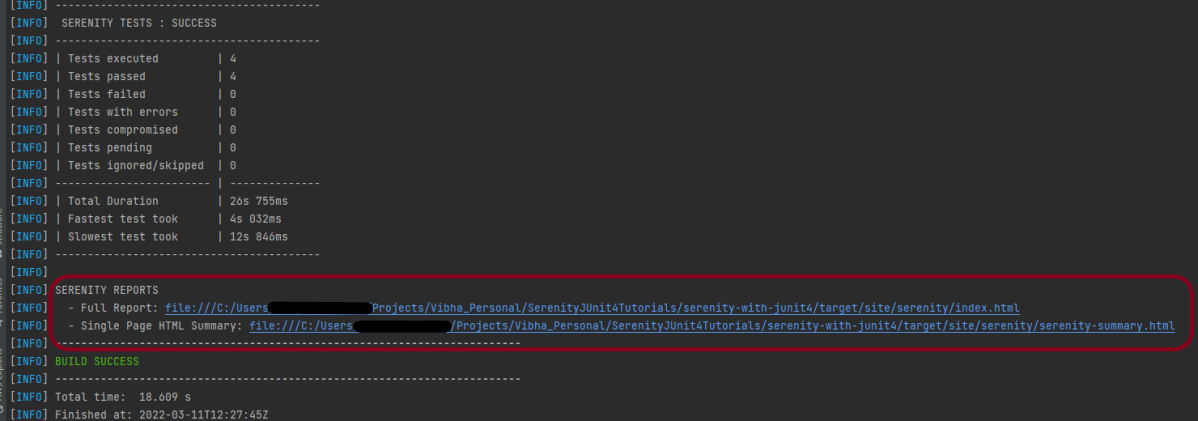
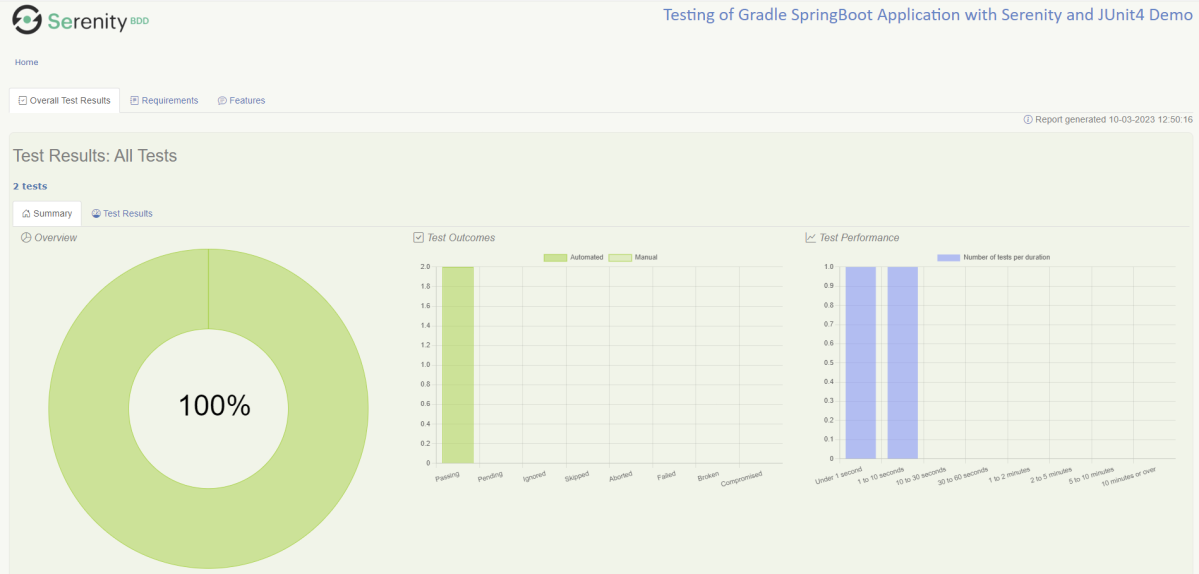
Step 9 – Serenity Report Generation

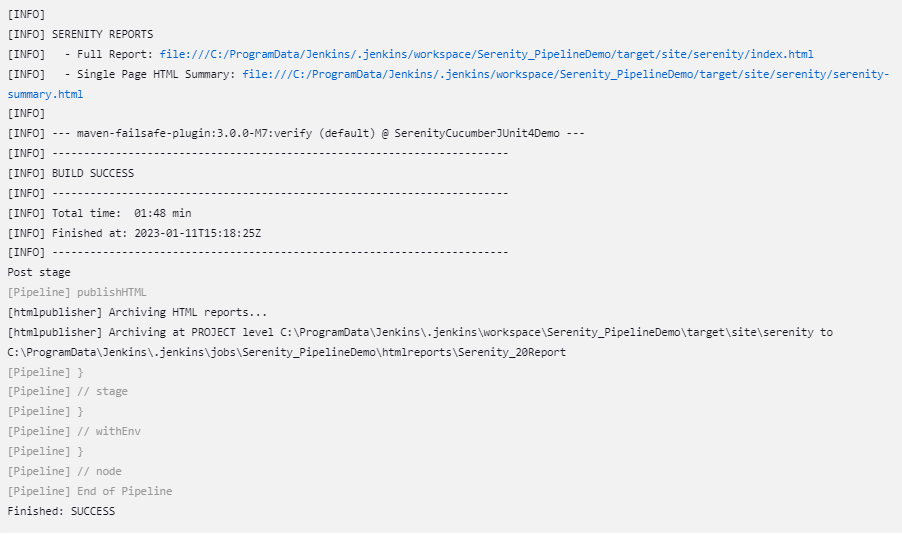
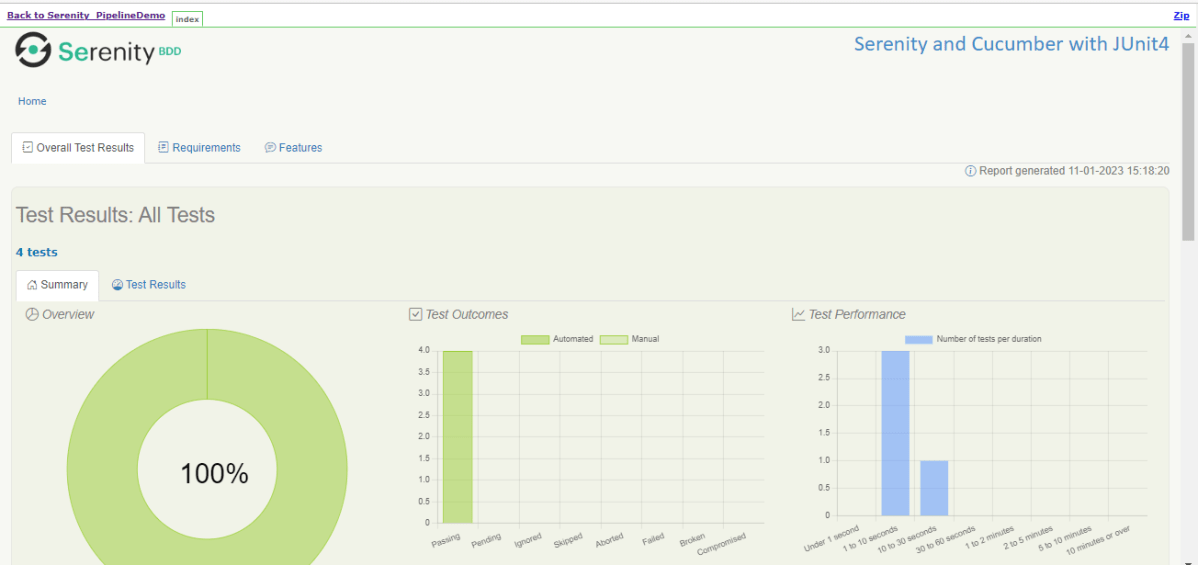
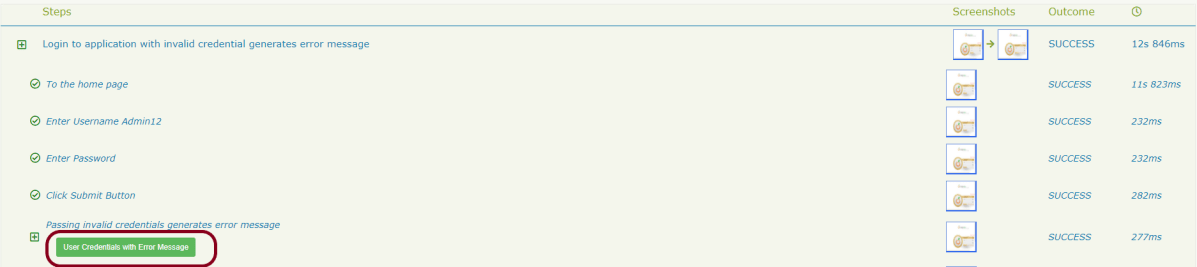
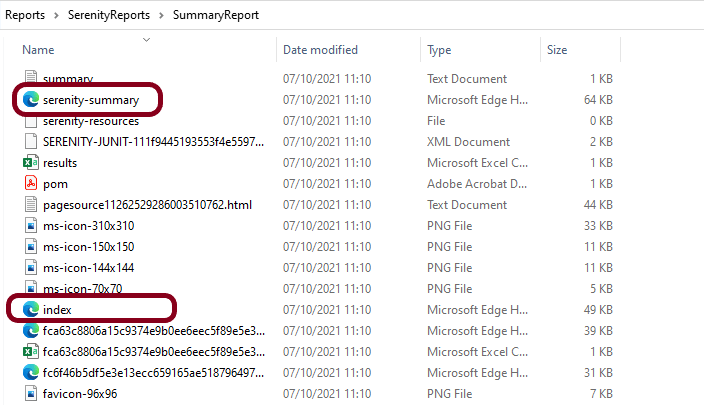
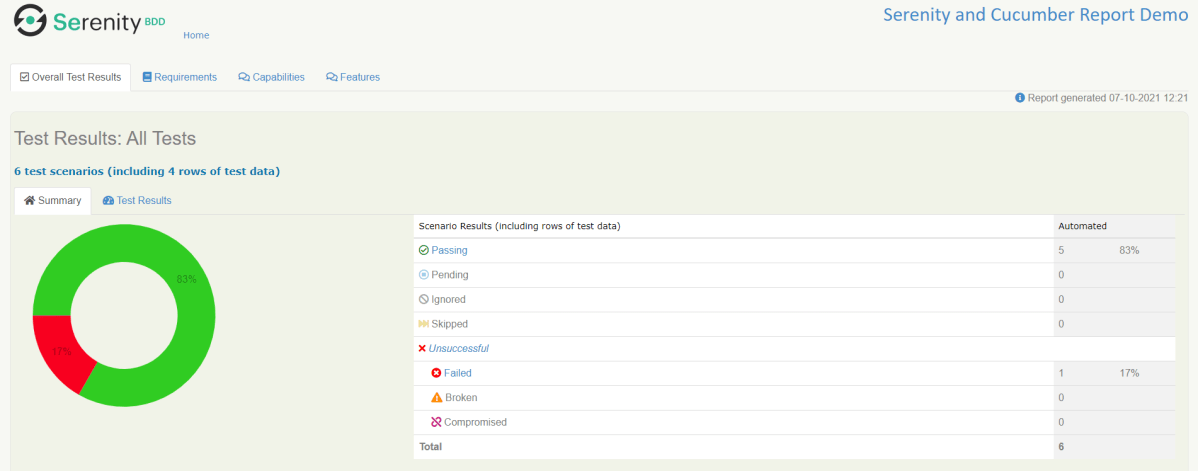
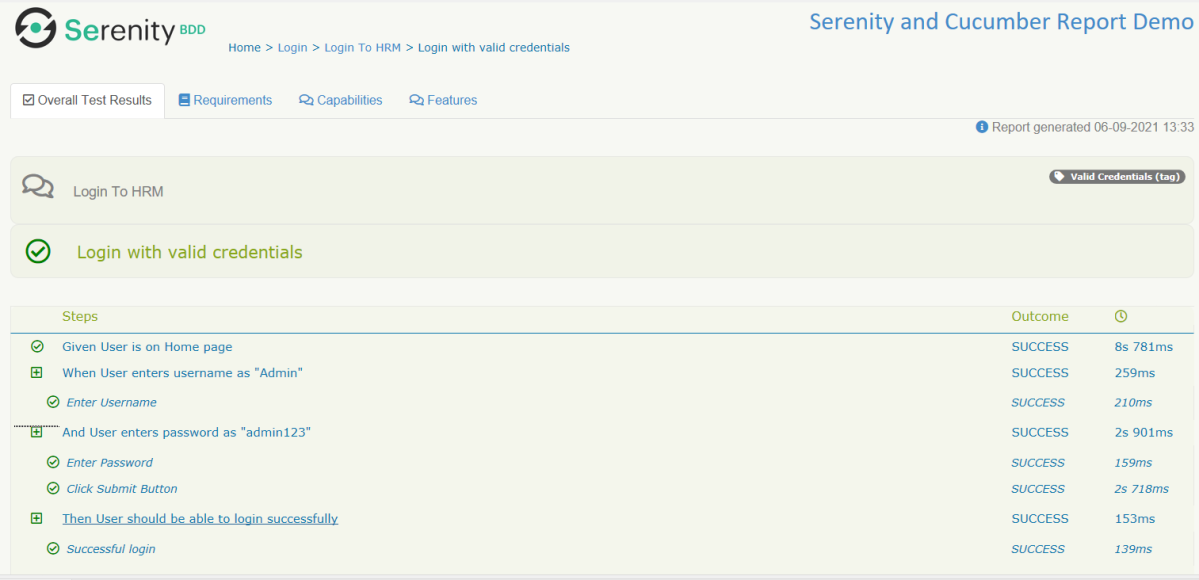
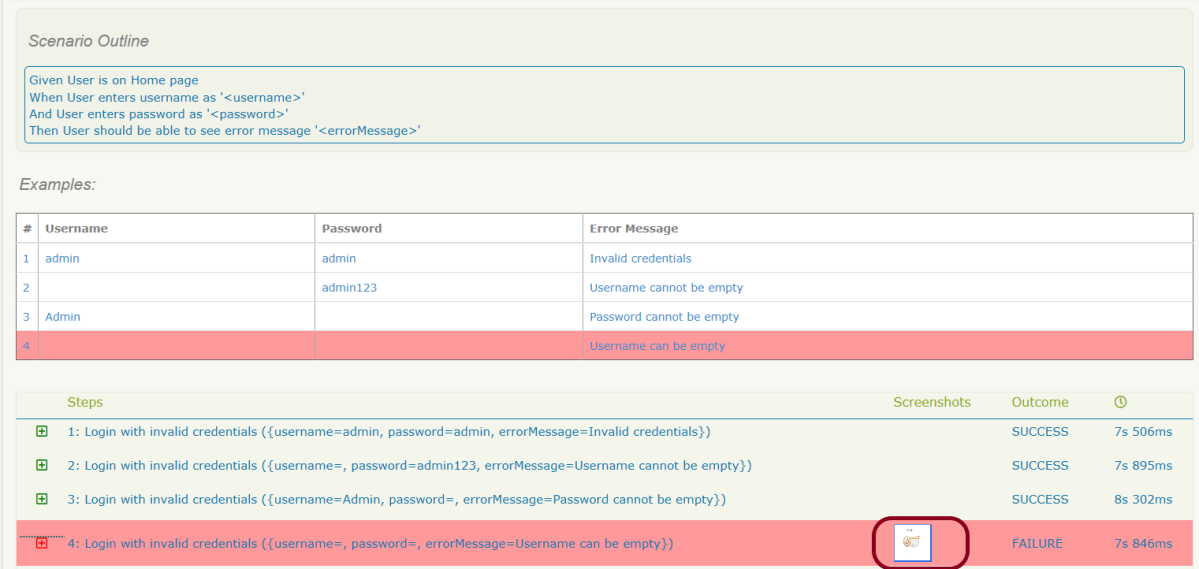
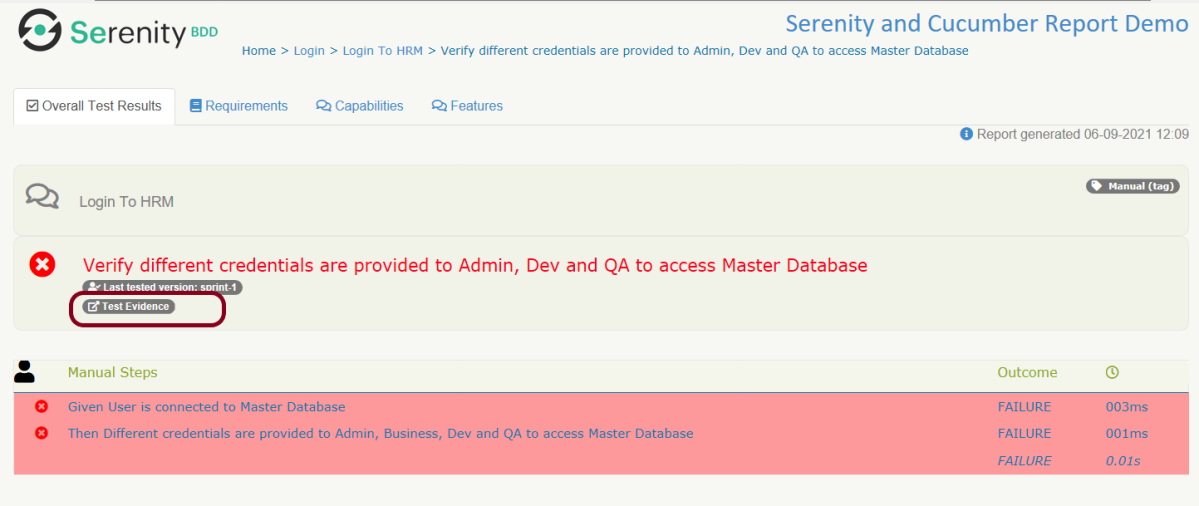
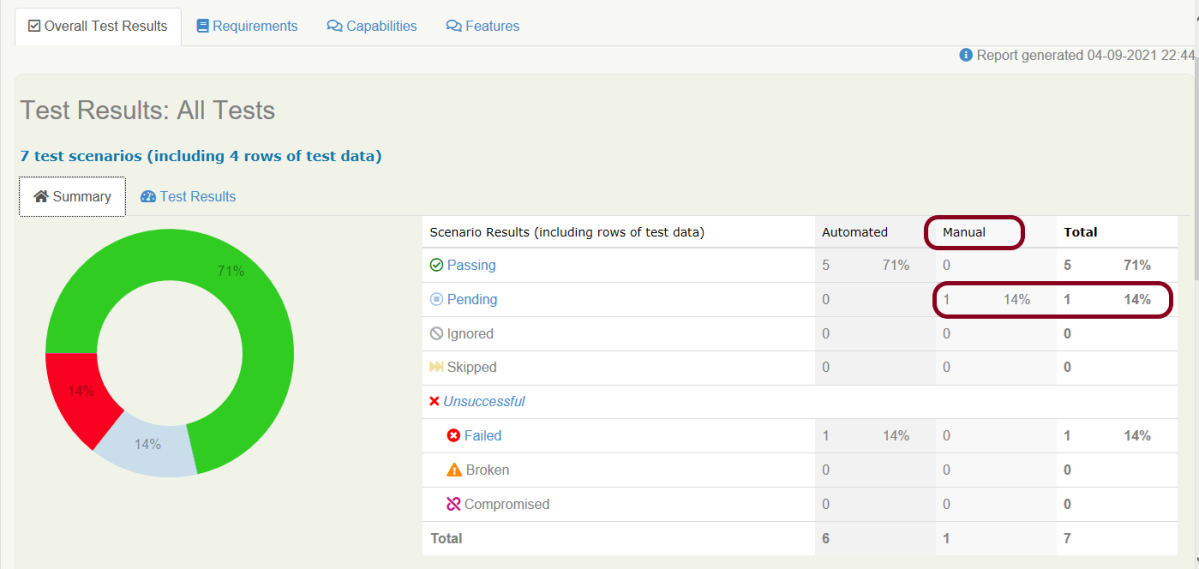
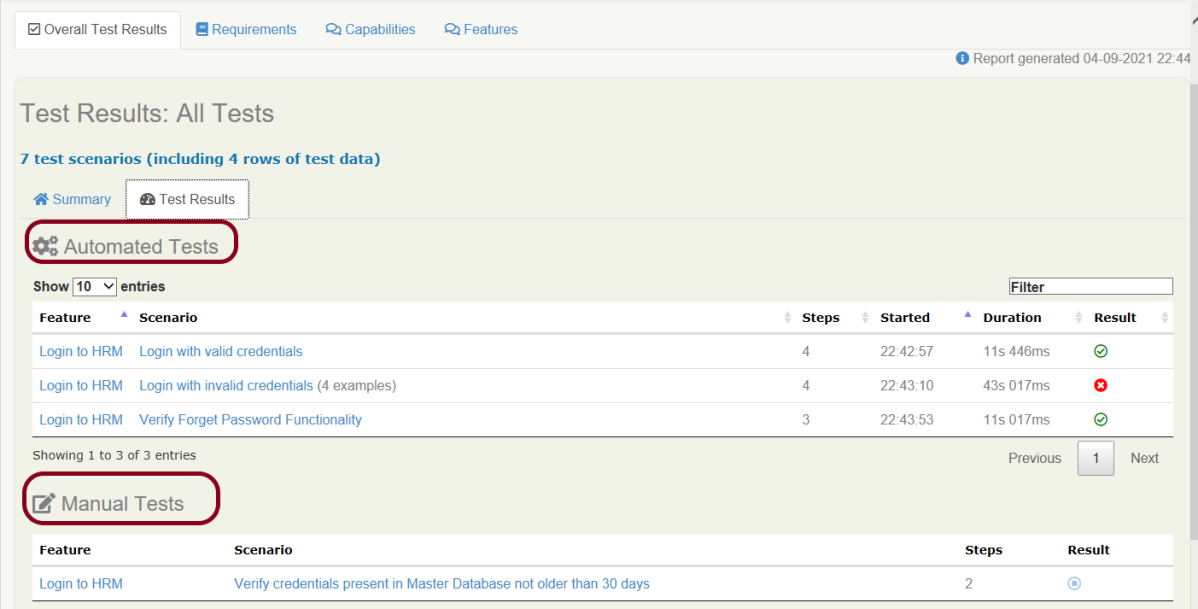
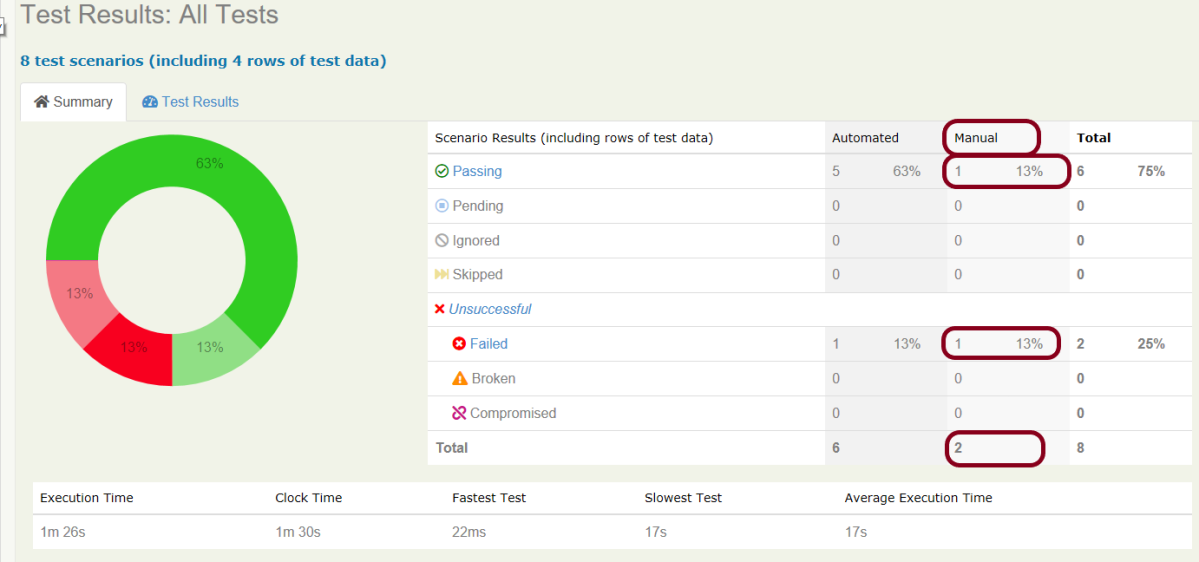
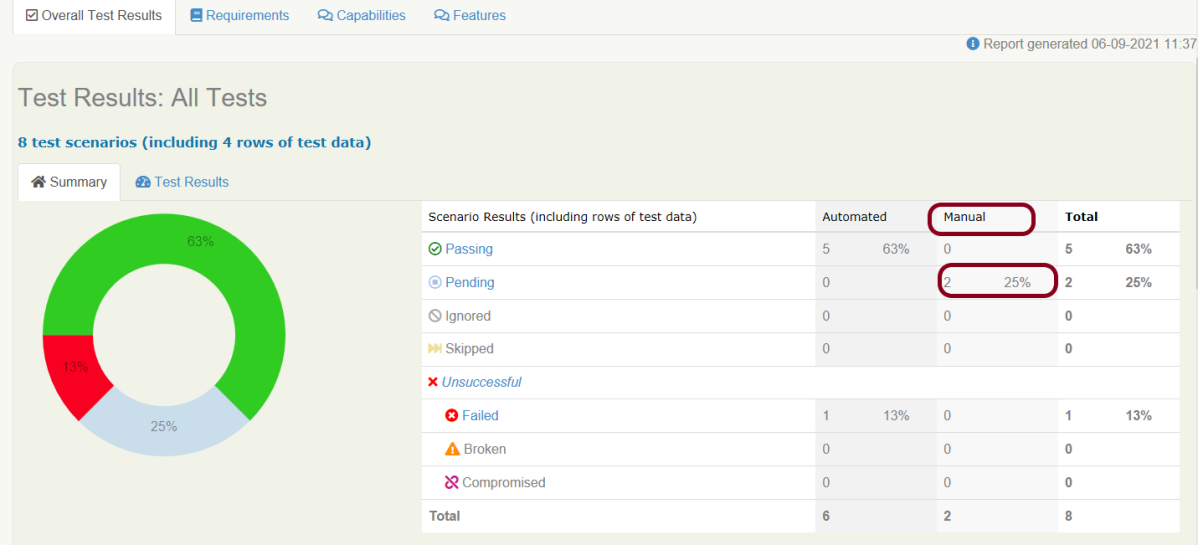
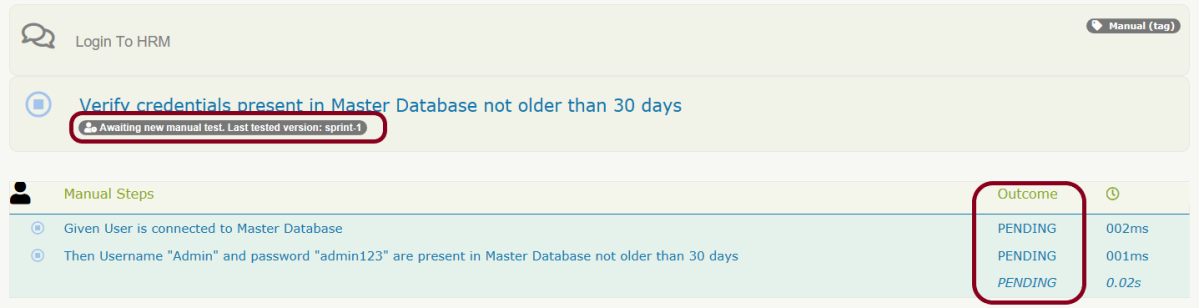
By default, the test report generated by Serenity is placed under target/site/serenity/index.html. Below is the sample Serenity Report.

Below is the sample Serenity Report.

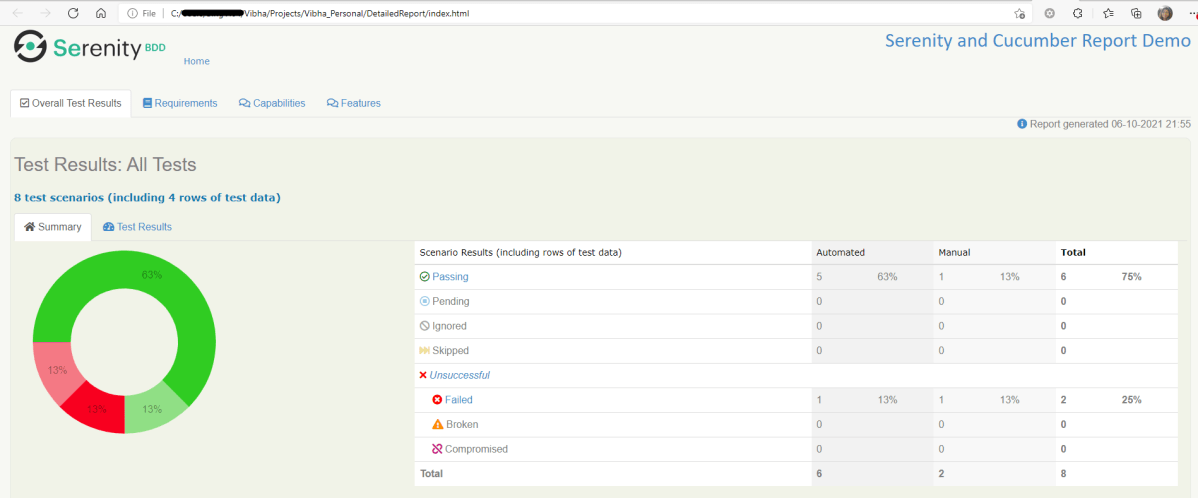
Step 10 – Cucumber Report Generation

A Cucumber Report can be generated by adding publish=true in SpringRunnerTests as shown in the above example. Click on the link provided in the execution status.

Cucumber Report

Congratulations on making it through this tutorial and hope you found it useful! Happy Learning!! Cheers!!

How to create Jenkins pipeline for Serenity tests

Last Updated On

HOME

In the previous tutorial, I discussed the Jenkins pipeline. This tutorial will discuss the steps to create the Jenkins pipeline for Serenity tests.

Table of Contents

  1. Prerequisite
  2. Implementation Steps
    1. Create a new pipeline project
    2. Scroll down to Pipeline
    3. Create Jenkinsfile
    4. Specify branches to build a section under Repositories
    5. Execute the tests
    6. Pipeline Steps
    7. View the Report

Prerequisite

Jenkins was installed and started on the computer.

To generate Serenity Report in Jenkins, we need to download HTML Publisher. Please refer to this tutorial to install the plugin – How to install Plugins in Jenkins.

Implementation Steps

Step 1: Create a new pipeline project

  1. Give the Name of the project – Serenity_PipelineDemo
  2. Click on the pipeline project. 
  3. Click on the OK button.

In the General section, enter the project description in the Description box.

Step 2: Scroll down to Pipeline

From the Definition field, choose the “Pipeline script from SCM” option. This option instructs Jenkins to obtain your Pipeline from Source Control Management (SCM), which will be your locally cloned Git repository.

From the SCM field, choose Git.

The Repositories section contains the Repository URL and Credentials.

In the Repository URL field, specify the directory path of the GitLab/GitHub project.

In the Credentials field, specify the username and password needed to log in to GitLab/GitHub.

In this case, I have the project is present in GitLab and using it.

Step 3: Create Jenkinsfile

Create and save a new text file with the name Jenkinsfile at the root of the project in the GitLab repository. Here, we are using the Selenium project with TestNG. To know more about the Integration of Serenity with TestNG, please refer to this tutorial – Testing of Web Application using Serenity with JUnit4.

For this tutorial, we are using Declarative syntax. The sample example is given below:

pipeline {
    agent any
 
    stages {
        stage('Test') {
            steps {
                bat "mvn -D clean verify"
            }
 
            post {                
                // If Maven was able to run the tests, even if some of the test
                // failed, record the test results and archive the jar file.
                success {
                   publishHTML([allowMissing: false, alwaysLinkToLastBuild: false, keepAll: false, reportDir: 'target/site/serenity/', reportFiles: 'index.html', reportName: 'Serenity Report', reportTitles: '', useWrapperFileDirectly: true])	  
				}
            }
        }
    }
}

We are publishing index.html, so it is mentioned as reportFiles and it is present in Directory – target/site/serenity.

Step 4: Specify branches to build a section under Repositories

  1. Branch Specifier – */master (This is my main branch)
  2. ScriptPath – Jenkinsfile

Click on the Apply and Save buttons.

We have created a new Maven project Serenity_PipelineDemo” with the configuration to run the Serenity Tests with JUnit4.

Step 5: Execute the tests

Let’s execute it now by clicking on the “Build Now” button. 

Right-click on Build Number (here in my case it is #3) and click on Console Output to see the result.

Below is the test execution summary.

Step 6: Pipeline Steps

Once the execution is completed, and we want to see the Pipeline Steps, click on the Pipeline Steps mentioned on the left side of the page.

Step 7: View the Report

Once the execution is completed, go back to “Serenity_PipelineDemo”. We can see below that the Serenity Report is generated.

We could see a link to view the “Serenity Report“. Click on the Serenity Report. It displays the index.html Report.

Tip: If you don’t see the Report UI intact, then you need to configure a simple groovy script. For that, go to Dashboard–>Manage Jenkins–>Script Console and add the script as:

	System.setProperty("hudson.model.DirectoryBrowserSupport.CSP","")

We are done! Congratulations on making it through this tutorial and hope you found it useful! Happy Learning!!

Serenity Reports

HOME

Serenity Reports are living documentation that contains the meaningful report for each Test. It illustrated narrative reports that document and describe what your application does and how it works.

How to embed Custom Data in Serenity Report

HOME

Serenity Reports are living documentation that contains meaningful reports for each Test. It illustrated narrative reports that document and describe what your application does and how it works.

This report can be organized by using features, stories, steps, scenarios/tests. Serenity Report shows the count of passed, failed, compromised, skipped, pending, broken, ignored, pending, and manual test cases count and percentage. Serenity shows Over All Test Results, Requirements, Test Specifications & Test Results. It shows the details and overall time taken by each test step of a test case. It shows the details and overall timing taken by each on all test case execution.

All the above features of Serenity Report make it a great Report. But sometimes, we want to embed data from a JSON or XML file in the Serenity Report.

Let me explain this with the help of an example. Data-Driven tests are created in Serenity. We have test data mentioned in a .csv file and the test is reading the data from this file. When the report is generated, it does not show what all data are used by the Test. To overcome this situation, Serenity provides a feature that uses recordReportData()., and this can be used like this:

Path credentialsFile = Paths.get("src/test/resources/testdata/credentials.csv"); 
Serenity.recordReportData().withTitle(" User Credentials with Error Message")
                                             .fromFile(credentialsFile);

If you have the contents of the report as a String, you can pass the String directly like this:

String testData = "...";
Serenity.recordReportData().withTitle("User")
                           .andContent(testData);

Let me explain this with the help of an example. Here, I have created a Data-Driven Test which is using .csv file as an input file.

@RunWith(SerenityParameterizedRunner.class)
@UseTestDataFrom(value = "testdata/credentials.csv")
public class ParameterizedTestsUsingCSV {

    private String userName;
    private String passWord;
    private String errorMessage;

    @Managed(options = "--headless")
    WebDriver driver;

    @Steps
    NavigateActions navigate;

    @Steps
    StepLoginPage loginPage;


    @TestData(columnNames = "Username, Password, ErrorMessage")
    @Test
    @Title("Login to application with invalid credential generates error message")
    public void unsuccessfulLogin() throws IOException {

        // Given
        navigate.toTheHomePage();

        // When
        loginPage.inputUserName(userName);
        loginPage.inputPassword(passWord);
        loginPage.clickLogin();

        // Then
        Serenity.reportThat("Passing invalid credentials generates error message",
                () -> assertThat(loginPage.loginPageErrorMessage()).isEqualToIgnoringCase(errorMessage));

        Path credentialsFile = Paths.get("src/test/resources/testdata/credentials.csv");
        Serenity.recordReportData().withTitle(" User Credentials with Error Message").fromFile(credentialsFile);
    }

}

Here, I have used recordReportData().withTitle() to provide a name to the button created, and the data is retrieved using fromFile().

To locate the path of the file (credentials.csv), we have used – Path and Paths which are imported from:

import java.nio.file.Path;
import java.nio.file.Paths;

To get the complete detail about this code, refer to this tutorial Data Driven Tests using CSV file in Serenity.

To generate a Serenity Report, use the command like this:

mvn clean verify

The output of the above program is

The Serenity Reports are generated under target/site/serenity/Index.html.

Go to the Detailed Step Description part in Serenity Report. A button with the label “User Credentials with Error Message” will appear next to the step where you called this method:

If you click on this button, you will see your data:

Keep in mind that this feature of Serenity is available from 1.9.16 onwards only.

Congratulation!! We have learned a wonderful feature present in Serenity.

How to generate Serenity Report in customized path

HOME

In the previous tutorial, I explained the generation of Serenity Report. In this tutorial, I will explain how to generate the Serenity Report in Customized path.

Before going through this tutorial, please refer to the tutorial for Serenity Report Generation.

Add outputDirectory to serenity-maven-plugin and mention the path where we want to save our Reports.

 <plugin>
       <groupId>net.serenity-bdd.maven.plugins</groupId>
       <artifactId>serenity-maven-plugin</artifactId>
       <version>${serenity.version}</version>
       <dependencies> 
            <dependency>
                 <groupId>net.serenity-bdd</groupId>
                 <artifactId>serenity-single-page-report</artifactId>
                 <version>${serenity.version}</version>
             </dependency>                
         </dependencies>
         <configuration>
               <tags>${tags}</tags>
               <reports>single-page-html</reports> 
         </configuration>
         <executions>
             <execution>
                  <id>serenity-reports</id>
                  <phase>post-integration-test</phase>
                  <goals>
                       <goal>aggregate</goal>
                  </goals>
                  <configuration>
                            <outputDirectory>C:\\Users\\Vibha\\Projects\\Vibha_Personal\\DetailedReport</outputDirectory>
                   </configuration>
              </execution>
        </executions>
  </plugin>
  .........

Execute the tests using the command line

mvn clean verify

You can see that the reports are generated at the above-specified path.

Another way is to add outputDirectory detail in serenity.properties file.

serenity.project.name = Serenity and Cucumber Report Demo
serenity.outputDirectory=C:\\Users\\Reports\\SerenityReports\\SummaryReport

How to create a Serenity Report for specified tests?

Suppose we want to run a set of tests, not a complete test suite, and we want to get the report containing the details of only executed tests, in the short a very specific report. This can be achieved by using @tags.

 Suppose you mark each test suite with a tag @E2E. So to run only the tests for the @E2E, you could run the following:

mvn clean verify -Dtags="E2E"

You will also need to configure the serenity-maven-plugin to use the tags you provide at the command line:

 <plugin>
     <groupId>net.serenity-bdd.maven.plugins</groupId>
     <artifactId>serenity-maven-plugin</artifactId>
     <version>${serenity.version}</version>
     <dependencies> 
        <dependency>
            <groupId>net.serenity-bdd</groupId>
            <artifactId>serenity-single-page-report</artifactId>
            <version>${serenity.version}</version>
        </dependency>                
      </dependencies>
        <configuration>
             <tags>${tags}</tags>
             <reports>single-page-html</reports> 
        </configuration>
        ......... 

When you run the tests with this configuration, you will get a test report with only the tests related to the @E2E tag. 

We are done! Congratulations on making it through this tutorial and hope you found it useful! Happy Learning!!

Serenity Emailable Report in Gradle

HOME

In this tutorial, I will generate an emailable Serenity Report for Gradle project. In the previous tutorial, I have explained the Generation of Serenity Emailable Report in Maven Project.

Pre-Requisite

  1. Java 11 installed
  2. Gradle installed
  3. Eclipse or IntelliJ installed

This framework consists of:

  1. Serenity – 2.6.0
  2. Serenity Cucumber – 2.6.0
  3. Java 11
  4. JUnit – 4.13.2
  5. Gradle – 7.2

Steps to create Serenity Emailable Report

To setup a Gradle project for the testing of web application using Cucumber and JUnit4, please refer this tutorial (Step 1 to 3)

Update buildscript section of build.gradle file.

buildscript {
    repositories {
        mavenLocal()
        jcenter()
    }
    dependencies {
        classpath("net.serenity-bdd:serenity-gradle-plugin:2.4.24")
        classpath("net.serenity-bdd:serenity-single-page-report:2.4.24")
    }
}

Add serenity section in build.gradle.

serenity {
    reports = ["single-page-html"]
}

The complete build.gradle for the project will look like as shown below

defaultTasks 'clean', 'test', 'aggregate'

repositories {
    mavenLocal()
    jcenter()
}

buildscript {
    repositories {
        mavenLocal()
        jcenter()
    }
    dependencies {
        classpath("net.serenity-bdd:serenity-gradle-plugin:2.4.24")
        classpath("net.serenity-bdd:serenity-single-page-report:2.4.24")
    }
}

apply plugin: 'java'
apply plugin: 'eclipse'
apply plugin: 'idea'
apply plugin: 'net.serenity-bdd.aggregator'

sourceCompatibility = 11
targetCompatibility = 11

serenity {
    reports = ["single-page-html"]
}

dependencies {
   
    testImplementation 'net.serenity-bdd:serenity-core:2.6.0'
    testImplementation 'net.serenity-bdd:serenity-cucumber6:2.6.0'
    testImplementation 'net.serenity-bdd:serenity-screenplay:2.6.0'
    testImplementation 'net.serenity-bdd:serenity-screenplay-webdriver:2.6.0'
    testImplementation 'junit:junit:4.13.1'
}

test {
    testLogging.showStandardStreams = true
    systemProperties System.getProperties()
}

gradle.startParameter.continueOnFailure = true

test.finalizedBy(aggregate)

Execute the test suite by using the below command.

gradle test

This will generate only index.html not serenity-summary.html (emailable) report.

To generate single page html report, we need to invoke the report task.

gradle reports

Below is the image of serenity-summary.html report.

We are done! Congratulations on making it through this tutorial and hope you found it useful! Happy Learning!!

How to manage screenshots in Serenity Report

HOME

Serenity provides a wide range of options to manage screenshots in the report. By default, Serenity has set option serenity.take.screenshots=BEFORE_AND_AFTER_EACH_STEP, which means the screenshot is saved before and after each step as shown in the below image. Before this tutorial, refer to the previous tutorial on How to generate Serenity Report.

However, recording many screenshots can slow down test execution. So, maybe we like to record the screenshot of failed steps in the scenario. To achieve this flexibility, configure serenity.take.screenshots property in serenity.properties file.

There are various other types of options for managing screenshots in Serenity Report. This property can take the following values:

  1. FOR_EACH_ACTION: Saves a screenshot at every web element action (like click(), typeAndEnter(), type(), typeAndTab() etc.).
  2. BEFORE_AND_AFTER_EACH_STEP: Saves a screenshot before and after every step.
  3. AFTER_EACH_STEP: Saves a screenshot after every step
  4. FOR_FAILURES: Saves screenshots only for failing steps.
  5. DISABLED: Doesn’t save screenshots for any steps.

In the below option, I have used FOR_FAILURES option in the serenity.properties file.

serenity.project.name = Serenity and Cucumber Report Demo
current.target.version = sprint-1
serenity.take.screenshots = FOR_FAILURES

Below is the screenshot of the passed test case. We can see that there is no screenshot attached to any of the test steps.

Below is the screenshot of the failed test case. We can see that there is a screenshot attached to the failed test step only, not all the test steps. In below example, it is a scenario outline with four different test data. Out of four, only one set of test data has failed. So, the screenshot is generated for the failed step of that particular test data.

We are done! Congratulations on making it through this tutorial and hope you found it useful! Happy Learning!!

How to attach Test Evidence to Manual Tests in Serenity Report

HOME

In the previous tutorial, I explained how to mention Manual Test Cases in Serenity Report. In this tutorial, I will explain how to attach test evidence to manual tests. Before this tutorial, I suggest you to refer the tutorial which explain How to generate Serenity Report.

It is always advisable to attach screenshots or other files to our manual test reports as additional evidence, specially for failed scenarios. The @manual-test-evidence tag allows you to do just this. You can either include a link to an external site, as shown here:

@manual
@manual-result:failed
@manual-last-tested:sprint-1
@manual-test-evidence:https://database/demo.png

Mentioning the path of evidence in the test is not a very good way to attach test evidence to the manual tests. An alternative approach and favorable one is to place the image in the src/test/resources/assets folder and include a relative link to this file (starting with “assets/“):

    @manual
    @manual-result:failed
    @manual-last-tested:sprint-1
    @manual-test-evidence:assets/DB1.PNG
    Scenario: Verify different credentials are provided to Admin, Dev and QA to access Master Database
   
    Given User is connected to Master Database
    Then Different credentials are provided to Admin, Business, Dev and QA to access Master Database

Test Evidence is only displayed if the @manual-last-tested annotation is defined in serenity.properties.

serenity.project.name = Serenity and Cucumber Report Demo
current.target.version = sprint-1

Execute the test suite by using the below command

mvn clean verify

As we the the Serenity Reports (index.html and serenity-summary.html) are generated under target/site/serenity.

Below is the sample index.html report which has test evidence attached to the manual test.

You can see that there is a new tag with name – Test Evidence. This is the screenshot I have placed under assets folder.

Click on the link and a new page with the screesnhot placed under assets folder opens.

Congratulations. You are able to attach the test evidence to manual tests in Serenity Report. Hope you enjoyed this tutorial. Cheers!!

How to report Manual Tests in Serenity Report

HOME

Cucumber is primarily and traditionally used for automating executable specifications. But with Serenity BDD, you can add special tags to indicate that a scenario represents a manual test case.

You can flag any Cucumber scenario as manual simply by using the @manual tag. In the below example, I have tagged a scenario as “@manual”. The last scenario is tagged as “manual”. By default, @manual scenarios are marked as pending in the Serenity reports.

Feature: Login to HRM  

   @ValidCredentials
   Scenario: Login with valid credentials
   
    Given User is on Home page
    When User enters username as "Admin"
    And User enters password as "admin123"
    Then User should be able to login successfully
    
    @InValidCredentials    
    Scenario Outline: Login with invalid credentials
   
    Given User is on Home page
    When User enters username as '<username>'
    And User enters password as '<password>'
    Then User should be able to see error message '<errorMessage>'
      
   Examples:
    |username  |password  |errorMessage                    |
    |admin     |admin     |Invalid credentials             |
    |          |admin123  |Username cannot be empty        | 
    |Admin     |          |Password cannot be empty        |
    |          |          |Username can be empty        |
 
   @ForgetPassword  
   Scenario: Verify Forget Password Functionality
   
    Given User is on Home page
    When User clicks on Forgot your password link
    Then User should be able to see new page which contains Reset Password button
   
   @manual
   Scenario: Verify credentials present in Master Database not older than 30 days
   
    Given User is connected to Master Database
    Then Username "Admin" and password "admin123" are present in Master Database not older than 30 days

Execute the test suite using below command

mvn clean verify

The scenario marked with @manual tag will now appear as a Manual test case in the Serenity report (Index.html). To know how to create Serenity Report, click here.

We can indicate a different result by adding the @manual-result tag as shown here:

A passing test: @manual-result:passed
A failing test: @manual-result:failed
A compromised test: @manual-result:compromised

If we want to record the result of a manual test, we should include both the @manual and the @manual-result tags.

   @manual
   @manual-result:passed
   Scenario: Verify credentials present in Master Database not older than 30 days
   
   Given User is connected to Master Database
   Then Username "Admin" and password "admin123" are present in Master Database not older than 30 days
    
   @manual
   @manual-result:failed
   Scenario: Verify different credentials are provided to Admin, Dev and QA to access Master Database
   
   Given User is connected to Master Database
   Then Different credentials are provided to Admin, Business, Dev and QA to access Master Database

This image shows that there are 2 manual tests. I have marked one manual test as passed and another one as failed which is clearly shown in this image.

How to update Manul Test Results

In the below example, we are considering that the team is working on Sprint-1. We have executed the manual tests and marked the status in the feature file as shown below.

  @manual
  @manual-result:passed
  @manual-last-tested:sprint-1
  Scenario: Verify credentials present in Master Database not older than 30 days
   
  Given User is connected to Master Database
  Then Username "Admin" and password "admin123" are present in Master Database not older than 30 days
    
  @manual
  @manual-result:failed
  @manual-last-tested:sprint-1
  Scenario: Verify different credentials are provided to Admin, Dev and QA to access Master Database
   
  Given User is connected to Master Database
  Then Different credentials are provided to Admin, Business, Dev and QA to access Master Database

In the Serenity properties , the team also records the current version (or sprint number):

serenity.project.name = Serenity and Cucumber Report Demo
current.target.version = sprint-1

Now, execute the feature file. This is how the report look like.

Now, we are in next sprint. Update the value of current.target.version in serenity.properties file.

serenity.project.name = Serenity and Cucumber Report Demo
current.target.version = sprint-2

Now, when the manual scenario is processed, it will be marked as pending, with a note indicating that a new manual test is required:

Both the maual tests which were marked as pass and fail are now pending tests as shown in the image.

We are done! Congratulations on making it through this tutorial and hope you found it useful! Happy Learning!!

Serenity Emailable HTML Report

HOME

In the previous tutorial, I explained the Generation of Serenity Report (index.html) using Cucumber6 and JUnit. Index.html report that acts both as a test report and living documentation for the product. It has various views like Overall Test Status, Requirement View, Capabilities View, and Features View.

Sometimes it is useful to be able to send a short summary of the test outcomes via email. Serenity allows us to generate a single-page, self-contained HTML summary report, containing an overview of the test results, and a configurable breakdown of the status of different areas of the application. 

Pre-Requisite

  1. Java 11 installed
  2. Maven installed
  3. Eclipse or IntelliJ installed

This framework consists of:

  1. Java 11
  2. Maven – 3.8.1
  3. Serenity – 2.6.0
  4. Serenity Maven – 2.6.0
  5. Serenity Cucumber6 – 2.6.0
  6. JUnit – 4.13.2
  7. Maven Surefire Plugin – 3.0.0-M5
  8. Maven Failsafe Plugin – 3.0.0-M5
  9. Maven Comiler Plugin – 3.8.1

Implementation Steps

  1. Update Properties section in Maven pom.xml
  2. Add repositories and pluginRepository to Maven pom.xml
  3. Add Serenity, Serenity Cucumber and JUnit dependencies to POM.xml
  4. Update Build Section of pom.xml
  5. Create source folder – src/test/resources and features folder within src/test/resources to create test scenarios in Feature file
  6. Create the Step Definition class or Glue Code
  7. Create a Serenity-Cucumber Runner class
  8. Create serenity.conf file under src/test/resources
  9. Create serenity.properties file in the root of the project
  10. Run the tests through commandline which generates Serenity Report

To know about Step 1 to 3, please refer here. These steps are the same for Index.html report and emailable report.

Now, add the below-mentioned plugin. These reports are configured in the Serenity Maven plugin, where you need to do two things. First, you need to add a dependency for the serenity-emailer module in the plugin configuration. Then, you need to tell Serenity to generate the email report when it performs the aggregation task.

<plugin>
    <groupId>net.serenity-bdd.maven.plugins</groupId>
    <artifactId>serenity-maven-plugin</artifactId>
    <version>${serenity.version}</version>
    <dependencies> 
        <dependency>
            <groupId>net.serenity-bdd</groupId>
            <artifactId>serenity-single-page-report</artifactId>
            <version>${serenity.version}</version>
        </dependency>
        <dependency>
            <groupId>net.serenity-bdd</groupId>
            <artifactId>serenity-navigator-report</artifactId>
            <version>${serenity.version}</version>
        </dependency>
    </dependencies>
    <configuration>
        <tags>${tags}</tags>
        <reports>single-page-html,navigator</reports> 
    </configuration>
    <executions>
        <execution>
            <id>serenity-reports</id>
            <phase>post-integration-test</phase>
            <goals>
                <goal>aggregate</goal>
            </goals>
        </execution>
    </executions>
</plugin>

Step 10 – Run the tests through commandline which generates Serenity Report

Open the command line and go to the location where pom.xml of the project is present and type the below command.

mvn verify -Dwebdriver.gecko.driver="C:\\Users\\Vibha\\Software\\geckodriver-v0.26.0-win64\\geckodriver.exe"

I have provided the location of Firefoxdriver through the command line. I believe this is the best way to run the test. We can hard-code the path in the test code or in serenity.conf file. In that case, you don’t need to provide the location of Firefoxdriver through command line. You can use the below command.

mvn verify

The output of the above program is

This image shows that two different types of reports are generated by Serenity – Full Report (index.html) and Single Page HTML Summary ( serenity-summary.html ).

This emailable report is called serenity-summary.html. This is generated under site/serenity/ serenity-summary.html

You can see a sample of such a report here:

As you can see in the above execution status, out of six tests, one test failed. The same information is displayed in the report.

This report provides a summary of the test execution.

The Functional Coverage section lets us highlight key areas of your application. By default, this section will list test results for each Feature. But we can configure the report to group results by other tags as well.

We are done! Congratulations on making it through this tutorial and hope you found it useful! Happy Learning!!